Use MATLAB to analyze IoT Device Data🔢, and monitor on a visual graph 📊. Use trigger to perform actions, like webhooks
What is ThingSpeak?
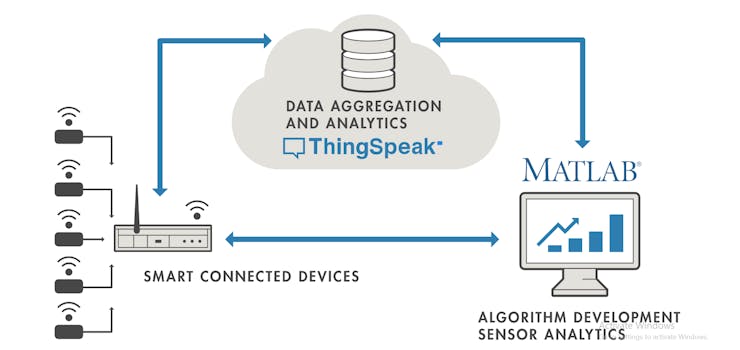
ThingSpeak is an IoT analytics service 📈 that allows you to aggregate, visualize, and analyze live data streams in the cloud. It is a MathWorks service specifically for IoT. It provides -
Instant visualizations of data posted by your devices to ThingSpeak.With the ability to execute MATLAB code in ThingSpeak, we can perform online analysis and process data as it comes in.Send data from any internet-connected device directly to ThingSpeak using a Rest API or MQTTCloud-to-cloud integrations with The Things Network, Senet, the Libelium Meshlium gateway, and Particle.ioCreate sophisticated event-based email alerts that trigger based on data coming in from our connected devices.
Get Started🗽
ThingSpeak is often used for prototyping and proof-of-concept IoT systems that require analytics.
Analytics support is derived from MATLAB, and therefore much better insights on the data can be generated in a fast pace environment⚡
Collect - From Devices to Cloud
ThingSpeak enables sensors, instruments, and websites to send data to the cloud where it is stored in either a private or a public channel. Once data is in a ThingSpeak channel, you can analyze and visualize it, calculate new data, or interact with social media, web services, and other devices🌐
Let us create a channel to store and view our Device Data -
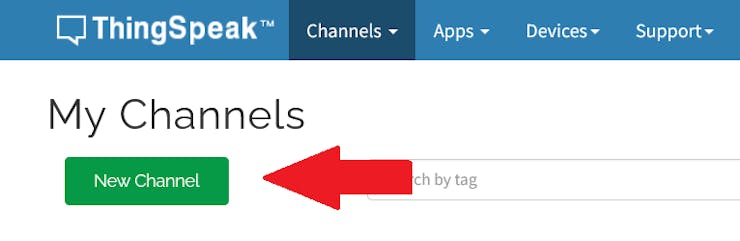
Sign In to ThingSpeak™ using your MathWorks® Account credentials, or create a new account.Click Channels > MyChannels.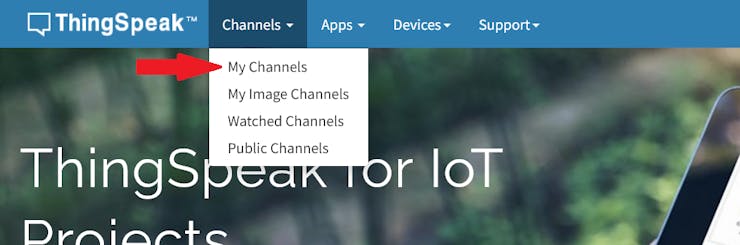
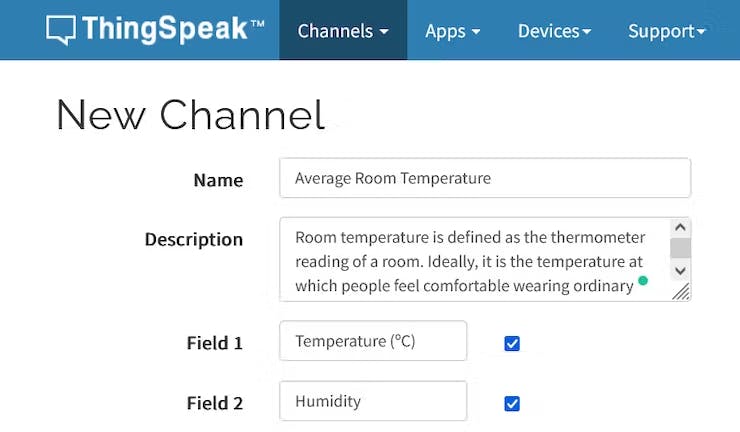
Name: Average Room Temperature
Field 1: Temperature (ºC)
Field 2: Humidity
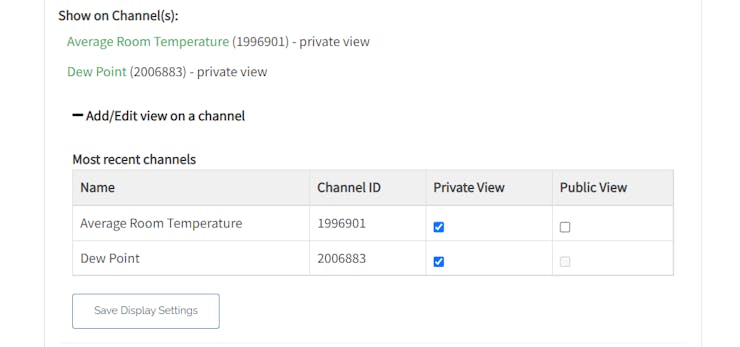
Private View: This tab displays information about your channel that only you can see 🔏
Public View: If you choose to make your channel publicly available, use this tab to display selected fields and channel visualizations 👁
Channel Settings: This tab shows all the channel options you set at creation. You can edit, clear, or delete the channel from this tab 🔧
Sharing: This tab shows channel-sharing options. You can set a channel as private, shared with everyone (public), or shared with specific users ☁
API Keys: This tab displays your channel API keys. Use the keys to read from and write to your channel 🗝
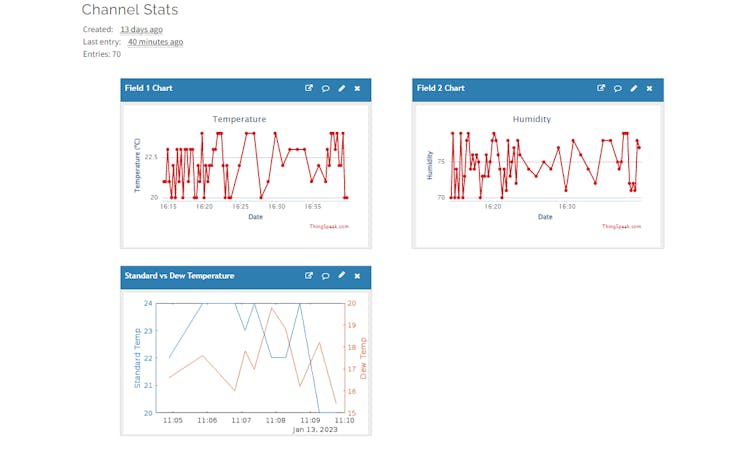
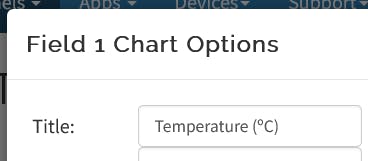
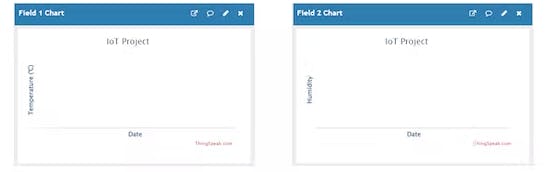
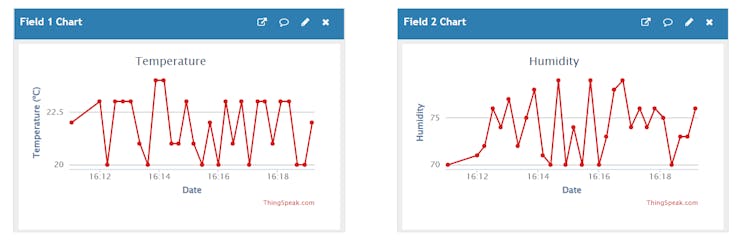
Data Import/Export: This tab enables you to import and export channel data 📩We can also see the visualization charts created on the private view (empty without data), as per the field we added on channel settings.
On the Channels page, click API Keys. Keep the browser open to access the WRITE API Key to WRITE data to the Cloud.
Hardware - From Device to Cloud
As hardware, we will be using the ESP32 Dev Board. Which uses Wi-Fi to connect to the Internet. There are 2 ways to write the code for the device. Using ThingSpeak library, and using HTTP requests.
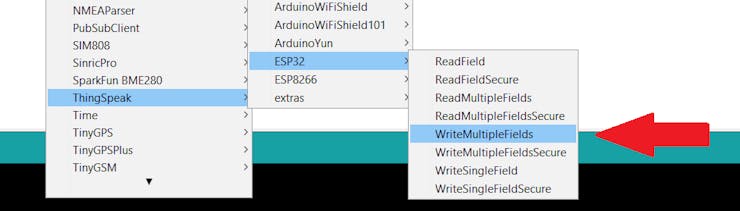
1. Using Library -
On Arduino IDE, select Sketch > Include Library > Manage Libraries.Search 'ThingSpeak' and Install the latest version.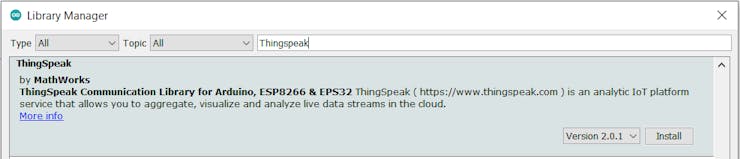

#define SECRET_SSID "xxxxxxx"	// replace MySSID with your WiFi network name
#define SECRET_PASS "xxxxxxx"	// replace MyPassword with your WiFi password

#define SECRET_CH_ID #####	// replace ##### with your channel number
#define SECRET_WRITE_APIKEY "xxxxxx" // replace xxxxxx with your channel write API Key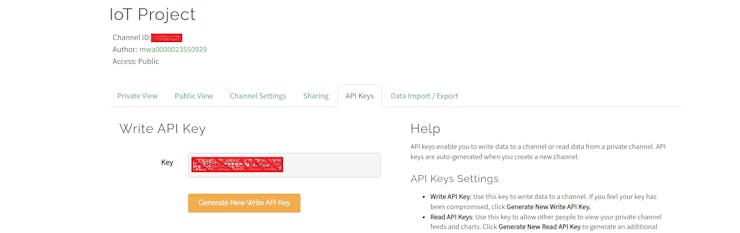
int temp = random(25,30);
int hum = random(0,100);#include <WiFi.h>
#include "secrets.h"
#include "ThingSpeak.h"
char ssid[] = SECRET_SSID; // your network SSID (name)
char pass[] = SECRET_PASS; // your network password
int keyIndex = 0; // your network key Index number (needed only for WEP)
WiFiClient client;
unsigned long myChannelNumber = SECRET_CH_ID;
const char * myWriteAPIKey = SECRET_WRITE_APIKEY;
// Initialize our values
int temp = random(25,30);
int hum = random(0,100);
void setup() {
Serial.begin(115200); //Initialize serial
while (!Serial) {
; // wait for serial port to connect. Needed for Leonardo native USB port only
}
WiFi.mode(WIFI_STA);
ThingSpeak.begin(client); // Initialize ThingSpeak
}
void loop() {
// Connect or reconnect to WiFi
if(WiFi.status() != WL_CONNECTED){
Serial.print("Attempting to connect to SSID: ");
Serial.println(SECRET_SSID);
while(WiFi.status() != WL_CONNECTED){
WiFi.begin(ssid, pass); // Connect to WPA/WPA2 network. Change this line if using open or WEP network
Serial.print(".");
delay(5000);
}
Serial.println("\nConnected.");
}
// set the fields with the values
ThingSpeak.setField(1, temp);
ThingSpeak.setField(2, hum);
// write to the ThingSpeak channel
int x = ThingSpeak.writeFields(myChannelNumber, myWriteAPIKey);
if(x == 200){
Serial.println("Channel update successful.");
}
else{
Serial.println("Problem updating channel. HTTP error code " + String(x));
}
// change the values
temp = random(25,30);
hum = random(70,80);
delay(20000); // Wait 20 seconds to update the channel again
}
Now that we have sent the data to the cloud, let us use MATLAB to analyze it and perform actions on it.
Analyze - Act | Using existing Device Data
ThingSpeak provides access to MATLAB to make sense of data. We can -
Convert, combine, and calculate new dataSchedule calculations to run at certain timesVisually understand relationships in data using built-in plotting functionsCombine data from multiple channels to build a more sophisticated analysisOnce data is received, it can be used for analysis to calculate something in particular. Let us calculate the Dew Point Temperature with the available data, which requires Temperature and Humidity.
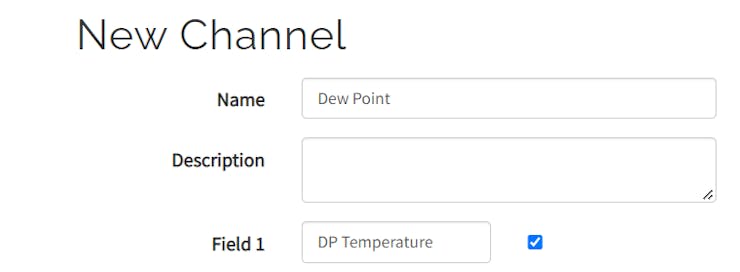
To view the data, let us create a new channel to view the updated analyzed data.
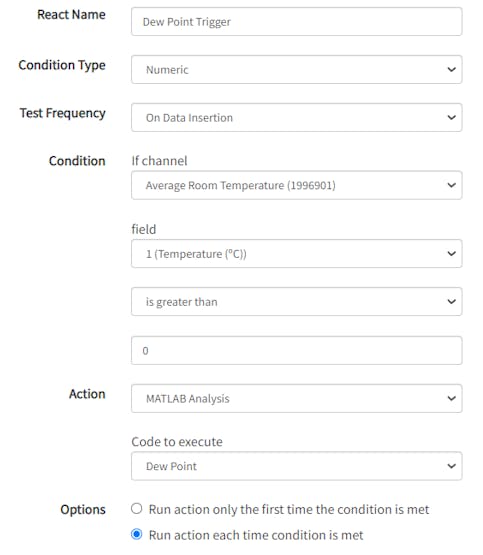
Now, back to the Temp-Humid Channel, let us implement simple calculations using MATLAB Analysis -
Click on MATLAB Analysis on the channel page
Name - Calculate Dew Point
Code -
% Channel ID to read data from (Temp-Humid)
readChID = 000000;
% Channel ID to send data (Dew Point)
writeChID = 000000;
% Enter Write API key between the ''
writeAPIKey = 'XXXXXXXXXXX';
% Read temperature and humidity from device
temp = thingSpeakRead(readChID,'Fields',1);
hum = thingSpeakRead(readChID,'Fields',2);
display(hum,'Humidity');
display(temp,'Temperature');
% Calculate and display dew point from device data
dew = temp - ((100-hum)/5);
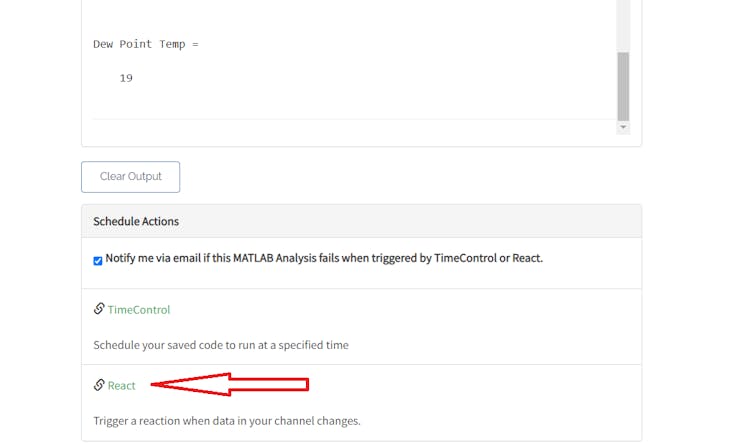
display(dew,'Dew Point Temp');
% Plot dew point to your channel
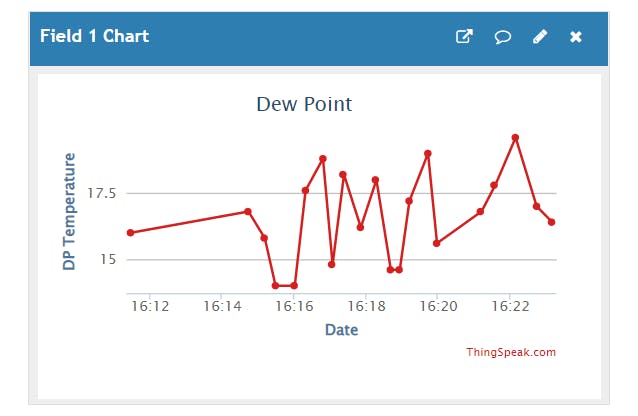
thingSpeakWrite(writeChID,dew,'Fields',1,'WriteKey',writeAPIKey);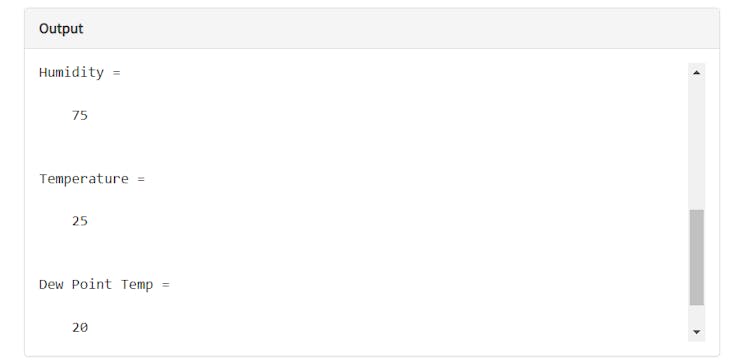
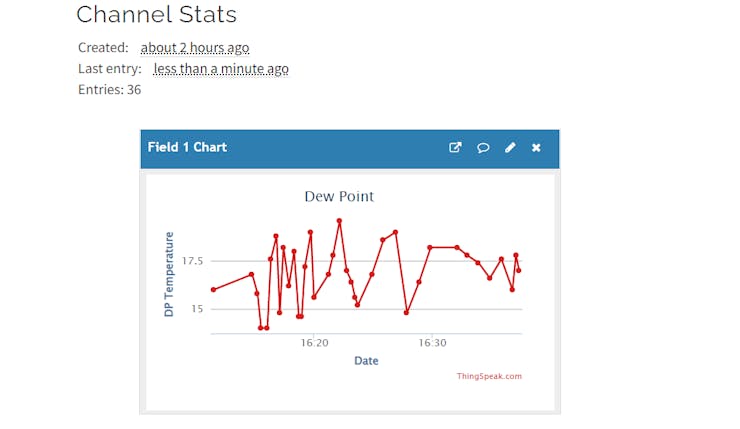
There is one more way we can analyze our data, using the MATLAB Visualization -
Click on MATLAB Visualization on the Dew Point channel page -
Name - Standard and Dew Point Temperature
Code -
% Channel ID1 - Temperature Channel
readChannelID1 = 000000;
% Channel ID2 - Dew Channel
readChannelID2 = 0000000;
% Temperature Field ID
TemperatureFieldID = 1;
% Dew Field ID
DewFieldID = 1;

% Channel Read API Key between the '' below:
readAPIKey = 'XXXXXXXXXXX';


[data1, timeStamps] = thingSpeakRead(readChannelID1, 'Fields',TemperatureFieldID,'NumPoints', 10);
[data2, timeStamps] = thingSpeakRead(readChannelID2, 'Fields',DewFieldID,'NumPoints', 10, 'ReadKey', readAPIKey);

% Extract the temperature data from the first column
temperatureData = data1(:, 1);
% Extract the windspeed data from the second column
DewSpeedData = data2(:, 1);

% Visualize Data
yyaxis left
plot(timeStamps, temperatureData);
ylabel('Standard Temp');
yyaxis right
plot(timeStamps, DewSpeedData);
ylabel('Dew Temp');