
Learn C/C++ and assembly language with Arduino LCD display shield. Links to college courses in embedded programming.

Story
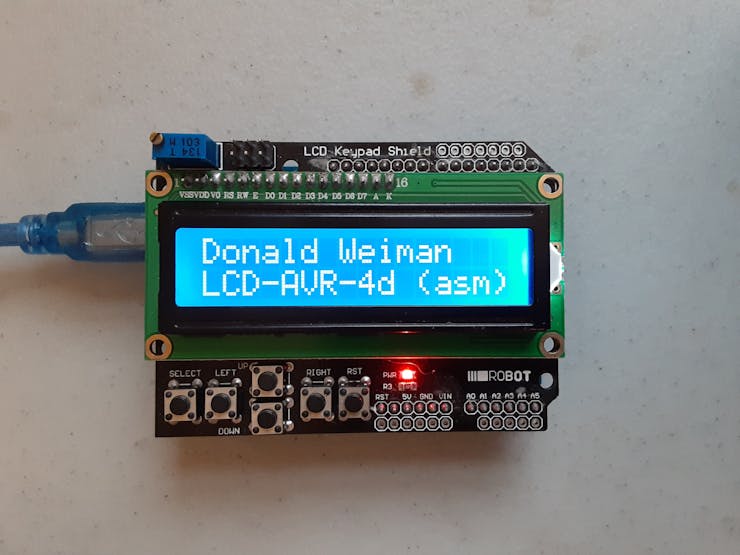
This shield is ready-wired with an HD47780 4bit display. You know where your connections will be made. 1602 means the LCD screen can show 16 pre-programmed letters across 2 rows. Pixel access allows special characters like sprites.

Use an ohm-meter to buzz out pins. Make sure your shield has the same connections. Avoid changing LCD Contrast Potentiometer once properly set.
Opensource
Websearch for college and university courses on embedded engineering and you will find many. Alfred State College of Technology uses this board to teach peripheral interfacing in C/C++ and AVR assembly [http://www.avr-asm-tutorial.net/avr_en/beginner/index.html] language.
All of the programs we use in this project have disclaimer statements that the software is free. No proprietary secrets are contained in the code and we can modify and share.
A master page of downloads is available here. We want the ones for Four-bit interface using software time delays. Our shield is built with only 4 data leads connected and there is no hardware busy flag.
Gratitude to Professor Donald Weiman for assembling some wonderful material and writing these demo programs. More on the display screen at LCD1602 DFRobot Shield.
TLDR
A better way to control speed is to use RW ready/wait signal. This type of display can have all 8 data bits connected to the screen. The shield just does not have these connections so we need to use software that passes the 8bit characters in 4bit nibbles and uses a delay to allow the screen to complete its cycle.
Read the explanations at the college website and in the sample code. The comments describe, in great detail how the software works. We've done a project using the same display and ATmega8.
Arduino Sketch
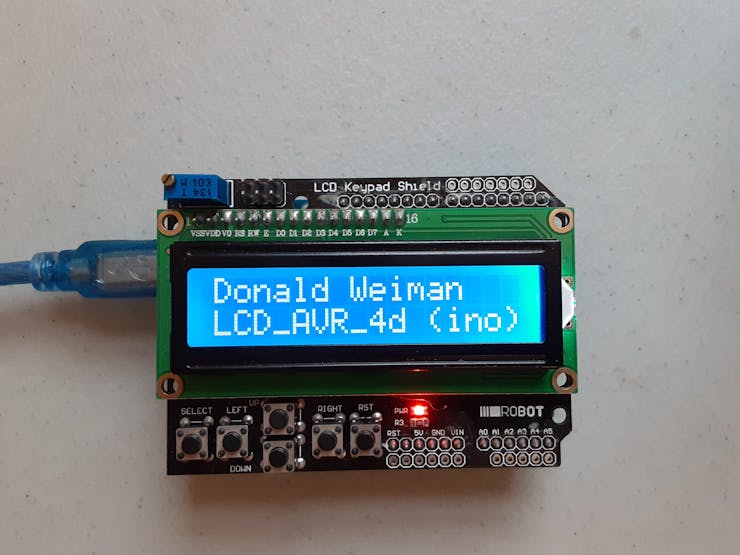
Create a new Arduino sketch with attached Arduino sketch file. Info and sketch download from here. Arduino programming is a dialect of the C++ language.
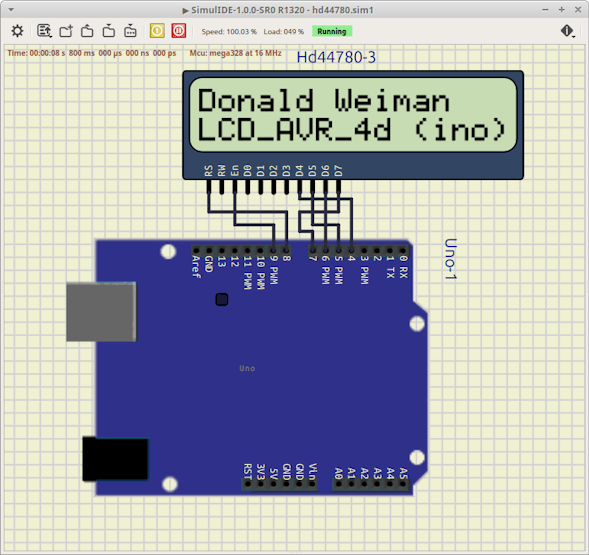
Upload and the sketch should run on your Uno.
AVR-GCC program
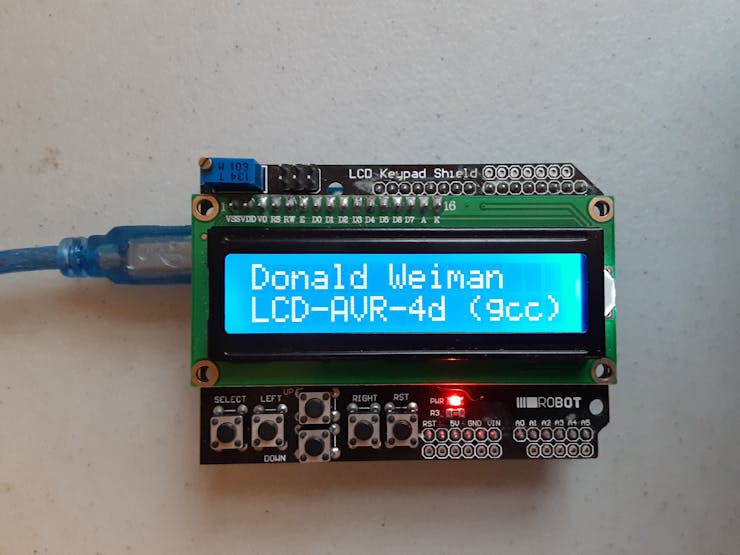
The Arduino IDE uses the C/C++ compiler from AVR-GCC. Open a new sketch. Insert attached C language program and it will compile and run. C code and explanation from here.

Upload from Arduino IDE and you should see sketch run on Uno.
We could run this C program on MicroChip Studio or MPLab X. Code::Blocks and other IDEs can be configured for Arduino and all the other AVR chips. WinAVR is a traditional option. There are even online compiler websites that will generate a hex file that runs in your Arduino.
C/C++ Languages
The relationship between C and C++ programming is complicated. C++ is designed to run C code and it adds OOP object oriented programming features to your programs.
C looks like algebra and is a functional programming language. Look at our sketch and we see the int main(void) function setting up which IO pins connect to the display.

Our Arduino sketch does the same job but differently. We have a void setup(void) function also setting up the connection pins. Read through the instructions and the comments in both sketches for more detail.

Assembly language
Assembly language [http://www.avr-asm-tutorial.net/avr_en/micro_beginner/index.html] is not supported by the Arduino IDE program. MicroChip Studio or Atmel Studio is the professional IDE for the chip in the Uno board. We've had some projects that show how to set up and program both Windows and Linux.
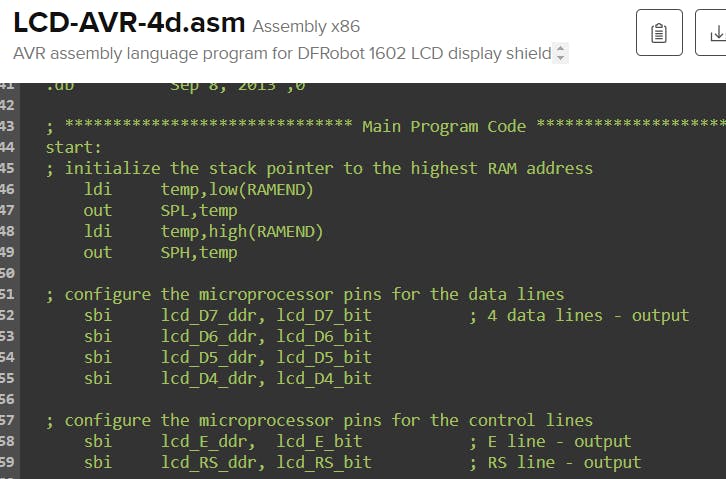
The program contains detailed explanations of how both assembly language and the display device function. Now that you've read the Arduino sketch and the C program you can better understand. Download and read details here.

MicroChip Studio Upload
We have a project Upload AVR assembly program to Arduino. Atmel Studio is the same program as MicroChip Studio IDE. Just treat the Uno as an external programming tool. Works for both C/C++ and assembly.

Remove the line /* and the line */ and now the code will be read by AVRA Linux assembler program. AVRA needed these lines to be uncommented.
Studio 6 refers to Windows Atmel Studio IDE program that uses the avrasm2.exe assembler program.
Next Steps
Experiment and add microphones sensors. Plenty of available IO pins are brought through to header or through-hole connections. I2C and SPI ports available. Serial monitor works through USB.
Analog input buttons on shield work, careful with the reset button which restarts the running sketch. Plenty of sketches available to work with this board.
Code
- LCD_AVR_4d.ino
The article was first published in Hackster, January 10, 2024
author: Patrick Fitzgerald


