HUSKYLENS-Based Facial Recognition Security System: Protecting Your Digital Home

Introduction
With the rapid advancement of artificial intelligence, facial recognition has moved from science fiction into everyday life. Beyond smartphone unlocking and payment authentication, it has demonstrated enormous potential in security applications. Imagine a home access system that automatically recognizes you and grants entry when you return, while instantly triggering an alarm if an unfamiliar person attempts to break in. This is no longer a distant future—by combining DFRobot’s HUSKYLENS AI camera with Arduino, you can build such an intelligent security system with ease.
This article explains how to implement facial recognition using HUSKYLENS and integrate it with Arduino-controlled LEDs and a buzzer to create a simple security system capable of distinguishing between an “authorized user” and an “intruder.” Whether you are a beginner maker or an experienced enthusiast, this guide will help you build an intelligent guardian for your digital home.
Project Background and Objectives
As smart homes become more widespread, home security has become a major concern. Traditional security systems often rely on passwords, keys, or access cards, which can be lost, copied, or compromised. Facial-recognition-based security systems offer greater safety and convenience. The goals of this project are:
Facial recognition: Use HUSKYLENS’ built-in AI vision capabilities to recognize pre-trained authorized faces and distinguish them from unregistered ones.
Real-time feedback: Display recognition results on-screen to clearly indicate the current status.
Intelligent alerts: Trigger different responses based on recognition results—for example, no alarm for authorized users, and LED flashing plus buzzer alerts for intruders.
Through this project, you will learn the fundamentals of facial recognition and gain hands-on experience integrating Arduino with AI vision modules, laying the groundwork for more advanced smart security systems.
Required Hardware
To complete this project, you will need the following components:
Arduino UNO: Acts as the main controller, receiving recognition results from HUSKYLENS and controlling alert devices.
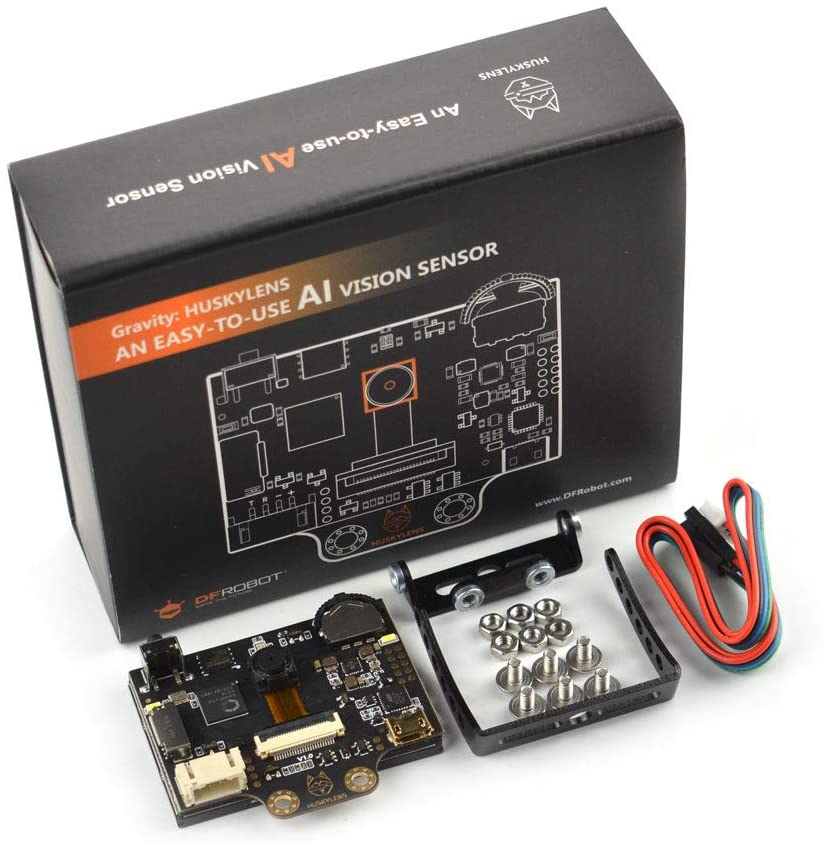
DFRobot HUSKYLENS AI Camera: The core module, featuring multiple built-in AI algorithms including face recognition.
LEDs (one red, one green): Used for visual alerts—green for authorized users, red for intruders.
Passive buzzer: Provides audible alerts when an intruder is detected.
Breadboard: For building the circuit.
Jumper wires: For module connections.
USB cable: Powers the Arduino and uploads the program.
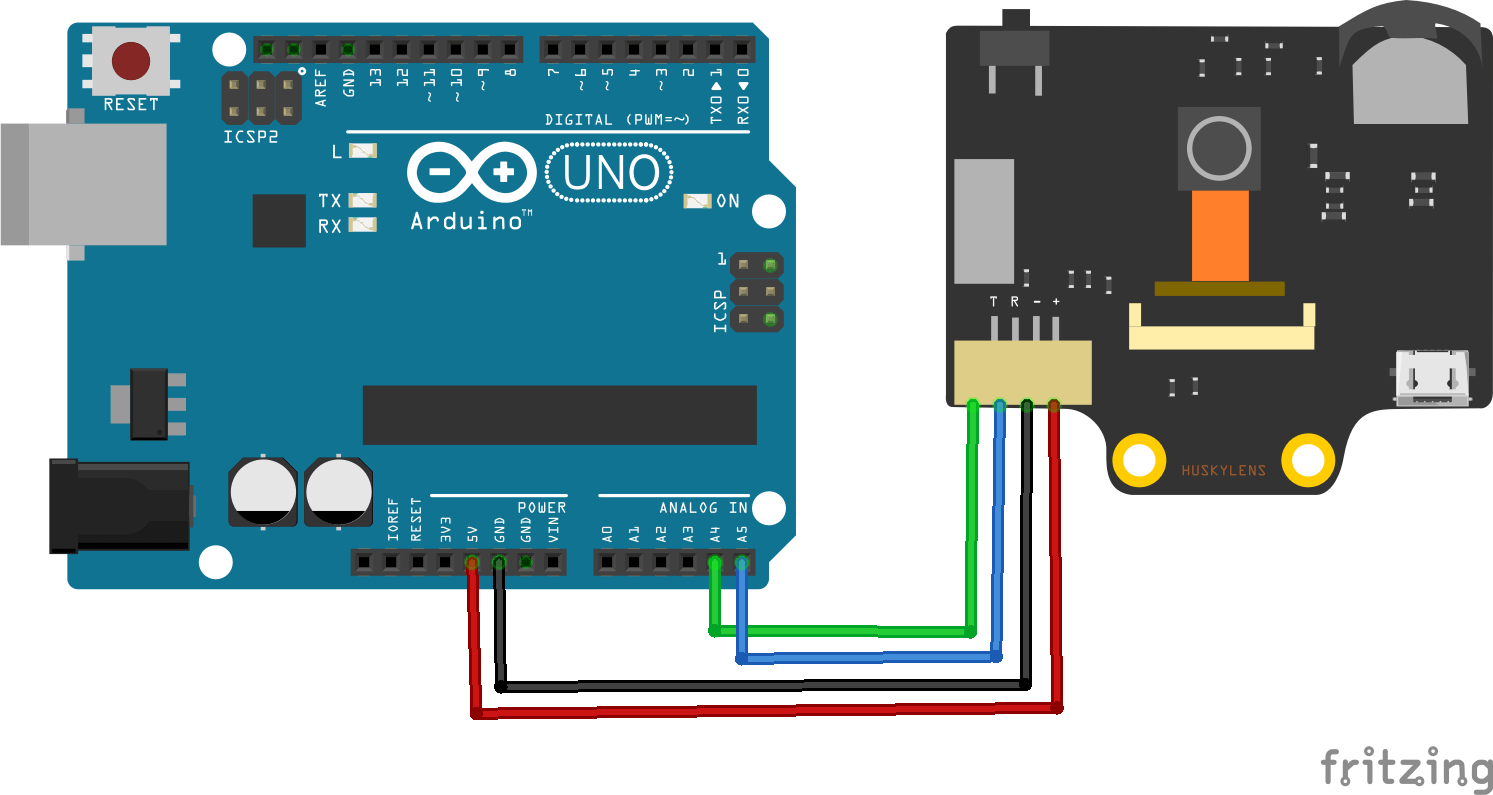
Hardware Connections
The hardware setup is straightforward, mainly involving I²C communication between HUSKYLENS and Arduino, plus digital connections for the LEDs and buzzer.
HUSKYLENS to Arduino (I²C):
-SDA → Arduino A4
-SCL → Arduino A5
-VCC → Arduino 5V
-GND → Arduino GND
LED Connections:
-Red LED anode → Arduino digital pin 11 through a 220 Ω resistor
-Red LED cathode → Arduino GND
-Green LED anode → Arduino digital pin 13 through a 220 Ω resistor
-Green LED cathode → Arduino GND
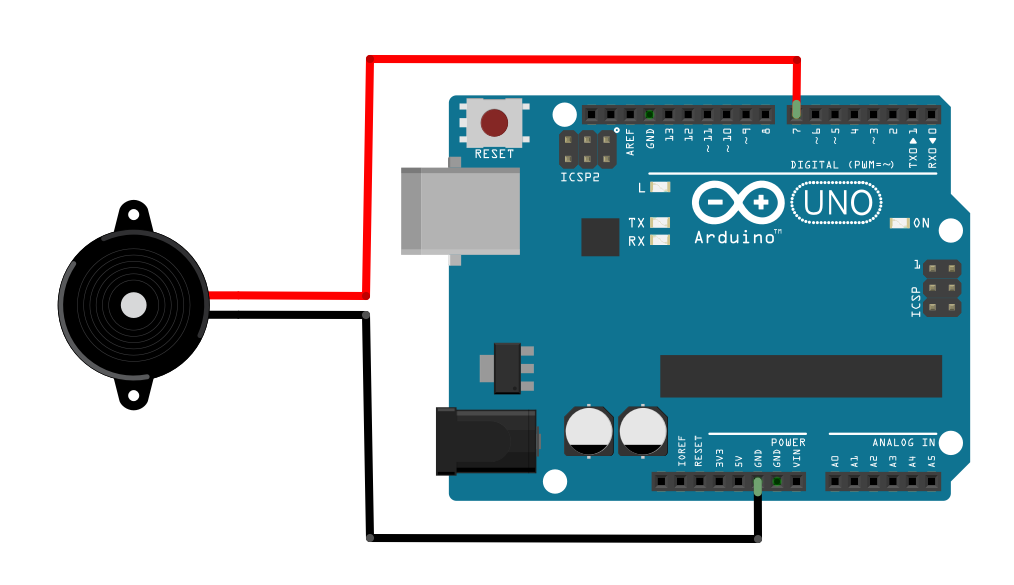
Buzzer Connection:
-Buzzer positive → Arduino digital pin 6 (or any PWM-capable pin if tone control is required)
-Buzzer negative → Arduino GND
Core Logic Overview
The project logic is implemented using the Arduino IDE with the official HUSKYLENS library from DFRobot. The HUSKYLENS library handles facial recognition, while standard Arduino functions and the DFRobot tone library control the LEDs and buzzer.
Below is a detailed analysis of the code:
#include <DFRobot_HuskyLens.h>
#include <DFRobot_Libraries.h>// Create objects
DFRobot_HuskyLens huskylens;
DFRobot_Tone DFTone;
// Main program starts
void setup() { Code Explanation
#include
These headers import the HuskyLens library and the general DFRobot library, providing the necessary functions for communicating with the HuskyLens module and controlling the buzzer.
DFRobot_HuskyLens huskylens; and DFRobot_Tone DFTone;
These lines create object instances for the HuskyLens module and the Tone library, which are used to access their respective functions in the program.
setup() Function
Digital pins 11 and 13 are configured as output pins to control the red and green LEDs, respectively.
Serial communication is initialized at 9600 baud, allowing recognition results to be viewed in the Serial Monitor.
huskylens.beginI2CUntilSuccess() initializes the HuskyLens module and ensures that I²C communication is working correctly. This step is required before any data exchange with HuskyLens can occur.
huskylens.writeAlgorithm(ALGORITHM_FACE_RECOGNITION) sets the HuskyLens operating mode to face recognition. HuskyLens supports multiple AI algorithms; in this project, face recognition is selected.
loop() Function
huskylens.request() sends a request to HuskyLens to retrieve the latest recognition results. This call is executed continuously in the loop to keep the data updated.
huskylens.isAppearDirect(HUSKYLENSResultBlock) checks whether HuskyLens has detected any face at all, regardless of whether it has been learned or not. HUSKYLENSResultBlock indicates that block-type detection results (i.e., a detected target) are present.
huskylens.isAppear(1, HUSKYLENSResultBlock) further checks, after a face has been detected, whether the detected face corresponds to ID 1. In HuskyLens, specific faces (such as the “owner”) can be associated with an ID through the learning function. If ID 1 is detected, the system executes the “owner” logic.
“Owner” logic:
The green LED turns on, the red LED turns off, and “Owner” is printed to the Serial Monitor.
else (non-owner logic):
If a face is detected but it is not ID 1, the system treats it as an “intruder.”
“Intruder” logic:
The buzzer emits an alarm tone (pin 6, frequency 523 Hz, duration 500 ms), the red LED turns on, the green LED turns off, and “Non-owner” is printed to the Serial Monitor.
else (no-person logic):
If huskylens.isAppearDirect(HUSKYLENSResultBlock) returns false, no face is detected.
“No one present” logic:
Both the red and green LEDs are turned off, and “No one” is printed to the Serial Monitor.
System Operation and Demonstration
After uploading the code and completing the hardware connections, the system can be demonstrated and tested as follows:
Face learning:
When using HuskyLens face recognition for the first time, face learning must be performed. Connect HuskyLens to a computer, use its built-in screen, and follow the prompts to register the “owner’s” face and save it as ID 1. Recording the owner’s face from multiple angles improves recognition accuracy. Intruders do not need to be trained; the system will automatically classify them as non–ID 1 faces.
System testing:
Owner recognition:
When the owner appears in front of the HuskyLens camera, the screen displays a recognized face with ID 1. The green LED on the Arduino turns on, the red LED turns off, and the buzzer remains silent.
Intruder recognition:
When a stranger (an unlearned face) appears, the screen shows that a face has been detected but with an ID other than 1. The red LED turns on, the green LED turns off, and the buzzer emits a short alarm sound.
No one present:
When no face is in front of the camera, no face information is displayed on the screen. Both the red and green LEDs remain off, and the buzzer stays silent.
Summary and Future Expansion
This project demonstrates a functional facial-recognition-based security system built with HuskyLens and Arduino. It reliably distinguishes between authorized users and intruders while providing clear visual and audible feedback. Beyond showcasing practical AI applications in security, it offers a solid hands-on introduction to combining AI vision with embedded systems.
Possible future enhancements include:
Multi-user recognition: Assign unique IDs to multiple authorized users.
Remote notifications: Integrate IoT modules (such as ESP8266) to send alerts to a phone or email when an intruder is detected.
Device integration: Link the system with smart locks, smart lighting, or other home automation devices.
Data logging: Record detection events with timestamps for later review and analysis.
This project serves as a practical starting point for deeper exploration into AI-powered maker projects. Build it, experiment with it, and create your own intelligent world.


