We introduce you our ConnectedRoom working with Lora network

Things used in this project
Hardware components
Software apps and online services
Microsoft Visual Studio Code Extension for Arduino
The Things Network [https://www.hackster.io/the-things-network/products/the-things-network?ref=project-f1d06f]
Hand tools and fabrication machines
3D Printer (generic)
Story
Introduction
At the end of our third year of studying, we had to create an IOT project with our own idea. During this year we have learned the Lora protocol and how to program with an arduino card exploiting sensor's datas.
This project has permited us to improve our capacity to challenge ourselves by confronting both technical and organizational problems
We have chosen to create a system which detect a fire start and notify that there is a danger in the room. The goal here is to connect multiple boxes like the one we made and interconnect them so that we can localize the fire breakthrough.
Story
Objective:
We wanted to create a system that would send sensor's datas with Lora protocol and treat these with an application server. This server would then fill the database with the datas. Whe would then finally request our database for the informations to be displayed in our dashboard.
System schematic:
_7HueH86IvZ.png?auto=compress%2Cformat&w=740&h=555&fit=max)
This is how the complete system works, there is a key verification by TTN server to verify if our enddevice key and networkkey is valid. Our payload is composed of 10 bytes of data.
Our database server is local and we manage it with phpmyadmin.
Arduino Development
This part was a mix between development and understanding hardware component like our sensors and cards.
We met problems with how to calibrate sensors (particularly the motion sensor) because we were reading outliers values...
Our most problematic sensor was the RFIC RC522 which didn't work with our SodaqExplorer card. We have lost too much time with this problem and to solve that, we have chosen to take an another card especially for the RFID sensor.
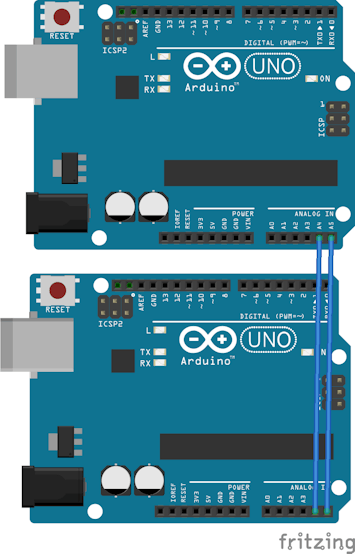
This Arduino Uno card is connected with the SDA/SCL port of our Sodaq and send with serial protocol the uid of the RFID.
For the arduino uno card we have used the two analogic ports A4 and A5 which support SDA/SCL protocol.
You can see under this text a schema of this kind of setup :
this is the part of the code which verify if keys are conform to TTN keys
LoRaBee.setDiag(debugSerial) ; // optional
if (LoRaBee.initOTA(loraSerial, devEUI, appEUI, appSKey, true))
{
debugSerial.println("OTA Keys Accepted.") ;
}
else
{
debugSerial.println("OTA Key Setup Failed!") ;
}
We chose an OTAA activation mode because ABP securities are fixed, you can't change your keys even if they leak.
We send a Lora frame every 10 secondes or if the RFID sensor is scanned.
But with this method we have a problem, sometimes the uid get scanned too qickly and thus we receive multiple times the same numbers. This result in the Sodaq sending the uid number's in a wrong order.
Application Server
We had to create an application server which has to be connected with TCP/IP protocol to our school gateway.
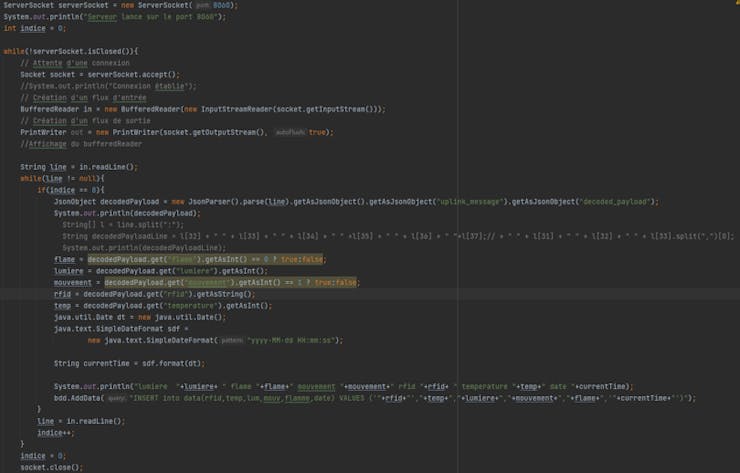
The server (developed in java) read the frame sended by TTN and decode the JSON format with google functions. The decoded values are then inserted in our database. This process is described below.
Insert of values : At the start of the program, the server connects to our local data base server (MySQL) with the JDBC driver for java.
To create this connection, we have downloaded the driver and stored it in our librairies. We also set an environment variable to keep the driver on.
WebSite
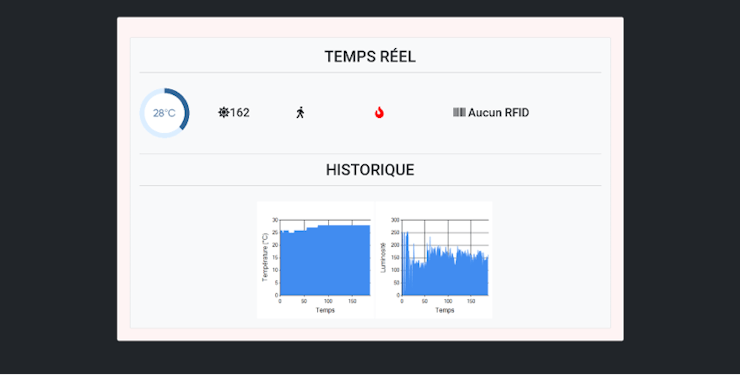
To show the values of all sensors and if a fire is detected by the system, we have decided to create a website with ASP.net. You can see the evolution of the temperature values in °C with a circular progession bar. The website request directly our database, so there is two graphics with the evolution of the temperature and luminosity. Values showed in these graphics are values that have existed since the beginning. If the system detects fire in the room, the fire icon is ON and borders of the webpage are blikding red.
3D design
To design our box, one of our teacher adviced us to use the web soft OnShape, which is quite easy to use for beginners in design.
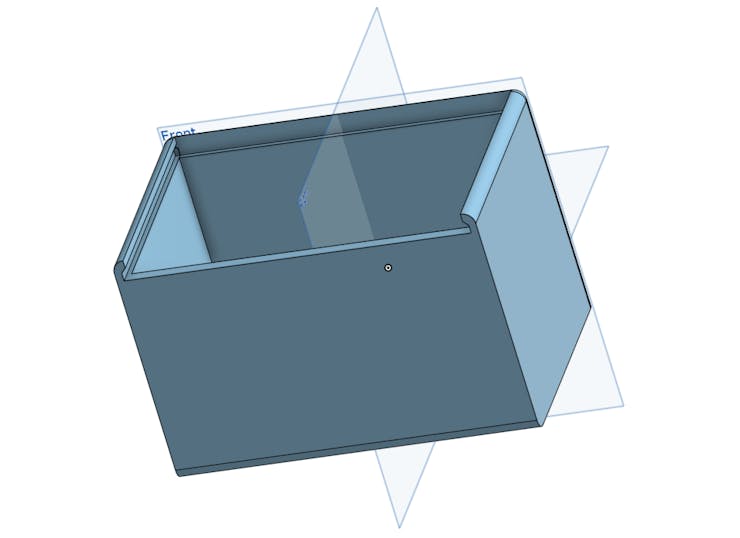
Just below you can see our first conception. We wanted to create a simple box with notches to slide an acryllic plate to close the whole box.
But our conception teacher told us that it would be difficult for a 3D printer to print this kind of form.. So we decided to create several detached pieces that we could print separately.

In the body of the box we have designed holes to keep the sensitive part of our sensors outside. The motion sensor, the flame sensor and the luminosity sensors must capture what happens in the room. But our temperature sensor doesn't need that, as such we kept it inside. On the top of the box, we have designed a little hole to keep outside our RFID sensor :
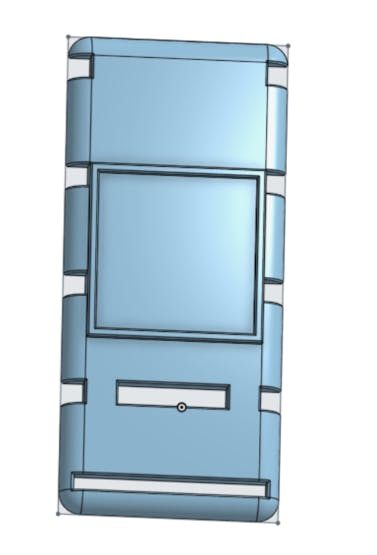
And these two pieces are supposed to hold the "card part" of our two sensors so that they do not move in the case. But unfortunaly, the impression was not sufficiently accurate to permit that.
The second card (Arduino Uno) was not planned in our conception. This is why it's not in the box. We lost too much time with our code part to restart a conception from 0.
These are some pictures of our final prototype :
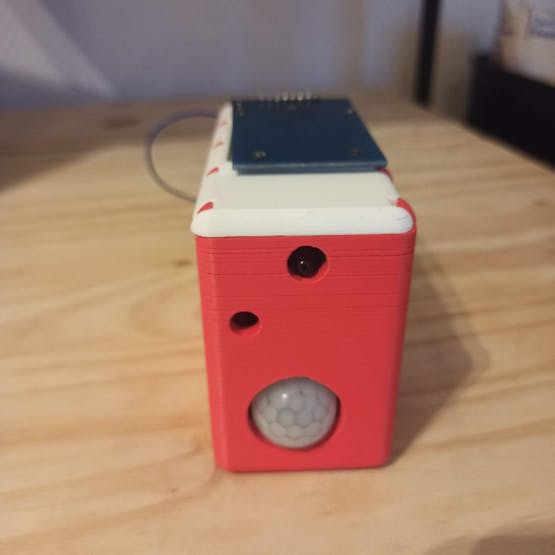
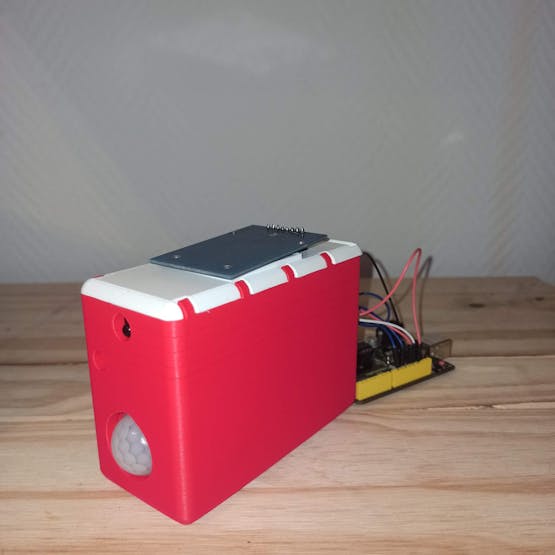
To Conclude
This experience was very nice to make our first steps in IoT. We've acquired new skills to create an entire IoT system. We think we succeeded to complete the project despite all of difficulties on our way.
The article was first published in hackster, Jun 14, 2022
cr: https://www.hackster.io/469073/connectedroom-f1d06f
author: Mathis Clermont, Argaïl GISCLARD, Nicolas DAILLY


