
Hand-off, AI enhanced in-sink waste composter that can change every household’s lifestyle by transforming trash to treasure.

Things used in this project
Hardware components
Software apps and online services
Microsoft Lobe
Hand tools and fabrication machines
3D Printer (generic)
Laser cutter (generic)
Story
The Idea
We waste 1.4 billion tons of food in the world every single year. In the United States alone, 80 billion pounds of food a year goes to waste, which means on average, every person generates 219 pounds of waste. To put things in perspective, just imagine every single person in America throwing more than 650 apples into the trash, and most of this waste goes straight into landfills.
For this project, we want to tackle one of the most important and pressing global issues: food waste. While there are established composting facilities, most food waste from households still directly goes to landfills. There are mini composters in the market, but they are expensive, take up a lot of space, and involve extra steps of filtering out and putting compostable waste into the machine, which is inconvenient and time-consuming. Our proposed solution is integrating an in-sink garbage disposer with a composter. In our vision, users can just throw food waste into the sink and let the composter do its job. The processed compost can be directly dumped into the garden to fertilize home-grown vegetables or fruits, completing the food cycle.
Our solution aims to change every household’s lifestyle by transforming trash into treasure.
Overview
The Biochemical Process
Inspired by the natural process, our project aims to optimize the chemical reaction rate of waste combustion. After exploring the specific and complex chemical reactions, which mainly focused on the utilization of nitrogen in food waste, we proposed a solution that could promote the efficiency of the chemical reaction through a delicate system that controls the environmental factors such as moisture content, pH, temperature, and waste processing. All these factors show a great influence in controlling the reaction speed of waste combustion since the microbiome requires an optimal environment to grow.
Moreover, to simulate the natural process, we incorporated multiple sources of the microbiome from soil and hay, which provide the system with a stable overall environment that could buffer the condition of different wastes and tumbling factors.
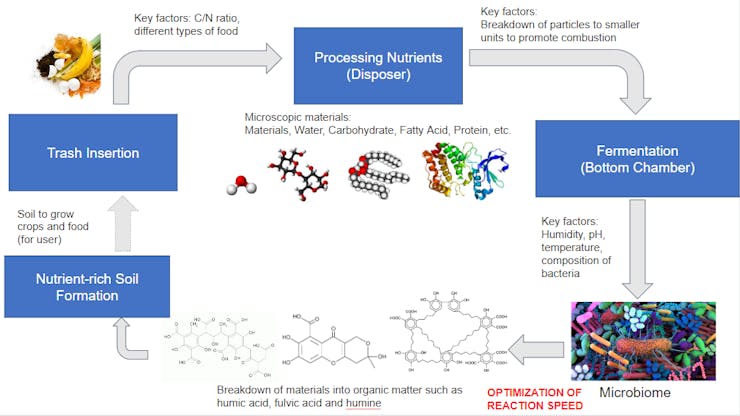
Composting Process Diagram
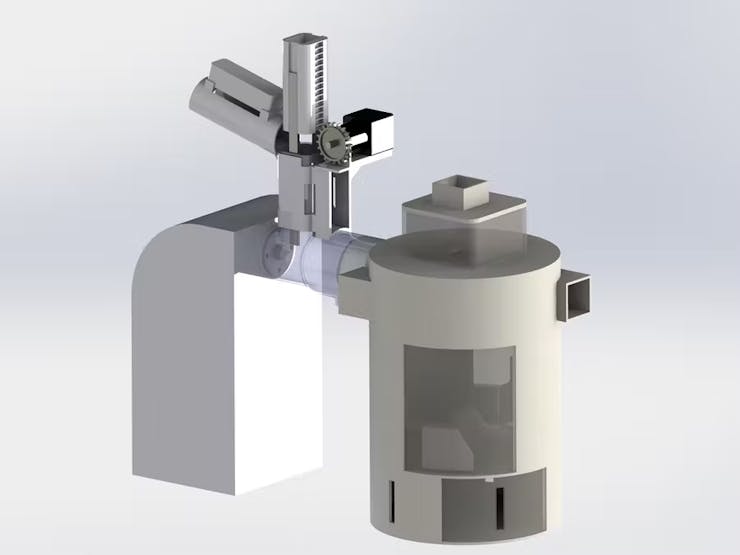
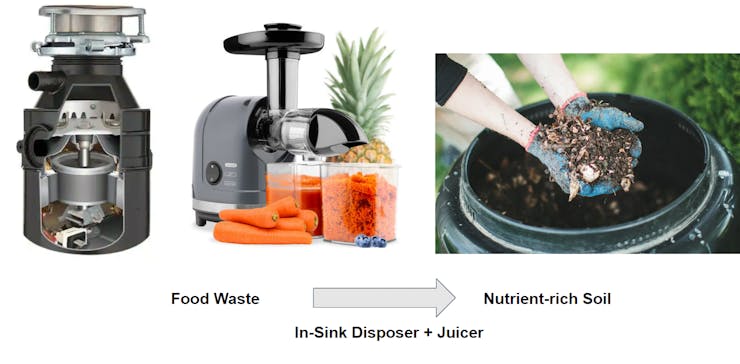
Build Upon a Juicer --- Integrating In-Sink Disposer and Composter
Juicer is a nice combination of things. We want to separate the liquids and solids that go into the sink. A juicer can do that. We want as little liquid as possible from the food scraps. A juicer is made to complete the purpose. So a juicer can perfectly interface between the sink and the composter.
The operating principle of a slow-speed juicer is to have a screw squeezing the mesh. While the liquid passes through the mesh, the solids remain behind and eventually get pushed through the waste hole. The composter then collects organic material from the waste hole and engages further processes.
I happened to have an old juicer which I have not used ever since the first month of purchase. So I decided to dismantle it and try to interface with Arduino. The juicer was button activated, so it was relatively easy to interface. I decided to use parallel relays to act as electronic switches for the buttons.
Juicer Compression
A traditional juicer requires the user to manually push in the fruits/vegetables down the intake pipe. For an in-sink composter, we need a mechanism to achieve that. We used a rack and pinion mechanism to control the vertical movement of a piston, which can lift up to allow food waste to come through and then push down to press the food into the grinder.
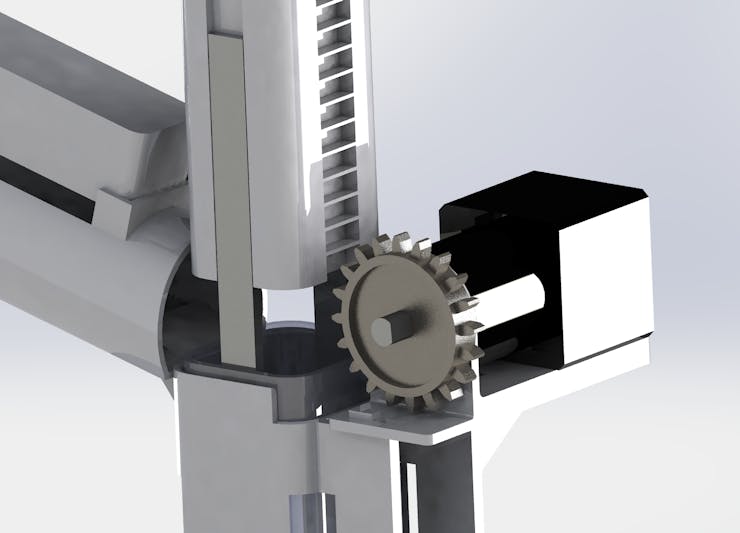
Juicer Compression
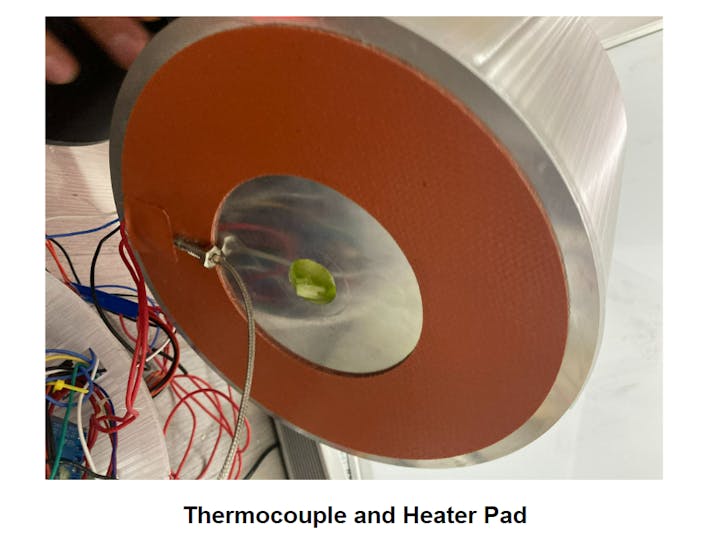
Temperature Control
The composter is heated via a customized heater pad attached to an aluminum heat spreader. The heater pad is controlled via relay, an effective way to control high-power devices. However, we need to know two temperatures to properly control the device.
Firstly, the temperature of the heat pad itself is obtained via a K-Type thermocouple with a MAX-6675 digital signal converter. Though K-type thermocouple is capable of measuring temperatures ranging from -200°C to 1000°C, MAX-6675 chip only supports readings from -20°C to 85°C, which would be sufficient for our application. Also, we are extra cautious in choosing the thermocouple to be one with metal isolation wires, as the one shown below. The environment that the device will operate in is electromagnetically complex. Since thermocouple is very sensitive to electromagnetic interference, the readings could be very off if the thermocouple were to be used with bare wires.
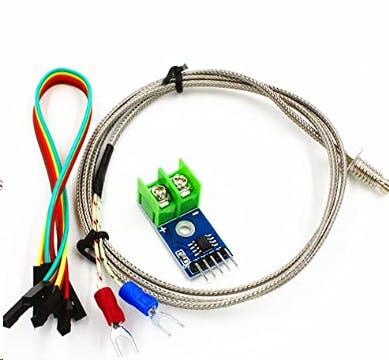
K Type Thermocouple
The MAX-6675 module is interfaced with the Arduino via SPI interface. And in this project, the MAX-6675 library by Adafruit provides some handy code that can be directly used to obtain the temperature. In the hardware side, the thermocouple is directly glued to the heater pad using some superglue. It could be noted, however, do not use hot glue since it will get hot :). Also do not use double-sided tape of any kind since their operating range is generally lower than 50°C.
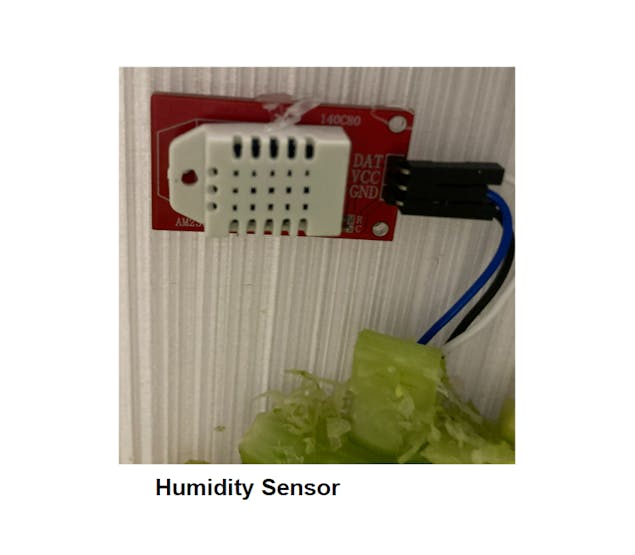
We will also need temperature data from the composting chamber as well. DHT-22 is a calibrated, accurate ambient temperature and humidity sensor capable of measuring temperatures ranging from -20°C to 80°C and humidity from 20%RH to 90%RH. It should be noted that DHT-22 is different than the commonly used DHT-11 sensor in the way that DHT-11 can only measure temperature up to 50°C, which could be tricky since our device is running at the edge of its detection limit.
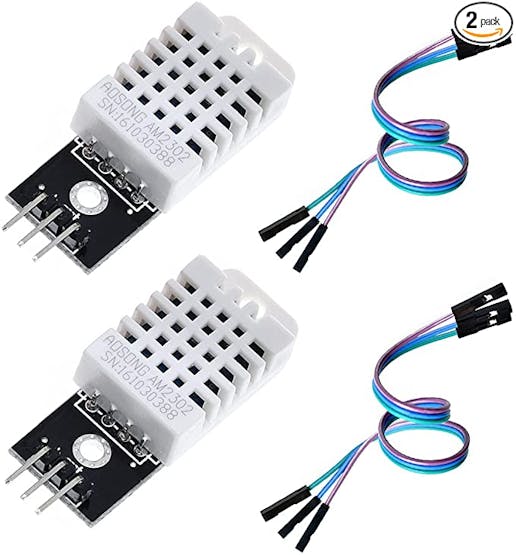
DHT-22 Module
Adafruit also kindly provides a DHT sensor library, which makes it relatively easy for us to follow the example code and obtain the temperature and humidity data.
Humidity Control
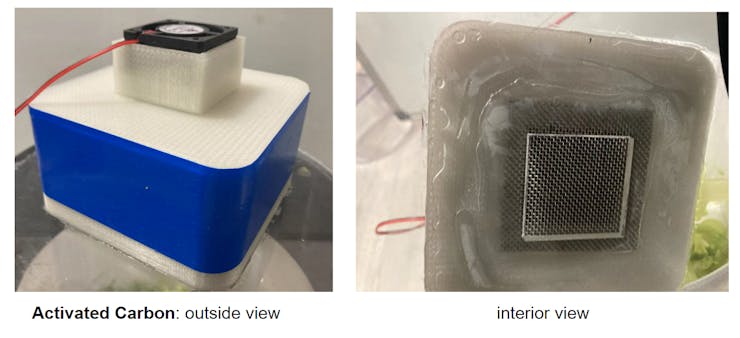
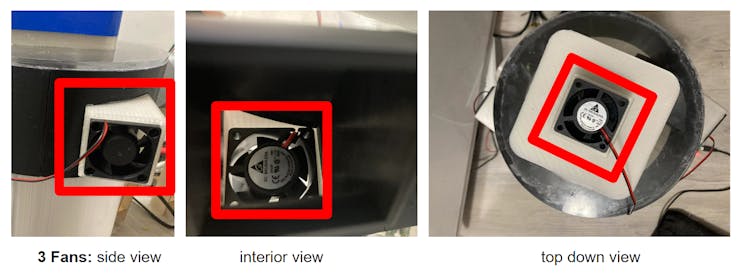
Humidity is controlled via three server fans—two for intakes and one for exhausts. Two intakes are offset from the center to generate a spiral air flow. The exhaust is taken from the center passing through an activated carbon box to reduce odor. Designed air flow direction is shown below:
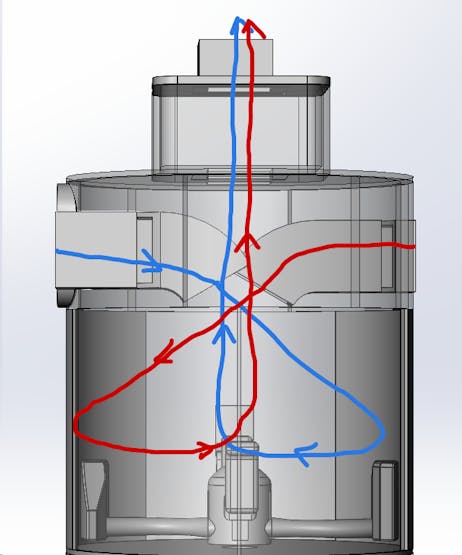
Air flow direction
Since the fans run on 12V, Arduino cannot directly power them. Thus, MOSFETs are needed to translate 5V Arduino PWM signals to 12V PWM speed control. Depending on the temperature and humidity data from the DHT-22, PWM percentages are determined by the Arduino to drive the fans.
Real-Time Module
DS1302 module is a simple real-time clock that can be integrated easily into the Arduino Interface. Our composter needs to know when to stop composting, A timer is necessary for performing the task since the typical composting time could be hours long, and the simple `delay` function of Arduino IDE is not going to work.
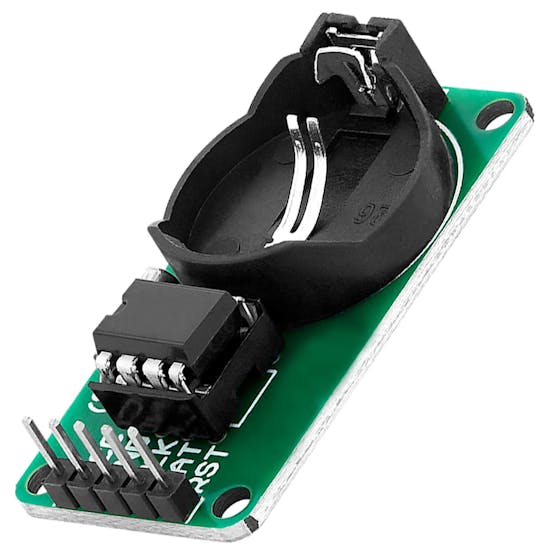
DS1302 RTC module
We used a library called "Rtc by Makuna", which can be found using Arduino IDE library manager. The library provided an example code which we followed to create our own timer control. DS1302 module is capable of reading year, month, day, hour, minute, and second. In our main Arduino code, we used global variables to record the target day, hour, minute, and second, whenever the resetDelay function is called, the target time will be set to the current time offset by the delay, By constantly checking the read out from the timer in the main event loop, we will know if the time elapsed or not. More details can be found in the attached Arduino code.
Blending
The blender is not a regular blender. While normal blenders chop things, this blender is designed to just stir the compostable materials in the chamber. This can be a tricky problem since we are working with solids, not liquids. If we were to use regular mixer props, such as those designed for baking, the vegetable fibers would jam the blades. So we designed a mixer 'blade' dedicated for our purpose.
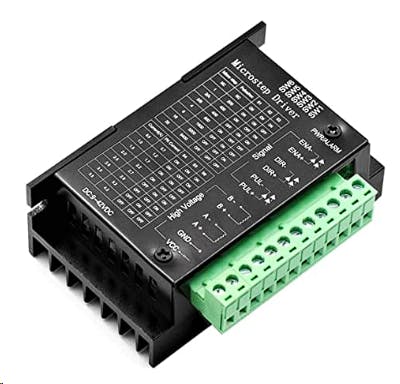
The 'blade' is driven by a 4240 stepper motor paired with a 27:1 gearbox to propel sufficient torque. To control the stepper motor, a simple and reliable TB6600 controller is used. Arduino only needs to give direction signals and pulses to drive the motor.
Smart Composter Control using Computer Vision
In our project, we also integrated an object detection machine learning algorithm to detect if materials added to the composter are actually compostable. When non-compostable material is detected, the compressor motor will automatically stop and the user could take out unwanted material and add compostable materials instead. To implement the machine learning algorithm we rely on TensorFlow lite, which is a lightweight version of TensorFlow that can run machine learning algorithms on embedded devices with very low power. We used a webcam to take photos of the composter intake channel and used a Raspberry Pi 3 to run the object detection model using python.
How to train and use the model:
Step 1:
For simplicity, we used the open-source software called lobe to train our object detection model.

Lobe Logo
Step 2:
In order to train the model, we also need to find a suitable data set for our use case, mainly dealing with food waste and garbage. We found a dataset from this link with prelabeled images of organic, recyclable, and non-recyclable materials. Then we import the downloaded dataset to lobe and wait for it to train. After it is all done, we export it as a tflite model which is ready to use in the next step.
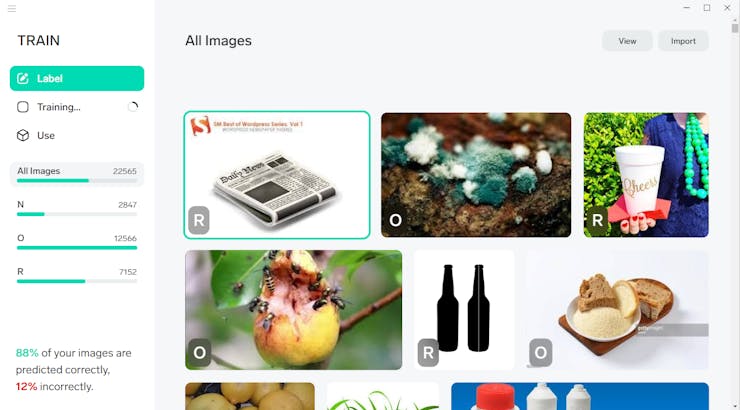
Lobe User Interface
Step 3:
We use openCV library to take photos using the webcam, we use lobe library which provides easy APIs to use the tflite model exported from lobe software, and we also use gpiozero library to control the Raspberry Pi GPIO. The main logic of the control program is that every second, the webcam takes a photo, then we feed the photo to the model we trained and decide if the material in the photo is organic/compostable. This code is running in loops: if for several iterations, no compostable materials or non-compostable materials are detected, the program will send a high signal to the main Arduino board through Raspberry Pi's GPIO and then the Arduino board will halt the composting process (in the demo above, we manully demo the process by inserting a bottle). Detailed code can be found in the code section below or this repo.
Schematics
Electronics Schematics
The oveall electronis schematics. Some of the representations are not exactly the same as the ones I actually used, but the pin connections should be very similar

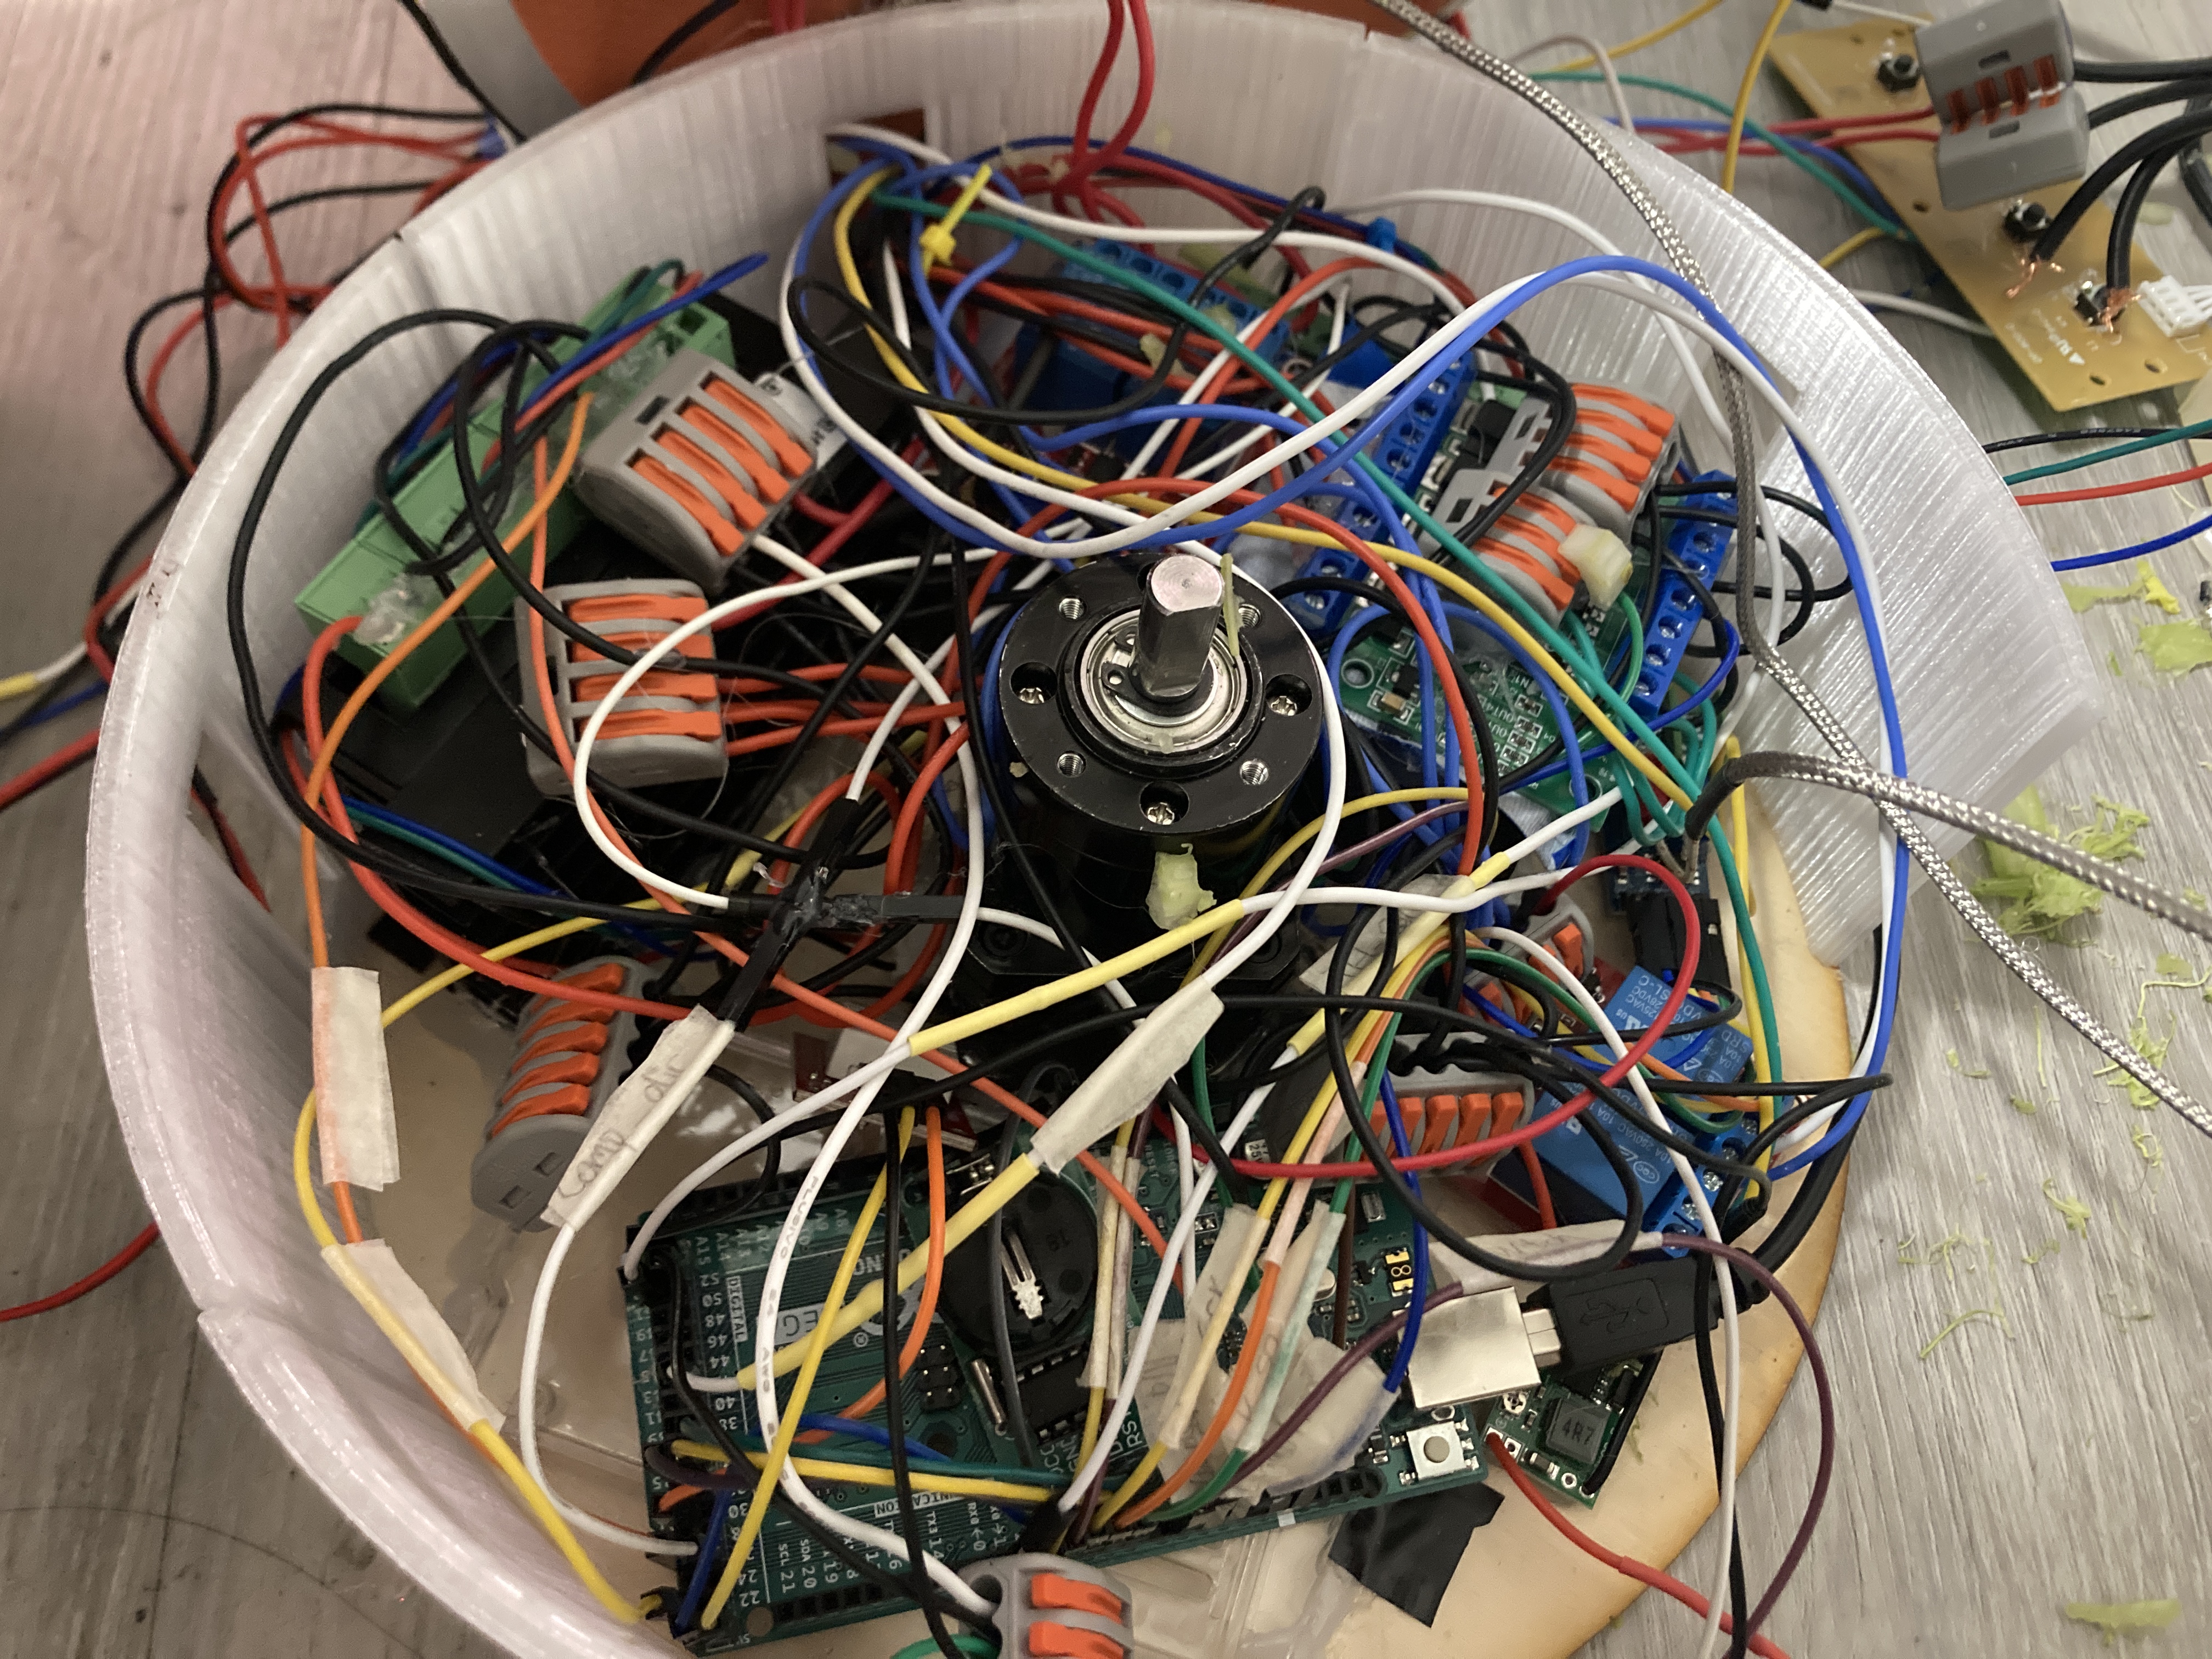
Electronics
sry for the mess, we tried
Code
Composter Arduino Control
Arduino
Object Detection Using Raspberry Pi
This is our code for object detection using raspberry pi. A pre-trained model has been included as well as a quick setup script.
The article was first published in hackster, Jul 1, 2022
cr: https://www.hackster.io/AG/in-sink-garbage-composter-33aeb1
author: Team Academic Garbage: Jinkai Qiu, Yuxi Chang, Luming Cao, Huiying Wang, Songrong QU


