
Simple steps are involved in making this mp3 player but we can't utilize the best without Digital to analog converters.
Things used in this project
Hardware components
Software apps and online services
Pcbway
Hand tools and fabrication machines
Soldering iron (generic)
Solder Wire, Lead Free
Breadboard, 270 Pin
10 Pc. Jumper Wire Kit, 5 cm Long
Story
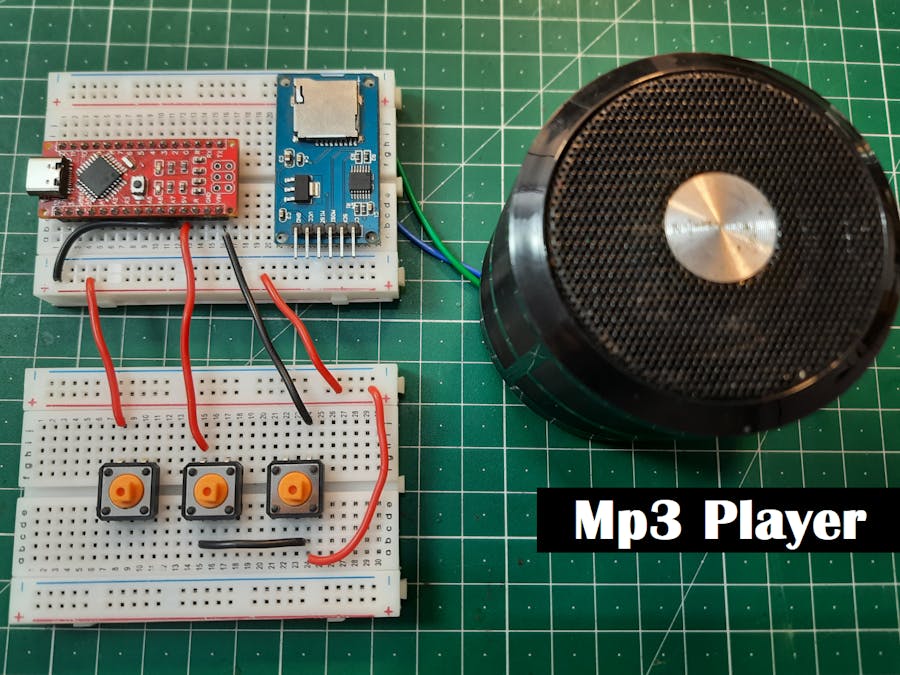
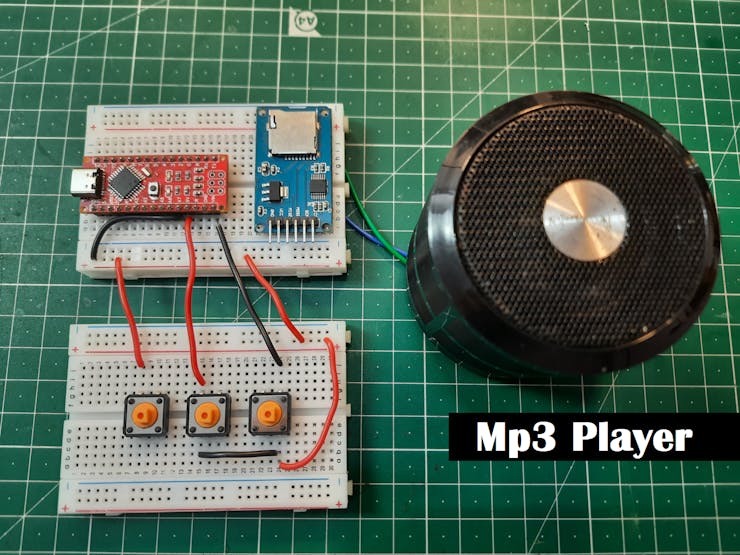
There are many different kinds of mp3 player available in market, comes with many features and with dedicated mp3 decoder and audio amplifier IC. But today we are going to build one using Arduino, this is an educational project but working well with play/pause and next/previous track switching options. In this project we will pair our Arduino with external storage using SD card reader module.
Then we will write a program to operate this using 3 tactile buttons having play/pause and Next/previous track option. And finally convert the circuit into schematics and PCB, then order the PCB prototype from PCBWAY.
Basic idea:
Modern mp3 players have inbuilt Digital to analog converters, which is used to produce the sound very similar to the original one. Microprocessor fetch the song bit wise and then inbuild DAC convert the steps into the analog value, the audio quality is based on the number of steps. That’s why an 8-bit DAC is not preferred for audio output.
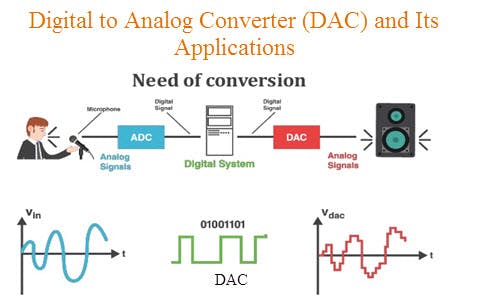
Our Arduino only have analog to digital converts which is required to do the same process but in reverse. But there are PWM digital pins which can output a signal similar to audio but a little distorted. So, we will use this feature of Arduino and produce sound using PWM pin. See PWM sound synthesis.
Components required:
1) Arduino UNO/NANO
2) SD card Module
3) Compatible SD card
4) Speaker
5) Tactile buttons
6) Connecting wires
7) 9V battery
8) Custom PCB from PCBWAY
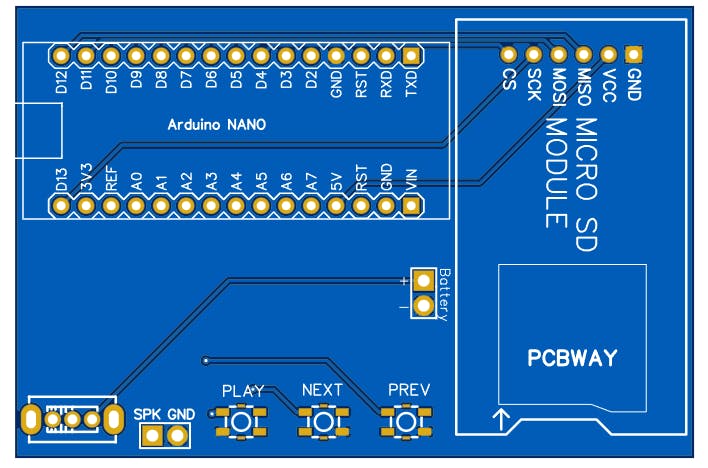
Circuit diagram:
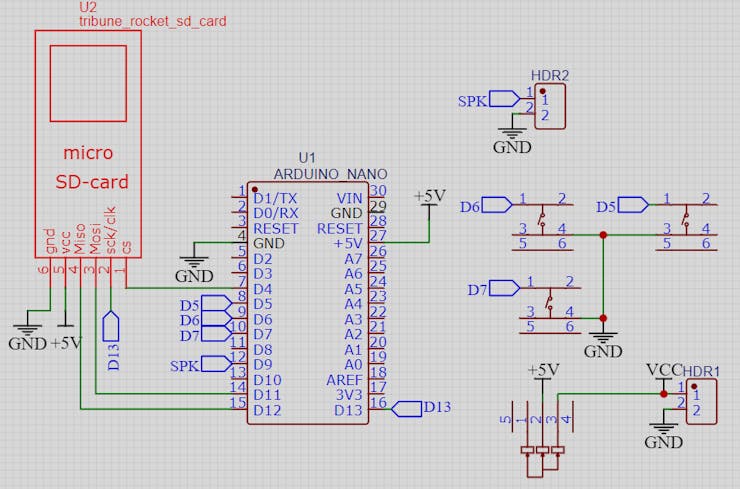
We can connect the SD card using SPI interface as given MOSI, MISO and SCK pins are connected to digital pin 11, 12 and 13 respectively. Chip select can be connected to any digital pin which can be defined high if no errors occurred. Three tactile buttons are connected to digital pin 5, 6 and 7 to control the play menu. For the audio output a PWM pin is needed, here pin 9 is defined for the PWM output. A mini amplifier can be connected to this PWM pin with filtered power supply to amplify the signals further.
Converting Audio files in proper format:
Because of no DAC Arduino can’t play the sound files directly but we can change the format in.wav format. A special online converter is available to convert the full audio files into its compatible wav file. Actually, these wav files are nothing but Waveform Audio File Format is an audio file format standard, developed by IBM and Microsoft, for storing an audio bitstream on PCs. It is the main format used on Microsoft Windows systems for uncompressed audio.
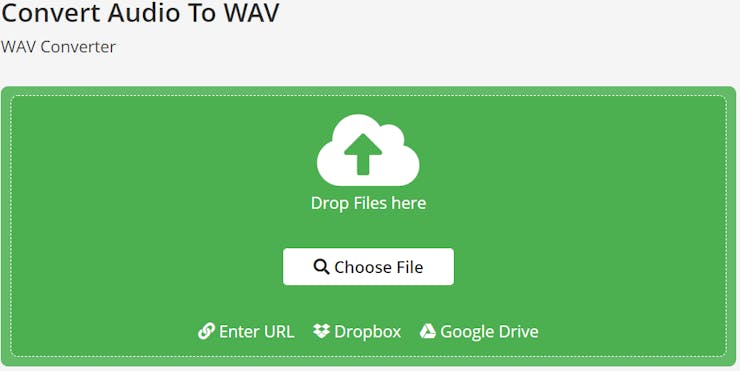
Go to the link given here: https://audio.online-convert.com/convert-to-wav
Upload your audio files and change the following data:

Change bit resolution: 8bit
Change audio frequency: 16000hz
Change audio channels: Mono
Change PCM format: U8 (unsigned 8 bit)

Then click to convert and download the respective wav files.
Setting up SD card:
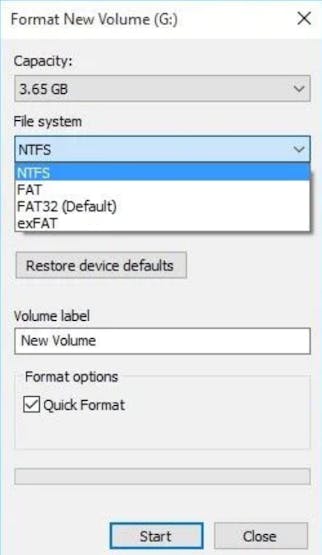
First make sure that SD card is formatted in FAT32 format, if not then do that first from disk manager in windows. Clear all the data from SD card and then paste wav audio files in it.
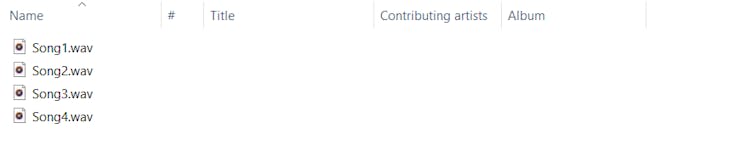
Rename the files as mentioned in program below. Here for songs- music1.wav, music2.wav, music3.wav is used. You can continue this format to as many songs (limited to storage device capabilities).
PCB files:
I am using PCBWAY prototype service to order this PCB, if you want to use the same designs as mine then download this from here, this PCB has onboard 3w mini amplifier to drive the small speaker.
This PCB is designed in dual layer, comes with HASL finish and costs just $5 for 5pcs. Sign-up to PCBWAY using this link and you will get new user rewards as coupons which can be used the first PCB in free. Visit PCBWAY right now and see all the offered services.
Code:
All the required libraries can be installed from the manage libraries section under the tools menu in Arduino IDE.
#include <SD.h> // need to include the SD library
#define SD_ChipSelectPin 4 //connect pin 4 of arduino to cs pin of sd card
#include <TMRpcm.h> //Arduino library for asynchronous playback of PCM/WAV files
#include <SPI.h> //  need to include the SPI library

TMRpcm tmrpcm; // create an object for use in this sketch
int temp=1;
int pp=5;
int next=6;
int prev=7;
void setup()
{
 pinMode(pp,INPUT_PULLUP);
 pinMode(next,INPUT_PULLUP);
 pinMode(prev,INPUT_PULLUP);

 tmrpcm.speakerPin = 9; //5,6,11 or 46 on Mega, 9 on Uno, Nano, etc
 Serial.begin(9600);
 if (!SD.begin(SD_ChipSelectPin)) // returns 1 if the card is present
 {
  Serial.println("SD fail");
  return;
 }

 tmrpcm.setVolume(5); //
 tmrpcm.play("Song1.wav"); //the sound file "song" will play each time the arduino powers up, or is reset
                          //try to provide the file name with extension

}


void loop()
{
  while(digitalRead(pp)==0 || digitalRead(next)==0 || digitalRead(prev)==0)
  {
    if(digitalRead(pp)==0)
    {
      tmrpcm.pause();
      while(digitalRead(pp)==0);
      delay(200);
    }
    else if(digitalRead(next)==0)
    {
      if(temp<4)//temp should be lesser than no. of songs
      temp=temp+1;
      while(digitalRead(next)==0);
      delay(200);
      song();
    }
    else if(digitalRead(prev)==0)
    {
      if(temp>1)
      temp=temp-1;
      while(digitalRead(prev)==0);
      delay(200);
      song();
    }
  }
}

void song (void)
{
  if(temp==1)
  {
    tmrpcm.play("Song1.wav");
  }
  else if(temp==2)
  {
    tmrpcm.play("Song2.wav");
  }
  else if(temp==3)
  {
    tmrpcm.play("Song3.wav");
  }
  else if(temp==4)
  {
    tmrpcm.play("Song4.wav");
  }
}
Working:
The Audio quality is okay but I never prefer to make this for personal mp3. In the same price range, you can buy a mp3 which has a lot more options. But again, this is an educational project which describe how can we use Arduino for audio output.
Custom parts and enclosures
Gerber files
Schematics
circuit pdf
Code
Code
Arduino
#include <SD.h> // need to include the SD library
#define SD_ChipSelectPin 4 //connect pin 4 of arduino to cs pin of sd card
#include <TMRpcm.h> //Arduino library for asynchronous playback of PCM/WAV files
#include <SPI.h> //  need to include the SPI library

TMRpcm tmrpcm; // create an object for use in this sketch
int temp=1;
int pp=5;
int next=6;
int prev=7;
void setup()
{
 pinMode(pp,INPUT_PULLUP);
 pinMode(next,INPUT_PULLUP);
 pinMode(prev,INPUT_PULLUP);

 tmrpcm.speakerPin = 9; //5,6,11 or 46 on Mega, 9 on Uno, Nano, etc
 Serial.begin(9600);
 if (!SD.begin(SD_ChipSelectPin)) // returns 1 if the card is present
 {
  Serial.println("SD fail");
  return;
 }

 tmrpcm.setVolume(5); //
 tmrpcm.play("Song1.wav"); //the sound file "song" will play each time the arduino powers up, or is reset
                          //try to provide the file name with extension

}


void loop()
{
  while(digitalRead(pp)==0 || digitalRead(next)==0 || digitalRead(prev)==0)
  {
    if(digitalRead(pp)==0)
    {
      tmrpcm.pause();
      while(digitalRead(pp)==0);
      delay(200);
    }
    else if(digitalRead(next)==0)
    {
      if(temp<4)//temp should be lesser than no. of songs
      temp=temp+1;
      while(digitalRead(next)==0);
      delay(200);
      song();
    }
    else if(digitalRead(prev)==0)
    {
      if(temp>1)
      temp=temp-1;
      while(digitalRead(prev)==0);
      delay(200);
      song();
    }
  }
}

void song (void)
{
  if(temp==1)
  {
    tmrpcm.play("Song1.wav");
  }
  else if(temp==2)
  {
    tmrpcm.play("Song2.wav");
  }
  else if(temp==3)
  {
    tmrpcm.play("Song3.wav");
  }
  else if(temp==4)
  {
    tmrpcm.play("Song4.wav");
  }
}
The article was first published in hackster, Jul 25, 2022
cr: https://www.hackster.io/LithiumION/arduino-mp3-player-3959db
author: Lithium ION


