
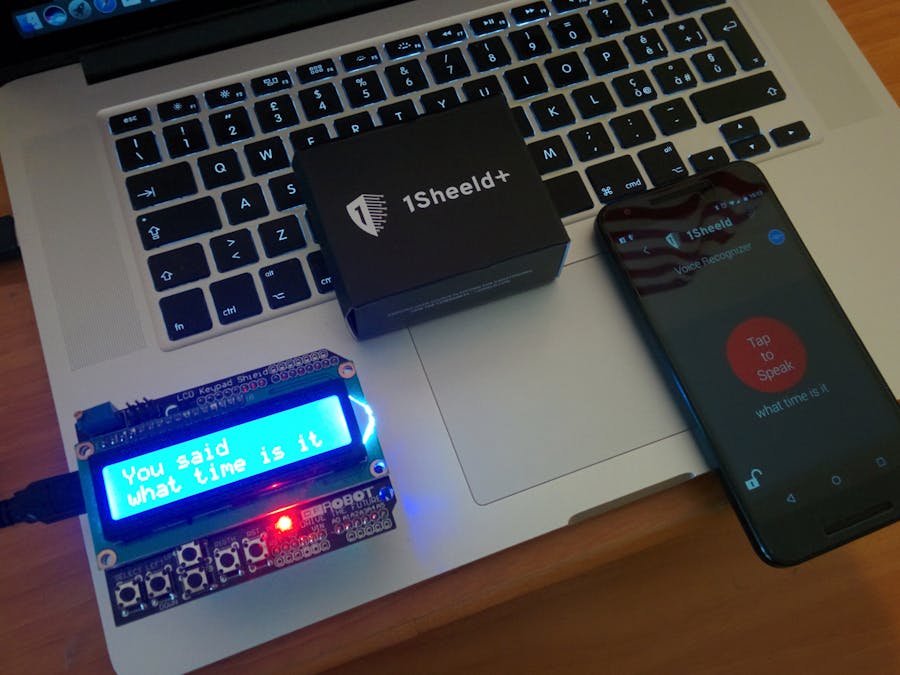
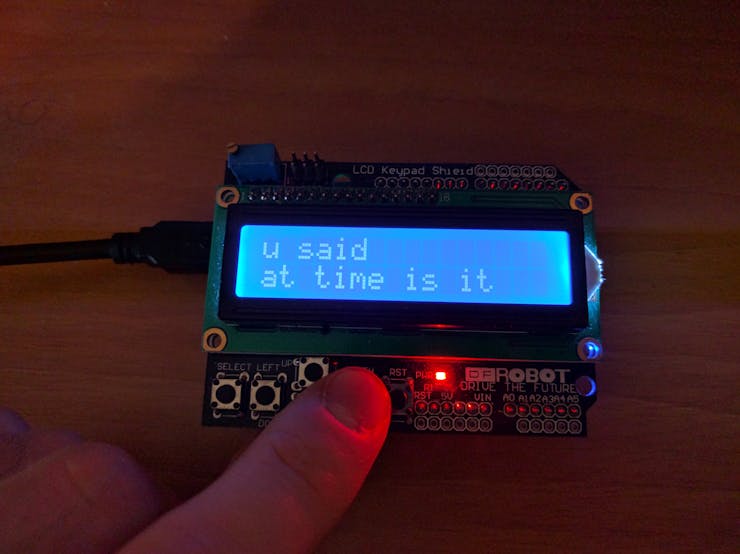
Use Arduino with 1Sheeld+ and your smartphone as a Voice Recognizer.. push a button, speak and you'll see what you said on the LCD screen
Things used in this project
Hardware components
Story
Hey guys ! I want to show you with this simple project the power of 1Sheeld , an Arduino Shield that placed on top of your favorite Arduino Board enable it to unlock and access the plenty of sensors and cool features your smartphone have inside !
For this purpose I'm going to use the VoiceRecognizer Shield, which is one of the 40+ Shield you can access using 1Sheeld ...
It uses your smartphone speech recognition capability and sends the words recognized by your phone to your Arduino over bluetooth ... A LCD/Keypad shield on the top is used to trigger the recognition on the phone by using the "Select" button and to visualize the recognized word directly on the LCD.
This is what you'll need :
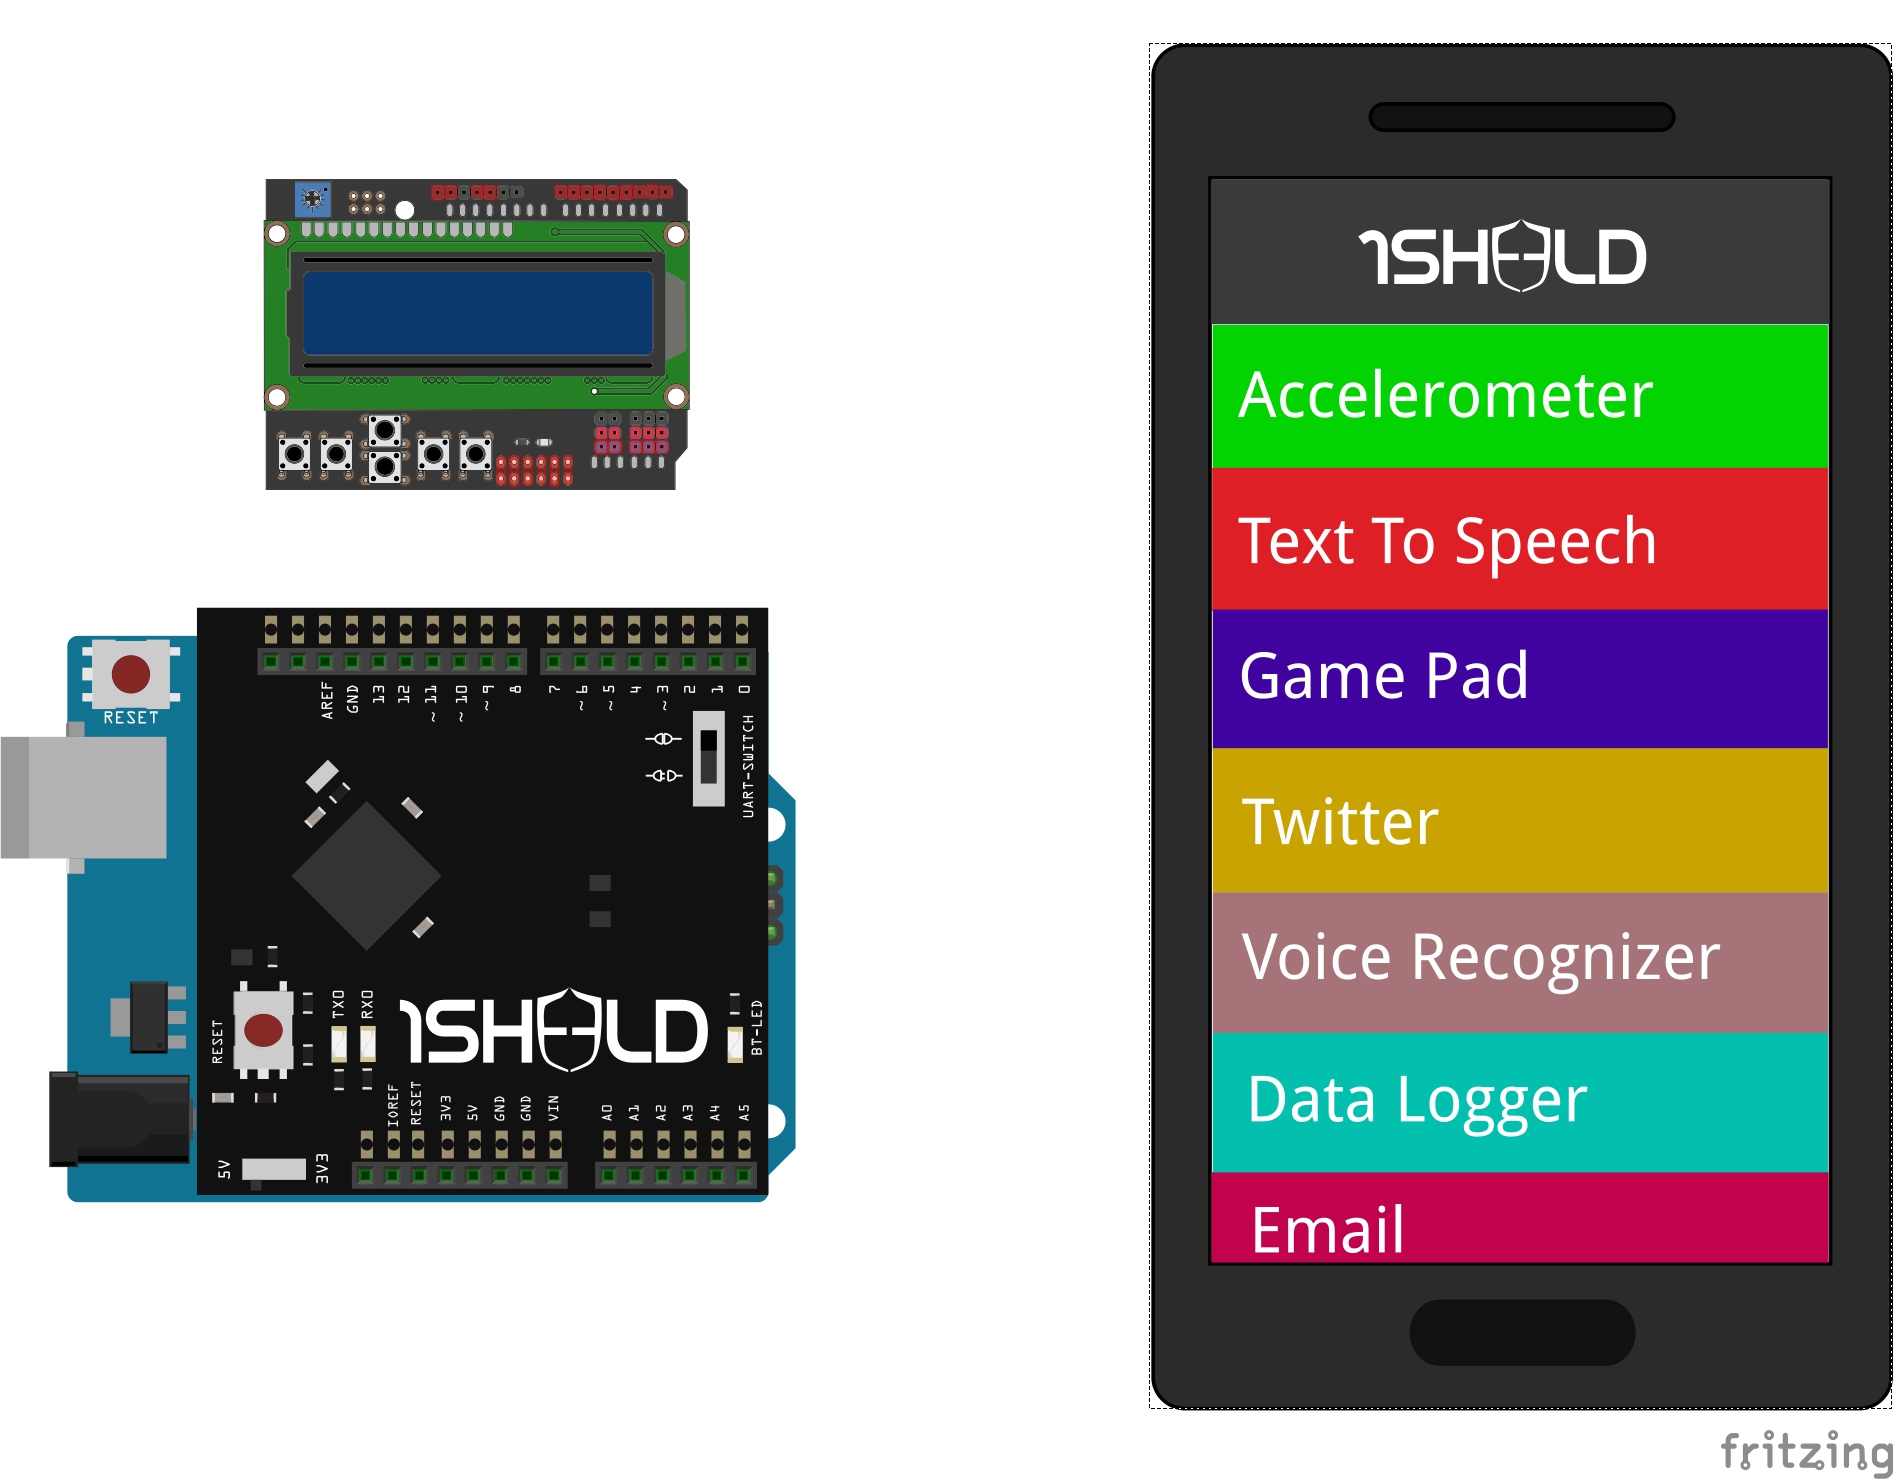
1Sheeld+Smartphone with 1Sheeld AppPC with Arduino IDEArduino UnoLCD/Keypad Shield
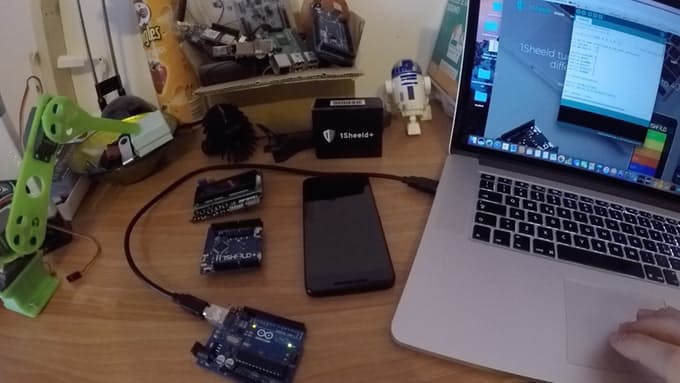
What you'll need
LET'S START !!
If this is your first time with 1Sheeld I suggest you to have a look to the Getting Started Guide first… http://1sheeld.com/tutorials/getting-started/
STEP 1 :
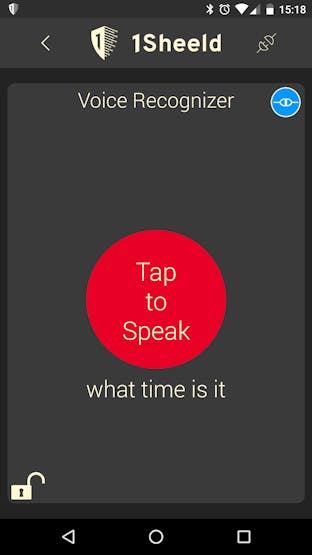
Download the App on your phone and select the Voice Recognition Shield

STEP 2 :
Upload the Arduino Sketch on your Arduino using the Arduino IDE (Remember to install 1Sheeld Library - http://1sheeld.com/downloads/)
Upload the sketch to your Arduino
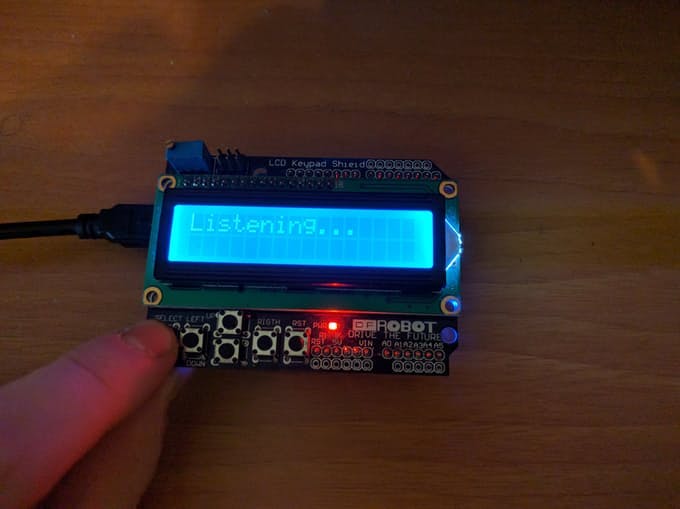
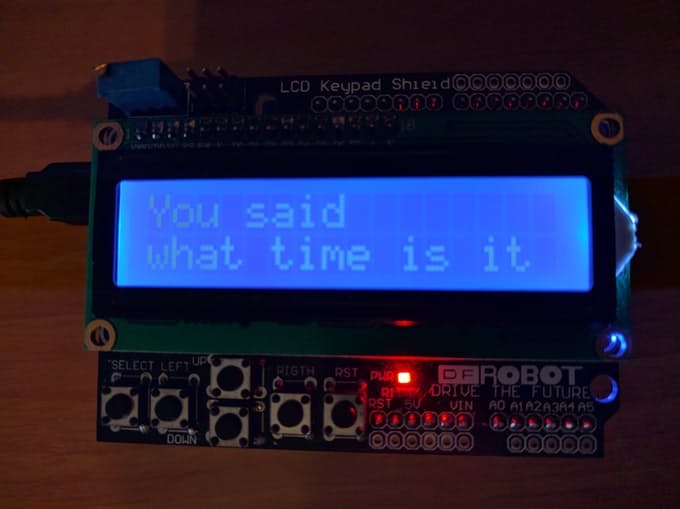
STEP 3 :
Press on the Select Button to make the phone start listening at you and recognized text appears on the LCD !


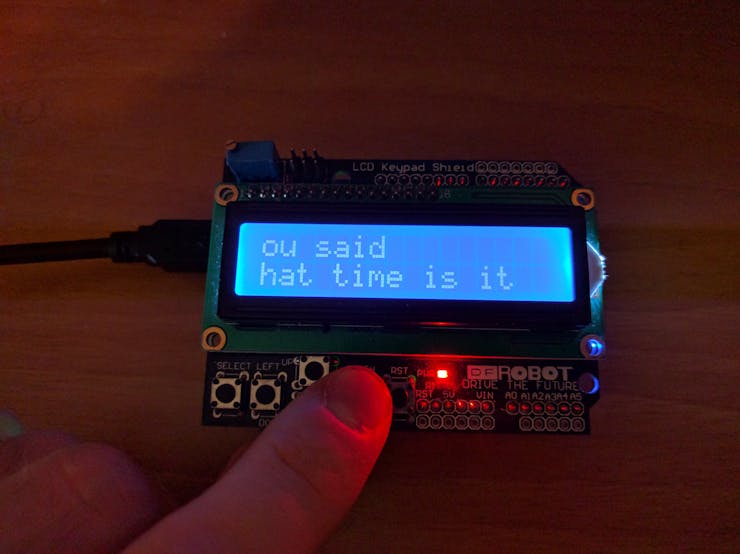
STEP 4 :
If the recognized text is too long you can even scroll left or right using arrows
Schematics
1Sheeld fritzing
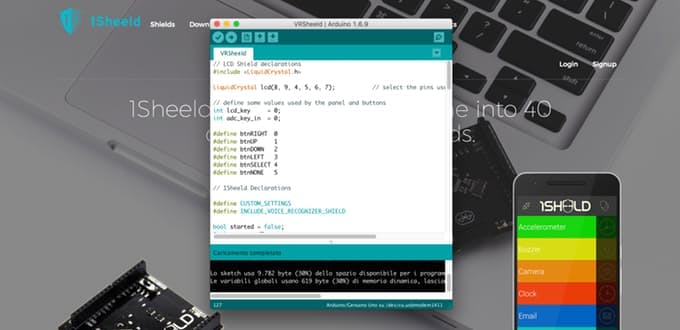
Code
VRSheeld
Arduino
Use the Voice Recognition shield of 1Sheeld to recognize words and print them on the LCD...
// LCD Shield declarations //////////////////////////////

#include <LiquidCrystal.h>

// select the pins used on the LCD panel
LiquidCrystal lcd(8, 9, 4, 5, 6, 7);


// define some values used by the panel and buttons
int lcd_key     = 0;
int adc_key_in  = 0;

#define btnRIGHT  0
#define btnUP     1
#define btnDOWN   2
#define btnLEFT   3
#define btnSELECT 4
#define btnNONE   5

//////////////////////////////////////////////////////////

// 1Sheeld Declarations///////////////////////////////////

#define CUSTOM_SETTINGS
#define INCLUDE_VOICE_RECOGNIZER_SHIELD

//A Boolean flag to know if recognition have been started already
bool started = false;

/* Include 1Sheeld library. */
#include <OneSheeld.h>

//////////////////////////////////////////////////////////

void setup(){
   lcd.begin(16, 2);               // start the library
   lcd.setCursor(0,0);             // set the LCD cursor   position
   lcd.print("Push select");  // print a simple message on the LCD
   /* Start Communication. */
   OneSheeld.begin();
   /* Error Commands handiling. */
   VoiceRecognition.setOnError(error);
   //This is a trigger for the newCommand void ,
   //It's called each time a new command is recognized by the phone
   VoiceRecognition.setOnNewCommand(newCommand);
}

void loop(){
   lcd_key = read_LCD_buttons();   // read the buttons

   switch (lcd_key){               // depending on which button was pushed, we perform an action

       case btnRIGHT:{             //  push button "RIGHT" to scroll the text
            lcd.scrollDisplayLeft();
            delay(300);
            break;
       }
       case btnLEFT:{
             lcd.scrollDisplayRight();//  push button "LEFT" to scroll the text
             delay(300);
             break;
       }
       case btnUP:{
             break;
       }
       case btnDOWN:{
             break;
       }
       case btnSELECT:{
             if (!started){
             lcd.clear();
             lcd.setCursor(0,0);
             lcd.print("Listening...");  //  push button "SELECT" to trig recognition
             VoiceRecognition.start();
             started = true;}
             break;
       }
       case btnNONE:{
             //  No action on the KeyPad
             started = false;
             break;
       }
   }

}

void error(byte errorData)
{
  /* Switch on error and print it on the LCD. */
  switch(errorData)
  {
    case NETWORK_TIMEOUT_ERROR: lcd.setCursor(0,1);lcd.print("Network timeout");break;
    case NETWORK_ERROR: lcd.setCursor(0,1);lcd.print("Network Error");break;
    case AUDIO_ERROR: lcd.setCursor(0,1);lcd.print("Audio error");break;
    case SERVER_ERROR: lcd.setCursor(0,1);lcd.print("No Server");break;
    case SPEECH_TIMEOUT_ERROR: lcd.setCursor(0,1);lcd.print("Speech timeout");break;
    case NO_MATCH_ERROR: lcd.setCursor(0,1);lcd.print("No match");break;
    case RECOGNIZER_BUSY_ERROR: lcd.setCursor(0,1);lcd.print("Busy");break;
  }
}

int read_LCD_buttons(){// read the buttons

    // read the value from the keypad since only one analog pin is used
    adc_key_in = analogRead(0);


    if (adc_key_in > 1000) return btnNONE;

    //For V1.1 of the LCD/Keypad Shield enable this threshold
    /*
    if (adc_key_in < 50)   return btnRIGHT;
    if (adc_key_in < 250)  return btnUP;
    if (adc_key_in < 450)  return btnDOWN;
    if (adc_key_in < 650)  return btnLEFT;
    if (adc_key_in < 850)  return btnSELECT;
    */
   // For V1.0 comment the other threshold and use the one below:

     if (adc_key_in < 50)   return btnRIGHT;
     if (adc_key_in < 195)  return btnUP;
     if (adc_key_in < 380)  return btnDOWN;
     if (adc_key_in < 555)  return btnLEFT;
     if (adc_key_in < 790)  return btnSELECT;


    return btnNONE;  // when all others fail, return this.
}

void newCommand(String command){
    //Clear the text on the LCD Screen
    lcd.clear();
    lcd.setCursor(0,0);// set the LCD cursor   position
    lcd.print("You said");
    lcd.setCursor(0,1);
    //print last command received
    lcd.print(VoiceRecognition.getLastCommand());
}
The article was first published in hackster, November 27, 2016
cr: https://www.hackster.io/alessandruino/arduino-can-hear-and-understand-your-voice-with-1sheeld-20b92f
author: Alessandro Didonna


