
Get your kids to stop asking how many days till Christmas. In an hour you can build a display to tell them.
Things used in this project
Hardware components
Story
If you have children you've likely heard these famous words: "how many days till Christmas?" The frequency of this question seems to intensify to almost unbearable levels somewhere around the December solstice. Why not channel that youthful excitement into a simple maker project?
What We're Making
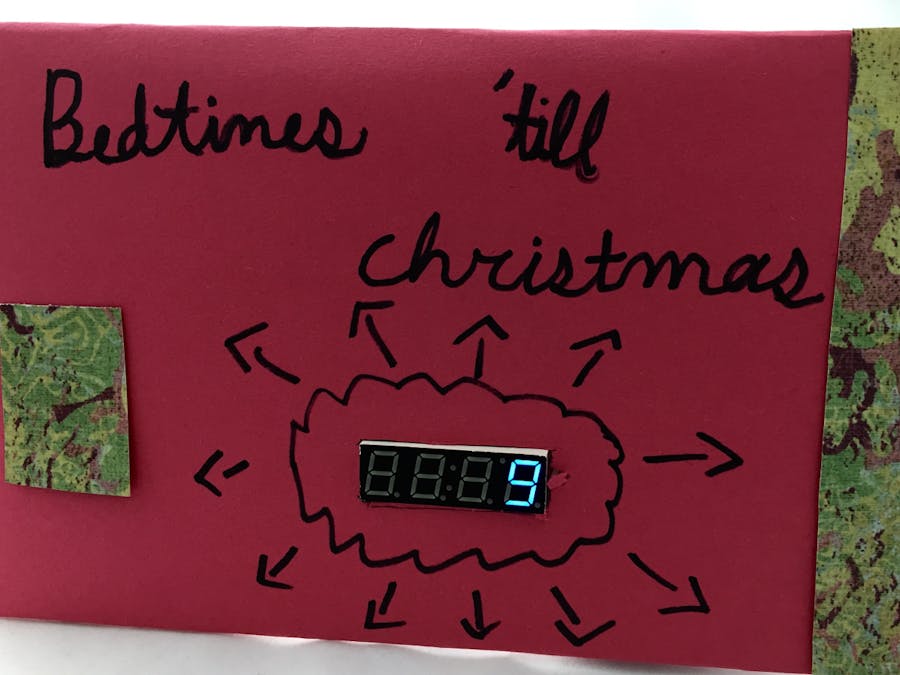
The idea behind the Christmas Countdown Display is very simple. Combine an art project with a Particle Photon and a simple display to show how many days are left until Christmas. The project is cross-holiday compatible, so you're good to go if you'd rather have a Hanukkah, Kwanzaa, or even Festivus countdown.
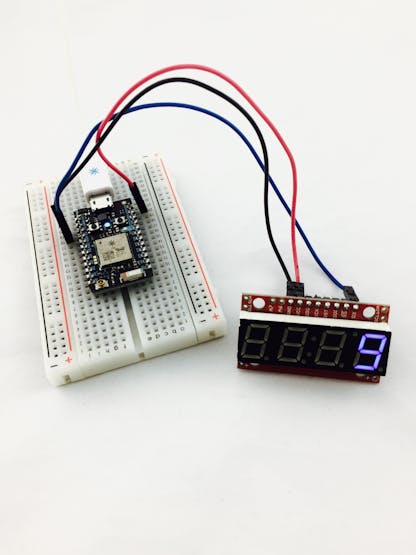
The raw machine with no artistic flair
Start with the Art
This is what makes this project special and unique to your circumstances and is a great job to give to younger kids who might still be too little to help out with the electronics or code work. All we need is a piece that frames our display. It can literally be made of anything and can be any size or shape as long as it has a spot to hold the display you've chosen. In my case, my daughter provided me with a piece of cardboard wrapped in construction paper and a placeholder for the screen.
The Display
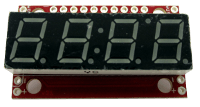
Sparkfun 7-Segment Display
It really doesn't matter what display you use. I just grabbed an old Sparkfun 7-Segment display I had in my parts drawer, so that's what I show here. If you pick a different display, just modify the code and connections. The Sparkfun display is pretty amazing because it supports the 3 most common protocols; I2C, SPI, and Serial. Not only does it support them but you can just start blasting characters at it and it will happily start displaying them. Unless you want more advanced features, you really don't even need to look at the datasheet. To keep things simple I went with the Serial protocol. All you need are 3 connections: power, ground, and the data line. Here's how we connect it to our Particle Photon.
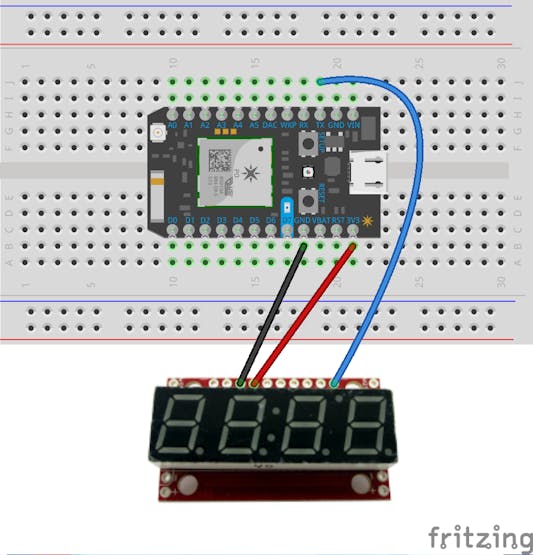
It only takes 3 connections
The Code
If you've ever done embedded programming, you likely understand that anything tied to time calculations can be tricky. Modern operating systems and the Internet have spoiled us in terms of time handling. In the embedded world, many platforms have no concept of real world time and sometimes, at best, can only give you the number of clock cycles since power on. Moving a step up the complexity ladder, we can install things like real time clock (RTC) modules that keep an accurate time, but even then we're left to do the time math ourselves. Sounds simple until you've tried writing a time library that handles things like leap years, daylight savings, leap seconds (yeah, that's a thing) and time zone management.
Fortunately, this is an area where the Photon gets us most of the way there. Since Particle devices, by default, perform a handshake with the Particle Cloud on power up, they can grab the current time from the interwebs and then expose that time to user code through some handy utility calls. The one thing the Time library does not give us out of the box, however, is the ability to calculate the difference between dates which is obviously a requirement for our countdown display. What it does provide though is access to some standard C libraries that get us the rest of the way there. Here is the code responsible for calculating how long we have until our anticipated event.
#define TARGET_MONTH    12
#define TARGET_DAY      25
#define TARGET_YEAR     2016
struct tm target = {0};
int diffInSeconds = 0;
target.tm_year = TARGET_YEAR - 1900; // tm_year is years since 1900
target.tm_mon = TARGET_MONTH - 1; // tm_mon is the zero based index for month
target.tm_mday = TARGET_DAY;
// Calculate the difference in seconds
diffInSeconds = difftime(mktime(&target), Time.local());
The tm struct is a standard C/C++ structure containing a calendar date and time that we can configure by setting various components. It can then be used in a call to difftime which is another standard function used to calculate the difference between two date/time points. That's exactly what we need. difftime accepts time_t types as the two arguments. The first argument is meant to be the future date while the second argument, in our case, is just right now. To convert the tm struct to a time_t we utilize yet another libc function called mktime which simply converts a tm struct to a time_t type. If we look at the Particle firmware source code we see that the built-in Time.local() function returns a time_t so we can use it directly as the second argument. Once we have the difference in seconds we can convert that to any other unit we like such as days, weeks, months, or even years.
If all of that sounded like a lot of C mumbo jumbo don't worry. You don't have to understand it to use the project code although I'd encourage you to try to figure it out if you're interested.
What If I Don't Celebrate Christmas?
Hey, no problem, just modify the artwork to reflect any event you want. Graduation, wedding, days till school lets out. Anything your heart desires. Just change the 3 #define statements at the top of the sketch file to target a different date.
#define TARGET_MONTH    12
#define TARGET_DAY      25
#define TARGET_YEAR     2016
Wrap it Up
If you have the parts on hand, the countdown display can easily be constructed in less than an hour and is a great project to involve the little ones. It's a simple way to add a creative touch to a special occasion in your life and geek out at the same time.
Extra Credit Challenges
Projects like these are great stepping stones to challenge your maker foo. While the initial project might only take an hour to build, there are always ways to take it to a whole 'notha level. Here are some ideas to do that.
Use the Particle Cloud to send a new target date so it can be changed on the fly. Write a library for the Sparkfun 7-Segment display and share it with the Particle community. Modify the existing display code to support all 3 possible protocols (SPI, I2C, Serial). Adjust automatically for daylight savings. Support dates over 999 days in the future (currently limited to 3 digits).
Schematics
7-Segment Display Connection
Code
Photon Code
#include <time.h>

#define TARGET_MONTH    12
#define TARGET_DAY      25
#define TARGET_YEAR     2016

#define CLEAR_COMMAND   0x76
#define CURSOR_COMMAND  0x79

struct tm target = {0};

// The following 3 functions have code for communicating
// with the display via Serial1 but also have code
// commented out to use SPI instead.

void configureCommChannel()
{
    // The 7-segment display default baud rate is 9600
    Serial1.begin(9600);

    // SPI.setClockSpeed(250, KHZ);
    // SPI.setDataMode(SPI_MODE0);
    // SPI.begin(A2);
}

void writeToScreen(byte b)
{
    Serial1.write(b);

    // digitalWrite(A2, LOW);
    // SPI.transfer(b);
    // digitalWrite(A2, HIGH);
}

void writeToScreen(byte bytes[], int len)
{
    Serial1.write(bytes, len);

    // digitalWrite(A2, LOW);
    // for (int i = 0; i < len; i++)
    // {
    //     SPI.transfer(bytes[i]);
    // }
    // digitalWrite(A2, HIGH);
}

void parseTargetDate(int year, int month, int day)
{
    target.tm_year = year - 1900;
    target.tm_mon = month - 1;
    target.tm_mday = day;
}

void clearDisplay()
{
    writeToScreen(CLEAR_COMMAND);
}

void setCursorPosition(int position)
{
    byte commands[] = {CURSOR_COMMAND, position};
    writeToScreen(commands, 2);
}

// displayDaysUntilEvent is specific to the 7-segment
// display because of how the cursor position must be
// moved before writing each digit. If you choose a
// different display this code could probably be more
// straight forward.
void displayDaysUntilEvent(int days)
{
    byte hundreds = 0;
    byte tens = 0;

    clearDisplay();

    hundreds = days / 100;
    if(hundreds > 0)
    {
        setCursorPosition(1);
        writeToScreen(hundreds);
    }

    tens = (days % 100) / 10;
    if(tens > 0 || hundreds > 0)
    {
        setCursorPosition(2);
        writeToScreen(tens);
    }

    setCursorPosition(3);
    writeToScreen(days % 10);
}

// The setup() function is called one time right after
// power up. We handle all initialization here.
void setup() {
    Time.zone(-8); // Set the timezone to PST
    configureCommChannel(); // Initialize communication
    parseTargetDate(TARGET_YEAR, TARGET_MONTH, TARGET_DAY);
    clearDisplay();
}

// The loop() function will be executed over and over after
// setup() has finished.
void loop() {
    int diffInSeconds = 0;

    // Calculate the difference between now and our target
    diffInSeconds = difftime(mktime(&target), Time.local());
    if(diffInSeconds > 0)
    {
        displayDaysUntilEvent(diffInSeconds / 86400 + 1);
    }

    // Check again in 10 seconds
    delay(10000);
}
The article was first published in hackster, December 17, 2016
cr: https://www.hackster.io/sidwarkd/christmas-countdown-art-with-particle-photon-5225f1
author: Kevin Sidwar


