
Build a robotic Panther tank that can use a laser pointer to play with a cat! It also uses a custom controller with Bluetooth.
Things used in this project
Hardware components
Software apps and online services
Autodesk Fusion 360: https://www.hackster.io/autodesk/products/fusion-360?ref=project-8d1371
Hand tools and fabrication machines
3D Printer
Soldering iron (generic)
Story
Recently I created a Laser Shootin' Robot that was able to drive around and had a laser that was fixed in place. This is part 2 of my Tanks in Real Life project series. This time, I took the chassis and added a hull and turret that could both move.
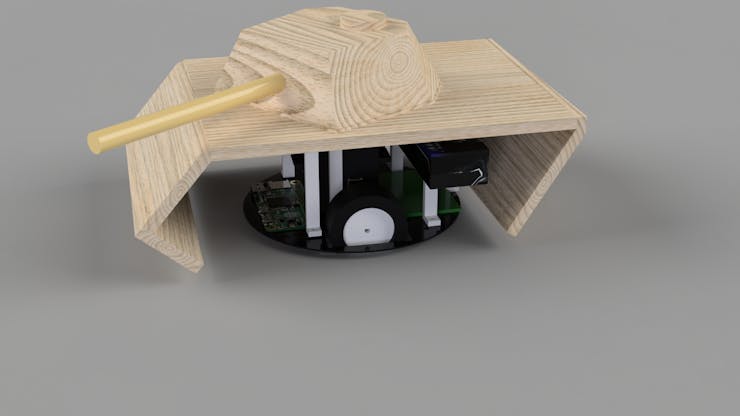
The Hull
I began by 3D printing the necessary parts: 4 hull supports, 4 hull mounting components, the upper turret, the lower turret, and the cupola. I used 4- 3mm x 12mm machine screws to attach the hull supports to the chassis. A brass rod goes across each pair of supports. I then glued the 4 hull mounting components into 2 pairs that align with the hull supports. These attach onto the hull I CNC routed. This will allow for the hull to drop and attach into place on the tank, enabling greater modularity.
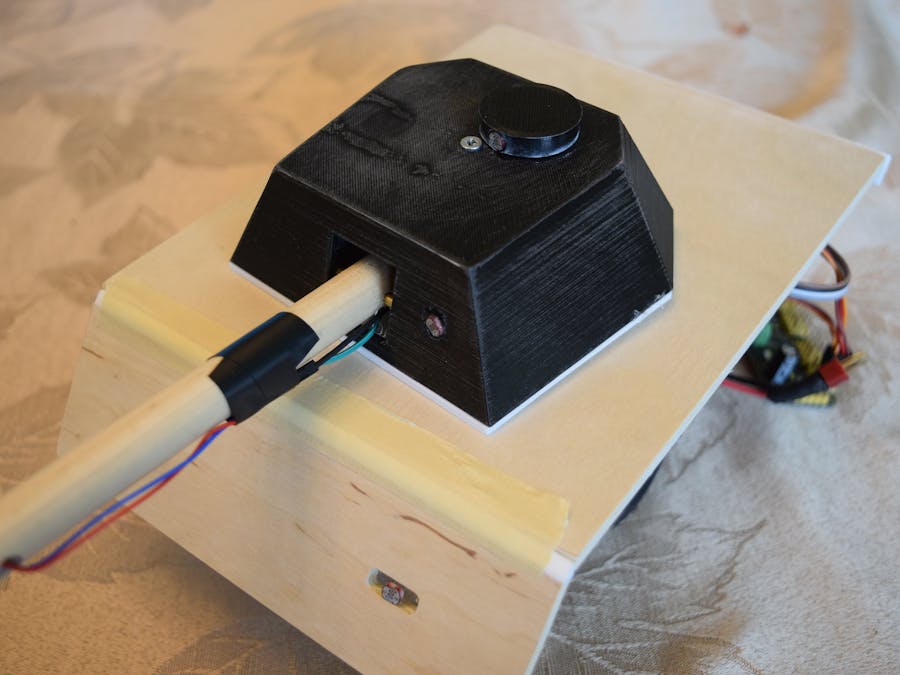
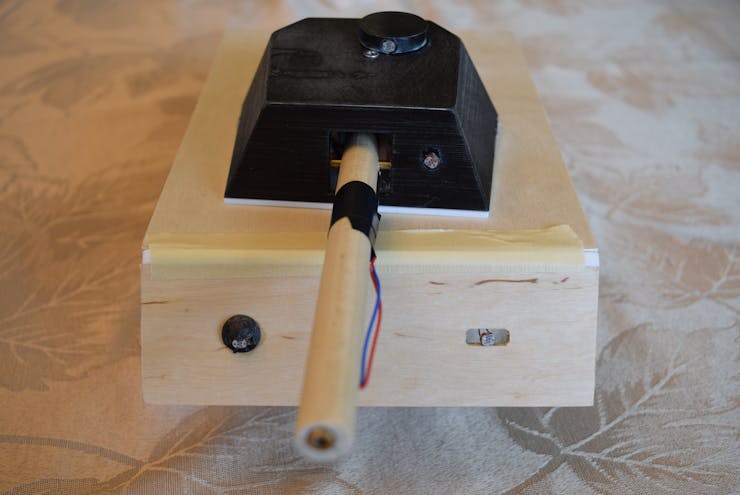
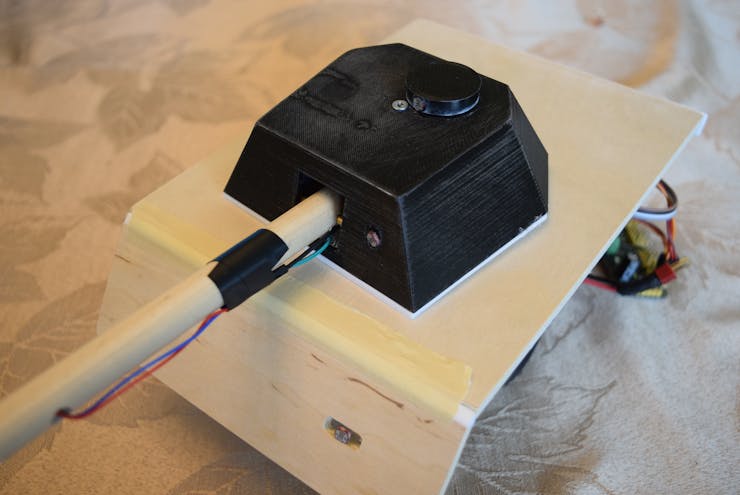
The Turret
The barrel on the tank is a 3/4" dowel. It is quite heavy for a micro servo to handle, so I decided to use a lever mechanism to move it. For elevation, the servo moves the opposite way, and vice-versa. I put a hole about 1" deep on the end of the barrel to accommodate the laser diode. The wires for the laser run underneath as to not hinder any movements. I glued the servo onto the lower turret plate facing the cutout. A cotter pin was added between the barrel and servo horn to create the hinge point.
My friend AceofAces16 helped to design the turret and body. Find him at this link: https://www.hackster.io/AceOfAces16

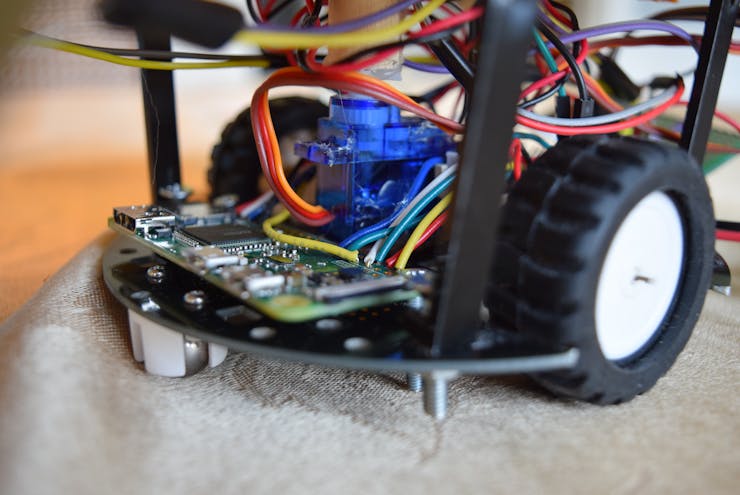
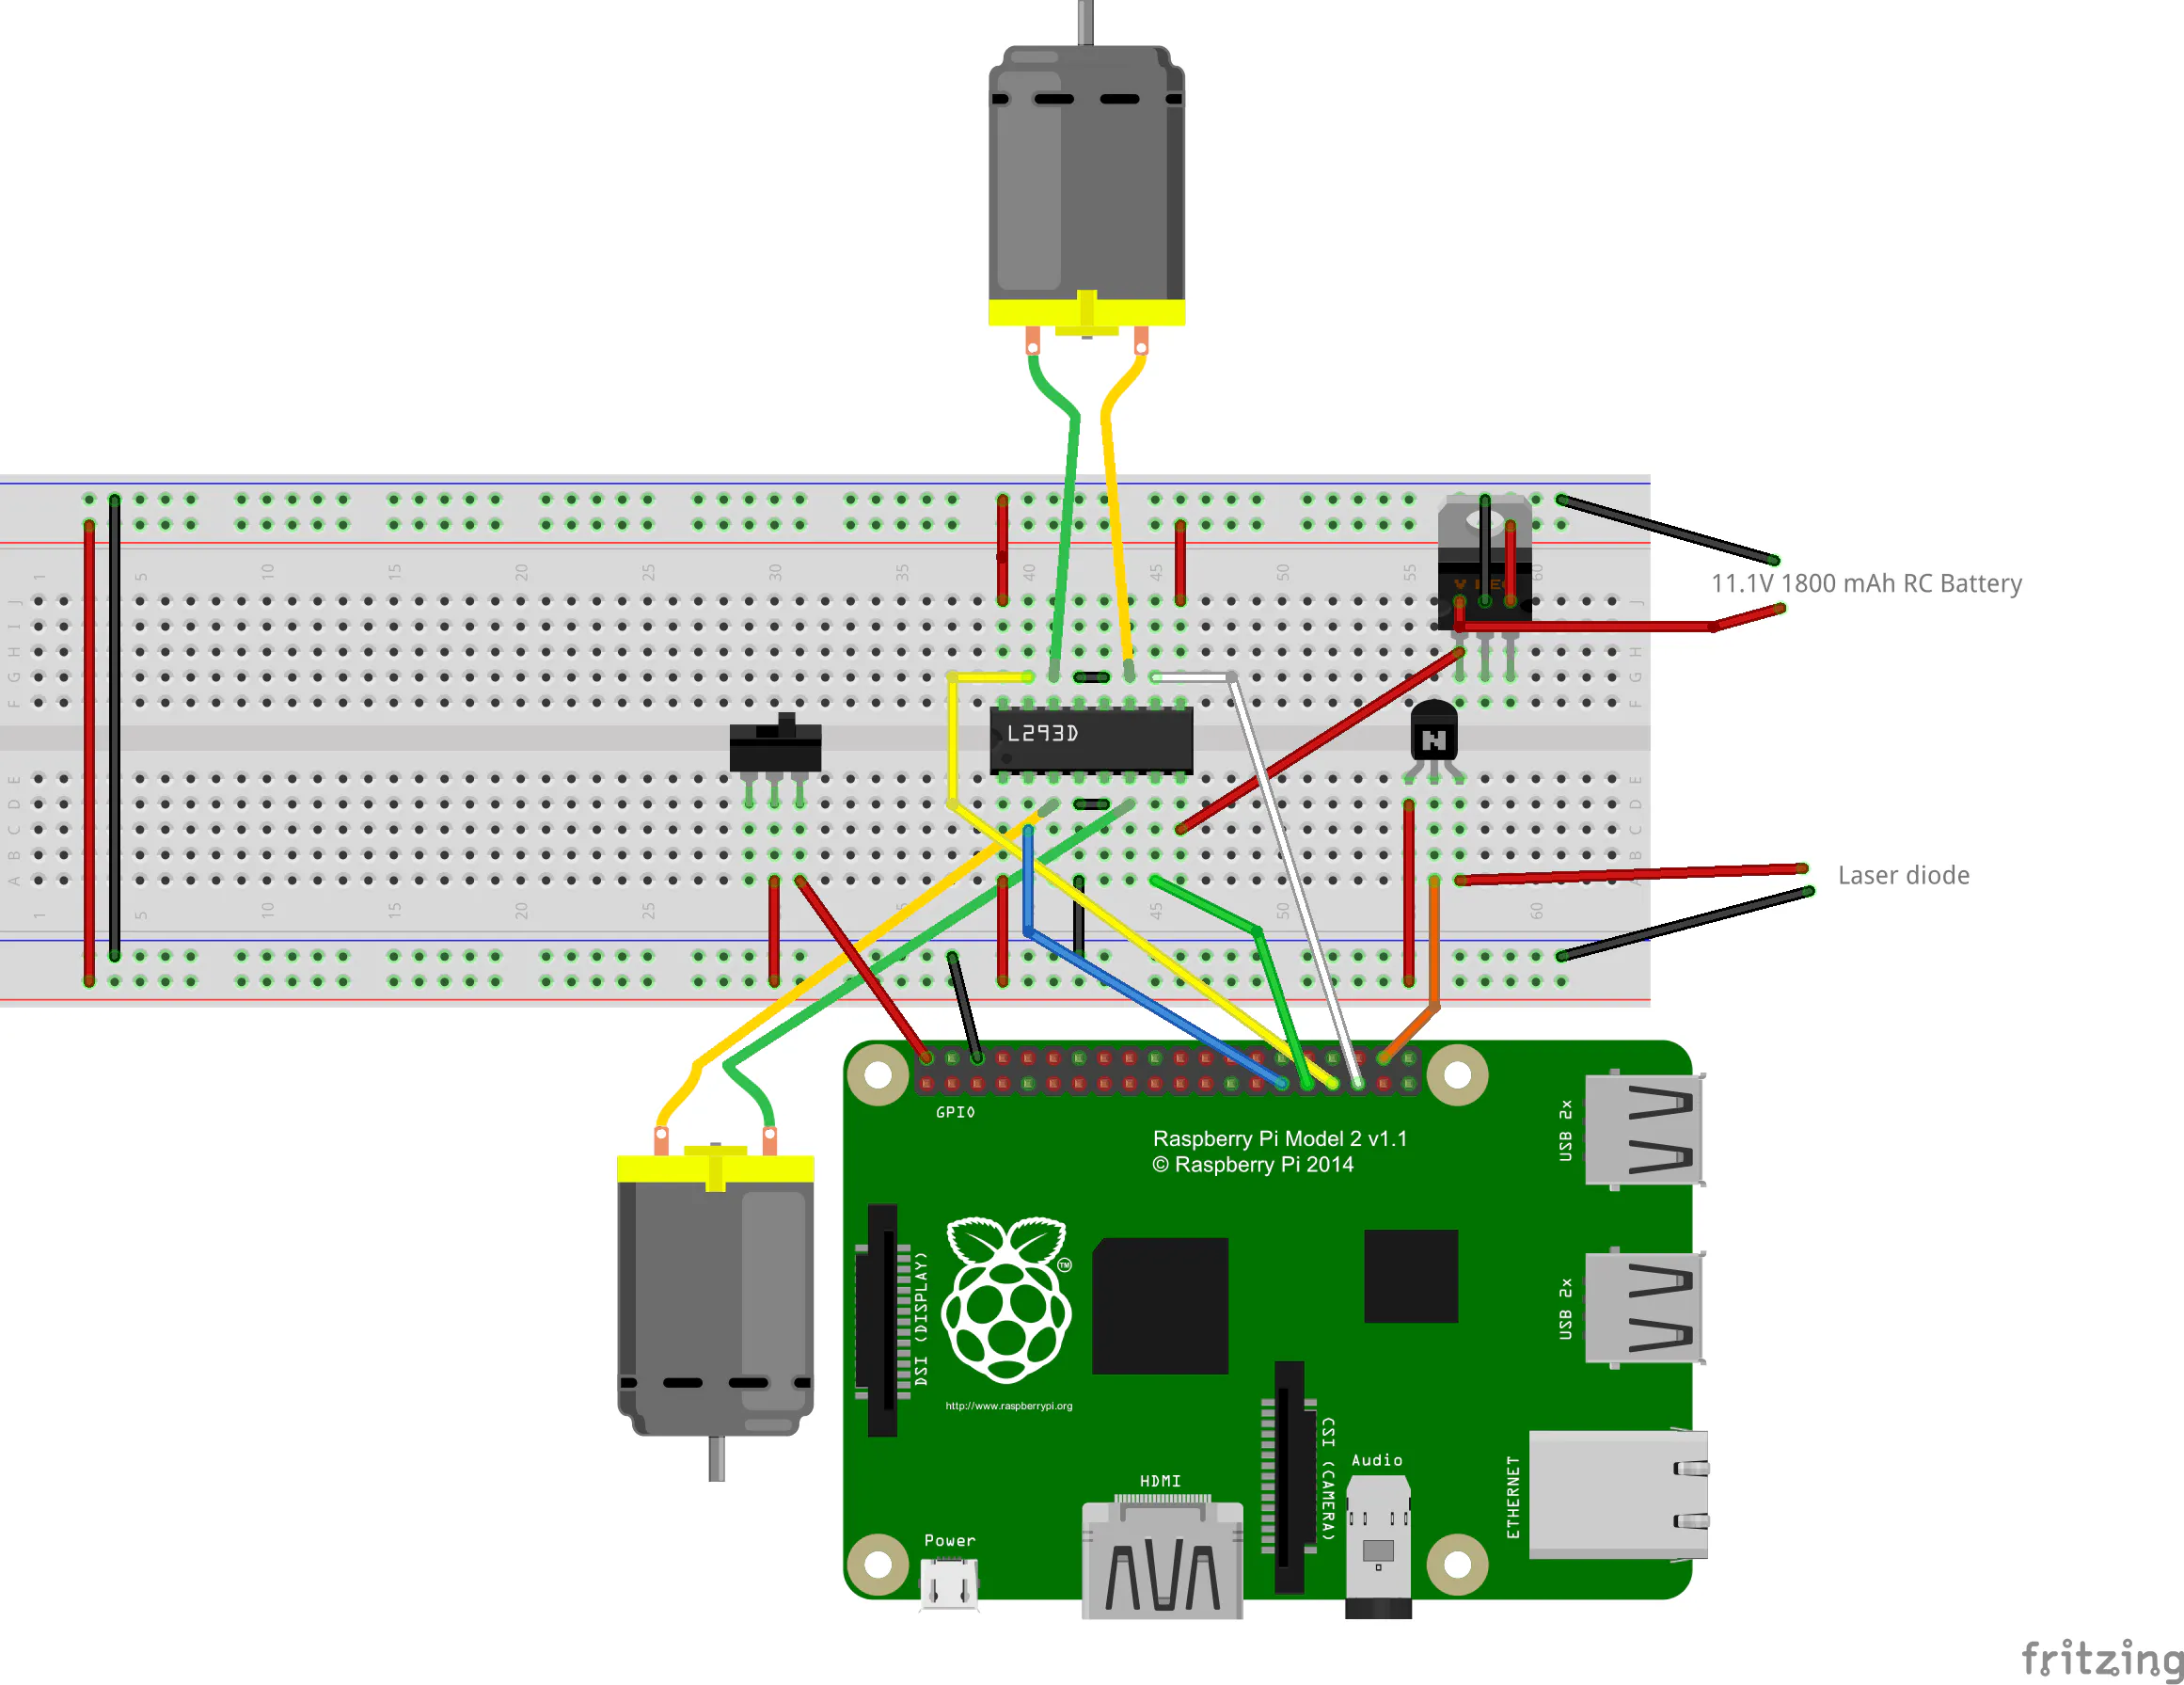
Tank Electronics
In my previous project Laser Shootin' Tank project, I detailed how to make the chassis move and the laser fire. Those electronics remain the same, except for one part. The Raspberry Pi isn't a microcontroller, but instead a microprocessor. This means it can't time pulses accurately, which causes servos to jitter about and draw large amounts of current. In order to save GPIO pins, I opted to use the I2C PCA 9685, which can output up to 16 channels of PWM pulses, all with just 2 wires! The turret drive servo connects to channel 0, and the barrel servo connects to channel 1. I then connected the PCA 9685 to the Pi by connecting SDA to SDA and SCL to SCL, along with GND to GND and VCC to 3.3V. DO NOT CONNECT 3.3V TO V+, as V+ is for SERVO power, not IC power.
Controller Body
A controller can have the best electronics, but without good ergonomics and looks it is nothing. I designed the controller body to look like a tank, with curves on the back and a frontal slope. It has a separate compartment for a 7.4V 1300 mAh LiPo battery. I 3D printed the back and front, along with the battery compartment. I CNC routed the lower plate and added a hinge so it can open, exposing the battery compartment.
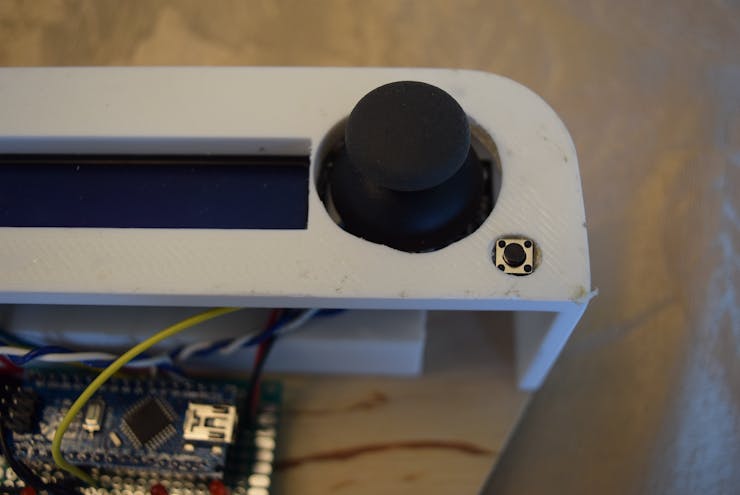
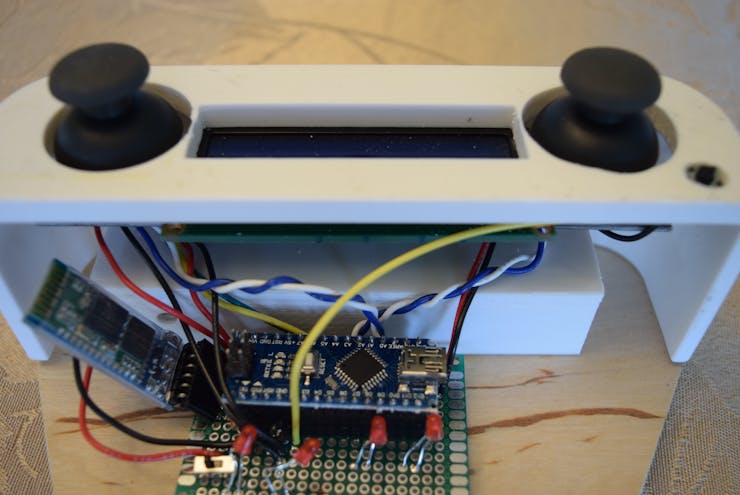
Controller Electronics
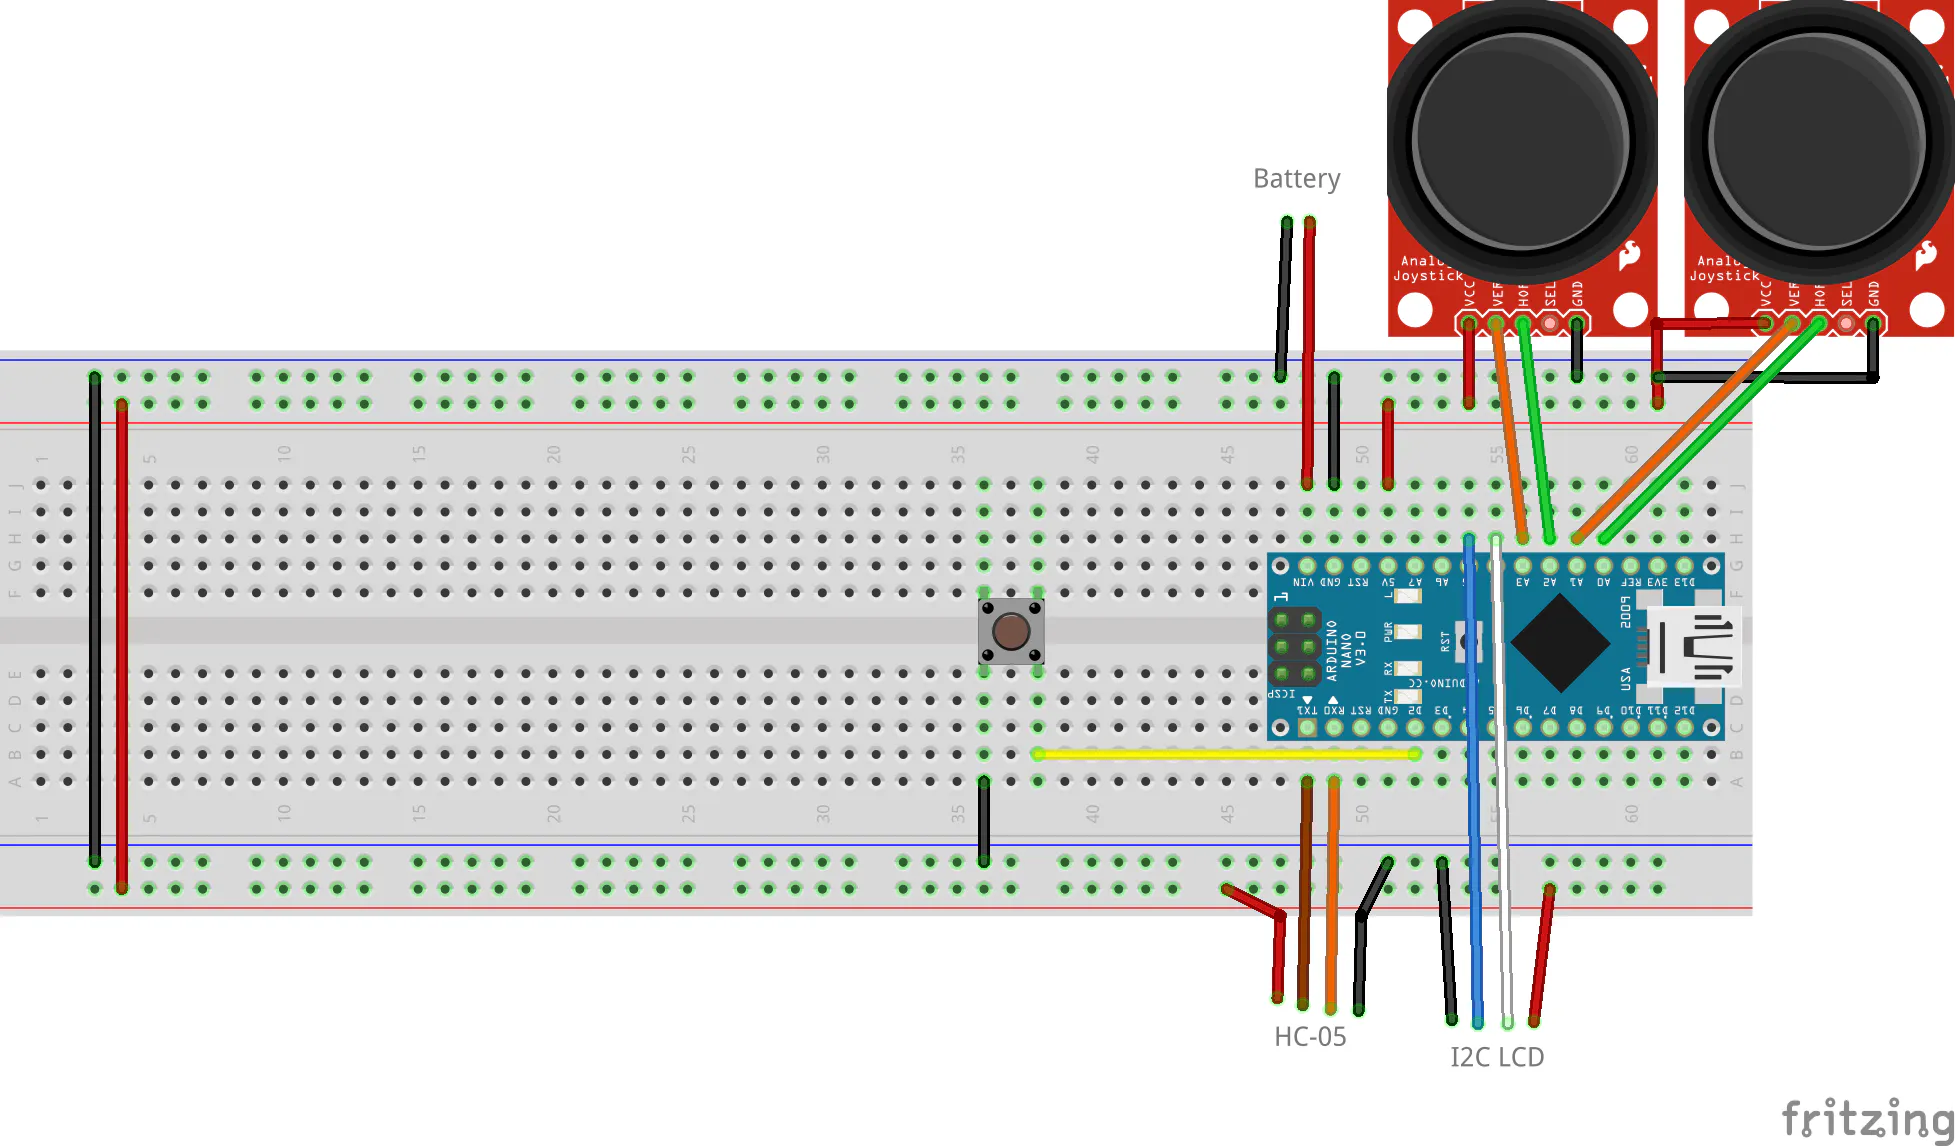
I began by taking a 6x4cm perf board and soldering two female headers the size of an Arduino Nano to the board. Next, I soldered the two joysticks to +5V, GND, A0, A1, A2, and A3. Joystick X axis pins go to even-numbered analog pins, and the Y axis go to odd-numbered analog pins. I decided on using an I2C LCD to reduce the number of pins needed. The LCD connects via +5V, GND, A4 for data, and A5 for clock. Finally, a simple tact switch attaches to D2 and GND. This will be a "fire" button that controls the laser.
Using the Panther
Load up the code onto both the Arduino Nano and the Raspberry Pi Zero W. Make sure to include the needed libraries, such as "Timer" for the Nano which can be found here. You also need to put car.py into the same folder as rc_car_main.py. Adafruit provides a PCA 9685 library that is used to control the servos. Additionally, you must pair and bind the HC-05 to the Pi. The HC-05 must be on in order to pair and scan. Using the terminal via SSH, you can do all of this. First, type sudo bluetoothctl, then agent on, then default-agent, then scan on, then scan off, after HC-05 appears and finally pair MAC_OF_HC05 1234. Type "exit" and then sudo rfcomm bind /dev/rfcomm3 MAC_OF_HC05. If you ever forget the MAC address, just type hcitool scan and then copy/paste the address. Now, type sudo python2 path/to/folder/rc_car_main.py to run the program.
That's it! Now you can fire a laser from a replica Panther. You can let your cat play around with it by driving it and moving the turret.
Custom parts and enclosures
Controller Back
Controller Front
Controller Battery Compartment
Panther Turret Upper
Panther Capola
Panther Turret Lower
Chassis Support
Hull Connector
Schematics
Robot Schematic
Controller Schematic
Code
Controller Code
C/C++
#include "Timer.h"

int JS_VALS[2] = {};
int JS_VALS_R[2] = {};

const int JS_PINS[4] = {A0, A1, A2, A3}; //L_X, L_Y, R_X, R_Y

const int button_pin = 2;
const int deadzone = 8;

const int servo_limits[5] = {0, 180, 50, 95, 75}; //Left, Right, Lower, Upper, Middle limits for the turret
int turret_positions[2] = {90, servo_limits[4]}; //Initial positions

unsigned long last_time = 0;
long motor_delay = 30; //Delay 30 ms between motor control polls
long turret_delay = 150; //Delay 150 ms between turret control polls

Timer t;

void setup() {
  // put your setup code here, to run once:
Serial.begin(9600);
pinMode(button_pin, INPUT_PULLUP);
attachInterrupt(digitalPinToInterrupt(button_pin), fire_laser, FALLING);
Serial.println("Begin");

t.every(motor_delay, control_motors);
t.every(turret_delay, control_turret);

}

void loop() {
  /*control_motors();
  control_turret();
  delay(150);*/
  t.update();


}

void fire_laser(){
  String json_string = "{\"shoot\":\"1\"}";
  Serial.println(json_string);
  delay(10);
}

void control_motors(){
  JS_VALS[0] = analogRead(JS_PINS[0]);
  JS_VALS[1] = analogRead(JS_PINS[1]);
  int x = map(JS_VALS[0], 0, 1023, -50, 50);
  x = constrain(x, -100, 100);
  int y = map(JS_VALS[1], 0, 1023, -50, 50);
  y = constrain(y, -100, 100);
  int motor1 = x+y;
  int motor2 = y-x;
  motor1 = constrain(motor1, -100, 100);
  motor2 = constrain(motor2, -100, 100);
  if(abs(motor1) <= deadzone){
    motor1 = 0;
  }
  if(abs(motor2) <= deadzone){
    motor2 = 0;
  }
  String json_string = "{\"motor\":[" + String(motor1)+","+String(motor2)+"]}";
  Serial.println(json_string);
}

void control_turret(){
  JS_VALS_R[0] = analogRead(JS_PINS[2]); //Get X values
  JS_VALS_R[1] = analogRead(JS_PINS[3]); //Get Y values
  int x = map(JS_VALS_R[0], 0, 1023, 5, -5);
  x = constrain(x, -5, 5); //Catch outliers
  int y = map(JS_VALS_R[1], 0, 1023, 2, -2);
  y = constrain(y, -2, 2);

  turret_positions[0] += x;
  turret_positions[1] += y;

  if(turret_positions[0] <= servo_limits[0]){
    turret_positions[0] = servo_limits[0];
  }
  else if(turret_positions[0] >= servo_limits[1]){
    turret_positions[0] = servo_limits[1];
  }
  if(turret_positions[1] <= servo_limits[2]){
    turret_positions[1] = servo_limits[2];
  }
  else if(turret_positions[1] >= servo_limits[3]){
    turret_positions[1] = servo_limits[3];
  }

  String json_string = "{\"turret\":[" + String(turret_positions[0])+","+String(turret_positions[1])+"]}";
  Serial.println(json_string);

}
Robot Class
Python
Put this in the same folder as "rc_car_main.py
from __future__ import division
import RPi.GPIO as GPIO
from time import sleep
from serial import Serial
import json

import Adafruit_PCA9685

class Car(object):

	def __init__(self, BT_Port, laser_pin):
		GPIO.setmode(GPIO.BCM)
		self.ser = Serial(BT_Port, baudrate=9600)
                self.laser_pin = laser_pin
		self.laser_state = False
                GPIO.setup(self.laser_pin, GPIO.OUT)

	def configMotors(self, mL1, mL2, mR1, mR2, invertLR=False):
	    self.motor_array = [mL1, mL2, mR1, mR2]
	    self.invert = invertLR
	    for pin in self.motor_array:
		GPIO.setup(pin, GPIO.OUT)
		#self.motor_pwm.append(GPIO.PWM(pin, 490))
	    self.motorL1_pwm = GPIO.PWM(mL1, 100)
	    self.motorL2_pwm = GPIO.PWM(mL2, 100)
	    self.motorR1_pwm = GPIO.PWM(mR1, 100)
	    self.motorR2_pwm = GPIO.PWM(mR2, 100)
	    self.motorL1_pwm.start(0)
	    self.motorL2_pwm.start(0)
	    self.motorR1_pwm.start(0)
	    self.motorR2_pwm.start(0)

	def configServos(self):
		self.pwm = Adafruit_PCA9685.PCA9685()
		self.servo_min = 150
		self.servo_max = 600
		self.pwm.set_pwm_freq(60)

	def deg_to_pulse(self, degree):
		pulse = (degree - 0) * (self.servo_max - self.servo_min) / (180 - 0) + 150
		print('Pulse: '+str(pulse))
		return int(pulse)

	def receive_command(self):
            self.cmd = ""
            if self.ser.inWaiting():
                self.cmd = self.ser.readline()
                if self.cmd != None:
                    try:
                        data = self.cmd.decode('utf-8')
                        data = json.loads(data.strip())
                        print data
                        if data != "":
                            return data
                        else:
                            return ""
                    except ValueError:
                        pass

	def turn_wheel(self, motor1, motor2):
            if self.invert:
                temp = motor1
                motor1 = motor2
                motor2 = temp
            motor1 = (motor1 / 2)
            motor2 = (motor2 / 2)
            if motor1<0:
		self.motorL2_pwm.ChangeDutyCycle(motor1*-1)
		self.motorL1_pwm.ChangeDutyCycle(0)#make positive if negative
            else:
		self.motorL1_pwm.ChangeDutyCycle(motor1)
		self.motorL2_pwm.ChangeDutyCycle(0)

            if motor2<0:
		self.motorR2_pwm.ChangeDutyCycle(motor2*-1)
		self.motorR1_pwm.ChangeDutyCycle(0)#make positive if negative
            else:
		self.motorR1_pwm.ChangeDutyCycle(motor2)
		self.motorR2_pwm.ChangeDutyCycle(0)

	def move_turret(self, turret_deg, barrel_deg):
            self.pwm.set_pwm(0, 0, self.deg_to_pulse(turret_deg))
	    self.pwm.set_pwm(1, 0, self.deg_to_pulse(barrel_deg))

        def fire_laser(self):
	    self.laser_state =  not self.laser_state
            GPIO.output(self.laser_pin, self.laser_state)

	def update(self): #Run to make the robot work
            self.json_obj = self.receive_command()
	    print self.json_obj
	    try:
                if "motor" in self.cmd:
                    if self.json_obj["motor"] != None:
                   	 val1 = self.json_obj["motor"][0]
			# if val1 > 0:
      			 #    val1 += 10
                   	 val2 = self.json_obj["motor"][1]
			# if val2 <0:
			#	val2 += 4
                   	 self.turn_wheel(val1, val2)
		elif "shoot" in self.cmd:
		    self.fire_laser()
		elif "turret" in self.cmd:
		    print('Turret found!!!!!!!!!!')
                    val1 = self.json_obj["turret"][0]
                    val2 = self.json_obj["turret"][1]
                    self.move_turret(val1, val2)

            except TypeError:
                pass
Robot Main
Python
Run this with sudo python2
import car

bt_port = "/dev/rfcomm3"
laser_pin = 20
rc_car = car.Car(bt_port, laser_pin)

rc_car.configMotors(6,5,19,13, invertLR=True)
rc_car.configServos() #Turret drive servo, barrel servo

while 1:
    rc_car.update()
The article was first published in hackster, September 26 2017
cr: https://www.hackster.io/gatoninja236/laser-pointer-panther-tank-8d1371
author: Arduino “having11” Guy


