
Train an artificial eye with Machine Learning to monitor analog knobs positions in audio consoles

Things used in this project
Hardware components
Software apps and online services
Autodesk Fusion 360: https://www.hackster.io/autodesk/products/fusion-360?ref=project-0b86c9
Story
Knob watching
A small recording studio has an analog Behringer console that is used for different type of works. Sometimes long recording sessions are made with a knob in the wrong position (high peaks, wrong equalization, etc) resulting in wasted time, effort and, ultimately, money.
How good it would be to have an eye watching console knobs full time? Is it still complicated and intrusive to read analog dials and panels?
Machine Learning seems to be the right tool to identify patterns in a set of console pictures. A model can be trained this way:
All these pictures were taken with incorrect knob positions All these other pictures were taken with correct knob positions
Then we can ask “How probable it is that this new picture has an incorrect knob positions?” 90%? In that case abort the recording.
ML Knob Eye
The following tutorial is made for a recording studio but the same principles apply to industrial analog equipment like raw natural gas dials, gauges, panels, etc A new model should be trained for those specific knobs, the rest of the tutorial applies.
Requirements
Raspberry Pi 3Raspberry Pi Cam v2DFRobot Led Switch buttonMachine Learning Edge Impulse account (free for developers)Behringer Console (you can use any other console or equipment with analog knobs)
Note: The Behringer Xenyx 302USB is able to send audio through USB but all knobs and controls are still analog and cannot be read or controlled digitally.
Circuit

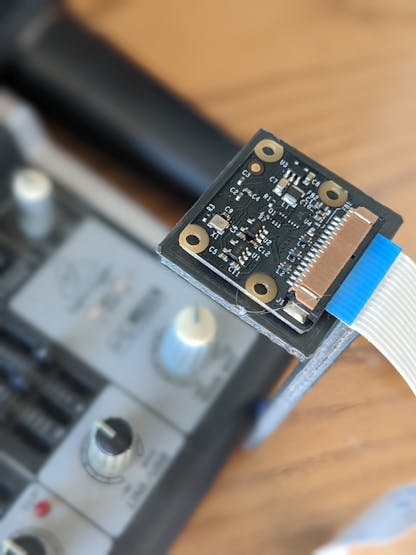
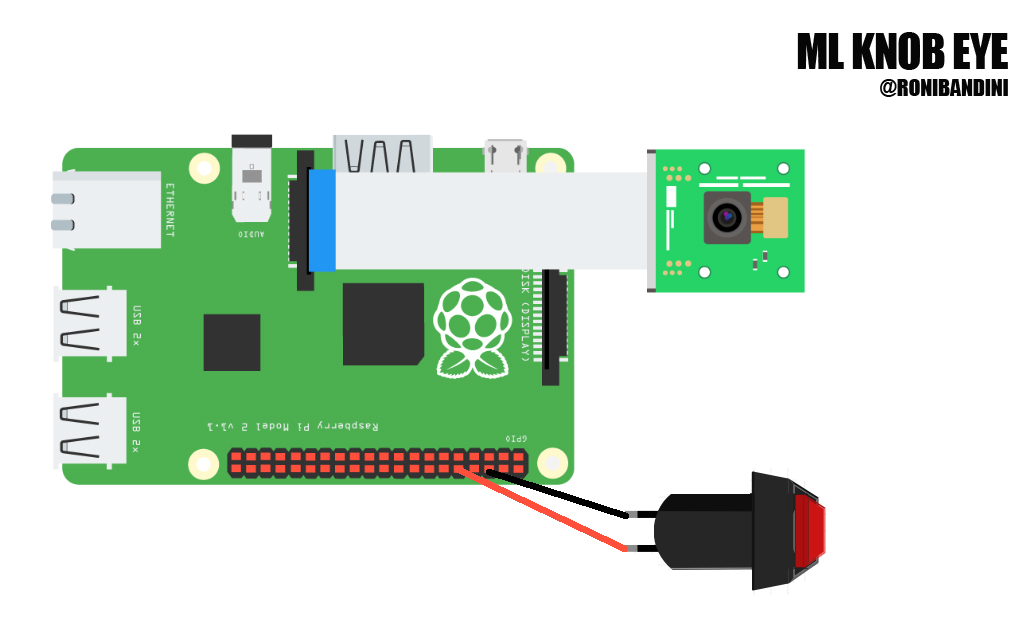
ML Knob Eye circuit
Connect the Raspberry Pi cam using the ribbon (ribbon letters pointing to Raspberry USB ports) Connect standard button to GND and GPIO15. If you are using DfRobot buttons with light included, connect also the red cable to + Raspberry Pi 5v pin.
3d Printed button case
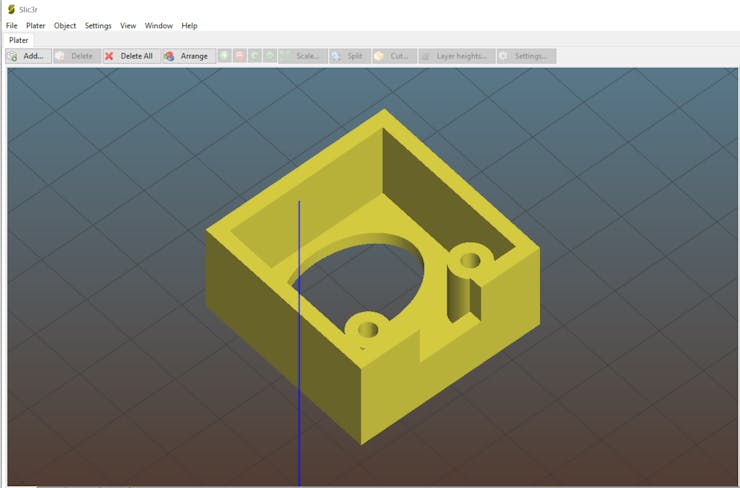
3d printed parts
Download and print these 2 parts: button case and camera stand.
Raspberry Pi Setup
Install latest Raspberry Pi OS without desktop. Then run the following:
sudo apt-get install python3-pip
sudo apt install git
pip install picamera
sudo apt install python3-opencv
sudo apt-get install libatlas-base-dev libportaudio0 libportaudio2 libportaudiocpp0 portaudio19-dev
git clone https://github.com/edgeimpulse/linux-sdk-python
sudo python3 -m pip install edge_impulse_linux -i https://pypi.python.org/simple
sudo python3 -m pip install numpy
sudo python3 -m pip install pyaudio
Model training
I will use main mix knob. If this knob is too low or too high, recording is considered wasted, so it should be aborted.
To start the training, a good number of pictures with variations of the knob for low and high positions is required. For other Machine Learning projects related to analog readings, one image is obtained and then digitally manipulated to add for example a needle in different positions. I have decided a different approach: a script for image acquisition with pauses to move the knob. Why? It is also an effort to digitally manipulate an image and if you are using knobs instead of gauges, the knob height could produce different shadows making the digital manipulation more complicated.
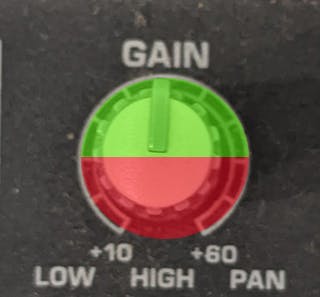
Safe and unsafe knob positions
Download the data acquisition script and the recording script here
Place the camera 10cm over the knob with good light. Place the knob in the min section. Then run:
sudo python3 acquisition.pyWhen the message “move” appears on screen, move the knob to another unsafe position.
Repeat the procedure to get at least 40 pictures. Then repeat to get 40 pictures of max positions.
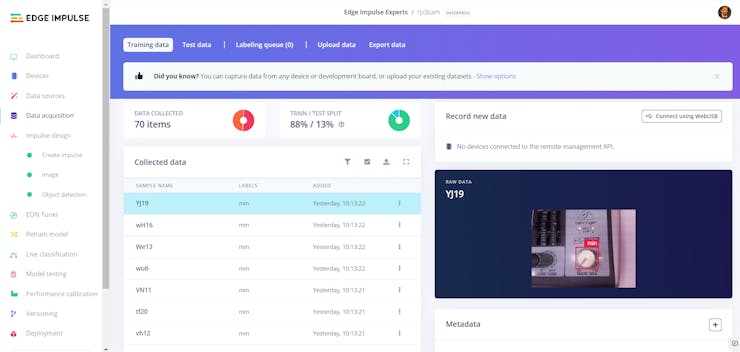
Edge Impulse Data acquisition
Upload all min images to Edge Impulse. Go to Label Queue. Place a square over the knob. In subsequent images square will be auto-placed but a small adjustment could be required. Do the same with max pictures.
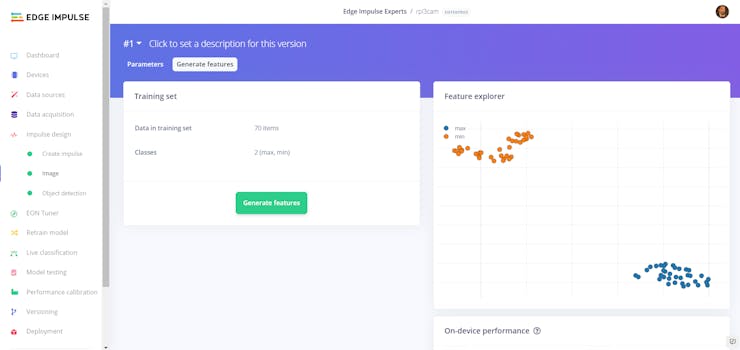
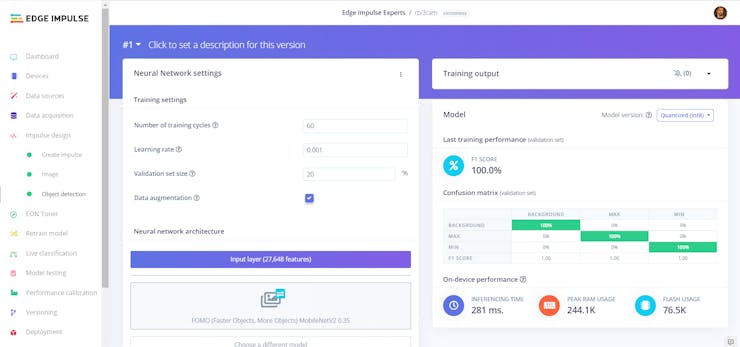
Edge Impulse training
Now Create Impulse. Image Data. 96X96, shortest axis. Color Depth RGB. Generate Features. Object Detection.
Go to Edge Impulse Dashboard, select Show Linux deploy options
Go to Deployment, select Linux ARM, download EIM file, upload to Raspberry Pi using FTP.

Edge Impulse Linux Python Deployment
Change.eim file permissions to 744
Code settings
# button Gpio pin
buttonPin=15
# confidence limit 90%
detectionLimit=0.90
# eim file name
model = "rpi3cam-linux-armv7-v7.eim"
System use
The Raspberry Pi running Linux will receive console audio out through USB and record a .wav file. At the same time, a connected camera will take pictures that will be sent for inferences against a Machine Learning model. If knobs are detected in the wrong position, the recording will be automatically stopped.
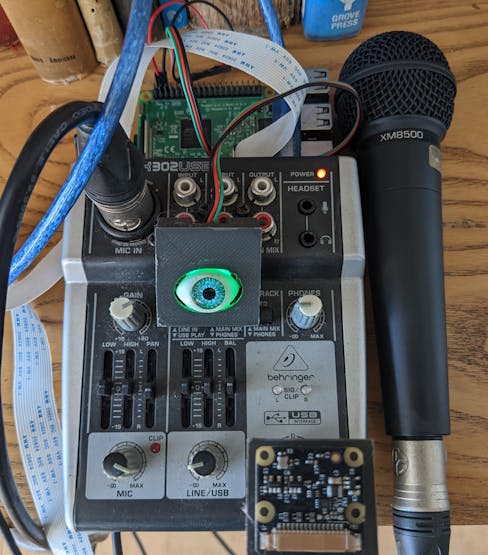
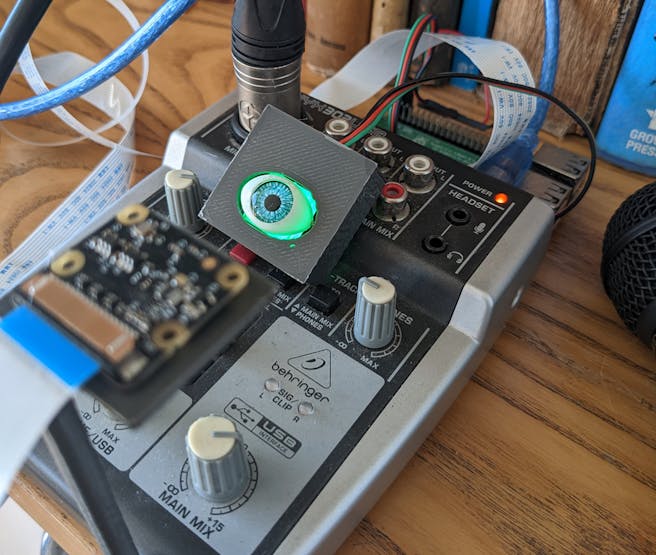
Raspberry, Behringer and ML Eye ready
Connect the Behringer to the Raspberry with USB cable. Execute
sudo python record1.pyConsole output will be recorded to the .wav file. If you press the eye button, whenever the main mix knob is placed into a unsafe position, the recording will be interrupted. You can monitor all activities from the console.
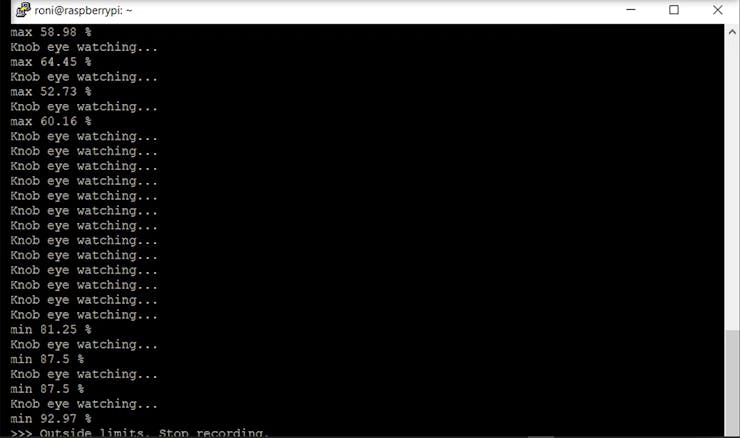
ML Knob Eye SSH console
Demo
Final notes
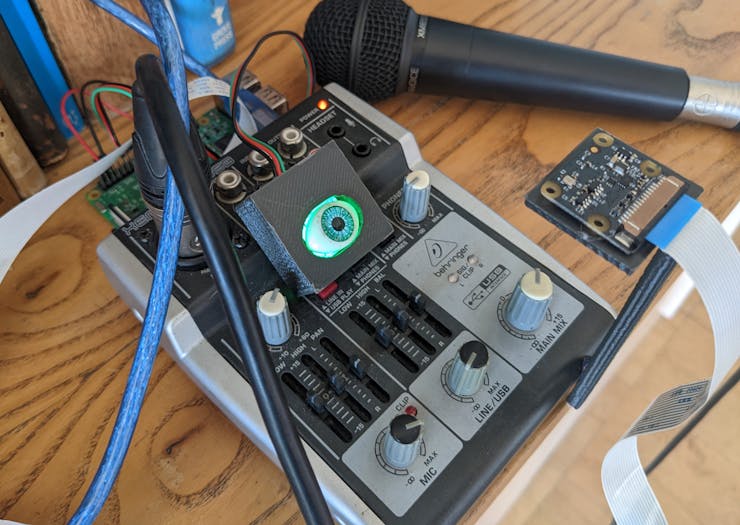
System ready
This is an example of Machine Learning to interface analog equipment with the digital world without being intrusive. Big industrial knobs, dials, gauges and panels are even easy to read than this small console knob, so possibilities are endless. You can read and store values, you can send alerts and you can also use analog knobs and dials to operate and trigger complex scripts.
For this concept proof one knob is used but Edge Impulse FOMO algoritm provides X, Y coordinates, so you can also read multiple knobs with one picture.
If you are interested in other Machine Learning projects
Machine Learning for medicineMachine Learning for power outages detectionMachine Learning to detect audio eventsMachine Learning and gas sensorsMachine Learning to detect workers falls
Schematics
ML Knob Eye Circuit
Raspberry Pi, cammera and button connections
Code
ML Analog Knob Reading
Acquisition and inference Python scripts for Raspberry Pi
The article was first published in hackster, December 1, 2022
cr: https://www.hackster.io/roni-bandini/ml-knob-eye-0b86c9
author: Roni Bandini


