
A luxmeter is a tool that measures the amount of light in a given area. It is useful for ensuring proper lighting and monitoring light level
Things used in this project
Hardware components
Hand tools and fabrication machines
Seeed Studio Grove - Universal 4 Pin Buckled 5cm Cable (5 PCs Pack)
Story
PCB design
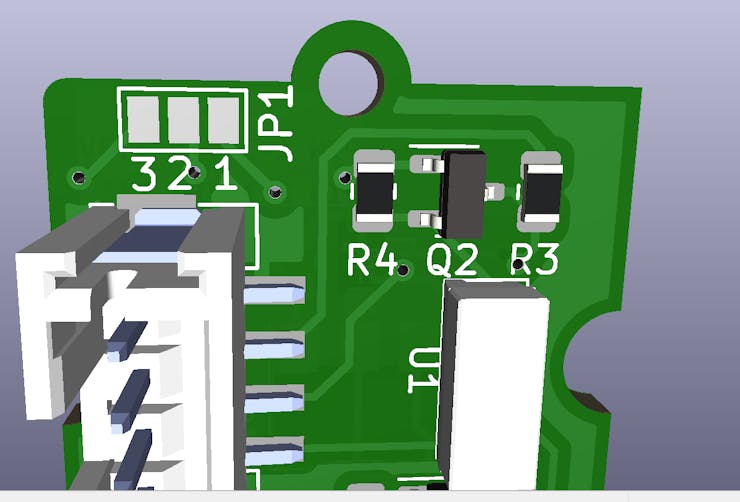
I followed the Seeed Studio standard form factor, as you can notice by the layout.
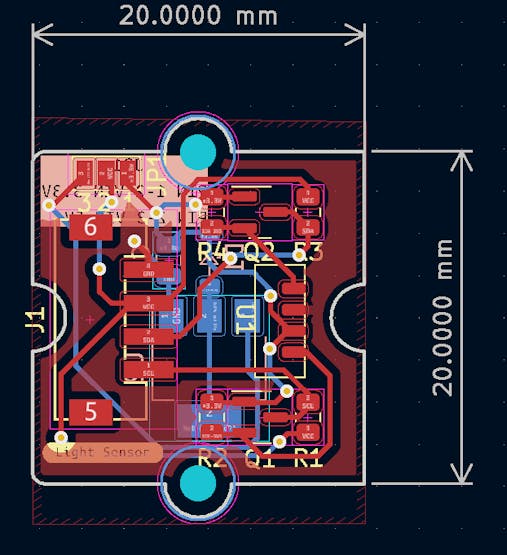
Design in KICAD
I ordered the PCB on Seeed Fusion service and judge for yourselves.

KICAD 3D Render
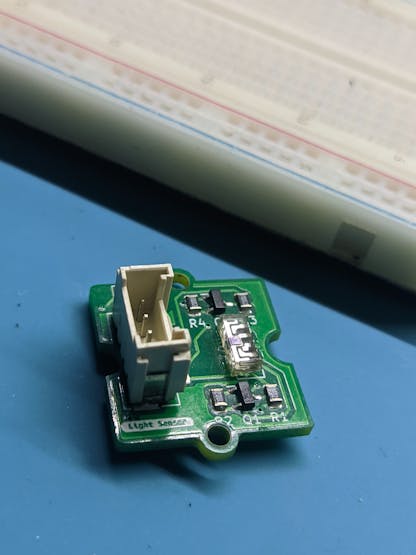
PCB From Seeed Fusion
Great results for me, and more importantly, it works.
if you want to get PCBs like these you can visit the Seeed Fusion website https://www.seeedstudio.com/pcb-assembly.html
Wiring
Only Grove Module
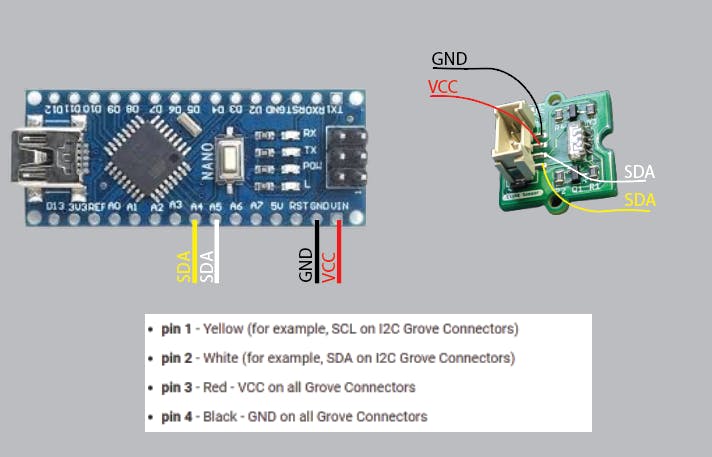
Grove module Connection.
The Grove standard is used for the order of the i2c pins on the module, then connect to the i2c pins on the arduino.
Grove Module and i2c LCD
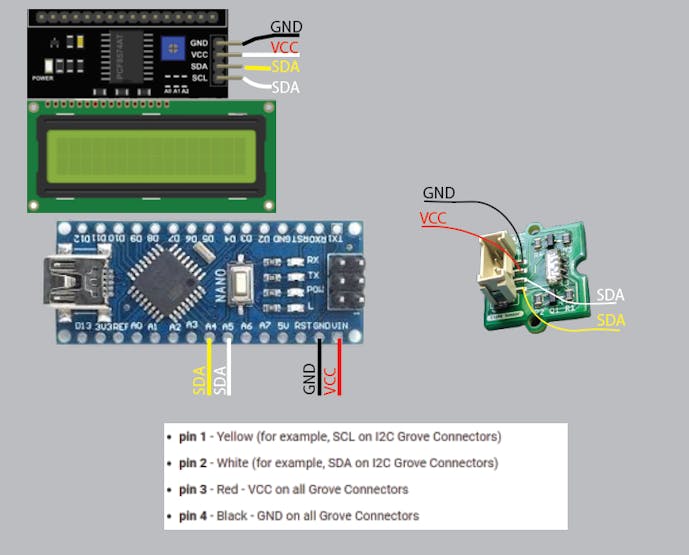
Grove module Connection and i2c LCD.
VCC Max 5V.
Power Supply
Supply Voltage Selector Jumper
This module has the advantage of being able to be powered with voltages of 3V3 and 5V. Mainly, the IC VEML7700 only admits voltages of 3V3, but this module already has an integrated Level Shifter which allows bidirectional communication and the power to use voltages of 5V and 3V3 at the same time.
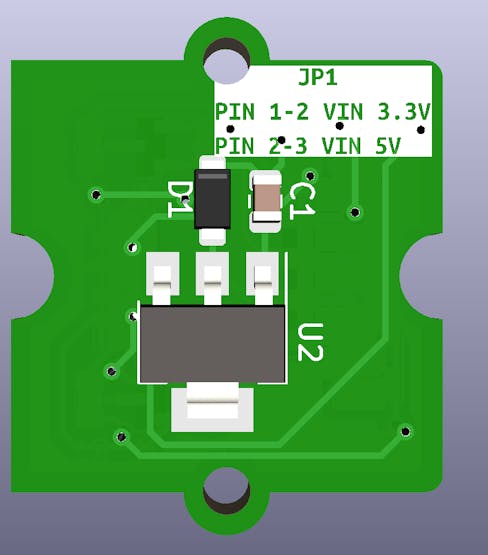
On the back we can see the pin combinations for the different supply voltages.
How to use it?
Download and install the arduino-VEML7700 in the Arduino IDE. Open the example code attached to this project. Once the code is open, Change the name or use the one you already have as an example in the instance:
VEML7700 als; // Create an instanceVEML7700 Groove_Lux_Sensor; // Create an instanceYou can also copy and paste the code below after installing the library.
After uploading the code we open the terminal.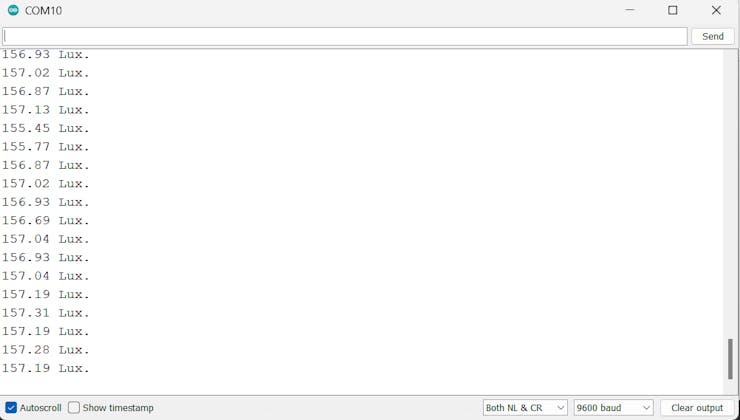
Add i2c Display
Download and install the New-LiquidCrystal in the Arduino IDE. Connect the SCL and SDA pins of the screen to the SCL and SDA pins of the arduino.
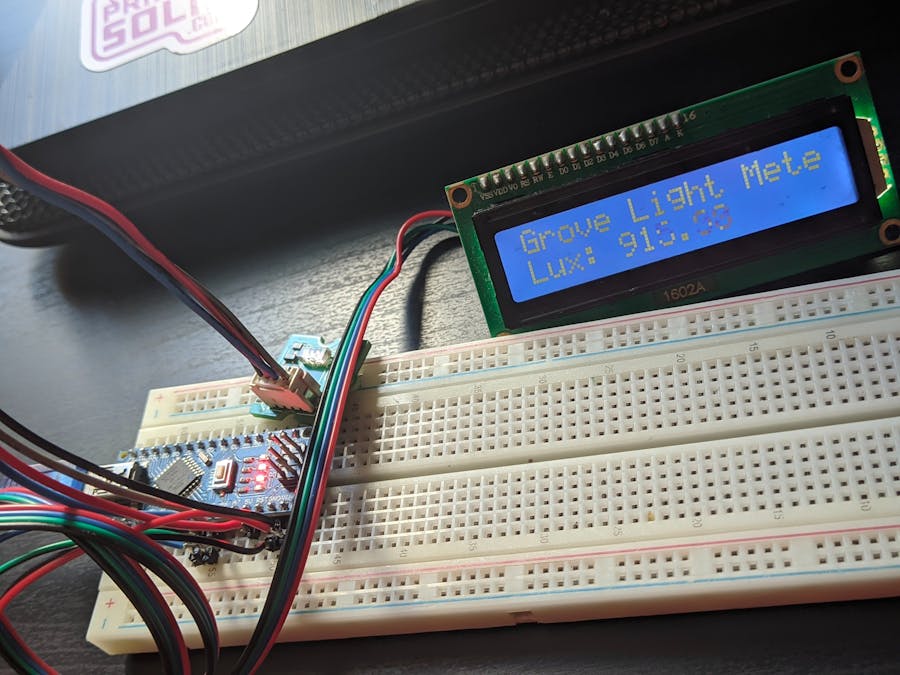
Display data on LCD
Conclusion
This is a very good sensor to measure the lux of the environment, we can also calibrate the gain as shown in the other examples of the library and other things, this type of sensor is used for many applications such as controlling the brightness of the screen of our phones In a future project I will use this sensor to apply the same thing and be able to automatically control the brightness of my computer screen just like my smartphone does.
This sensor creation was part of my entry to the Seeed Grove sensor co-invent campaign [https://www.seeedstudio.com/blog/2022/07/15/ignite-your-passion-fire-your-thoughts-develop-your-grove-sensor-with-seeed-fusion-for-a-chance-to-win-over-300usd-cash-prize%EF%BF%BC/], it's a great opportunity for you to make your dreamed sensor a reality.
Code
Getting the Lux value
C/C++
Using the I2C pins of the arduino nano connected to the Groove sensor (The standard for Groove pins is used).
// Code based on VEML7700 Library example

#include <Wire.h>
#include <VEML7700.h> // Include VEML7700 Library

VEML7700 Groove_Lux_Sensor; // Create an instance

void setup()
{
  Serial.begin(9600);
  Groove_Lux_Sensor.begin();
}

void loop()
{
  float lux;
  Groove_Lux_Sensor.getALSLux(lux); //extract Lux into Variable
  Serial.print(lux);
  Serial.println(" Lux.");
  delay(200);
}
Print values on LCD
C/C++
We added the i2c LCD screen to print the sensor values on it.
// Code based on VEML7700 Library example
#include <LiquidCrystal_I2C.h>
#include <Wire.h>
#include <VEML7700.h>  // Include VEML7700 Library

VEML7700 Groove_Lux_Sensor;  // Create an instance

//initialize the LCD
LiquidCrystal_I2C LCD(0x27, 2, 1, 0, 4, 5, 6, 7);  // DIR, E, RW, RS, D4, D5, D6, D7

//to use the millis() function instead of delay()
unsigned long Actual_Time;

float lux;  // to save sensor data

void setup() {

  Serial.begin(9600);
  Groove_Lux_Sensor.begin();
  LCD.setBacklightPin(3, POSITIVE);
  LCD.setBacklight(HIGH);
  LCD.begin(16, 2);
  LCD.clear();
  LCD.setCursor(0, 0);
  LCD.print("Grove Light Meter");
}

void loop() {

  Groove_Lux_Sensor.getALSLux(lux);  //extract Lux into Variable

  Actual_Time = millis();

  //we print on the screen every 2 seconds the values obtained from the sensor
  if (Actual_Time >= 2000) {
    Serial.print(lux);
    Serial.println(" Lux.");
    LCD.setCursor(0, 1);
    LCD.print("Lux: ");
    LCD.print(lux);
  }
}
The article was first published in hackster, December 10, 2022
cr: https://www.hackster.io/joanperaltaariel/grove-light-meter-diy-luxommeter-1e9eb2
author: Joan Peralta


