
A small cool and very informative project, to show "how Long range radio system can work with sensors"
Things used in this project
Hardware components
Hand tools and fabrication machines
Soldering iron (generic)
Solder Wire, Lead Free
Solder Flux, Soldering
PCB Holder, Soldering Iron
Story
Hi, friends ! iam going to show you how to make LoRa (rfm95) Weather Station With Arduino & Sensors this is a simple project does not require high knowledge about arduino and electronics this is an intermediate level project, so its kind of okay to you. I tried my best to document this project to you, to look simple. so you can also make this project as I do.
There are various sensor monitoring methods are available some of them using IoT and others using offline protocols like Bluetooth and BLE. But the offline method doesn’t offer a good range and online methods are expensive and very compilated. Today, we are going to make a simple sensor monitoring system using LoRa (long range radio). LoRa supports a very long range of 7-10 miles and data can be transferred without internet. It is quite similar to walkie talkie.
LoRa:
LoRa is a radio modulation technique that is essentially a way of manipulating radio waves to encode information using a chirped (chirp spread spectrum technology), multi-symbol format. LoRa as a term can also refer to the systems that support this modulation technique or the communication network that IoT applications use.

he main advantages of LoRa are its long-range capability and its affordability. A typical use case for LoRa is in smart cities, where low-powered and inexpensive internet of things devices (typically sensors or monitors) spread across a large area send small packets of data sporadically to a central administrator.
LoRa work on different frequencies and different modules are available for different country. You can see the Wikipedia article to know more about more advance protocols over LoRa like LORAWAN and alliance. I am using LoRa RF95W module from Ai thinker on 915MHz frequency.
433E6 for Asia
868E6 for Europe/Africa
915E6 for North America
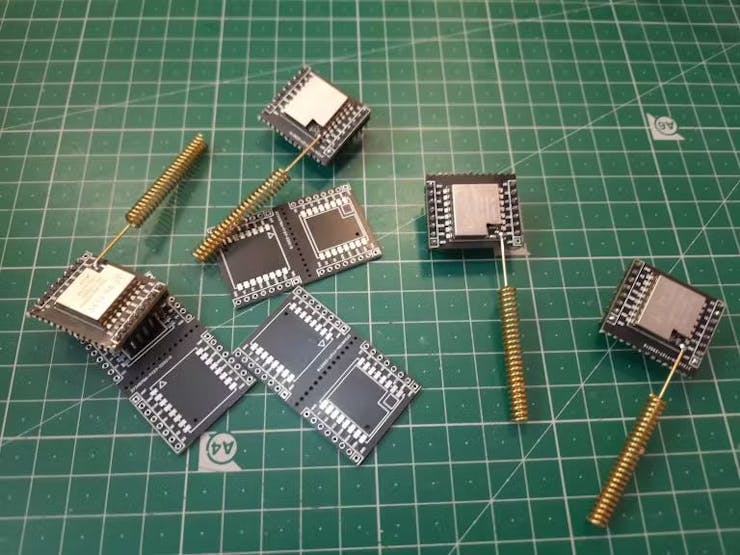
LoRa RF95W Module is available in two forms - SMD Form and Breakout Board Form. I would recommend ( and use ) the breakout board type as it is easy to use and breadboard friendly. Before starting the project, we have to solder the header pins on the LoRa Breakout board. Be careful not to overheat the board.
How to Program LoRa RF95W Using Arduino IDE :
1. Go to Files -> Preferences and paste the given link in Additional Boards Manager and select OK.
http://www.arduino.org/learning/reference/LoRaNode
2. Go to Tools -> Board and select Board Manager.
3. Search for LoRa by sandeep mistry An Arduino Library for sending and receiving data using LoRa radios.0.8.0 version
4. Go to Tools -> Boards, navigate and select Arduino uno. Now, your Arduino IDE is ready to program on LoRa RF95W.
_a4PubwYHAa.png?auto=compress%2Cformat&w=740&h=555&fit=max)
_Rh8snselz2.png?auto=compress%2Cformat&w=740&h=555&fit=max)
_Jo3yuGOKN0.png?auto=compress%2Cformat&w=740&h=555&fit=max)
LoRa library by Sandeep Mistry
_ftTOd2v8nu.png?auto=compress%2Cformat&w=740&h=555&fit=max)
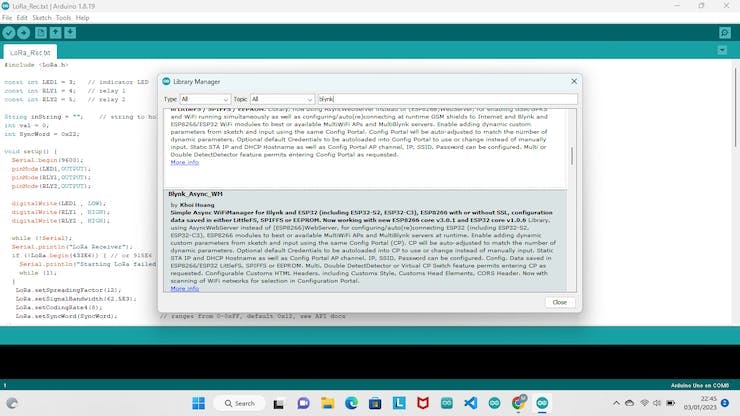
Here I am using LoRa library by Sandeep Mistry, it is very well optimized library for SPI protocol LoRa modules. You can also see more examples and go through each of them in order to make some new projects.
Importing Libraries :
We will use two new libraries. So we need to import it from its source. This can be done from the Arduino IDE.
1. Go to Sketch -> Include Library -> Manage Libaraies
2. Search for LoRa by Sandeep Mistry, select latest version and install.
implementation :
You can also use an Arduino Uno, if you don't have an Arduino Nano.
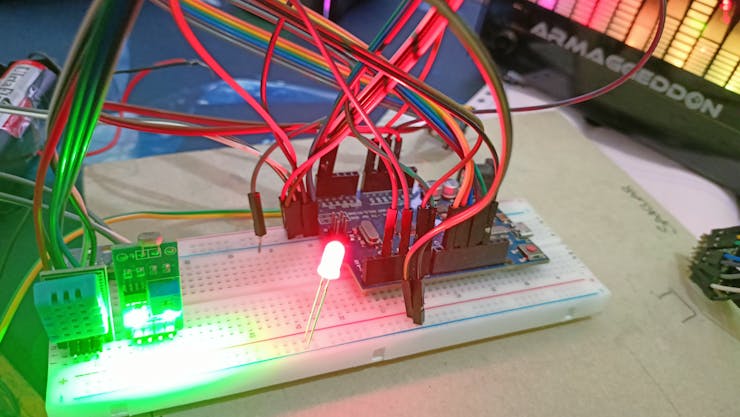
Transmitter
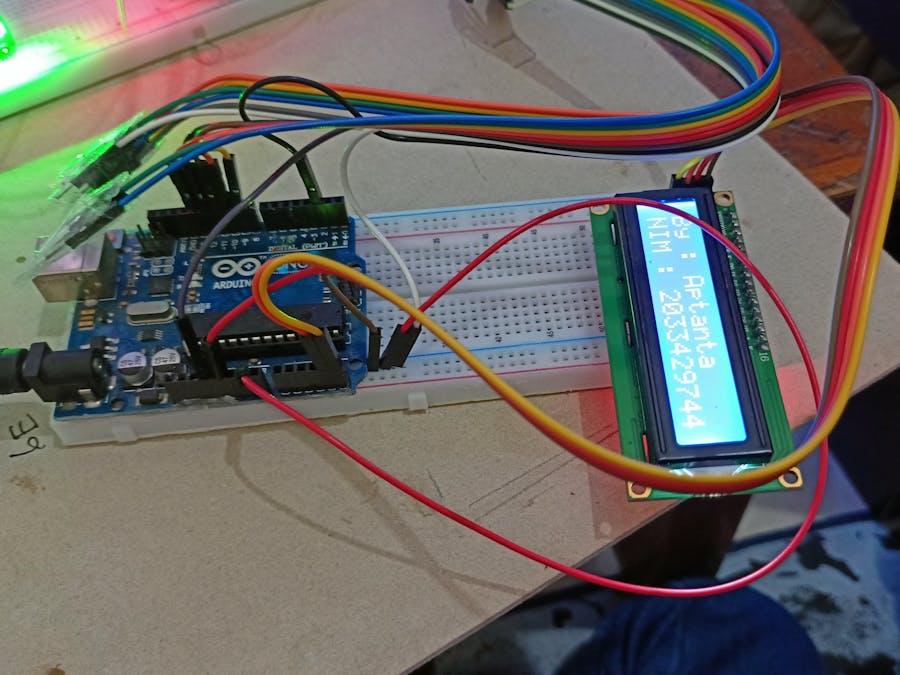
Receiver
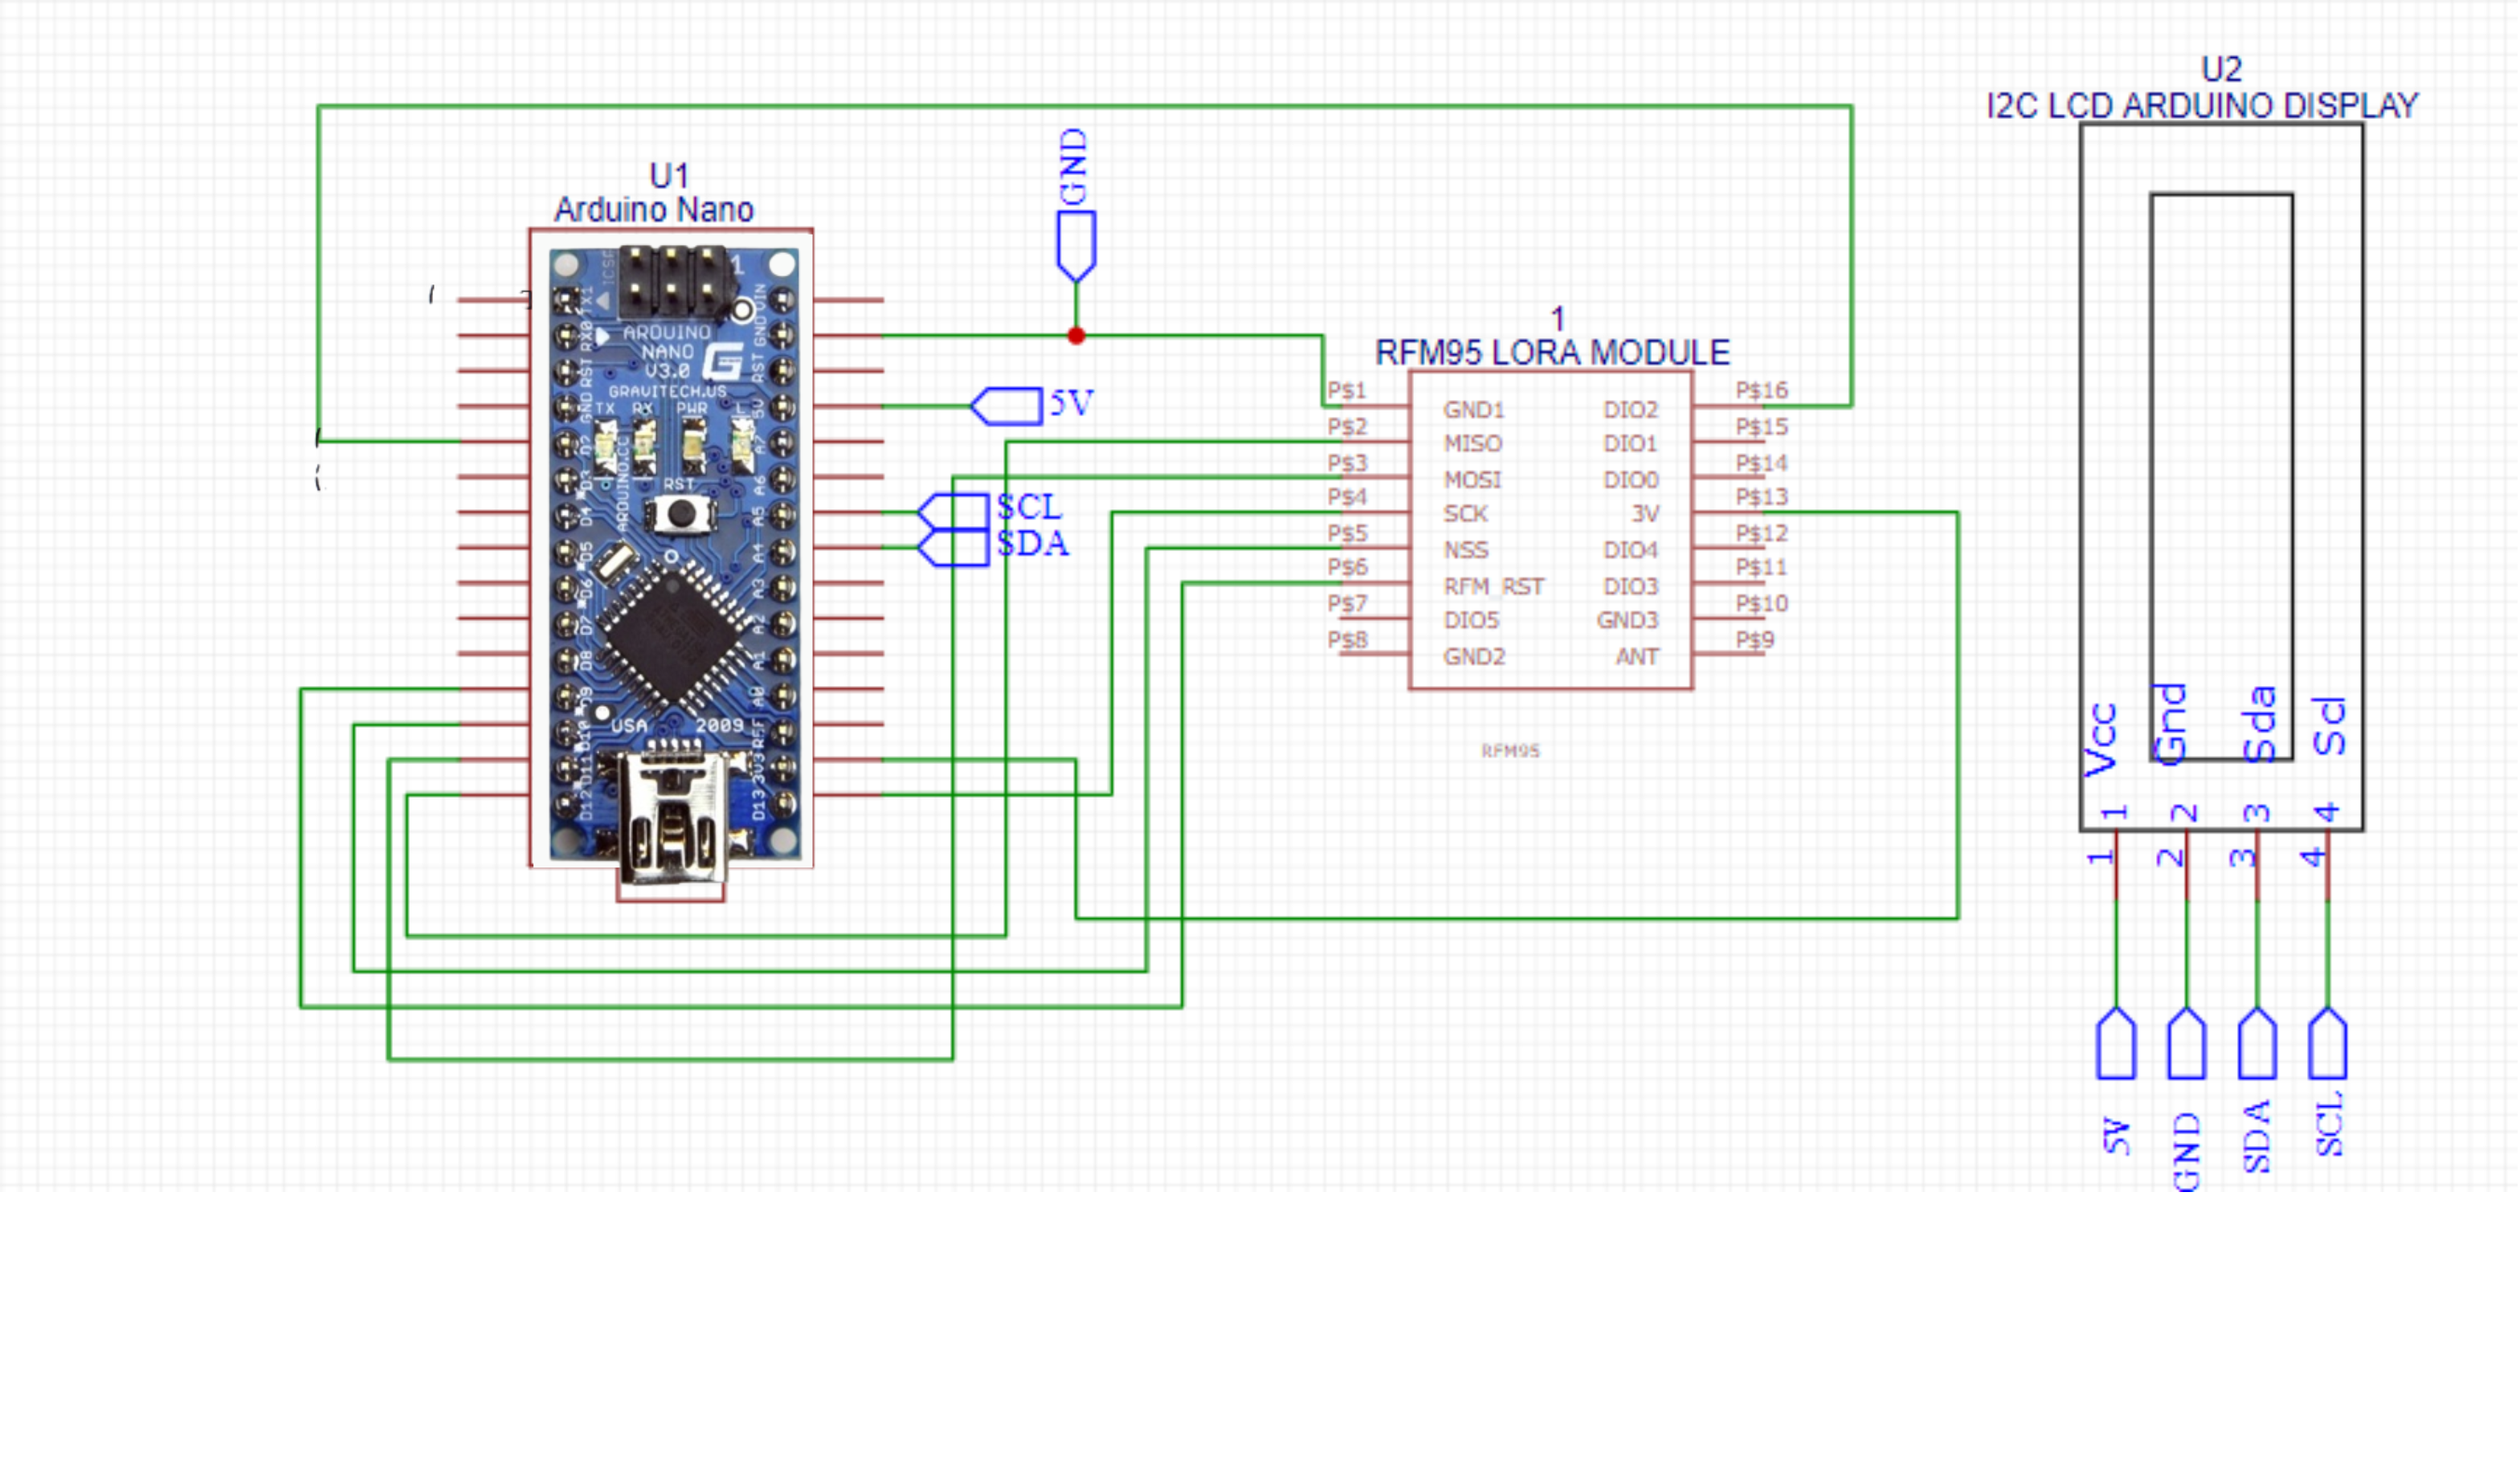
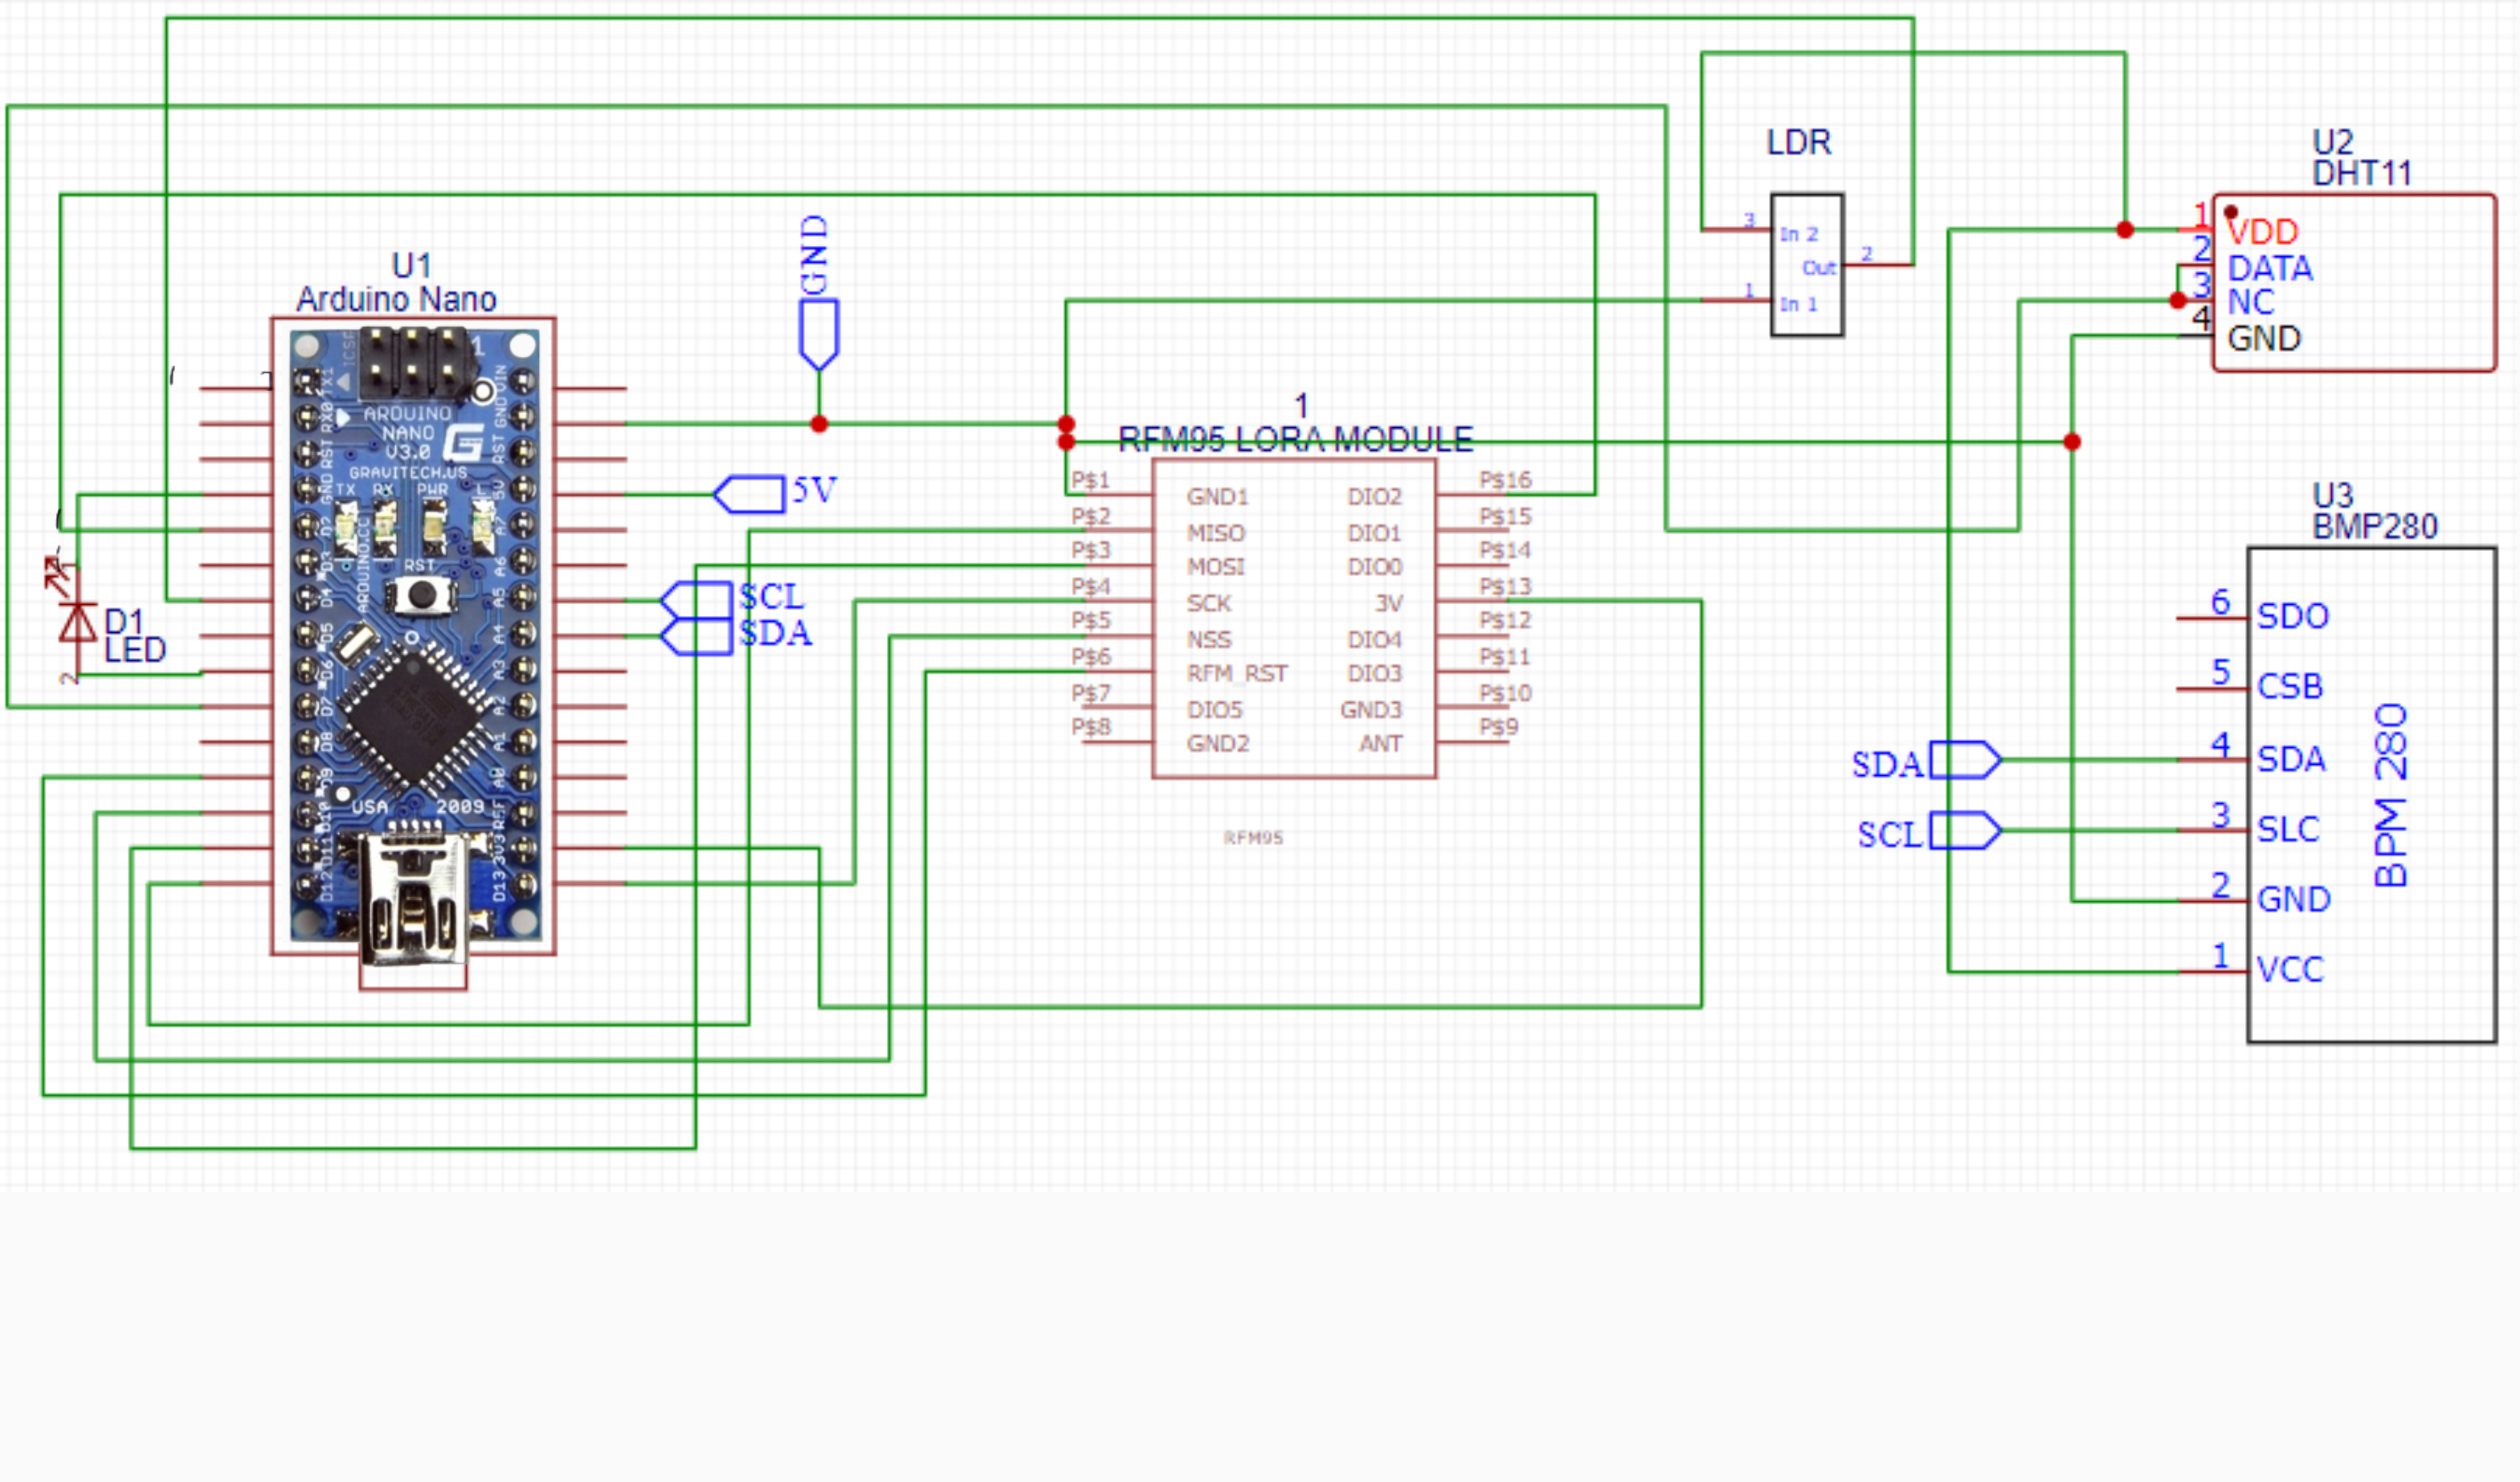
Schematics
Schematics For Lora Reciever
Connect As per Schematics
Schematics For Lora Sender
Connect As Per Schematics
Code
Lora Sender Code
Arduino
Upload The Code To Lora Sender
#include <SPI.h>
#include <LoRa.h>

#include "DHT.h"
#include <Adafruit_BMP280.h>

#define DHTPIN 7
#define DHTTYPE DHT11
Adafruit_BMP280 bmp;

float Pressure;
float Altitude;
int ldr = 4;
int counter = 0;
int Dummyvalue;

DHT dht(DHTPIN, DHTTYPE);
long randNumber; //Create Random Number To Avoid Transmission Loss For First Digit

void setup()
{
  Serial.begin(115200);

 randomSeed(analogRead(0));
 dht.begin();

if (!bmp.begin()) {
    Serial.println(F("Could not find a valid BMP280 sensor, check wiring!"));
    while (1);
  }

   pinMode(ldr, OUTPUT);
  while (!Serial);

  Serial.println(" Lora Weather Station By ZenoModiff ");

  if (!LoRa.begin(915E6)) {
    Serial.println("Starting LoRa failed!");
  }
  else
  {
   Serial.println("Starting LoRa Sucesses!");
  }
}
void loop()
{
 Serial.println();
 Serial.print("Sending packet: ");
 Serial.println(counter);
 randNumber = random(1000);


 int randNumber = random(100); Dummyvalue = randNumber;
 double ldrvalue = analogRead(ldr);
 float h = dht.readHumidity();
 float t = dht.readTemperature();
 float f = dht.readTemperature(true);
 float pressure = (bmp.readPressure()/100); Pressure = pressure;
 int altitude =  (bmp.readAltitude(1019.66)); Altitude = altitude;


  if (isnan(h) || isnan(t) || isnan(f)) {
    Serial.println(F("Failed to read from DHT sensor!"));
    return;
  }

  String Datastring = String(Dummyvalue) + (";") + String(t) + (";") + String(h) + (";") + String(ldrvalue) + (";") + String (Pressure) + (";") + String (Altitude);

  Serial.println(Datastring);
  LoRa.beginPacket();
  LoRa.print(Datastring);
  LoRa.print(counter);
  LoRa.endPacket();
  counter++;

  delay(3000);

}
Lora Reciever Code
Arduino
Upload The Code To Lora Reciever
#include <Wire.h>
#include <SPI.h>
#include <LoRa.h>
#include <LiquidCrystal_I2C.h>
LiquidCrystal_I2C lcd(0x27, 16, 2);
void setup()
{
Serial.begin(115200);
lcd.begin();
lcd.setCursor(0,0);
lcd.print("LoRa Weather");
lcd.setCursor(0,3);
lcd.print("Station");
delay(2000);
lcd.clear();
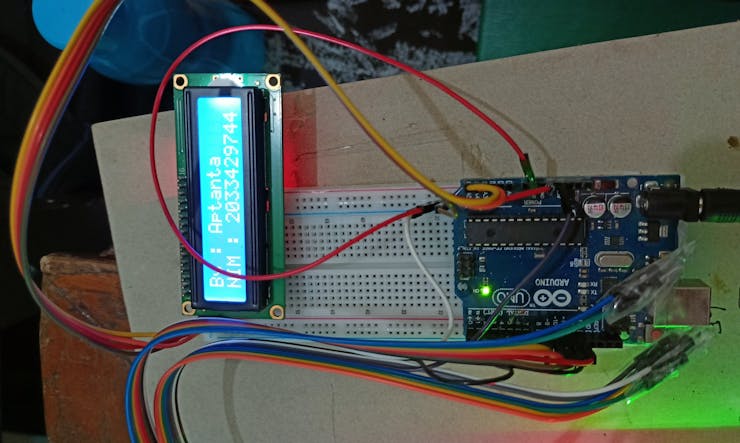
lcd.print("By : Aptanta");
lcd.setCursor(0,3);
lcd.print("NIM : 2033429744");
delay (2000);
while (!Serial);
Serial.println("LoRa Receiver By : Aptanta");
if (!LoRa.begin(915E6)) {
Serial.println("Starting LoRa failed!");
while (1);
}
}
void loop() {
String packet = "";
int packetSize = LoRa.parsePacket();
if (packetSize) {
Serial.print("Received packet :-- ");
while (LoRa.available()) {
packet = LoRa.readString();
}
Serial.println(packet);
Serial.println();
int firstcommaIndex = packet.indexOf(';');
int secondCommaIndex = packet.indexOf(';', firstcommaIndex+1);
int thirdCommaIndex = packet.indexOf(';', secondCommaIndex+1);
int fourthCommaIndex = packet.indexOf(';', thirdCommaIndex+1);
int fifthCommaIndex = packet.indexOf(';', fourthCommaIndex+1);
int sixthCommaIndex = packet.indexOf(';', fifthCommaIndex+1);
String firstValue = packet.substring( 0, firstcommaIndex);
String secondValue = packet.substring(firstcommaIndex+1, secondCommaIndex);
String thirdValue = packet.substring(secondCommaIndex+1, thirdCommaIndex);
String fourthValue = packet.substring(thirdCommaIndex +1, fourthCommaIndex);
String fifthValue = packet.substring(fourthCommaIndex+1, fifthCommaIndex);
String sixthValue = packet.substring(fifthCommaIndex+1, sixthCommaIndex);
Serial.print("Temp:-"); Serial.println(secondValue);
Serial.print("Humi:-"); Serial.println(thirdValue);
Serial.print("Ldr:-"); Serial.println(fourthValue);
Serial.print("Pressure:-"); Serial.println(fifthValue);
Serial.print("Altitude:-"); Serial.println(sixthValue);
Serial.println();
/*since we can't print the first digit
it is a dummy value sent by the LoRa String
in case of transmission Loss*/
lcd.clear(); lcd.setCursor(0,0);
lcd.print("Temp:-"); lcd.println(secondValue);
delay(2000);
lcd.clear(); lcd.setCursor(0,0);
lcd.print("Humi:-"); lcd.println(thirdValue);
delay(2000);
lcd.clear(); lcd.setCursor(0,0);
lcd.print("Ldr:-"); lcd.println(fourthValue);
delay(2000);
lcd.clear(); lcd.setCursor(0,0);
lcd.print("Pres:-"); lcd.println(fifthValue);
delay(2000);
lcd.clear(); lcd.setCursor(0,0);
lcd.print("Alti:-"); lcd.println(sixthValue);
delay(2000);
}
}The article was first published in hackster, December 17, 2022
cr: https://www.hackster.io/aptanta/simple-weather-monitoring-with-lora-arduino-and-sensors-8dc01c
author: Aptanta Pratiangga 29744


