
A Game-Inspired Gadget for Remote Control of Devices

Things used in this project
Hardware components
Software apps and online services
Hand tools and fabrication machines
3D Printer (generic)
Soldering iron (generic)
Story
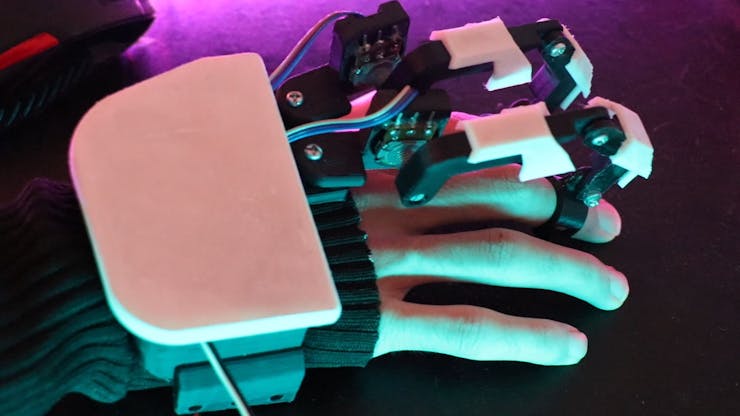
In this tutorial, you’ll learn how to build a smart glove inspired by the game “Rainbow Six Siege” from the IANA character. The smart glove allows you to control a device remotely using hand gestures. The project uses an MPU6050, an Arduino Nano, and two potentiometers to send data from the movement of your two fingers. It also uses the nRF24 for wireless communication.
🌟 About the Project
We will be building a smart glove inspired by the game Rainbow Six Siege from IANA character. The project allows us to control a device remotely, using hand gestures captured by a MPU6050 accelerometer/gyroscope and two potentiometers. Wireless communication between the glove and the device is achieved using the nRF24 radio.
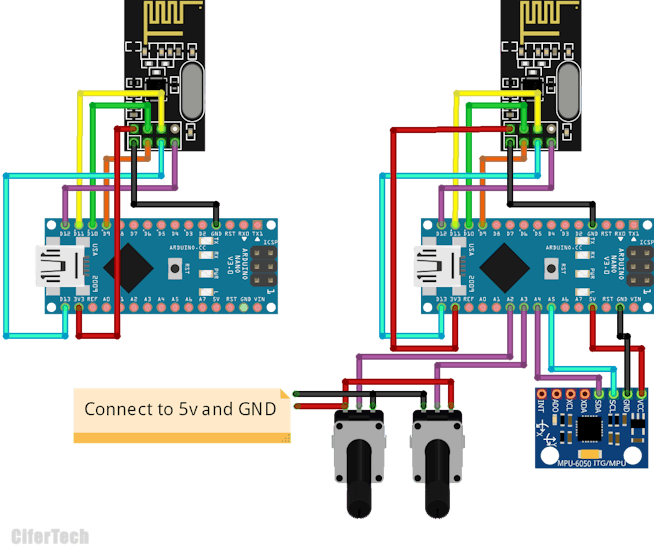
The project consists of two sections, the Transmitter and the Receiver. The Transmitter section has a circuit diagram that connects the nRF24L01 and the Arduino Nano, the MPU6050 and the Arduino Nano, and two potentiometers. The Receiver section has a circuit diagram that connects the nRF24L01 and the Arduino Nano and two servo motors.
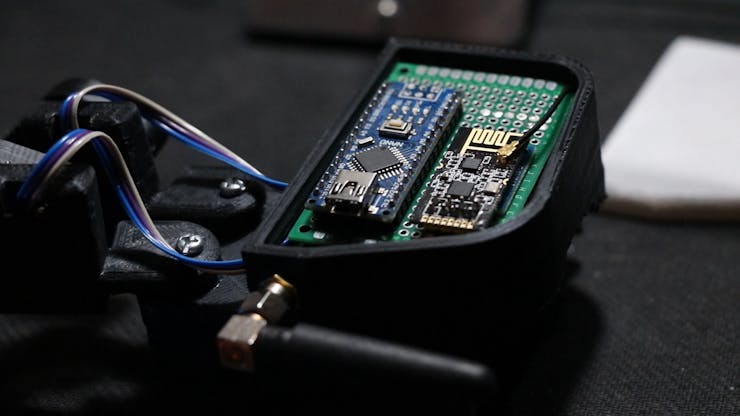
📷 Pictures
🎯 Features
Uses 2.4Ghz band for comunication2 potenciameter for track the movemnent of two fingerMPU6050 for track the hand movement
🧰 Getting Started
To build this project, you will need the following parts and tools:
Arduino NanoMPU6050 GyroscopenRF24L01 Wireless Transceiver2 Potentiometers
🔌 Schematic
Make the connections according to the table and schematic below.
⚙️ Installation
The next step is to install the required libraries for MPU6050 and nRF24L01 for the arduino software. The following libraries should be installed for this project:
MPU6050 library: This library provides the basic functions for accessing the MPU6050 accelerometer and gyroscope sensor.
nRF24L01 library: This library provides the basic functions for accessing the nRF24L01 wireless transceiver module.
Follow this path Sketch> Include Library> Manage LibrariesSearch for nRF24L01 and Install the librarySearch for RF24 and Install the librarySearch for MPU6050 and Install the library
Code
If you’re interested in building this project on your own, the code is available on GitHub. Simply go to the GitHub repository, and download the code.
GitHub repository: https://github.com/cifertech/IANA
The code for the Transmitter section is responsible for sending the data from the MPU6050 and the two potentiometers. The code first includes the required libraries and defines variables for the gyroscope and accelerometer data. The setup function initializes the Serial communication, sets the pin modes for the potentiometers, initializes the I2C communication for the MPU6050, and configures the radio communication for the nRF24L01. The loop function reads the data from the MPU6050 and the two potentiometers, maps the data to a value between 0 and 255, and writes the data to the nRF24L01.
The code for the Receiver section is responsible for receiving the data from the nRF24L01 and controlling the servo motors. The code first includes the required libraries, defines the radio communication pipe, and initializes the Servo library. The setup function initializes the Serial communication, attaches the servo motors to the appropriate pins, and starts listening to the nRF24L01. The recvData function checks if there is data available from the nRF24L01, reads the data, maps the data back to its original values, and uses it to control the servo motors.
👀 Usage
After uploading the code, Finally, you can test the smart glove by sending data wirelessly to a device and verifying that it responds as expected. You can then customize the code further to suit your specific requirements and make the smart glove even more functional.
🤝 Contact
CiferTech - @twitter - [email protected]
Project Link: https://github.com/cifertech/IANA
Custom parts and enclosures
Schematics
Code


