
How does UNIHIKER use Azure speech recognition and speech synthesis
UNIHIKER is a single-board computer(SBC) that features a 2.8-inch touchscreen, Wi-Fi and Bluetooth. It is equipped with light sensor, accelerometer, gyroscope and microphone. With built-in co-processor, it is able to communicate with various analog/digital/I2C/UART/SPI sensors and actuators.
Through official information, we learned that UNIHIKER has speech recognition, speech synthesis, wifi and other functions. Therefore, it can be used for speech recognition and speech synthesis projects.
I have shared the Azure method I often use to make UNIHIKER an intelligent conversation assistant.
Official website link: https://azure.microsoft.com/en-us

Step 1: Account Login
Login with GitHub account
Login with email address
Login with phone or Skype
Click Next to complete the login
Step 2 Create resources
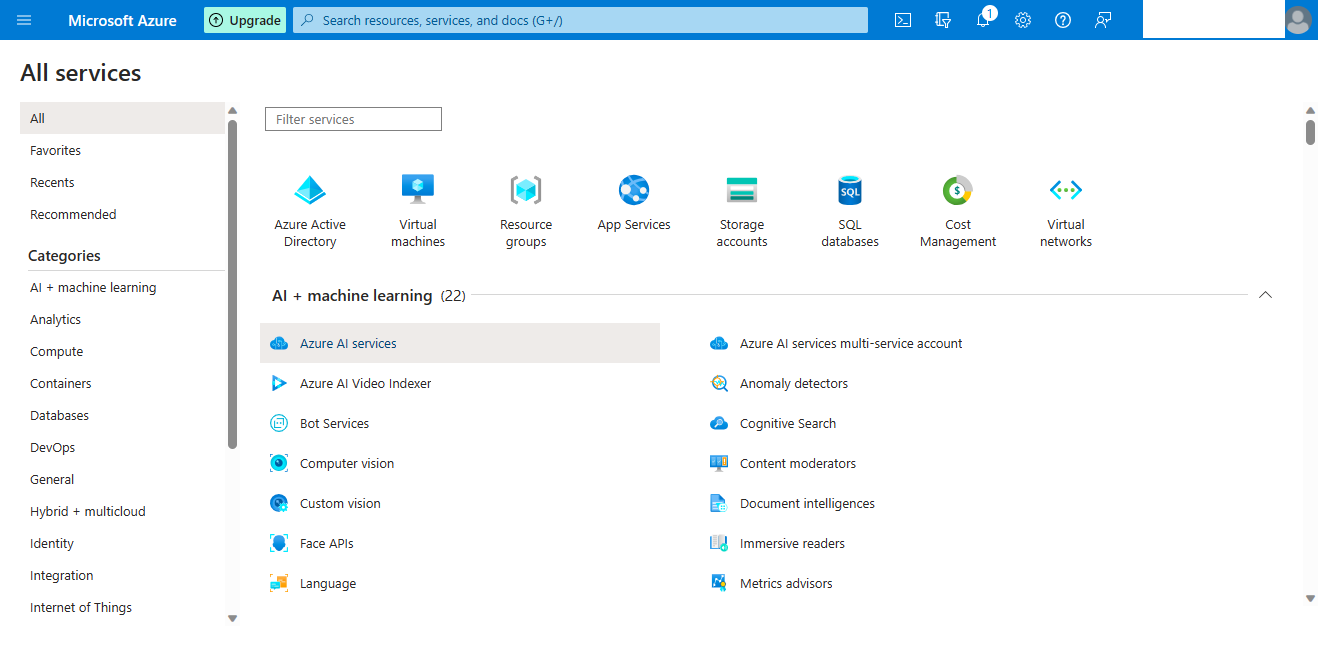
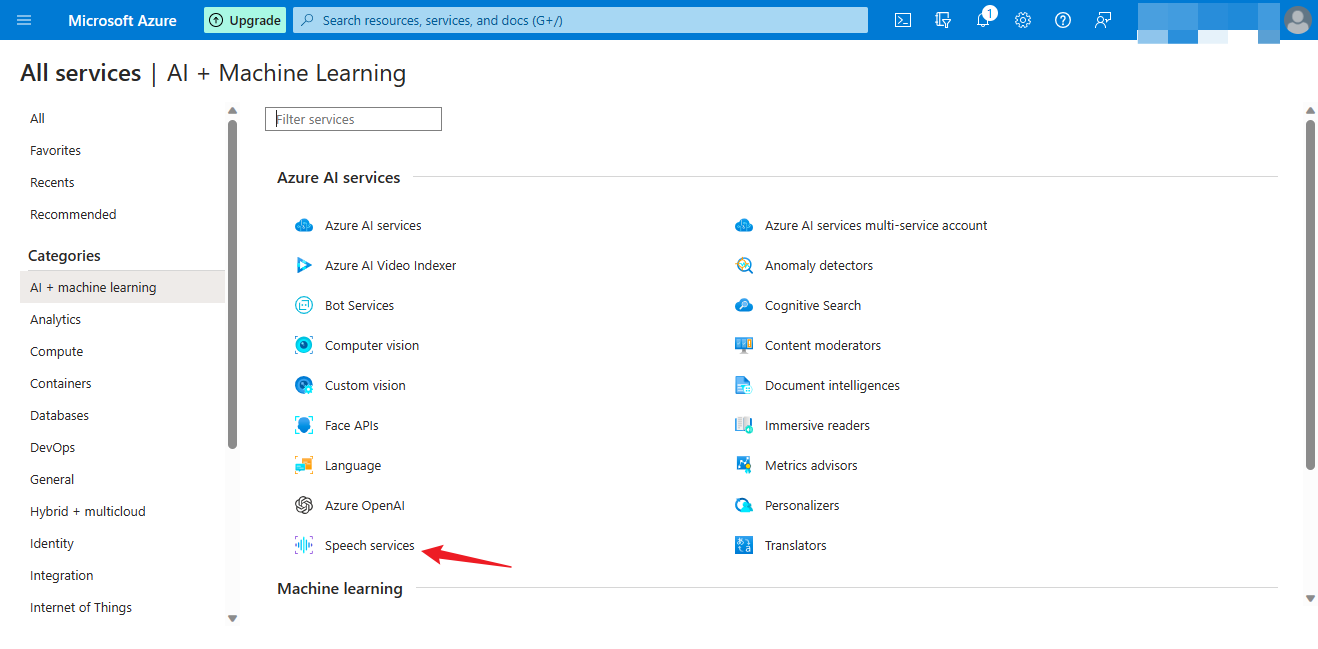
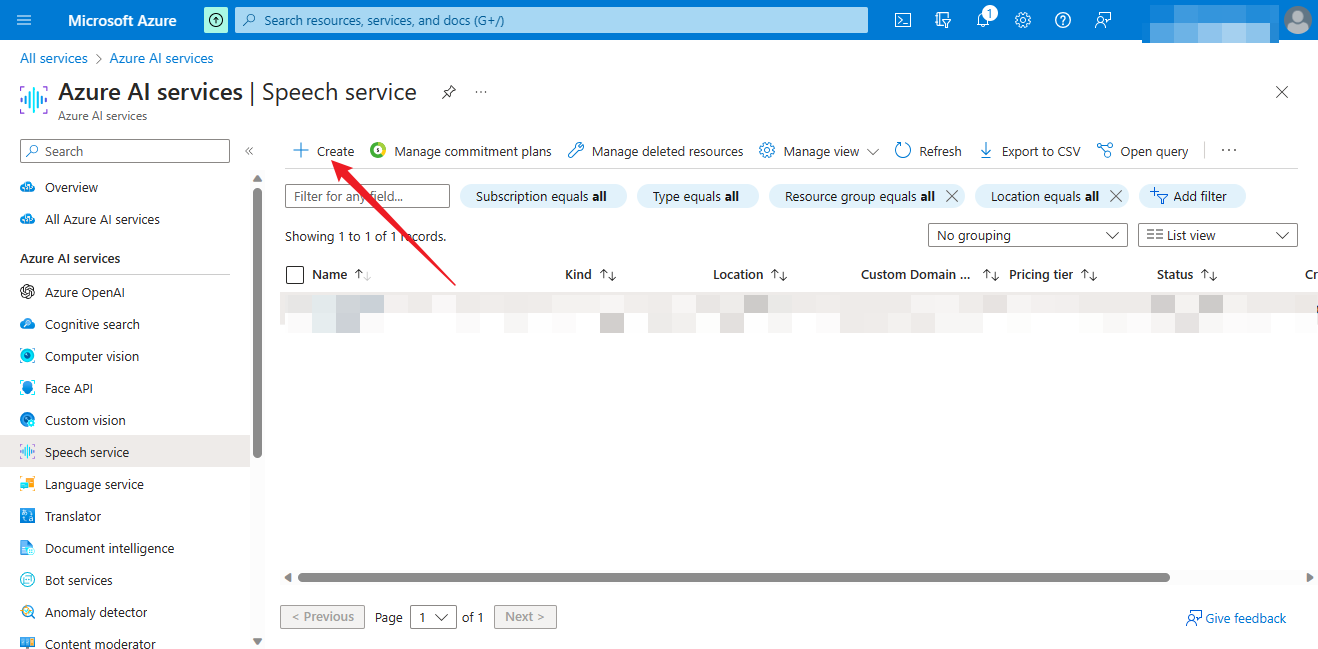
Step 3 Set parameters
Basics create
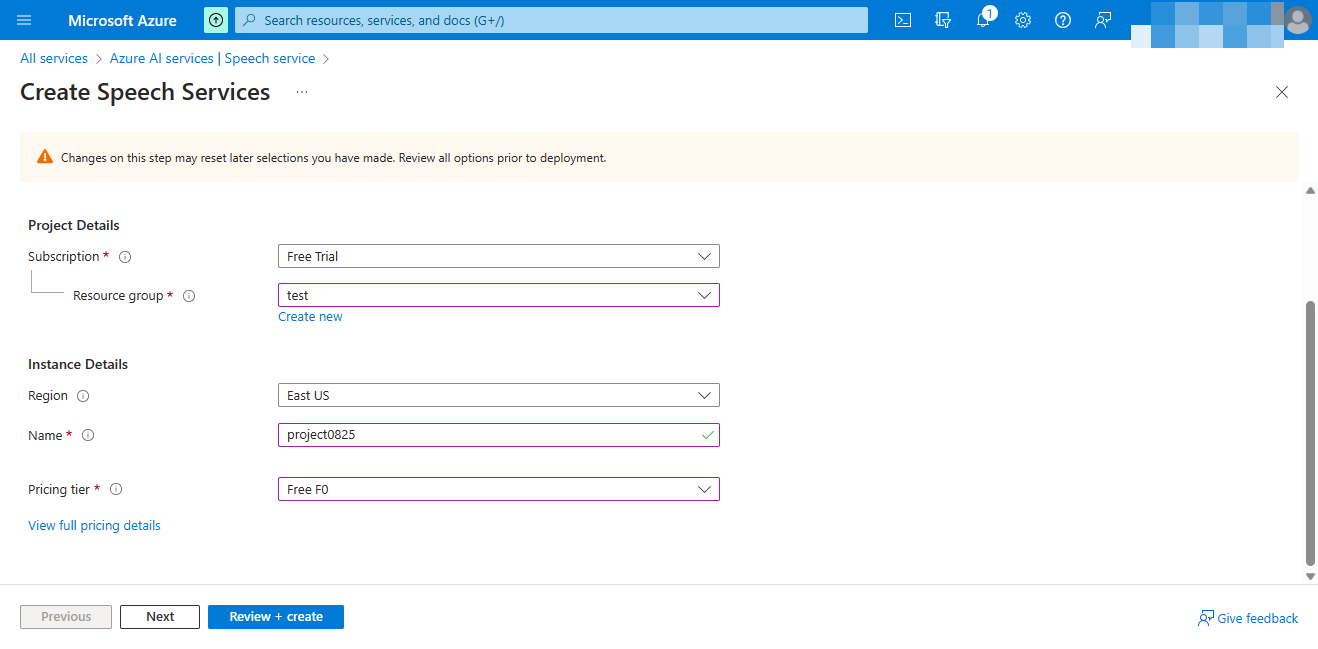
Subscription-> Default selection
Resource group-> Create a new resource group
Regin-> Select according to your region
Create a new project name
Pricing tier-> Depending on your choice of pricing
Then select Next.
Network selection
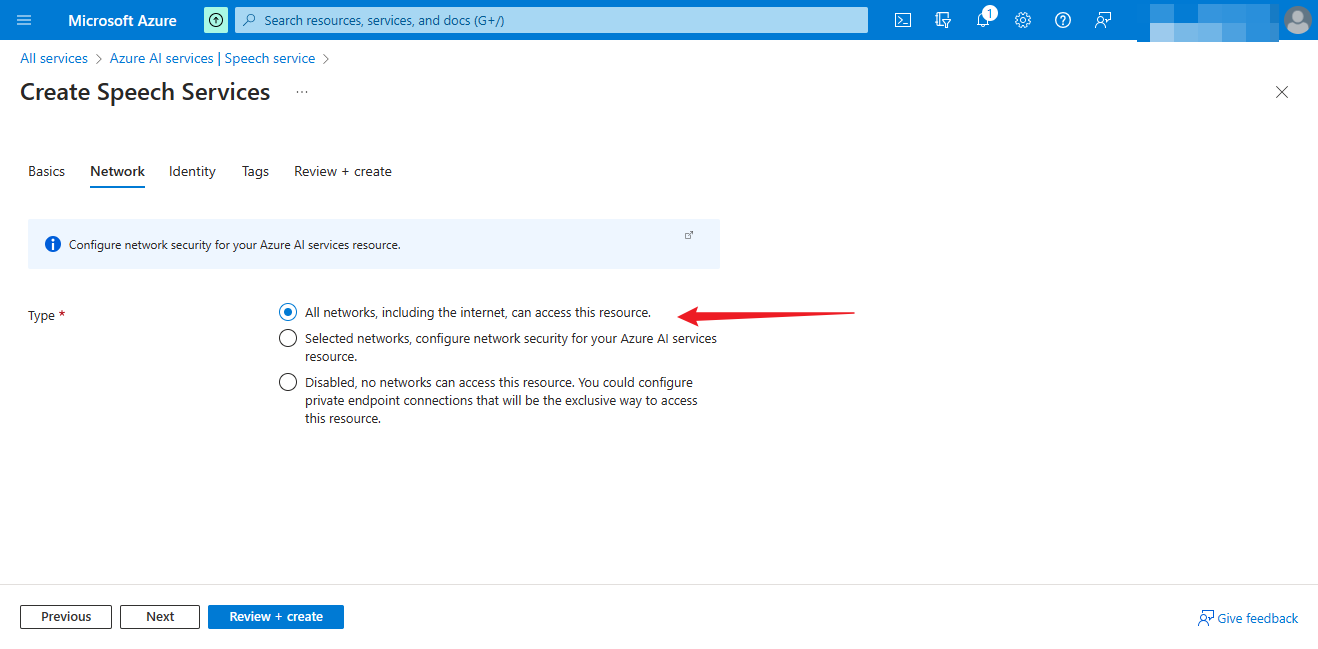
Then select Next.
Identity selection
Open or close according to your needs
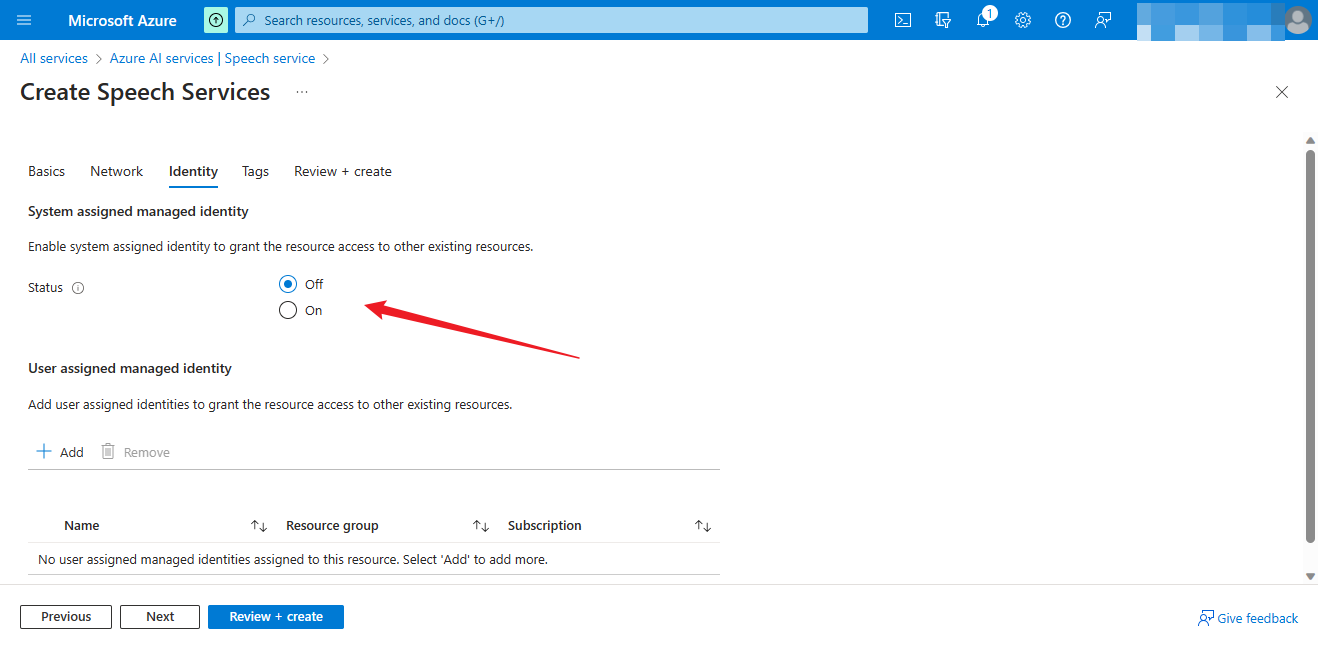
Then select Next.
Tags choice
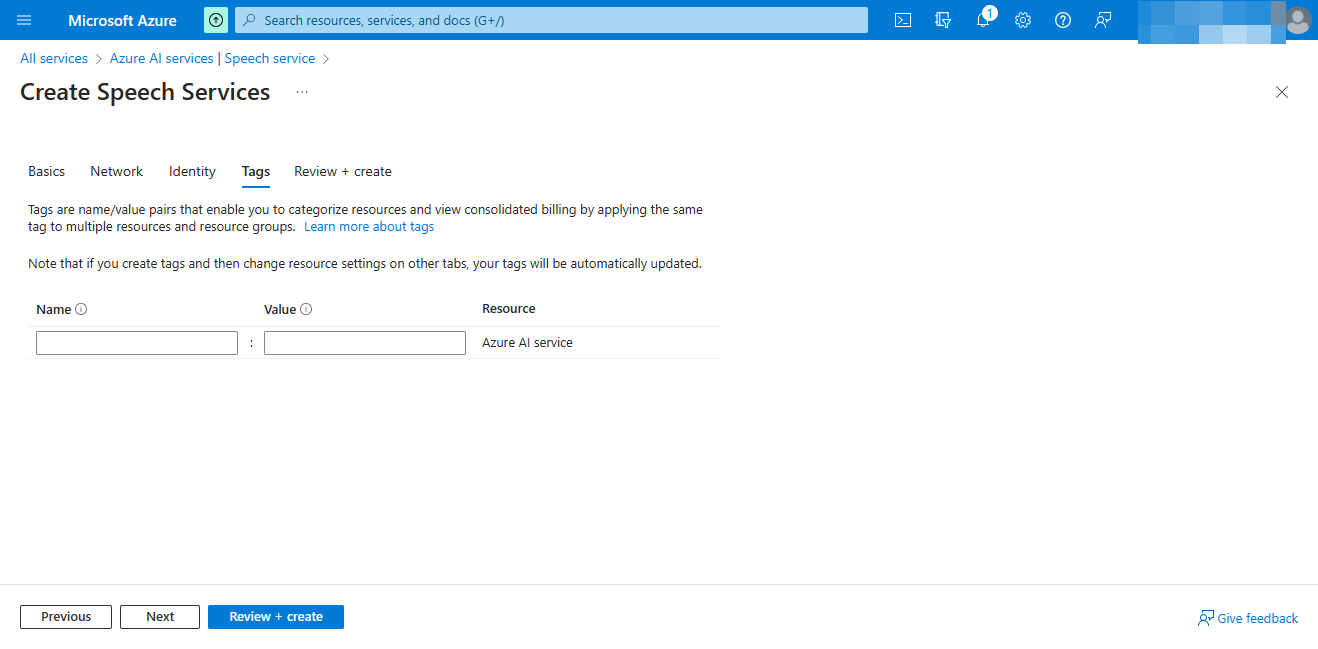
Default empty
Then select Next
Review + create
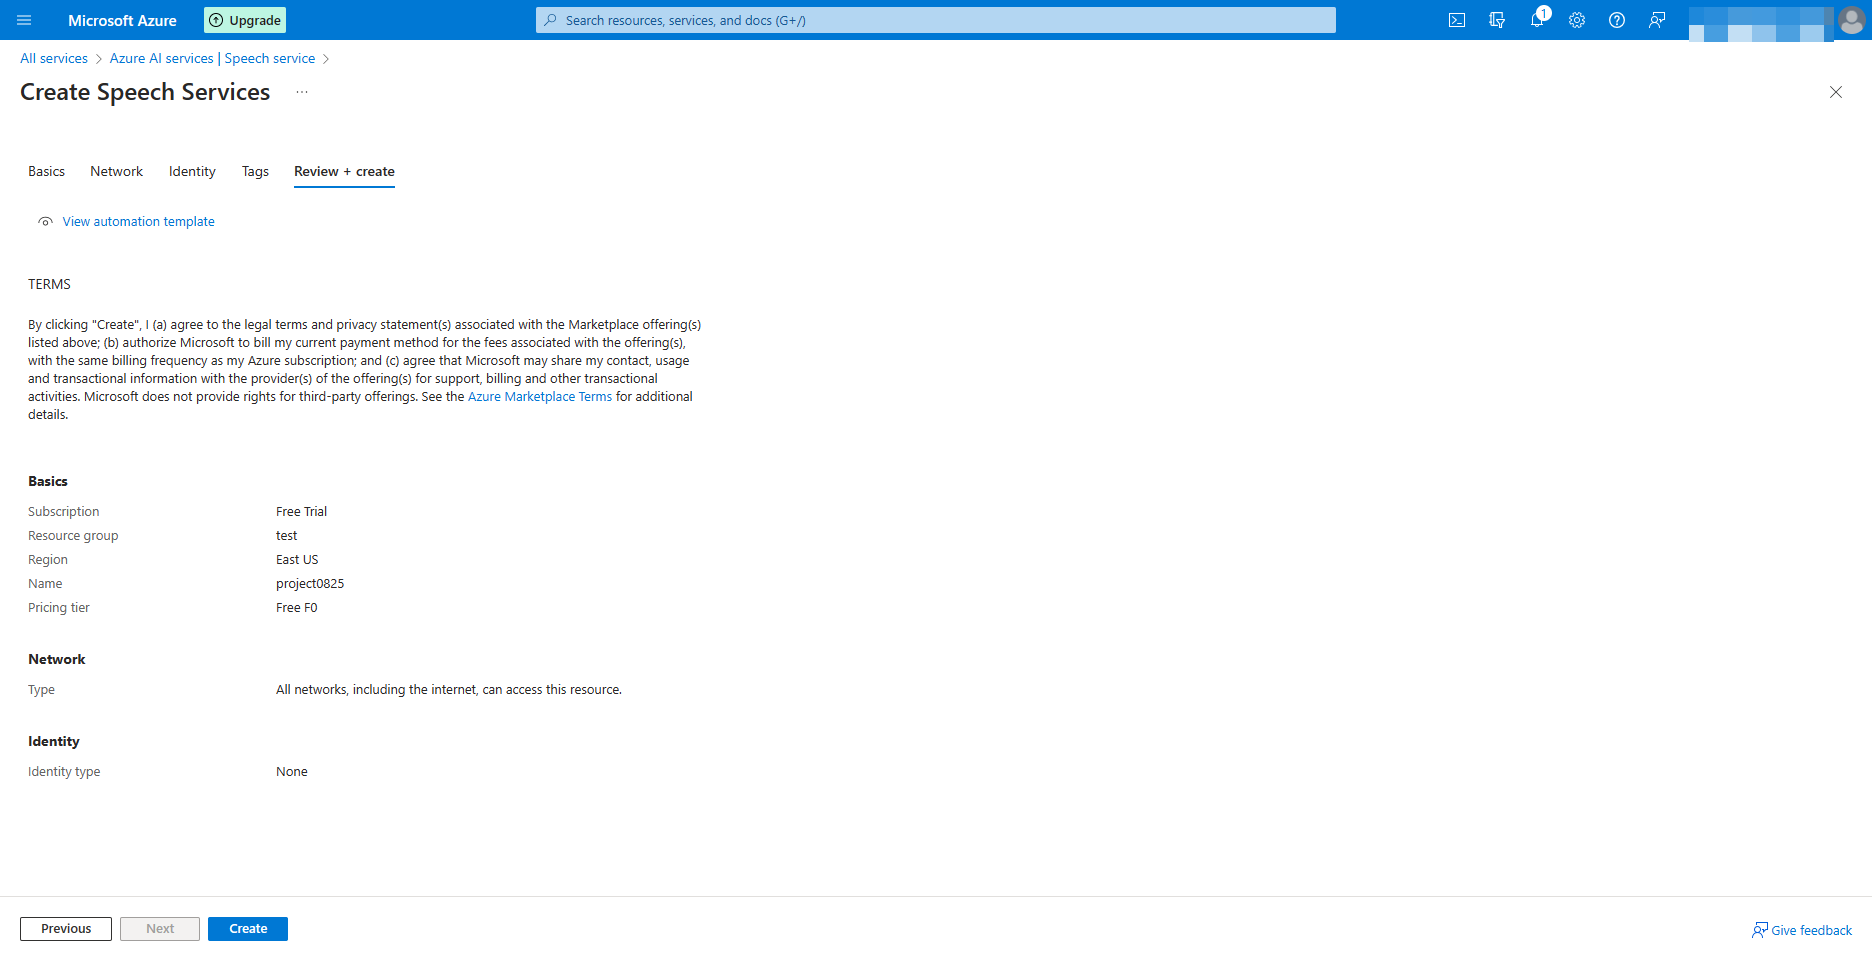
Review + Create
Then select Create.
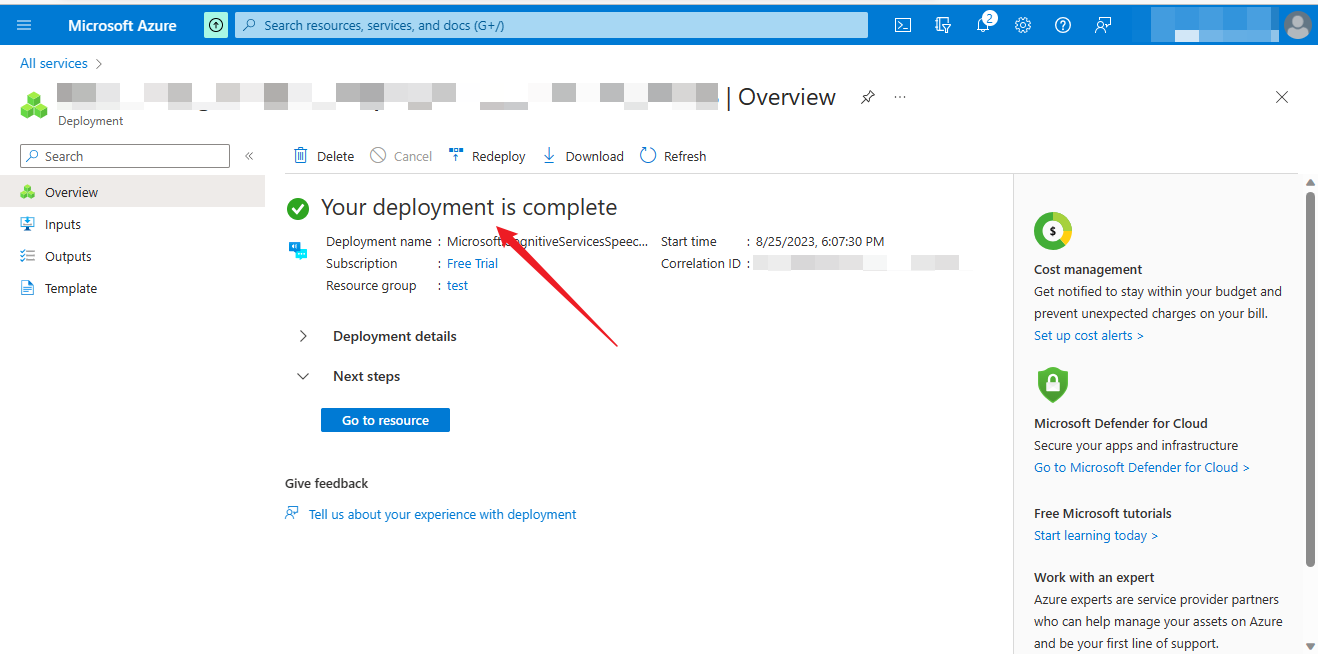
Creation complete
Click on GO to resource
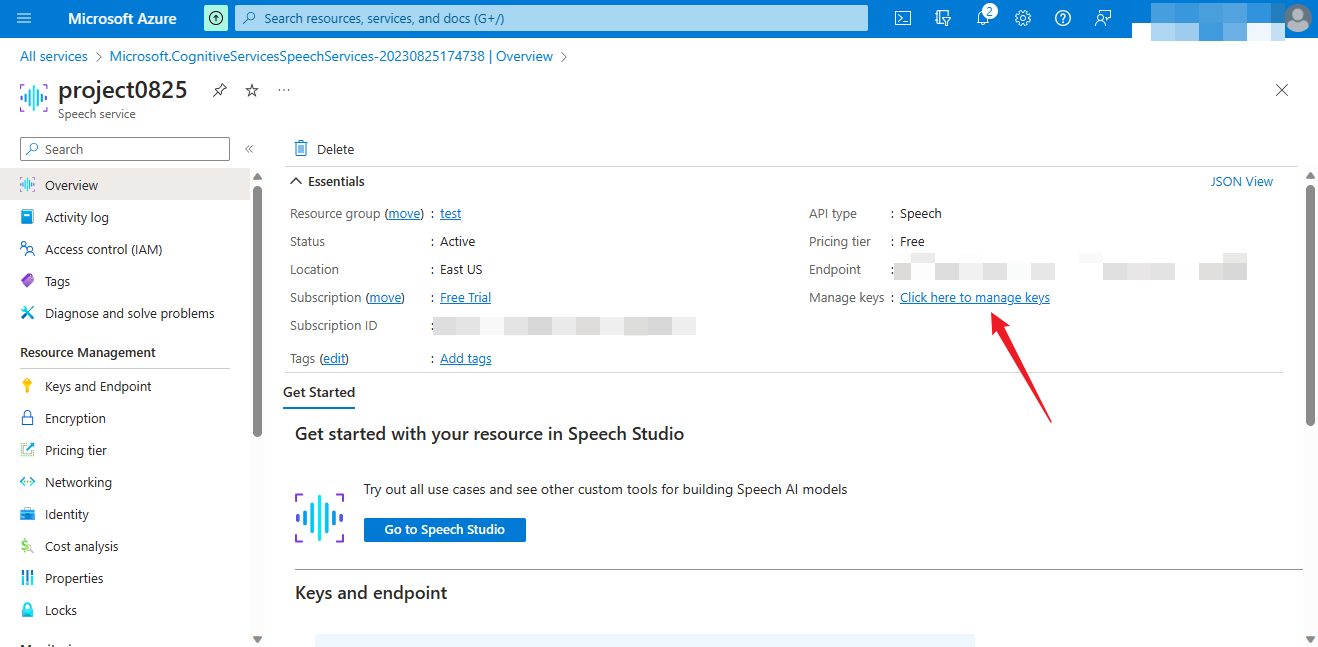
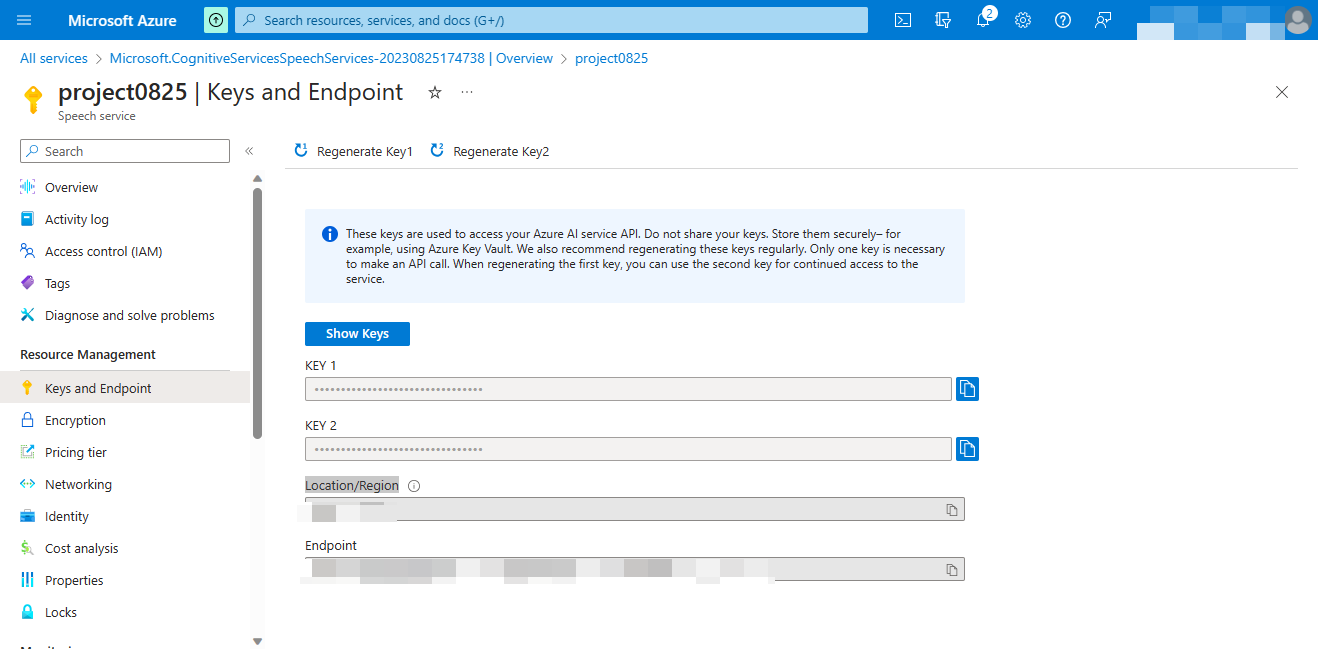
Get the key and Location/Region
Click the arrow to get the key and Location/Region
The Unihiker uses Azure services
Installation:
Before installation, ensure that UNIHIKER is connected to wifi. For details, see the official documentation of UNIHIKER.
pip install azure.cognitiveservices.speechimport time
import os
from azure.cognitiveservices.speech import SpeechConfig
AZURE_SPEECH_KEY = "" # Fill key
AZURE_SPEECH_REGION = "" # Enter Location/Region
try:
import azure.cognitiveservices.speech as speechsdk
except ImportError:
print("""
Importing the Speech SDK for Python failed.
Refer to
https://docs.microsoft.com/azure/cognitive-services/speech-service/quickstart-python for
installation instructions.
""")
import sys
sys.exit(1)
# Set up the subscription info for the Speech Service:
# Replace with your own subscription key and service region (e.g., "japaneast").
speech_key, service_region = AZURE_SPEECH_KEY, AZURE_SPEECH_REGION
def tts(text):
speech_config = SpeechConfig(subscription=speech_key, region=service_region)
speech_config.speech_synthesis_language = "en-US"
speech_config.speech_synthesis_voice_name ="en-US-JennyNeural"
# Creates a speech synthesizer for the specified language,
# using the default speaker as audio output.
speech_synthesizer = speechsdk.SpeechSynthesizer(speech_config=speech_config)
# Receives a text from console input and synthesizes it to speaker.
result = speech_synthesizer.speak_text_async(text).get()
def speech_recognize_once_from_mic():
speech_config = speechsdk.SpeechConfig(subscription=speech_key, region=service_region, speech_recognition_language="en-US")
audio_config = speechsdk.audio.AudioConfig(use_default_microphone=True)
speech_recognizer = speechsdk.SpeechRecognizer(speech_config=speech_config, audio_config=audio_config)
print("Speak into your microphone.")
speech_recognition_result = speech_recognizer.recognize_once_async().get()
if speech_recognition_result.reason == speechsdk.ResultReason.RecognizedSpeech:
print("Recognized: {}".format(speech_recognition_result.text))
elif speech_recognition_result.reason == speechsdk.ResultReason.NoMatch:
print("No speech could be recognized: {}".format(speech_recognition_result.no_match_details))
elif speech_recognition_result.reason == speechsdk.ResultReason.Canceled:
cancellation_details = speech_recognition_result.cancellation_details
print("Speech Recognition canceled: {}".format(cancellation_details.reason))
if cancellation_details.reason == speechsdk.CancellationReason.Error:
print("Error details: {}".format(cancellation_details.error_details))
print("Did you set the speech resource key and region values?")
tts(speech_recognition_result.text)
while True:
speech_recognize_once_from_mic()


