
Pan & Tilt Object Tracking with DFRobot Huskylens & Cytron Technologies Edu:bit (Micro:bit)
Things used in this project
SOFTWARE APPS AND ONLINE SERVICES
· Microsoft MakeCode
Story
Hi, this is my first hackster.io post.
I backed DFRobot Huskylens Kickstarter campaign and received the AI camera early this year. Since then, the sensor was kept in the box for a few months until recently.
In August Cytron Technologies launched new product called Edu:bit which included Micro:bit and contains built-in electronic components (Potentiometer, neopixel LED, traffic light LED, IR sensor, sound sensor, buzzer, speaker, servo & DC motor controller ). I purchased it on the launching day so that I can teach my children the basics of coding, and found out that there is Huskylens extension in Microsoft Makecode.
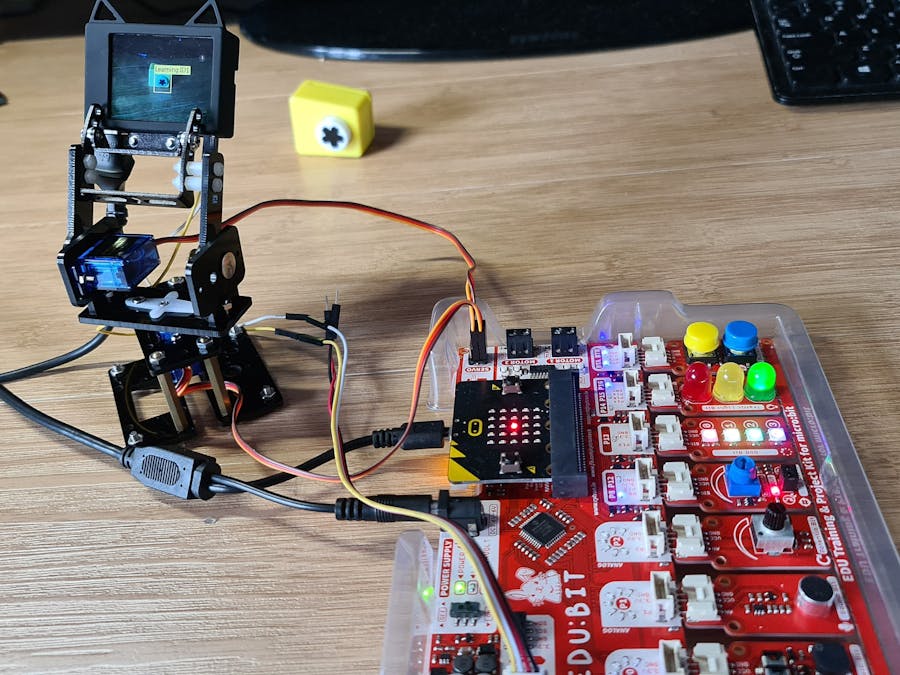
So here is our project which combined both Huskylens and Edu:bit with pan & tilt servo kit.
The objective of this project is to demonstrate how object detection and tracking works in PTZ (pan, tilt & zoom) CCTV, drone gimbal and camera composition.
The Huskylens AI camera will detect the object using object detection algorithm and send the coordinates of the object in 320 x 240 screen (x & y variables) to the Micro:bit.
Servo is programmed make correction and move the camera to the respective direction, so that the object is always located at the center of the screen.
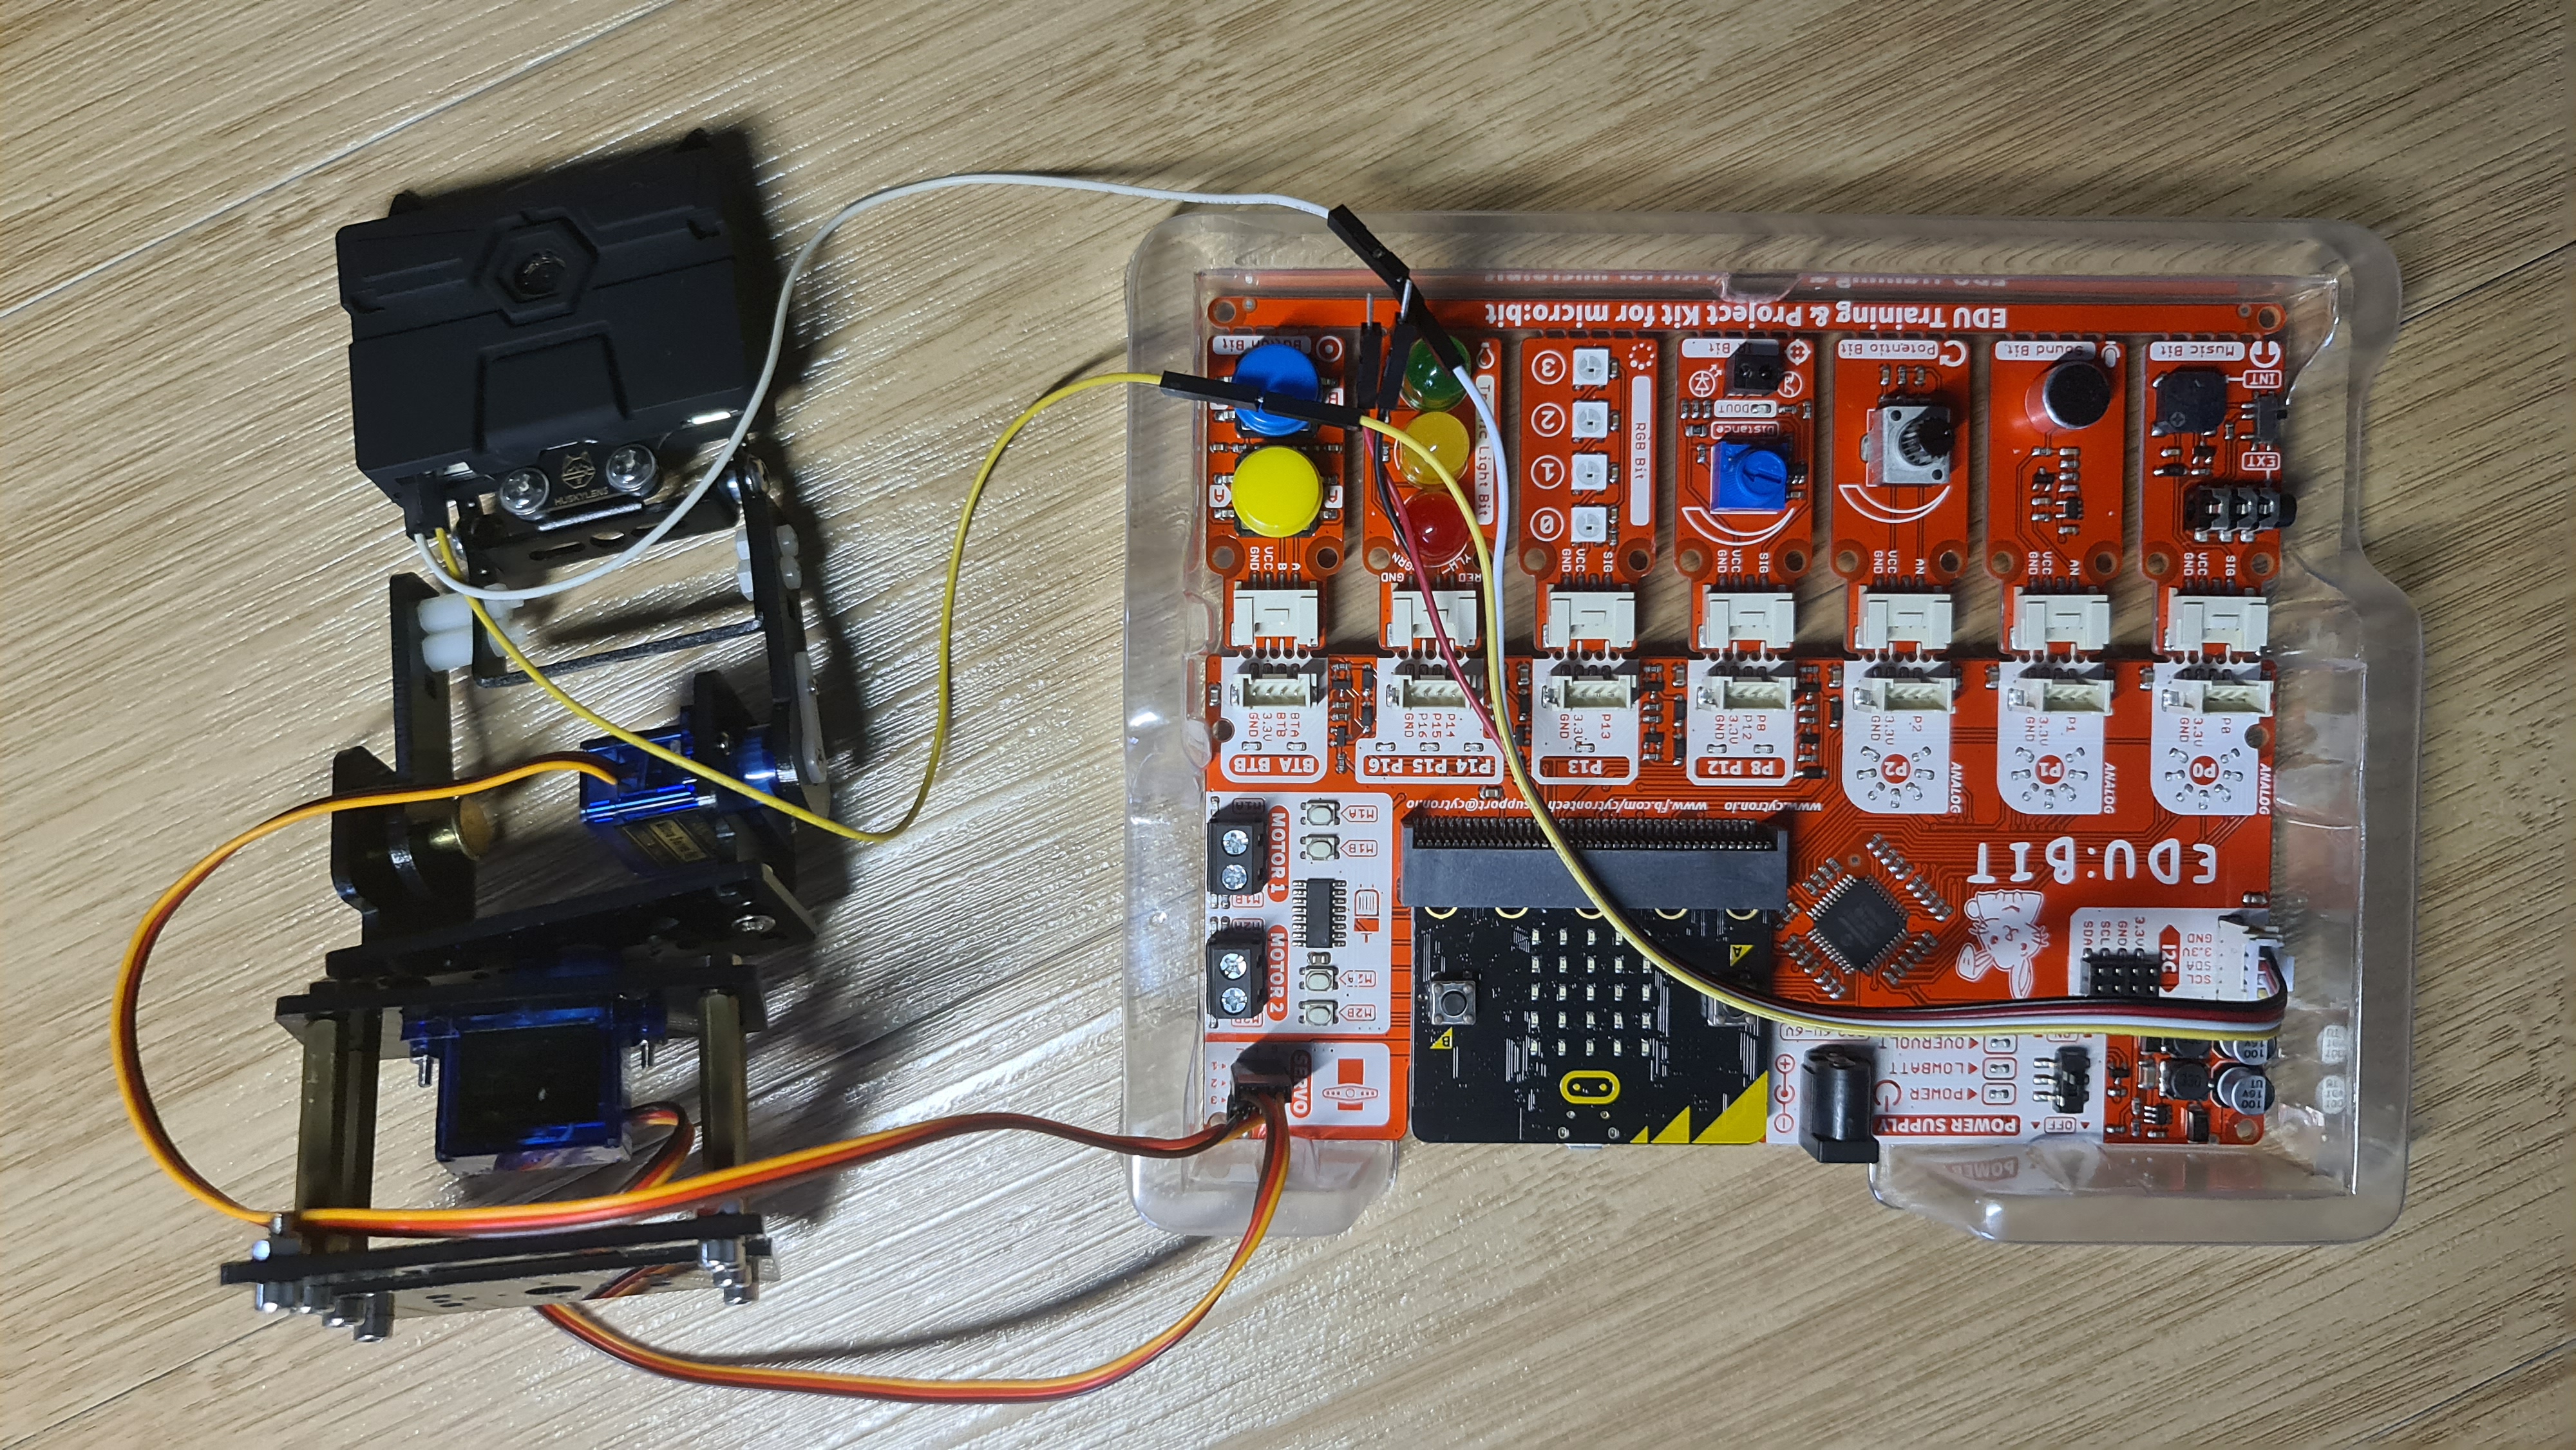
Step 1 : Hardware Connection
a) Huskylens to Edu:bit via I2C
Connect SDA & SDL on Edu:bit Grove connector for I2C to TX & RX at Huskylens respectively

image from https://wiki.dfrobot.com/HUSKYLENS_V1.0_SKU_SEN0305_SEN0336
b) Servo to Edu:bit - connect both servos to Servo pins 1 & 2 on Edu:bit

I2c grove connector on the top-left, and servo connector on the top-right
Step 2: Software
a) Initialise the Huskylens & the servo positions
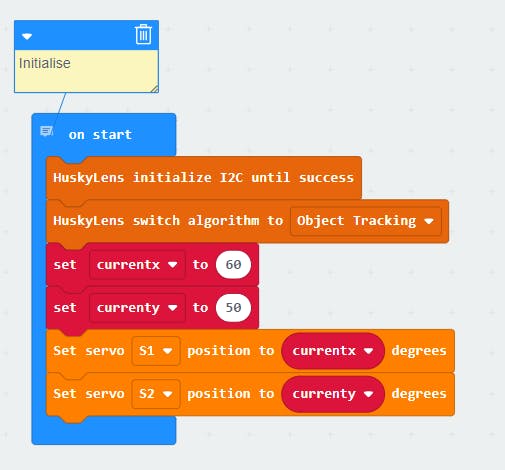
b) set conditions to move both servos (pan or tilt) based on the object location

Step 3: Learn object
a) Select object detection in Huskylens menu, and then click learn button on the image
b) Test that Object ID:1 is tracked and displayed on the screen
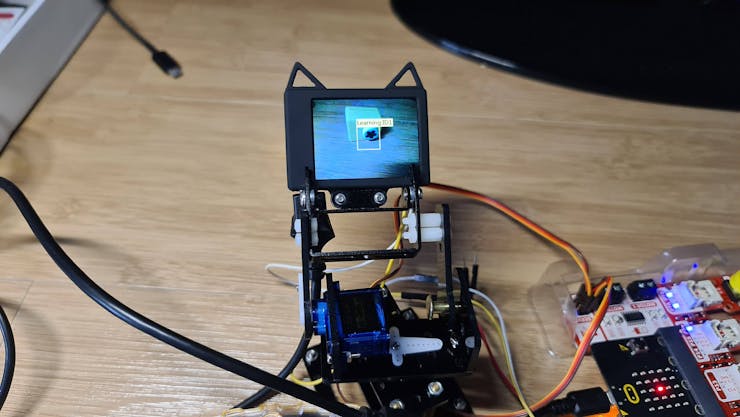
Object ID1 is learned and tracked
Step 4: Track it!
a) Check the wiring
b) Download the code into Micro:bit
c) Track the object! - the camera will follow the object and servo will make correction to the direction so that the object is always located at the center of the screen.
d) Move the object to test the tracking mechanism.
Step 5: Additional functions
a) Use Micro:bit plot function to plot the location of object on the 5 x 5 matrix LED. (need to map 320 x 240 screen to 5 x 5 matrix LED)
b) Change RGB bit and Traffic Light bit to red when object is not centered, and to Green once it centered
c) Use potentiometer to adjust the center value when the servo begin to correct the position i.e by default, correct the position if object x less than 120, and more than 190
Schematics
Connection
as explained in the story, Huskylens is connected to Edu:bit thru I2C, and servo is connected to servo connector
Makecode code for Pan Tilt object detection using Huskylens and Edu:bit
Makecode code
The article was first published in hackster, September 14, 2020
cr: https://www.hackster.io/sidikalamini/pan-tilt-object-tracking-with-huskylens-and-edu-bit-309679
author: Sidik Al Amini Zailani


