
Introducing LabGuard, a safety device designed for laboratory settings. With advanced technology, LabGuard can detect the usage of lab coats
Software apps and online services
Hand tools and fabrication machines
· 3D Printer (generic)
Story
Challenge
We are students from the Electrical Engineering department and Mechanical Engineering department of Diponegoro University. Ensuring the safety of students and researchers in campus laboratories is of paramount importance for educational institutions. Laboratories are the heart of scientific research and experimentation, but they also pose significant risks to the safety of those working in them. The nature of laboratory work involves handling hazardous materials, chemicals, and equipment, making it vital to implement strict safety measures to prevent accidents and protect the health of personnel.
One of the most critical safety measures in laboratories is the usage of lab coats to protect the user from chemical spills and other hazards. However, it can be challenging to ensure that everyone is wearing a lab coat in a large laboratory. In addition, explosions can occur, posing a significant risk to the safety of everyone in the laboratory.
Another challenge is that laboratory personnel may not always be aware of the risks associated with their work, leading to a lack of proper safety practices. Additionally, educational institutions often have limited resources to ensure laboratory safety, making it challenging to implement effective safety measures.
Solution We Propose
To address the challenge of ensuring laboratory safety in educational institutions, we propose a comprehensive safety solution that uses cutting-edge technology to monitor laboratory activities. The solution consists a Lab Coat Detection System.
The Lab Coat Detection System uses the Huskylens AI Camera to detect the usage of lab coats by laboratory personnel. The Huskylens AI Camera is an advanced image recognition system that can detect objects and patterns in real-time. By using the Huskylens AI Camera, we can detect whether someone is wearing a lab coat or not.
In addition to these systems, we also add room temperature sensor and air quality sensor. We also integrating an ESP32 and Arduino IoT Cloud to allow for real-time data monitoring and alerts to laboratory staff.
The ESP32 and Arduino IoT Cloud allow for easy integration of data monitoring and alert systems. By connecting the LabGuard system to the cloud, we can send notifications and data to laboratory staff via their smartphones, tablets, or desktops. This allows laboratory staff to monitor room temperature and air quality and also receive real-time notifications of any detected safety hazards, allowing for quick and effective response.
Our safety solution is easy to install and can be integrated into existing laboratory infrastructure seamlessly. The system is user-friendly and requires minimal training to operate. By using our solution, educational institutions can demonstrate their commitment to laboratory safety, ensuring that their laboratories are a safe place for students and researchers to work.
Preparation
This project is divided into four system parts: Lab Coat Usage Detection System, Real Time Alert System, Room Temperature and Air Quality Monitoring System, and Wireless Transmission System for Laboratory Staff.
And thankfully Hackster, DFRobot, and Arduino give all the things needed for the purpose.
This four system will consist of these guides to fulfill the main objective:
Make a lab coat usage detection using HuskyLens.Make a sound alert using DFPlayer.Make a room temperature and air quality monitoringsystem using DHT11 and MQ135 Sensors.Send the detection/alert data with ESP32 and push it to Arduino Cloud and an IoT dashboard for send alert to laboratory staff.The flow chart of our system is as follows:

Complete Wiring Diagram of our system is as follows:

Setting Up The HuskyLens
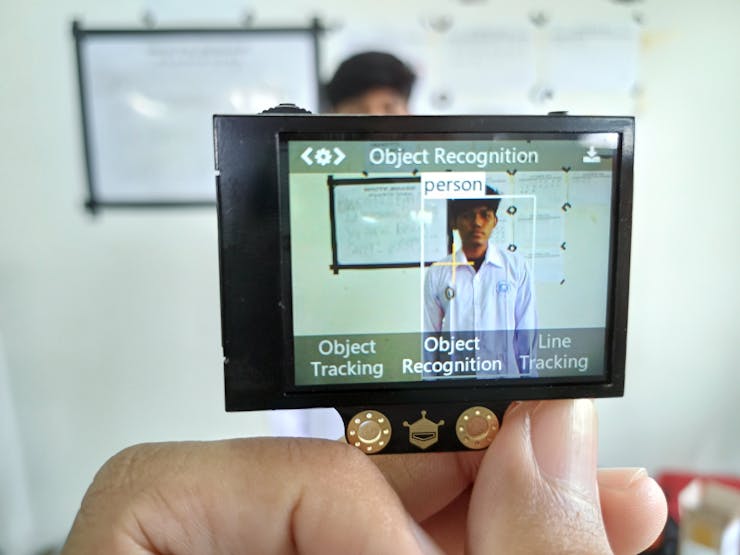
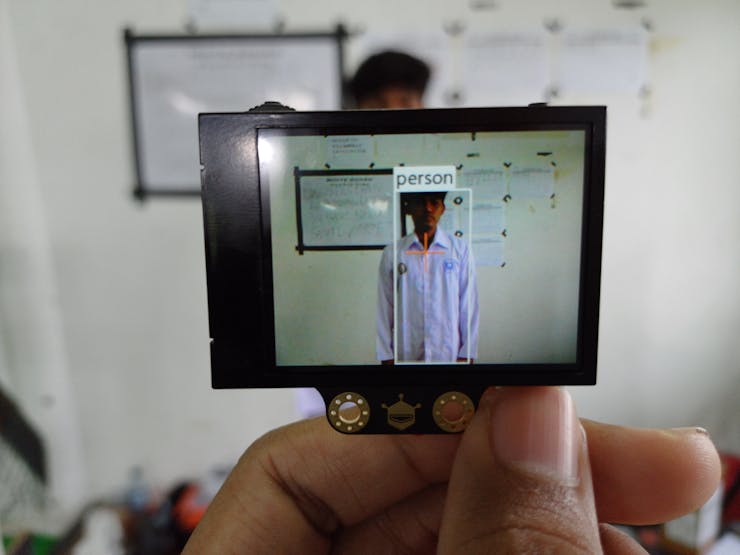
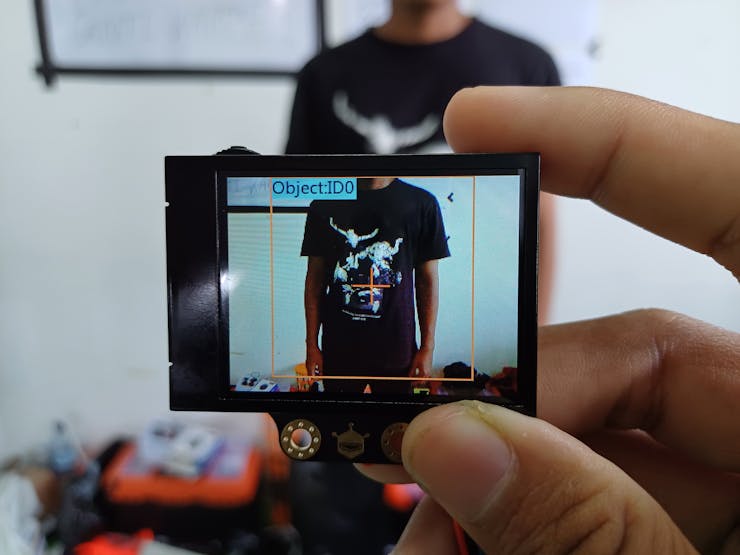
For this system we use HuskyLens Object Recognition and Object Classification. Object Recognition will detect the presence of a human.
Step1:Object Recognition, we use HuskyLens built-in function name Object Detection. HuskyLens can recognize 20 built-in objects. They are aeroplane, bicycle, bird, boat, bottle, bus, car, cat, chair, cow, dining-able, dog, horse, motorbike, person, potted lant, sheep, sofa, train, TV. We use person detection, when huskylens detecting person, HuskyLens will automatically recognize it, and the object will be displayed by the white frame with its name on the screen.
If a human is detected, HuskyLens will send a signal to the ESP32 microcontroller, which will then send a signal back to HuskyLens to perform Object Classification and detect whether the person is wearing a lab coat.
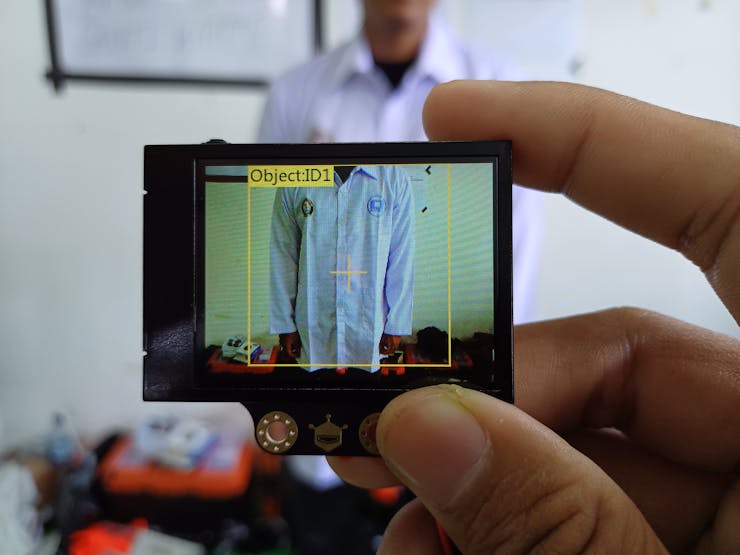
Step2:ObjectClassification. By following this guide a model will be built to detect Lab Coat Usage. There is a video while we perform object learning to learn lab coats.
We save the object with ID1. When HuskyLens detects the person is wearing the lab coat, the device will return in the variable result.ID == 1
However, if HuskyLens fails to detect the lab coat, the device will return in the variable result.ID == -1
Step3. Next step is to set up the ESP32 to process the data received from HuskyLens and become the controller for HuskyLens. For this step we do coding in the Arduino IDE with result as shown in the code section.
Setting Up The DFPlayer
When HuskyLens detects the person is wearing the lab coat, the device will produce a sound indicating "Praktikan Boleh Masuk" or "You can enter the lab". However, if HuskyLens fails to detect the lab coat, the device produce a sound indicating "Praktikan Tidak Boleh Masuk, Pakai Jas Lab mu dahulu!" or "You cannot enter the lab, please wear your lab coat first!" This will remind the person to wear their lab coat before entering the lab and ensure the safety of everyone inside.
To generate the sound, we use a free Online Text to Speech service. You can access this website at the following link: Free Text-To-Speech and Text-to-MP3 for US English


After generating the sounds, we download them in MP3 format and copy them to a Micro SD Card with file name "1" and "2". Use the function 'myDFPlayer.play(/*File Number = */1);' to play the audio file with the specified number.

In this project, we use the DFPlayer Mini because we have experience with it, although we received a free DFPlayer Pro from the Hackster EDU Kit. We can use either of them, as they are essentially the same.
Next step is to set up the code to in the Arduino IDE with result as shown in the code section.
Setting Up Arduino IoT Cloud
By following this guide we connect the device to Arduino IoT Cloud.
You should pay attention to the added variables for this project, as shown in the image below:

There is the result of IoT Dashboard we have created.
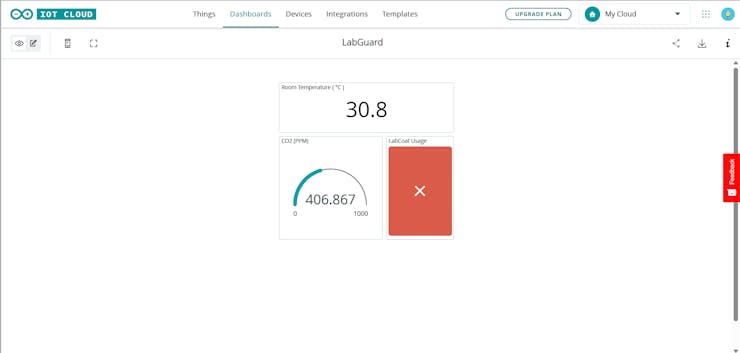

We can also open it from android using Arduino IoT Cloud Remote on the PlayStore or from Iphone by using Arduino IoT Cloud Remote on the App Store
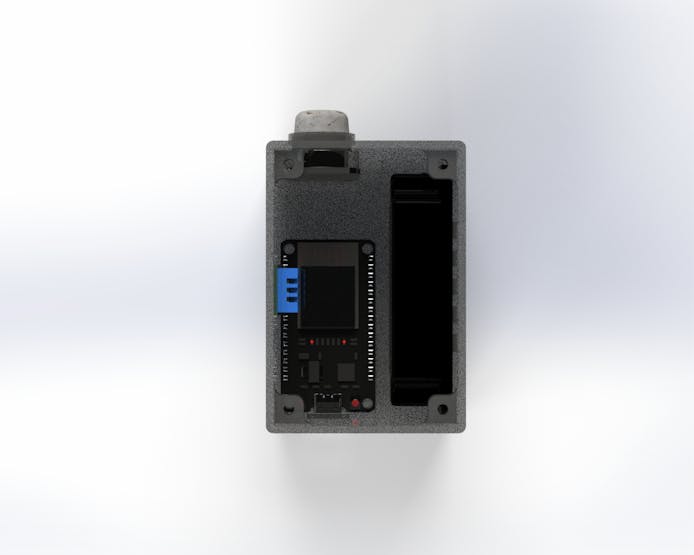
Custom Enclosure Design
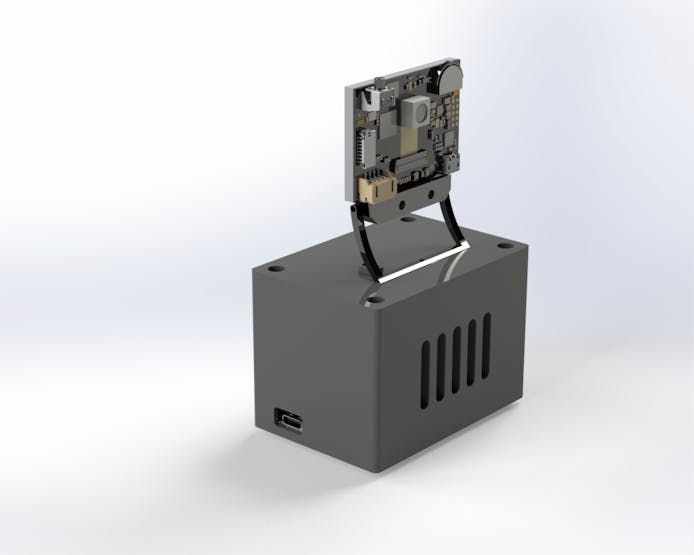
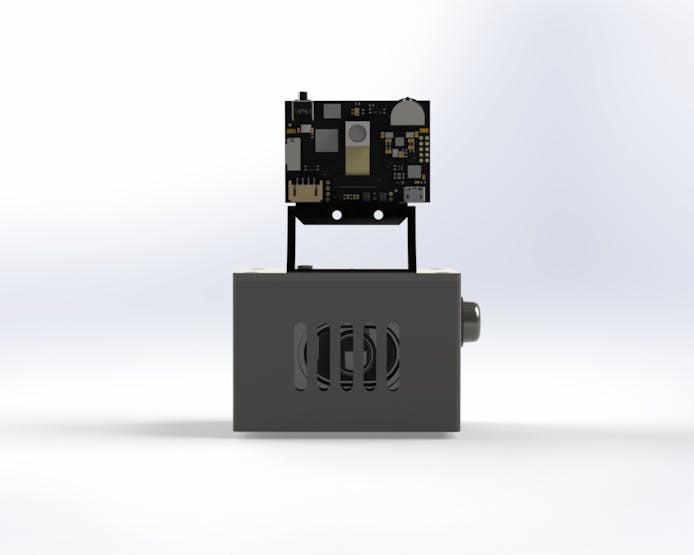
We use SolidWorks software to design custom enclosures and print them using 3D printing. The CAD files can be downloaded in the attachment.
Here is some 3D Models of Lab Guard:
Project Result
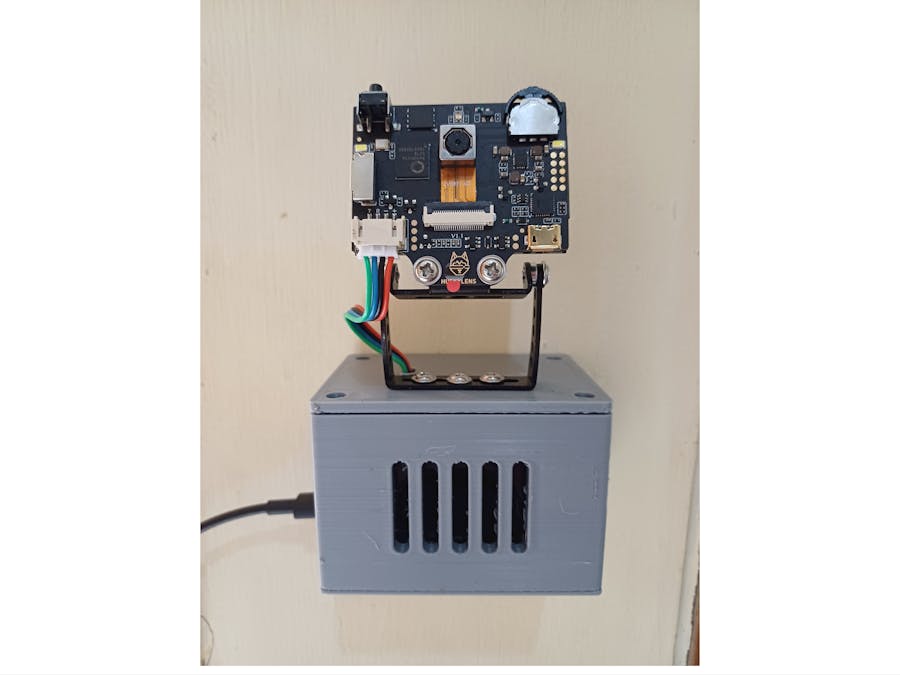
Here is the view of LabGuard after assembly:


LabGuard is highly compact in size, making it flexible to be placed anywhere. You can attach it next to the laboratory entrance, like this:

Below are two specimens for LabGuard testing. We have one person wearing a lab coat and another person not wearing a lab coat.


Below is a video of LabGuard testing:
Project Evaluation
The LabGuard project still has weakness in terms of accuracy and camera response speed in detecting the use of lab coats. In the future, the camera response capability should be improved.
Custom parts and enclosures
· assem1_tj7LLe2QJS.SLDASM
· casing 2_UHeWMiYT56.SLDPRT
· Casing 1_DvKw6YutC4.SLDPRT
· casing lab guard.STL
Schematics
Wiring Diagram
We use jumper for wiring.

Code
https://create.arduino.cc/editor/xahsan/2435af9e-e912-4150-8d67-2dc25d698fb8/preview
The article was first published in hackster, June 14, 2023
cr: https://www.hackster.io/dipowin/labguard-lab-coat-detection-device-for-laboratory-safety-08202f
author: Muhammad Ahsan Fillah Abadi


