Pipboy inspired watch from the Fallout game series.

Software apps and online services
- Autodesk Fusion 360
- Arduino IDE
Hand tools and fabrication machines
- 3D Printer (generic)
Story
Greetings Vault dwellers, and I'm back with a new watch project.
Meet PipWatch, a PipBoy-inspired wrist watch powered by a FireBeetle ESP32 board along with a round GC9A01 display.


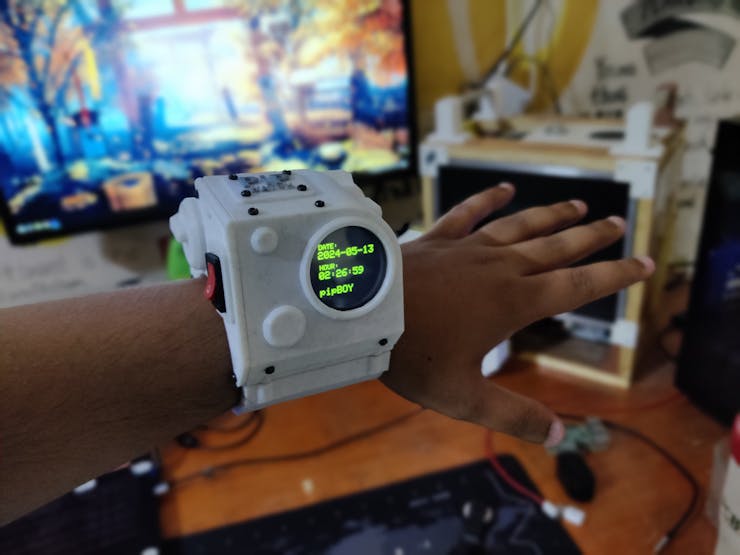
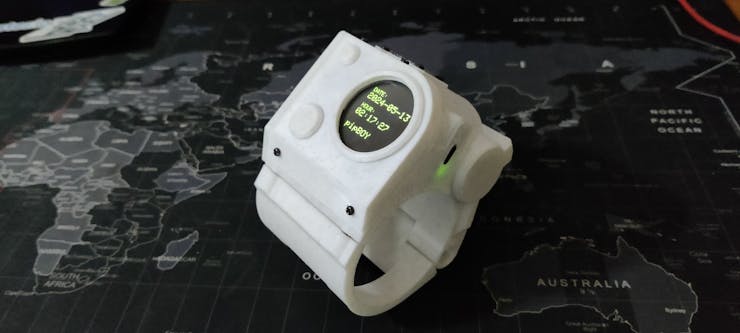
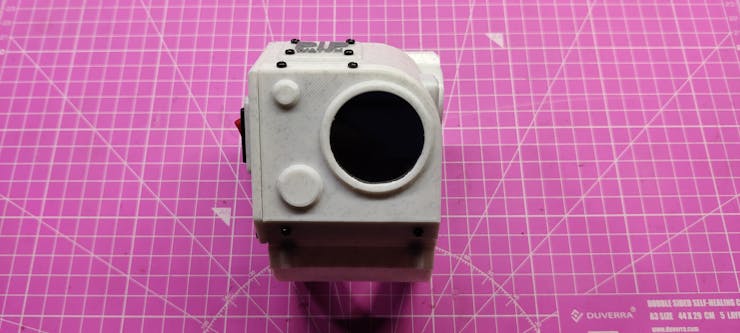
For those who are not familiar, a pipboy is a wrist-mounted computer device that characters in the Fallout video game series utilize to interact with the game world, access maps, and manage their stuff.
PiPWatch gets time from an NTP server and displays the result on the round-oled screen in green, which follows the Pipboy theme.
We 3D printed each component and assembled everything from scratch.
This article is about the build process of this watch project, so let's get started with the build.
Designing the Watch
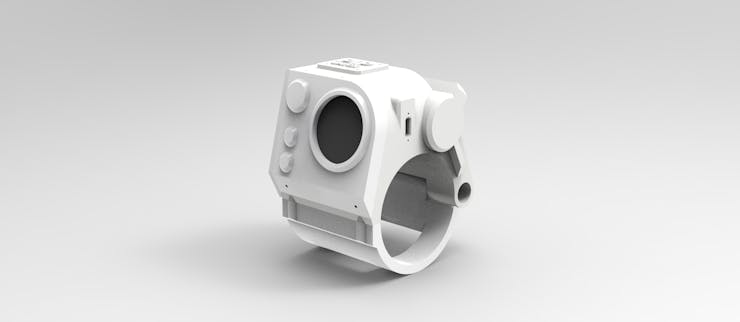
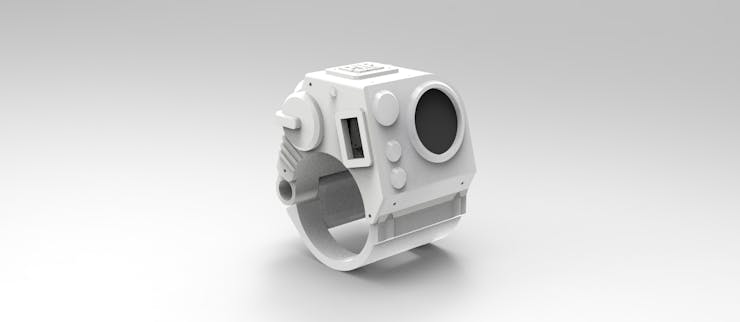
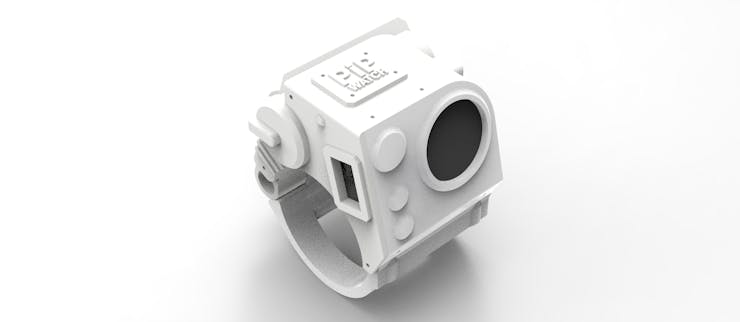


We did research on the many Pipboy designs—both fan-made and original—and the Pipboy design language in order to get ready for this project.
After that, we prepared the model around the existing components to create a similar design to a pipboy by modeling the interior components first in Fusion360, which included the display, Firebeetle board, and lithium cell. This Pipwatch borrows certain design cues from the Pipboy, but it is not an exact duplicate.
We also measured the wrist and modeled it in the Cad program.
The hinged portion that connects to the main watch and rotates on a hinge mechanism is called the wrist clamp. Super magnets that are fastened to the interior of the clamp and body are what hold the hinge clamp portion of the watch together with the body. These magnets hold the hinge portion of the watch in place. To wear it, we can use some force to separate the magnet joints, which will cause the clamp to open and the user to be able to place the watch on their wrist.
For one main reason, we chose magnets instead of snap locks in the design. Snap locks are typically the best for this kind of task, but since we plan to 3D print the body, PLA is required for the snap locks, which is not the best material for a snap joint that tends to bend. As a result, the snap locks we 3D print will not last very long.
Since magnetic locks would not break and would be simple to produce, they were the ideal solution in this case.
The main body, side cover, front screen holder, lower hinge clamp, and PipWatch logo nametag were the five elements that made up the entire model.
The nametag was printed using a different technique. We printed it halfway with white PLA and then paused the print to swap the filament with a grey PLA, making the letters grey on a white base. This made the nametag more appealing and unique. All parts were 3D printed using white marble PLA with a 0.4mm nozzle.
Electronics
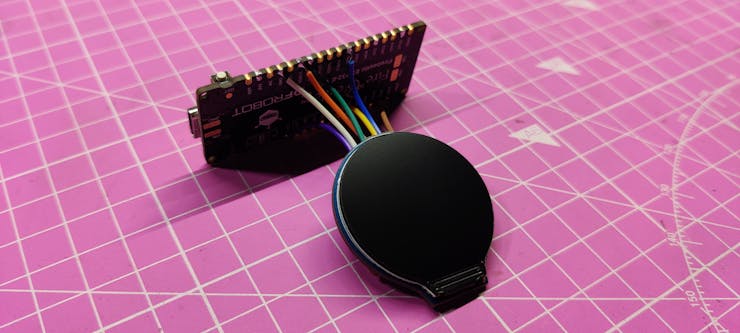
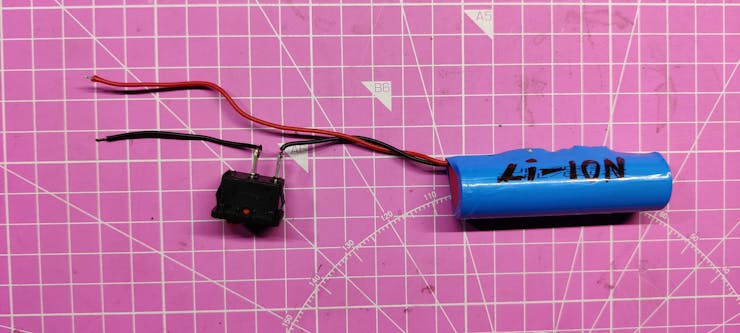
In this project, we used the DFROBOT FireBeetle 2 ESP32-E, and one of the primary reasons for using this particular board was to utilize the TP4056, an onboard lithium cell power management integrated circuit.
The onboard ESP-WROOM-32E is also quite capable of handling display-related projects, so it was an ideal choice for a project like this.
You can check out the product's wiki for more information about this dev board.
https://wiki.dfrobot.com/FireBeetle_Board_ESP32_E_SKU_DFR0654
For the screen, we're using the GC9A01, which is a 240x240 round RGB LCD display that adopts a four-wire SPI communication interface. SPI is fast, so it can greatly save the GPIO port, and the communication speed will be faster.
It's similar in size to the 240x240 square LCD but has rounded edges.
The built-in driver used in this LCD is GC9A01, with a resolution of 240RGB×240 dots.
Checkout its wiki page for more information: https://www.waveshare.com/wiki/1.28inch_LCD_Module
We're also using a 3.7V, 2200mAh Li-ion Cell in this project, which will be the main power source for this project.
Basic Assembly Process: Electronics
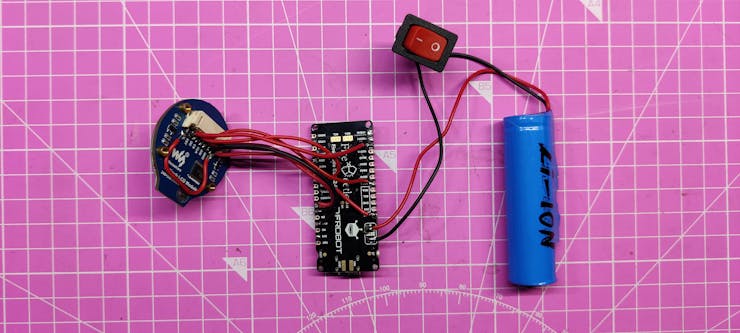


The Firebeetle and GC9A01 display are first connected using the wiring connector shown below.
- VCC- 3.3V
- GND- GND
- DIN-MOSI GPIO23
- CLK-SCK GPIO18
- CS- GPIO15
- DC- GPIO02
- RST- GPIO04
We then add positive and negative terminals to the 3.7V lithium cell with the Firebeetle's battery port present on the bottom side of the board.
Additionally, a rocker switch that is attached to the negative cell and negative Firebeetle battery connector will cut off power to the Firebeetle board.
Main Code and TFT_eSPI Setup

Here's the main code that was used in this project, and its a simple one. Let me explain.
#include <WiFi.h>
#include <NTPClient.h>
#include <WiFiUdp.h>

#include <TFT_eSPI.h>
TFT_eSPI tft = TFT_eSPI();

// Replace with your network credentials
const char *ssid = "YOUR SSID";
const char *password = "YOUR PASS";

// Define NTP Client to get time
WiFiUDP ntpUDP;
NTPClient timeClient(ntpUDP);

// Variables to save date and time
String formattedDate;
String dayStamp;
String timeStamp;

void setup() {
  // Initialize Serial Monitor
  Serial.begin(115200);
  Serial.print("Connecting to ");
  Serial.println(ssid);
  WiFi.begin(ssid, password);
  while (WiFi.status() != WL_CONNECTED) {
    delay(500);
    Serial.print(".");
  }
  // Print local IP address and start web server
  Serial.println("");
  Serial.println("WiFi connected.");
  Serial.println("IP address: ");
  Serial.println(WiFi.localIP());

// Initialize a NTPClient to get time
  timeClient.begin();
  // Set offset time in seconds to adjust for your timezone, for example:
  // GMT +1 = 3600
  // GMT +8 = 28800
  // GMT -1 = -3600
  // GMT 0 = 0
  timeClient.setTimeOffset(19800);
  tft.init();
  tft.setRotation(4); // Adjust rotation if needed

}

void loop() {
  while(!timeClient.update()) {
    timeClient.forceUpdate();
  }

  formattedDate = timeClient.getFormattedDate();
  Serial.println(formattedDate);

  int splitT = formattedDate.indexOf("T");
  dayStamp = formattedDate.substring(0, splitT);

 tft.fillScreen(TFT_BLACK); // Clear the screen
  tft.setCursor(35, 40); // Set cursor position
  tft.setTextColor(TFT_GREEN); // Set text color
  tft.setTextSize(2); // Set text size
  tft.print("DATE: "); // Print DATE
  Serial.print("DATE: ");


  tft.setCursor(32, 60); // Set cursor position
  tft.setTextColor(TFT_GREEN); // Set text color
  tft.setTextSize(3); // Set text size
  tft.print(dayStamp); // Print text
  Serial.println(dayStamp);


  // Extract time
  timeStamp = formattedDate.substring(splitT+1, formattedDate.length()-1);

  tft.setCursor(35, 100); // Set cursor position
  tft.setTextColor(TFT_GREEN); // Set text color
  tft.setTextSize(2); // Set text size
  tft.print("HOUR: "); // Print text
  Serial.print("HOUR: ");

  tft.setCursor(32, 120); // Set cursor position
  tft.setTextColor(TFT_GREEN); // Set text color
  tft.setTextSize(3); // Set text size
  tft.print(timeStamp); // Print text
  Serial.println(timeStamp);

  tft.setCursor(32, 170); // Set cursor position
  tft.setTextColor(TFT_GREEN); // Set text color
  tft.setTextSize(3); // Set text size
  tft.print("pipBOY"); // Print text

  delay(500);
}
The program essentially fetches the current date and time over the internet, formats it, and displays it on the screen in a readable format. It's a basic example of using Wi-Fi and NTP functionality with a microcontroller to create a digital clock or timestamp display.
You must look up the GMT offset for your location and put it to this line instead of 19800. I am from India, and this place has GMT offset 19800.
timeClient.setTimeOffset(19800);
Also, we're using the TFT_eSPI Library by Bodmer here, which requires the user to first edit the user setting located in this path: C:\Users\user\OneDrive\Documents\Arduino\libraries\TFT_eSPI, and select the user setup data of the display you want to use, in our case, we used GC9A01 Display and added user data for it.
You can get the library from here:
https://github.com/Bodmer/TFT_eSPI
After getting all things ready, we move onto the Assembly process of this watch.
Hinge Clamp Assembly: Adding Threaded Inserts


The first stage in the assembly process is to put M3 threaded inserts into the clamp's hinge section. These inserts will be fastened to the body of the clamp with M3 bolts, which will allow the portion to rotate and maintain the clamp firmly attached. A soldering iron that has been heated to 150 degrees Celsius is used. An M3 threaded insert is placed on top of the hole, and the iron heats and presses the insert down, melting the plastic beneath it and permanently attaching it to the spot. We redo this process for adding threaded inserts on the other side of the hinge part.
Magnets Placement


Now, we take four super magnets and place them in the hinge clamp's designated holes. These magnets are pressure-fitted in their position Four super magnets are now taken and fitted into the holes on the hinge clamp. Now, we use two M3 bolts on each side to join the main body and hinge clamp together. The M3 threaded inserts keep the body and hinge clamp together. Now that the wrist watch portion is closed and the main body has been tightened with the clamp, the arrangement feels solid and well-built, and the magnet locking works well as well.
Body-Electronics Assembly


The fire beetle is now positioned, and hot glue is used to hold it in place. To fully connect the Firebeetle to the watch body, we apply adhesive next to its USB port. Subsequently, we remove the rocker switch from the electronics configuration and install it on the side cover. After that, we reattach the rocker switch to the battery terminals, install the lithium cell, and attach the side covert component to the main body. We then use three M2 screws to attach the side cover to the main body.
Front Screen Holder Assembly


A round 38mm acrylic sheet is first added to the front portion of the front screen holder assembly. This sheet serves as a protective barrier between the round screen and the body.
The protective covering is removed from both sides of the acrylic sheet, which is then placed into the front screen holder section. The circular display is then placed on top of the acrylic sheet.
Hot glue is used to secure the round screen and the acrylic round portion in place.
We placed the first screen holder component on the body and permanently mounted it with M2 screws after allowing the adhesive to cool for a few minutes.
Final Touches


To add the finishing touch, we place the PipWatch nametag atop the device and fasten it to the body with four M2 screws.
The assembly has been completed, and the PiPWatch project is now complete.
RESULT


Here's the result of this build. a working PipWatch that connects to the internet and shows you the current time and date.
It is a digital watch, extremely simple. The goal was to focus on the watch's appearance, but we could also add a gif of Vault Boy by simply modifying the code.
This post includes the code and other necessary files to make one; if you have any questions about the project, please leave a comment.
All in all, this attempt was successful, and I will be preparing a life-size PipBoy soon.
Thanks for reaching this far, and peace out.
Custom parts and enclosures
- cad file
- code
This article was first published on Hackster on May 17, 2024
cr: https://www.hackster.io/Arnov_Sharma_makes/pip-watch-project-370245
Author: Arnov Sharma


