
Smart Home DIY Project using DFRobot's Fermion: BLE Sensor Beacon
Software apps and online services
- Arduino IDE- PlatformIO IDE
- Microsoft VS Code
- InPlay Inc NanoBeacon™ Config Tool
Story
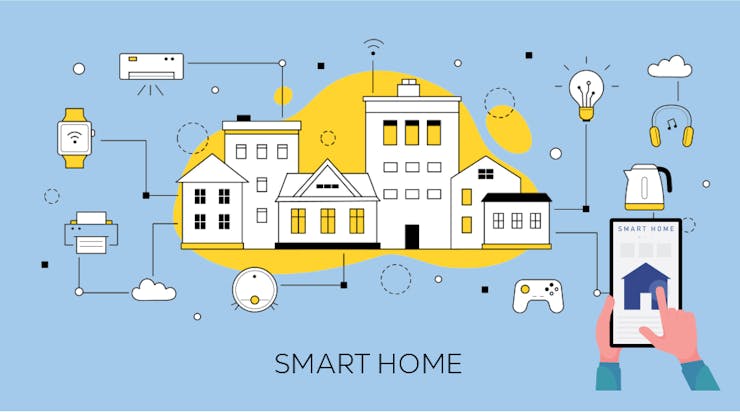
A smart home refers to a residence that utilizes internet-connected devices to enable remote monitoring and management of various systems and appliances, often via a smartphone or other smart devices. These interconnected devices, often part of the Internet of Things (IoT), provide automation, convenience, energy efficiency, and enhanced security to homeowners.
Common features and components found in a smart home are Home Automation, Connected Appliances, Home Security, Energy Management, Voice Command Control, Remote Monitoring and Control and Interconnectivity etc.
In Smart home system there is a central Hub/controller. Devices in such systems often communicate with each other and with a central hub using different wireless technologies such as Wi-Fi, Bluetooth, Zigbee, or Z-Wave. This allows for seamless integration and interoperability between different devices and systems.
In IoT Environmental monitoring applications in smart home, we have to use different analog and digital sensors to collect data of various environmental parameters like temperature, humidity, pressure, Air quality etc. Now suppose a scenario where we want to collect temperature and humidity data from Kitchen. What we will require,
- We will require Temperature and humidity sensors (Analog/Digital), then
- We will require a microcontroller, which have capabilities of ADC and Data processing.
- Additionally if "main IoT hub controller" is at longer distance from this collection sensor node, we need wired/wireless connection for connecting to main hub.
- If distance is longer then deploying wired connection will become costly and complexity overhead.
Therefore, In such scenario's, we will require a device, a data collection/Sensor node which have features like - ADC, Computing power - MCU and Wireless data broadcasting capability.
So, What if all above features and capabilities come with single hardware. It will be cherry on the cake. Let me introduce you to the DFRobot's Fermion: BLE Sensor Beacon.
We have seen detailed information, review, getting started guide in my previous article. You can check it out for more details.
Now here we will utilize Fermion: BLE Sensor Beacon module to make DIY project of Smart Home Application.
So, we will use this BLE sensor beacon module to send all sensor readings to main IoT based Smart Home hub controller over BLE (Bluetooth Low Energy) broadcasting.
I'm very grateful to DFRobot for providing me their awesome hardware and supporting my Project's Idea with Fermion: BLE Sensor Beacon.
Block Diagram of the Project
Following figure shows functional block diagram of the project.
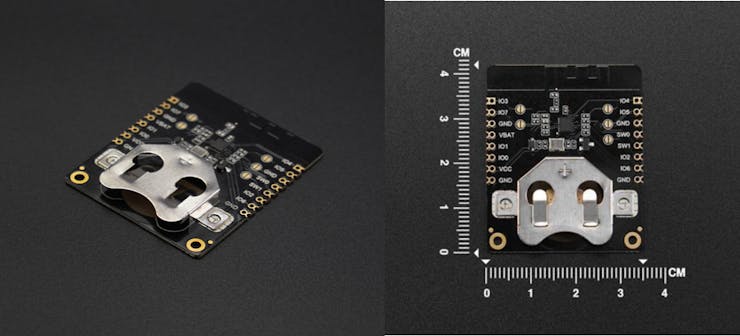
So, Fermion: BLE Sensor Beacon, is a wireless beacon that broadcasts sensor data via Bluetooth, with built-in 11-bit ADC acquisition and I2C write/read functionality, can be connected to digital or analogue sensors for data acquisition and broadcasting. Sensor data broadcasted by the beacon can be accessed within the beacon's broadcast range using mobile phones, ESP32 and other devices that support BLE reception.
Here as shown in block diagram we have interfaced 3 Analog sensors and one I2C sensor with BLE Sensor Beacons.
1. DFRobot's Analog Ambient Light Sensor
2. DFRobot's Analog Soil Moisture Sensor
3. DFRobot's Fermion : MEMS Smoke sensor
4. DFRobot's SHT40 Temperature and Humidity sensor

We configured them using Nano Beacon Config Tool. They (DFRobot) have given detailed information about, how you can configure BLE beacons, The data format of the beacon broadcast, the content of the broadcast, the broadcast interval and so on. You can follow their WiKi page for more details. Also you can refer our previous getting started article and video.
- We interfaced all these sensors to separate BLE beacon. Circuit diagrams are shared below in Schematics section. as well as on GitHub Repo.

- Then as per instructions given in WiKi pageof BLE Sensor Beacon, we configured BLE beacon data acquisition and broadcast parameters using NanoBeaconConfigTool. - We checked for all Sensor beacons broadcast. By using Mobile App:NanoBeacon BLE Scanner(IOS/Android)
- Please Refer our Article and Video for all above configuration and Getting started with this BLE Sensor Beacon module and details
How Project will work ?
- So, once configured, BLE beacons will start broadcasting the sensor data (Temperature, Humidity, Light, Soil Moisture and Smoke) to the outside world according to the configuration information.
- As shown in block diagram we have used DFRobot's FireBeetle 2 ESP32-E feature rich development board which has BLE reception capability. So we have programmed ESP32-E to receive the broadcasted data by beacons. It then receives data packet over BLE and process and decode it.
- Here ESP32-E also programmed to take control measures according Home environmental conditions (Edge level Automation - Air Conditioning, Plant Watering, Adjusting Lighting for save power etc.)
- In addition to this by leveraging one additional wireless capability/feature of ESP32-E (i.e WiFi), we will connect our Smart Home system to Internet via WiFi Router and subsequently to Blynk IoT cloud platform.
Hence, once our project get connected to Blynk IoT cloud platform, we can now monitor and control the whole system from anywhere in the world. Means we can remotely monitor the all environmental parameters (Like Temperature, Humidity, Air Quality, Lighting etc.) We can control the actuators we interfaced in our project. As well as we can also use cloud based automation and Alert systems, notifications, In-App pop-ups on Smartphone application.
Hardware
As we discussed in above block diagram. We will be using 4 BLE Sensor beacons. One ESP32-E Dev board, Nextion LCD Display to locally display the sensor readings and 4 Channels Relay board to connect appliances like (Fan, AC, Heater, cooler, Lights etc.)
You can find all circuit diagrams below in Schematics section. We have listed all hardware components above in 'Things' section.
DFRobot's FireBeetle 2 ESP32-Eis specially designed for IoT and feature rich development board -
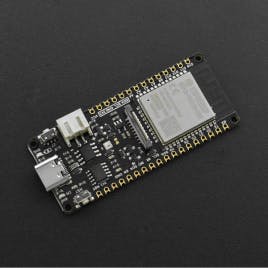
- It supports WiFi and Bluetooth dual-mode communication
- Main Frequency: 240MHz
- SRAM: 520KB
- Flash: 32Mbit
- Bluetooth Protocol: Bluetooth v4.2 BR/EDR and BLE standard compliant.
Software
We will require multiple software's like -
- Recommended Mobile App:NanoBeacon BLE Scanner(IOS/Android)
- Beacon Config Tool:NanoBeaconConfigTool
- Blynk Mobile Apps - IOS/Android
- Display Editor - Nextion Display GUI Editor
Library :
We have not used touch feature of Nextion display, so we have not used Nextion's specific library (You can use it if you want to design GUI for Home Automation). In our previous article we have given detailed information how you can interface it with FireBeetle 2 ESP32-E
- Blynk library for ESP32 - blynk-library
- For Arduino IDE we encountered strange (Ping Timeout error) during compilation. So we decided to go with PlatformIO.
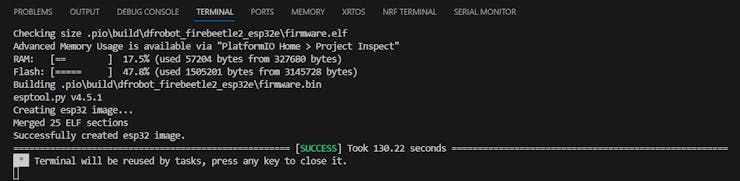
- Due to code and related libraries got very big, platformIO also thrown following error.
Error: The program size (1505201 bytes) is greater than maximum allowed (1310720 bytes)

This is because by default it is taking flash size of 4MB, but DFRobot's FireBeetle 2 ESP32-E has whopping 32MB's of flash.

So we changed platformio.ini [http://platformio.ini/] file of project as following
; PlatformIO Project Configuration File
;
;   Build options: build flags, source filter
;   Upload options: custom upload port, speed and extra flags
;   Library options: dependencies, extra library storages
;   Advanced options: extra scripting
;
; Please visit documentation for the other options and examples
; https://docs.platformio.org/page/projectconf.html
[env:dfrobot_firebeetle2_esp32e]
platform = espressif32
board = dfrobot_firebeetle2_esp32e
framework = arduino
lib_deps = blynkkk/Blynk@^1.3.2
board_build.partitions = huge_app.csv
by adding at the end
board_build.partitions = huge_app.csv
Now we can successfully compiled the code
Blynk IoT Cloud Setup
You will get plenty of tutorials on internet also on Hackster, about how to get started with Blynk IoT cloud. How to send sensor data to Dashboard and so on. So you can refer them to design your dashboard. I will just cover important points here.
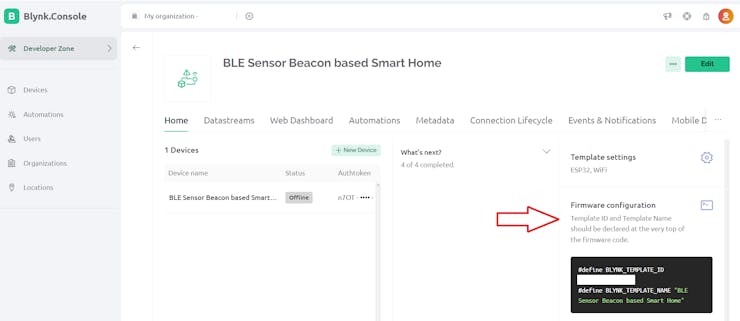
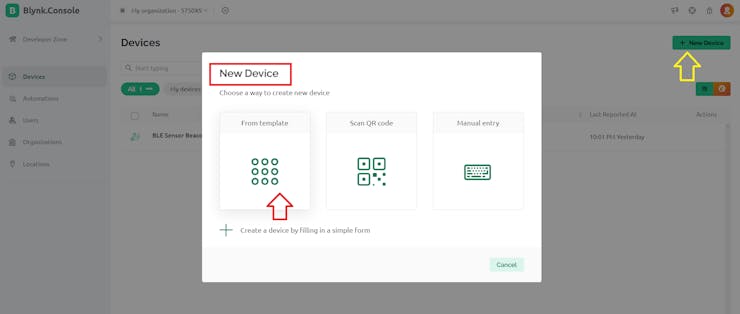
- After sign-up and Login. Go to Blynk Console. Then Create template
- Then go to created template. Here you will get template ID.- Template ID and Template Name should be declared at the very top of the firmware code.
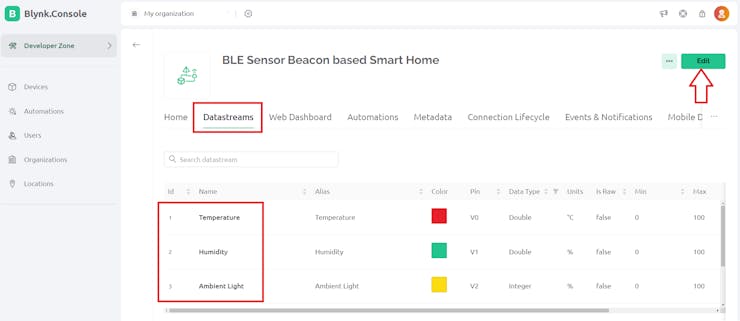
- Then create Datastreams. You can create 5 Datastreams in free plan.
- Create Datastreams for Environmental parameters which BLE Sensor beacon broadcasts. Temperature, Humidity, Light, Soil Moisture and Smoke
- Then design your Web Dashboard like following

- You also can create Automations for Datastreams
- Like following we have created, Notification and In-App Pop-up alert for Smoke Alert and Plant's Soil Moisture status

- Then add your ESP32-E device for your template
- Once you add the device, you will get Template ID, Template Name and Auth Token. (You will need these to add these in final code of the project)- Copy it and paste(/Declare) it at the very top of the firmware code.

- Similar to Web Dashboard on Blynk Mobile App design Dashboard for Mobile deices as following
_WH3SSJAklU.jpeg?auto=compress%2Cformat&w=740&h=555&fit=max)
- You can edit and set Automations on Blynk Mobile App
_4mQK9slrjc.jpeg?auto=compress%2Cformat&w=740&h=555&fit=max)
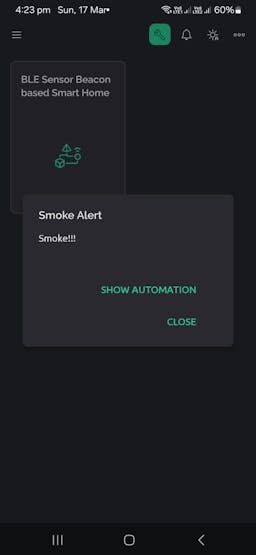
- You will get Pop-up notification in App as an alert, whenever the trigger happens - Just like given below Alert for Smoke getting detected in Home.
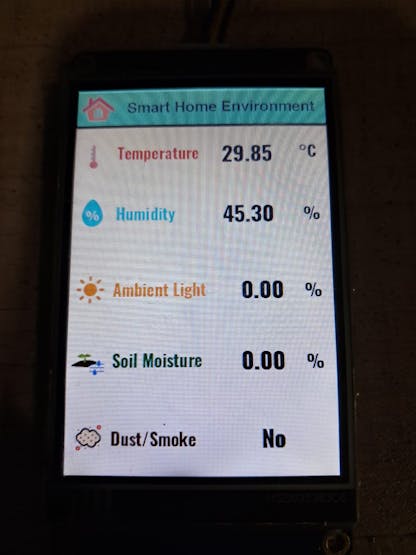
Nextion Display Screen
We used 3.2" Nextion display to show the reading of Home Environmental parameters locally. You can use Nextion Display GUI Editor to design the screen or GUI as per your choice. All design files are shared on project repository
Configure BLE Sensor Beacon
Take utmost care during configuration of BLE Sensor Beacons -

Fermion: BLE Sensor beacons can be set to three broadcast channels, check Enable to open the corresponding broadcast channel, the default is to open one, Edit to enter the configuration page.

In our previous article we have explained these steps in detail. You can also refer DFRobot WiKi

So for SHT40 I2C sensor it is recommended to directly use the sensor sample configuration fileprovided by DFRobot.
Once you configured all BLE Sensor Beacon's. Then interfaced with Sensors according to circuit diagrams given (below in Schematics Section) for data collection nodes. Power them using coin cell batteries.
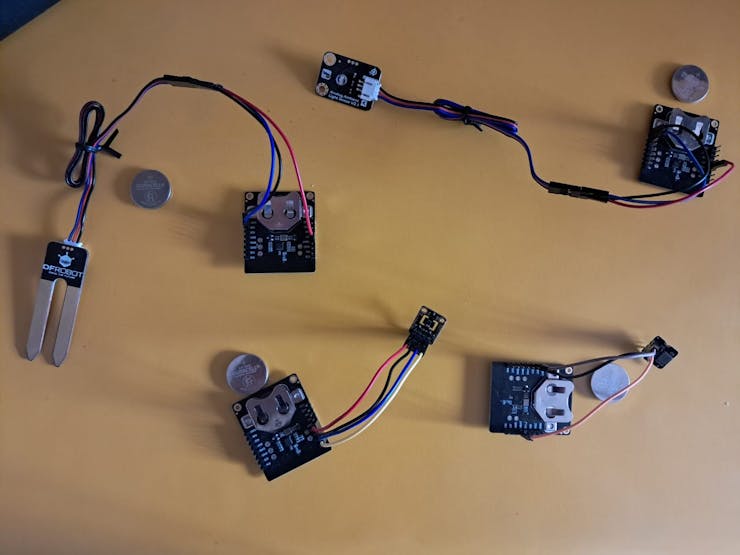
- Analog Sensors
- Ambient Light Sensor,Soil Moisture Sensor and Smoke Sensor
- I2C Sensor
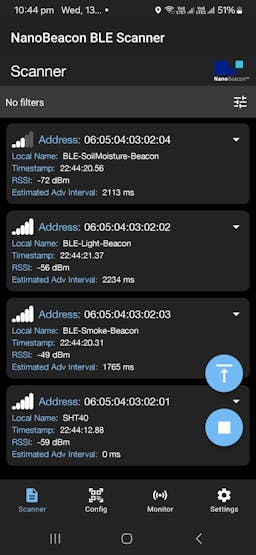
How to Check Broadcast of BLE Sensor Beacons ?
We will use NanoBeacon BLE Scanner (IOS/Android) App for scanning the nearby BLE beacons. You will get output as following

Demo
- Assemble all circuitry as shown in circuit diagram below.- Code is also shared on GitHub as well as below in Code section.
- Don't forget to replace the 'WiFi Credentials' and Blynk IoT cloud credentials according to your settings.
- Check out the demo to know, how the system is working in real time
Project Documentation
I will share all the documents, codes, schematics, etc. on GitHub.
Suggestions about this Project design, Circuits, code modifications, Optimization, Errors/Bugs findings and queries are most welcomed.
Suggestions about this Tutorial/Project design, Circuits, code modifications, Optimization, Errors/Bugs findings and queries are most welcomed.
Credits
Thank you Hackster, DFRobot and all other peoples, websites and entities who helped me (directly/indirectly) for creating this article.
Schematics
- Project - IoT based Smart Home using Fermion BLE Sensor Beacon
- How-To-Configure-Fermion-BLE-Sensor-Beacon
Code
- Project - IoT based Smart Home using Fermion BLE Sensor Beacon C/C++
- Project - IoT based Smart Home using Fermion BLE Sensor Beacon
This article was first published on Hackster, on March 19, 2024
CR: https://www.hackster.io/maheshyadav216/smart-home-using-dfrobot-fermion-ble-sensor-beacon-f6161b
Author: maheshyadav216


