
In this tutorial we will learn how to make a WiFi Scanner using M5Stack Core ESP32 and Visuino, to Scan & Display the WiFi networks around.
Watch the video!
- M5Stack Core ESP32 more info here
- Wifi Internet connection or a Wifi HotSpot
- Visuino program: Download Visuino


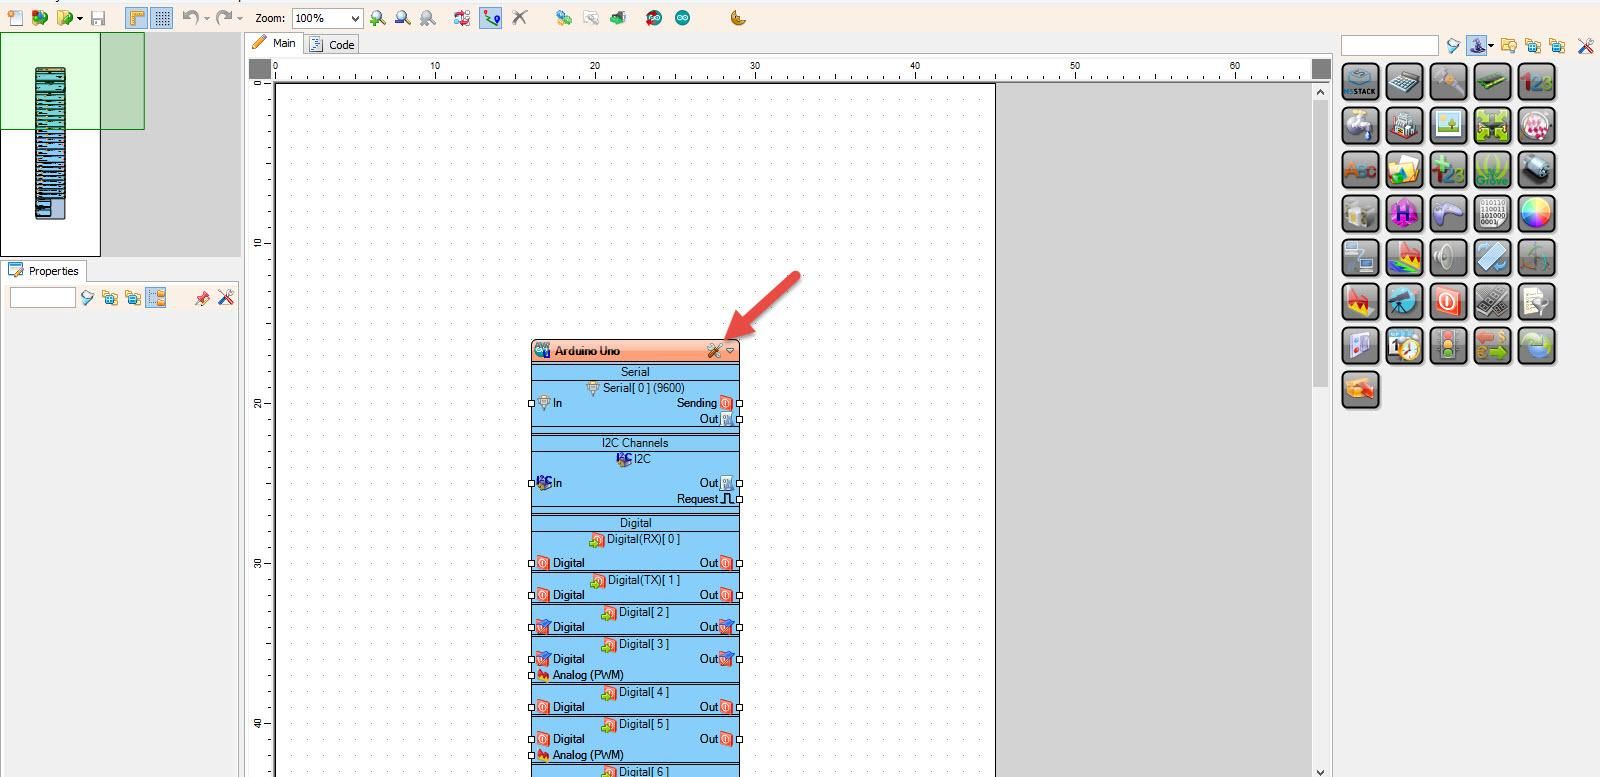
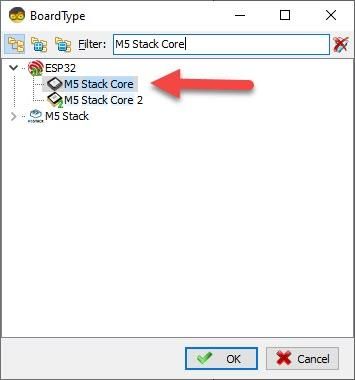
Start Visuino as shown in the first picture Click on the "Tools" button on the Arduino component (Picture 1) in Visuino When the dialog appears, select "M5 Stack Core" as shown on Picture 2
- Add "Digital Multi Source" component
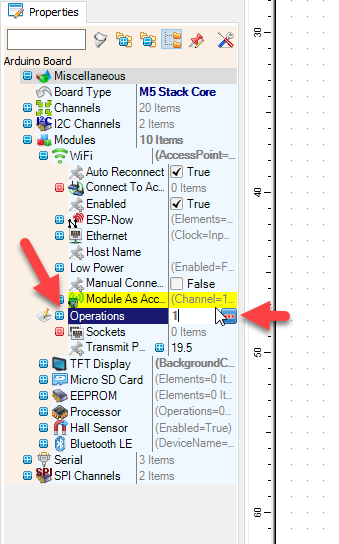
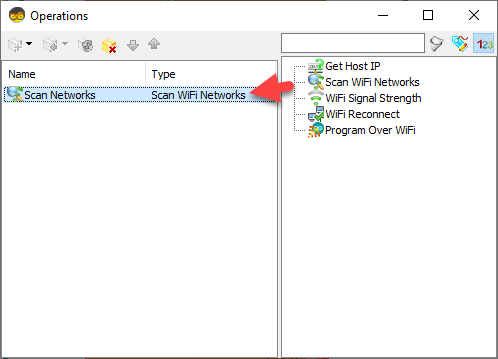
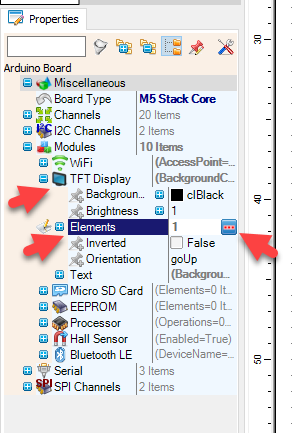
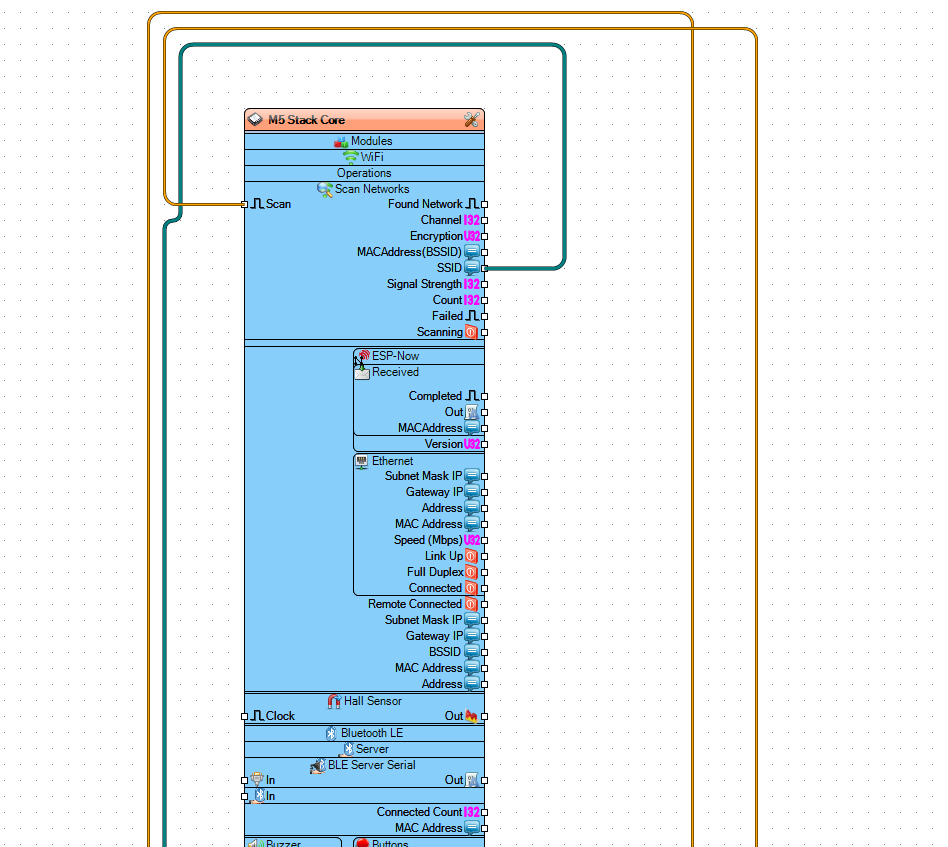
- Select "M5 Stack Core" and in the properties window expand "Modules" > "WiFi" > "Operations" and click on the 3 dots button.
- In "Operations" window drag "Scan WiFi Networks" to the left side
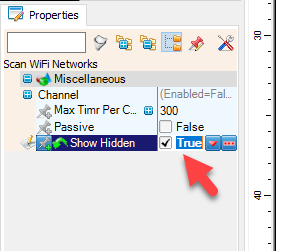
- In the properties window set "Show Hidden" to True, this way we will also be able to se hidden networks
- Close the "Operations" window
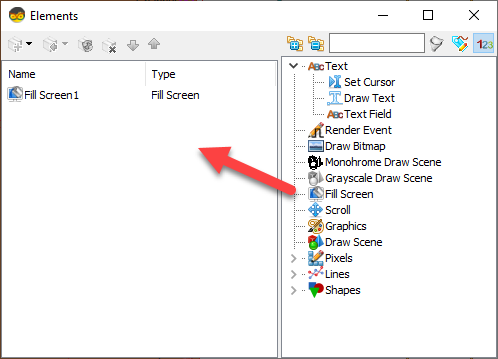
- Select "M5 Stack Core" and in the properties window expand "Modules" > "TFT Display" > "Elements" and click on the 3 dots button.
- In the "Elements" window drag "Fill Screen" to the left side and close the window

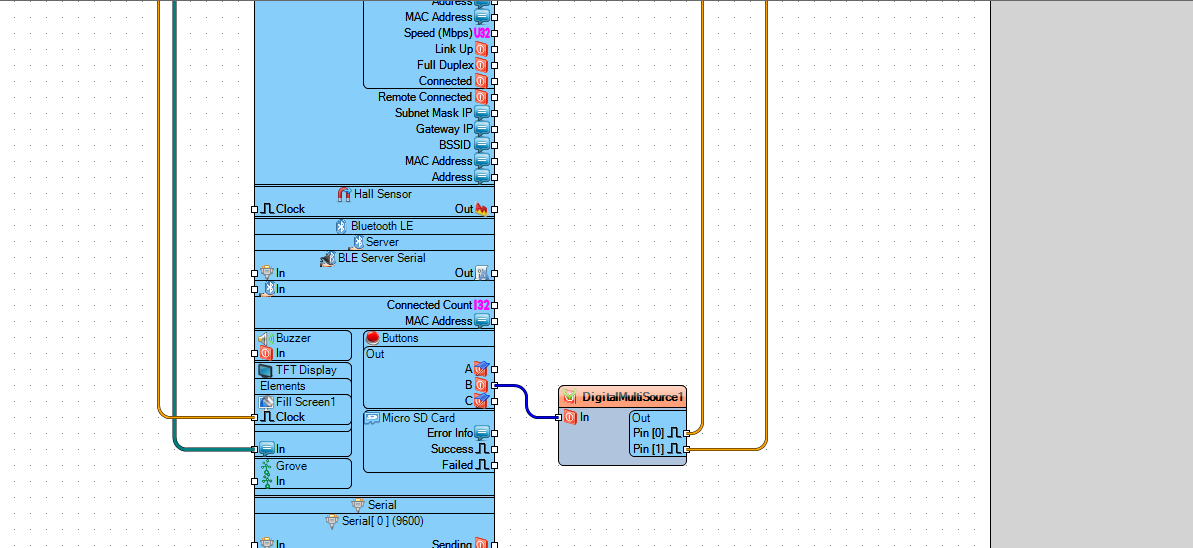
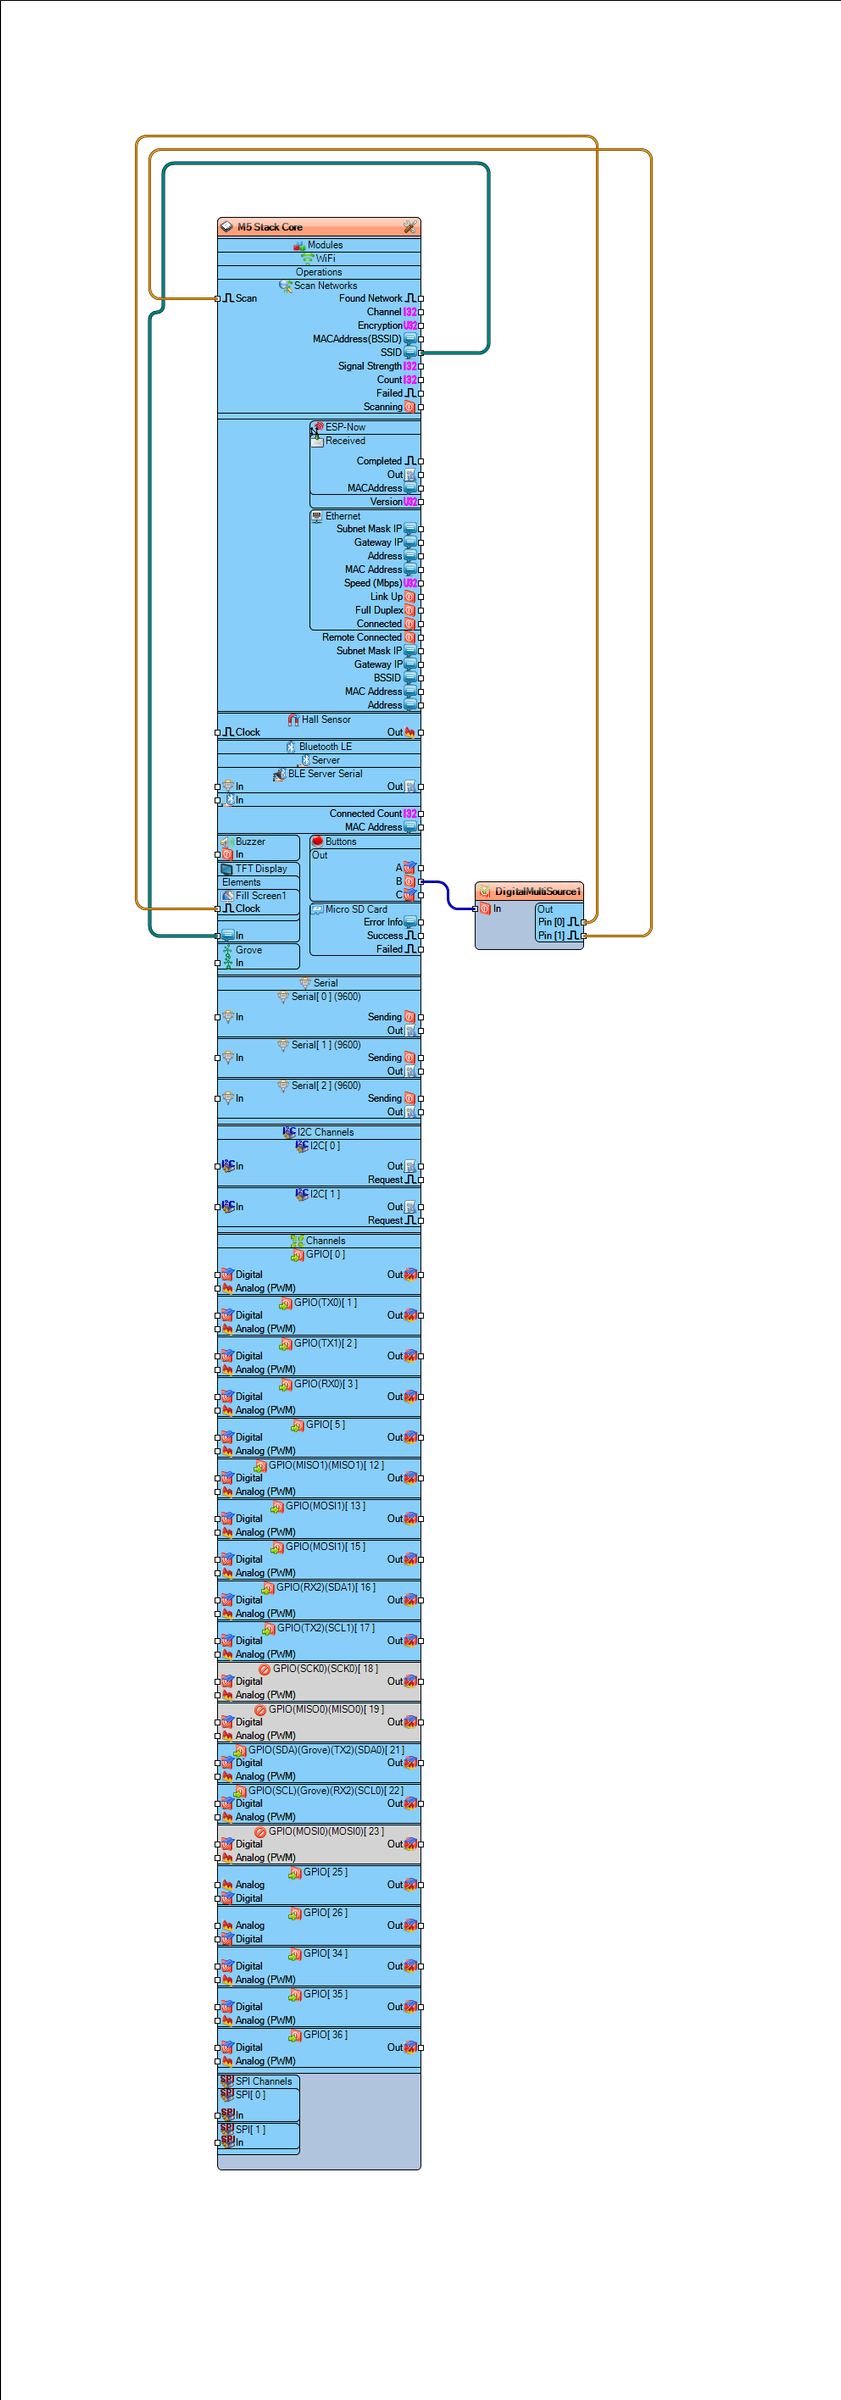
- Connect "M5 Stack Core" pin Out (B) to "DigitalMultiSource1" pin [In]
- Connect "DigitalMultiSource1" pin [0] to "M5 Stack Core" > "Fill Screen1" pin [Clock]"
- Connect "DigitalMultiSource1" pin [1] to "M5 Stack Core" > "Scan Networks" pin [Scan]"
- Connect "M5 Stack Core" > pin [SSID] to "M5 Stack Core" >"TFT Display" pin "In"
In Visuino, at the bottom click on the "Build" Tab, make sure the correct port is selected, then click on the "Compile/Build and Upload" button.

If you power the M5 Stack Core module and click on the B button, the module will start scanning for WiFi networks. After the scanning is finished you will be able to se on the display the names of the WiFi networks around.
Congratulations! You have completed your project with Visuino. Also attached is the Visuino project, that I created for this Instructable, you can download it and open it in Visuino: https://www.visuino.eu


