

Air pollution is a growing concern worldwide, and fine particulate matter (PM2.5) is one of the most dangerous pollutants due to its ability to penetrate deep into the lungs and enter the bloodstream. Whether you're concerned about indoor air quality, wildfire smoke, or urban pollution, having real-time data empowers you to take action.
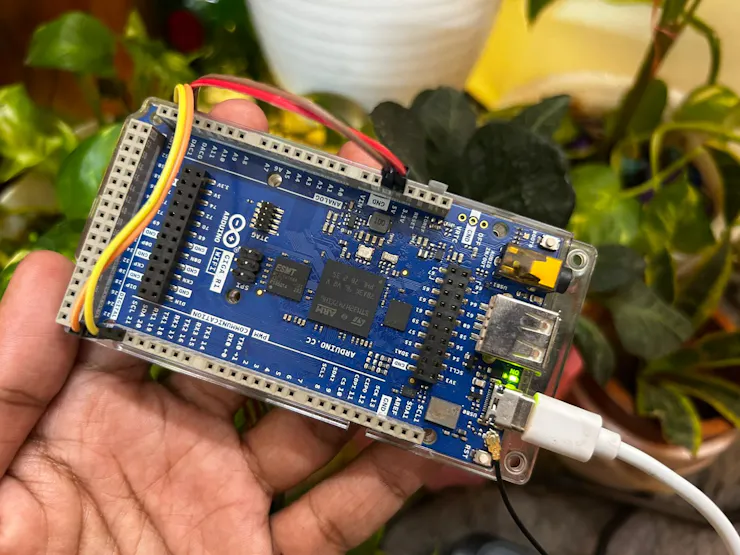
In this article, we'll build a professional-grade Air Quality Monitor by integrating a DFRobot PM2.5 Sensor (SEN0460) with the Arduino GIGA R1 WiFi — one of the most powerful Arduino boards ever released. We'll cover everything from wiring to code, calibration, data logging, and even an optional IoT dashboard.
Why This Combination?
The Arduino GIGA R1 WiFi is a development powerhouse built around the STM32H747XI dual-core microcontroller (480 MHz Cortex‑M7 + 240 MHz Cortex‑M4), with 2MB of flash, 1MB of RAM, and additional 8MB SDRAM. With 76 GPIO pins, 3 I2C ports, 4 UARTs, and 2 SPI ports, it can effortlessly handle sensors, displays, SD cards, and Wi‑Fi/Bluetooth connectivity all at once.
The DFRobot PM2.5 Sensor (SEN0460) uses laser‑scattering technology to continuously measure airborne particles from 0.3 µm to 10 µm and outputs concentrations for PM1.0, PM2.5, and PM10 via the simple Gravity I2C interface. It operates from 3.3 V to 5 V, draws only up to 100 mA, and has a measuring range of 0–500 µg/m³ (up to 1000 µg/m³ maximum) with 1 µg/m³ resolution.

Together, they form the foundation for a laboratory‑grade air monitoring station that can be built in an afternoon.
Get PCBs for Your Projects Manufactured

You must check out PCBWAY for ordering PCBs online for cheap!
You get 10 good-quality PCBs manufactured and shipped to your doorstep for cheap. You will also get a discount on shipping on your first order. Upload your Gerber files onto PCBWAY to get them manufactured with good quality and quick turnaround time. PCBWay now could provide a complete product solution, from design to enclosure production. Check out their online Gerber viewer function. With reward points, you can get free stuff from their gift shop. Also, check out this useful blog on PCBWay Plugin for KiCad from here. Using this plugin, you can directly order PCBs in just one click after completing your design in KiCad.
Step 1 — Setting Up the Arduino GIGA R1
Before connecting the sensor, ensure your GIGA R1 is ready:
- Install Arduino IDE — Download and install the latest version from arduino.cc.
- Add GIGA R1 board support — Open Tools → Board → Boards Manager, search for "GIGA", and install the Arduino Mbed OS GIGA Board Package.
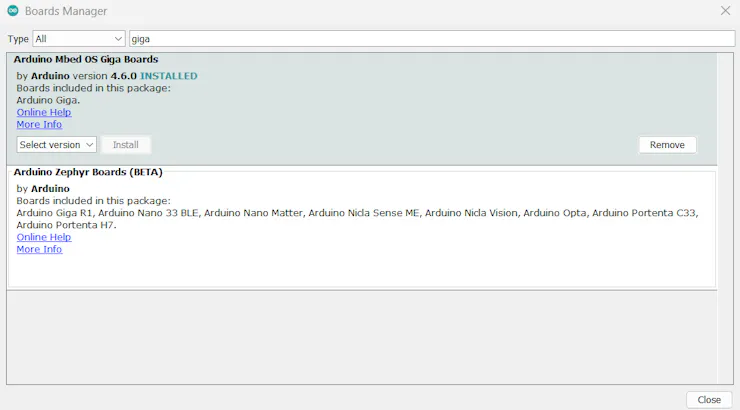
- Select the board — Go to Tools → Board → Arduino Mbed OS GIGA Boards → Arduino GIGA R1 WiFi.
- Select the port — Connect the board via USB‑C and choose the correct COM port (Windows) or /dev/cu.* (macOS/Linux).
⚠️ Important: The GIGA R1 operates at 3.3 V logic. Never apply 5 V directly to any GPIO pin. Fortunately, the DFRobot PM2.5 sensor's I2C logic level is compatible — it accepts 3.3 V on SDA/SCL even when powered at 5 V.
Step 2 — Wiring the DFRobot PM2.5 Sensor to GIGA R1

Thanks to the Gravity interface and the GIGA’s three I2C ports, wiring is simple and plug‑and‑play.

Which I2C Port to Use?
The GIGA R1 provides three I2C ports:
- I2C1 (Wire) — Default I2C, pins 20 (SDA) and 21 (SCL).
- I2C2 (Wire1) — Pins 26 (SDA) and 27 (SCL).
- I2C3 (Wire2) — Pins 82 (SDA) and 83 (SCL).

For simplicity, we will use I2C1 (pins 20 & 21) in this tutorial.
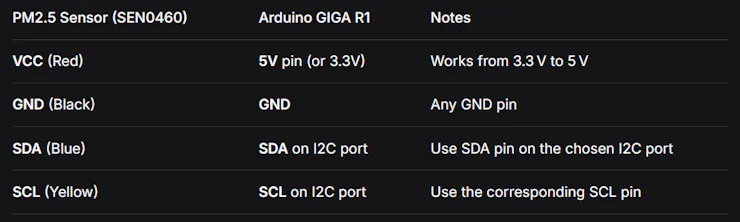
Wiring Diagram
DFRobot PM2.5 (SEN0460) Arduino GIGA R1
┌─────────┐ ┌─────────┐
│ VCC ├──────────────────────│ 5V │
│ GND ├──────────────────────│ GND │
│ SDA ├──────────────────────│ Pin 20 │ (SDA)
│ SCL ├──────────────────────│ Pin 21 │ (SCL)
└─────────┘ └─────────┘
Once connected, double‑check the I2C address of the sensor. The SEN0460 uses default I2C address 0x19. You can verify it using an I2C scanner sketch.
Step 3 — Installing the DFRobot Library
The DFRobot team provides an official library that handles all low‑level communication and delivers clean, ready‑to‑use sensor data.
- In Arduino IDE, go to Sketch → Include Library → Manage Libraries.
- Search for "DFRobot AirQualitySensor" .
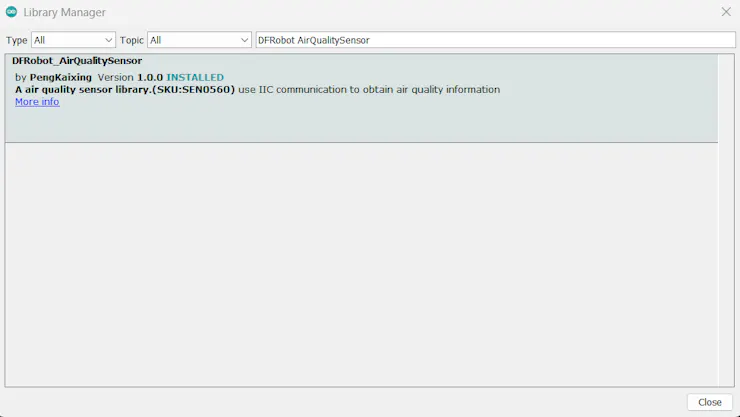
- Install the library by DFRobot.
- Alternatively, download from the official GitHub repository.

- After installation, you can browse examples under File → Examples → DFRobot_AirQualitySensor.

Step 4 — Writing the Code
Now we’ll write a sketch that reads PM1.0, PM2.5, and PM10 concentrations every second and outputs them to the Serial Monitor.
#include "DFRobot_AirQualitySensor.h"

#define I2C_ADDRESS 0x19

// Create sensor object on the default I2C bus (Wire)
DFRobot_AirQualitySensor particle(&Wire, I2C_ADDRESS);

void setup() {
  Serial.begin(115200);
  while (!Serial); // Wait for Serial Monitor to open (optional)

  Serial.println(F("Initializing PM2.5 Sensor..."));

  // Initialize the sensor
  while (!particle.begin()) {
    Serial.println(F("Sensor not detected! Check wiring."));
    delay(1000);
  }
  Serial.println(F("Sensor initialized successfully!"));

  // Read and display firmware version
  uint8_t version = particle.gainVersion();
  Serial.print(F("Firmware version: "));
  Serial.println(version);
  delay(1000);
}

void loop() {
  // Read standard particle concentrations (µg/m³)
  uint16_t pm1_0  = particle.gainParticleConcentration_ugm3(PARTICLE_PM1_0_STANDARD);
  uint16_t pm2_5  = particle.gainParticleConcentration_ugm3(PARTICLE_PM2_5_STANDARD);
  uint16_t pm10   = particle.gainParticleConcentration_ugm3(PARTICLE_PM10_STANDARD);

  // (Optional) Read atmospheric particle concentrations
  // uint16_t pm1_0_atm  = particle.gainParticleConcentration_ugm3(PARTICLE_PM1_0_ATMOSPHERE);
  // uint16_t pm2_5_atm  = particle.gainParticleConcentration_ugm3(PARTICLE_PM2_5_ATMOSPHERE);
  // uint16_t pm10_atm   = particle.gainParticleConcentration_ugm3(PARTICLE_PM10_ATMOSPHERE);

  // Print results to Serial Monitor
  Serial.println(F("--- Air Quality Readings ---"));
  Serial.print(F("PM1.0  concentration: "));
  Serial.print(pm1_0);
  Serial.println(F(" µg/m³"));

  Serial.print(F("PM2.5  concentration: "));
  Serial.print(pm2_5);
  Serial.println(F(" µg/m³"));

  Serial.print(F("PM10   concentration: "));
  Serial.print(pm10);
  Serial.println(F(" µg/m³"));

  // Simple air quality index assessment based on PM2.5
  Serial.print(F("Air Quality: "));
  if (pm2_5 <= 35) {
    Serial.println(F("Good"));
  } else if (pm2_5 <= 75) {
    Serial.println(F("Moderate"));
  } else {
    Serial.println(F("Unhealthy"));
  }

  Serial.println();
  delay(1000);  // Update every second
}
Code Walkthrough
- Library inclusion — DFRobot_AirQualitySensor.h provides all sensor functions.
- I2C address definition — The sensor uses address 0x19 (default).
- begin() — Initializes I2C and verifies communication. A while() loop ensures we retry until the sensor is found.
- gainParticleConcentration_ugm3() — Retrieves concentration in µg/m³. Use PARTICLE_PM2_5_STANDARD, PARTICLE_PM1_0_STANDARD, or PARTICLE_PM10_STANDARD to specify which particle size you want.
- Atmospheric vs. Standard — The sensor can output both "Standard" (lab‑calibrated) and "Atmospheric" (environment‑adjusted) values. The standard values are recommended for general use.
- Air quality assessment — A simple if/else block categorizes PM2.5 readings based on common health guidelines
Upload and Test
- Connect the GIGA R1 via USB‑C.
- Select the correct port and board (Arduino GIGA R1 WiFi).

- Click Upload

- Open the Serial Monitor (Tools → Serial Monitor) at 115200 baud.
- You should see real‑time PM2.5, PM1.0, and PM10 readings.

Conclusion

With just a few connections and some straightforward code, you’ve built a professional‑grade air quality monitor that can measure the invisible particles affecting your health. The Arduino GIGA R1 provides more than enough horsepower to turn this sensor into a full‑featured environmental station — with a local touchscreen, cloud data logging, and even predictive alerts. Breathe easier knowing exactly what’s in the air around you.


