
Bring the DF Robot Devastator to life with Windows!

Things used in this project
Hardware components
Hand tools and fabrication machines
Conical metal grinding tip
Needle Nose Pliers
Phillips Head Screwdriver
Windows Device
Story
Rise of the robots!
For our first official robot kit, we partnered with DFRobot. We saw the RomeoBLE controller and Devastator platform live at Maker Faire, San Mateo, and we couldn't wait to control it using Windows.
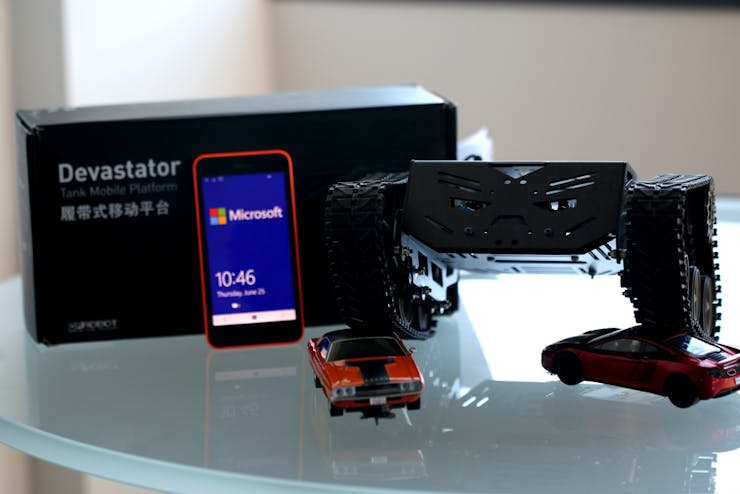
Devastated cars not included...
In DFRobot's own words:
Romeo is an all-in-one Arduino-compatible microcontroller especially designed for robotics applications. The integrated 2 channel motor driver and built-in Bluetooth Low-Energy radio module make this a single-board solution for building your own Arduino-powered robot.
The Devastator uses high strength aluminum alloy which makes it extremely solid and durable. The high-speed motors and premium tracks also allow it to move swiftly everywhere. What's more, it benefits from a high performance suspension and enjoys an outstanding mobility across even the toughest terrains.
This combination makes for an extremely reliable and durable robot that is perfect for mounting additional sensors and learning robotics. Once we put this robot together, we could barely stop playing with it long enough to write this post!
Hardware
Assembly was a breeze! It comes with very clearly marked parts and illustrations to show you how each and every piece goes together. There are even extra nuts, bolts and screws; just in case.
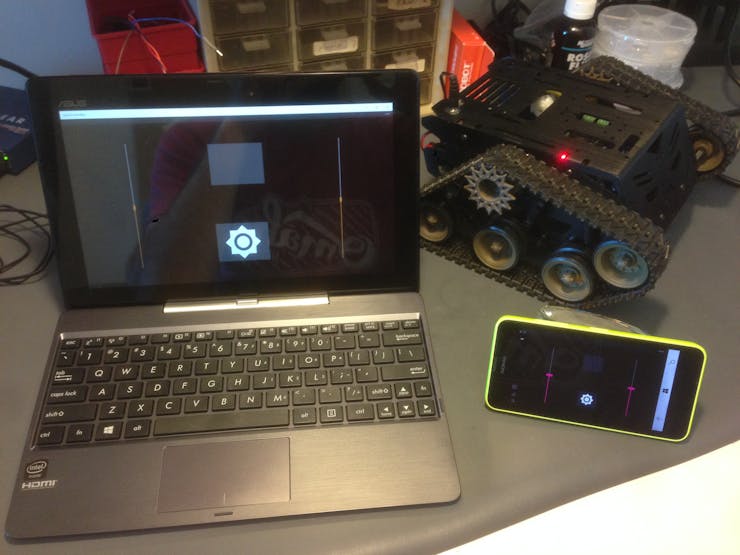
A Windows device is necessary to deploy the controller application. A Windows Phone is pictured above, but you can simply use the Bluetooth LE enabled Windows machine you used to download and compile the code.
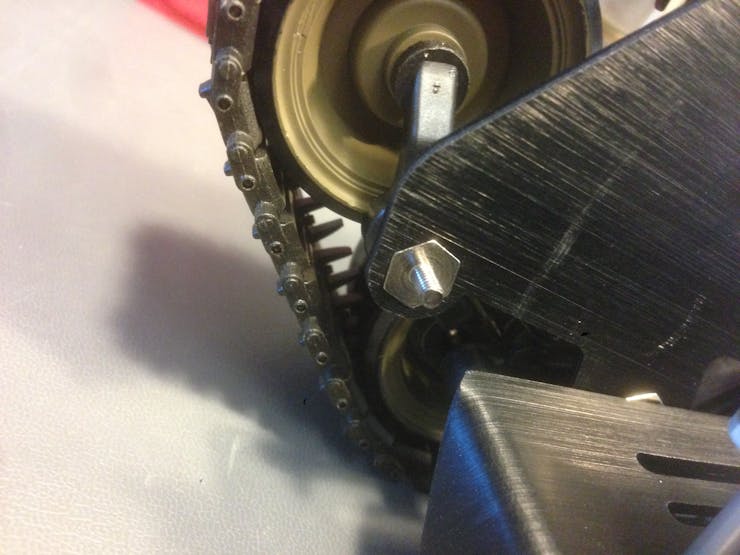


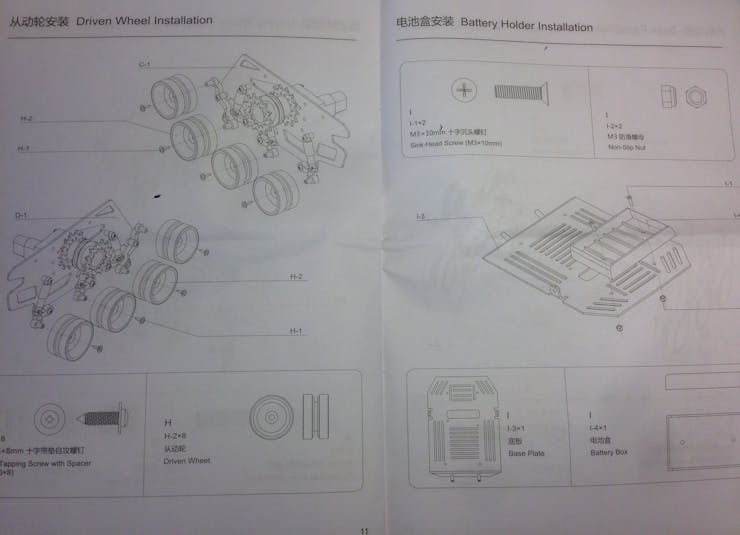
Before you screw in the bolt, sand (or grind) the hole to remove machining debris.
Gotchas:
Although the construction is relatively simple, there were a couple of gotchas that you should watch out for.
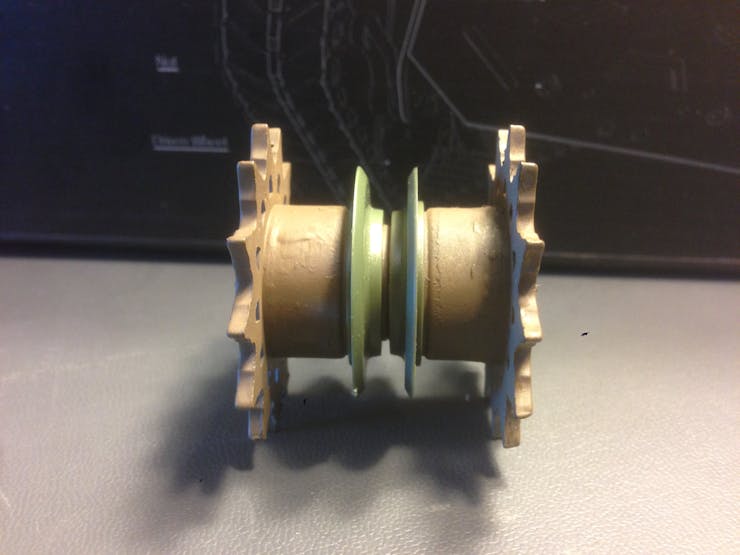
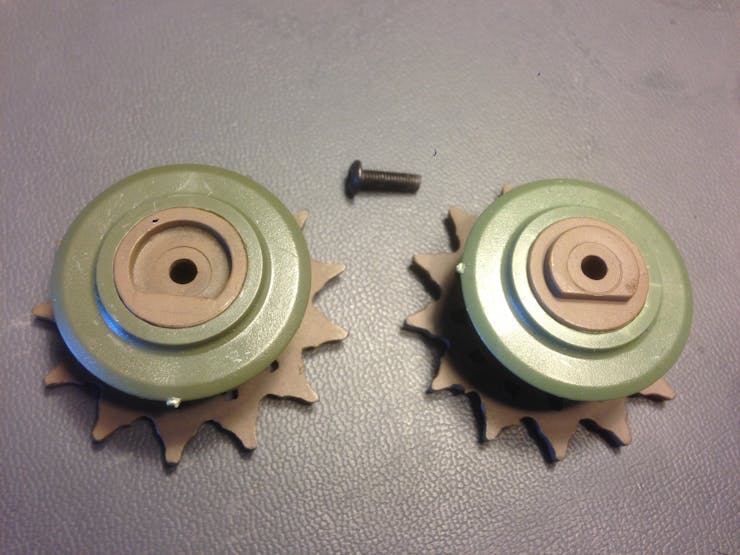
The machining on the side panels (parts C-1 and D-1) made it nearly impossible to screw in bolts; I had one shear off. The drive sprockets (part G-2) needed to be assembled so the track guide is as wide as possible.
The wrench has two sides, but the small side only fits the larger nuts. So another tool will be necessary for the smaller nuts.
The prefabricated holes place the BLE antenna of the Romeo between the electric motors.
You can easily fix the panels by taking a conical metal grinding tip and cleaning up the interior side of the hole. The work becomes obvious when you attempt to finger tighten a bolt through the hole.
In my box, one of the drive sprockets came preassembled (incorrectly) and the other was split in half. Not to worry, each sprocket consists of two fitted halves, pressed together and held by groves. You can simply pull the halves apart and flip the groove skirts, so the groove will be as wide as possible.
I mounted the board crooked, using the slots instead of using the pre-cut holes. This keeps the BLE antenna from being centered between the motors, and therefore minimizes the interference from the magnetic field generated by the electric motors.
Software
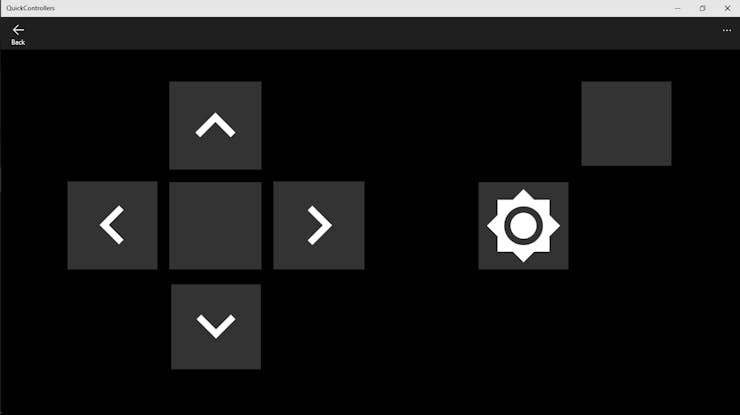
The controller software is written as a Universal Windows application, using the new Windows Remote Arduino library at its core. This allows you to use either your Windows 10 Phone or your Windows 10 desktop as the controller.
Windows Preparation:


![Make sure your Windows device[s] have](https://hackster.imgix.net/uploads/image/file/54001/ForDevelopers.png?auto=compress%2Cformat&w=740&h=555&fit=max)
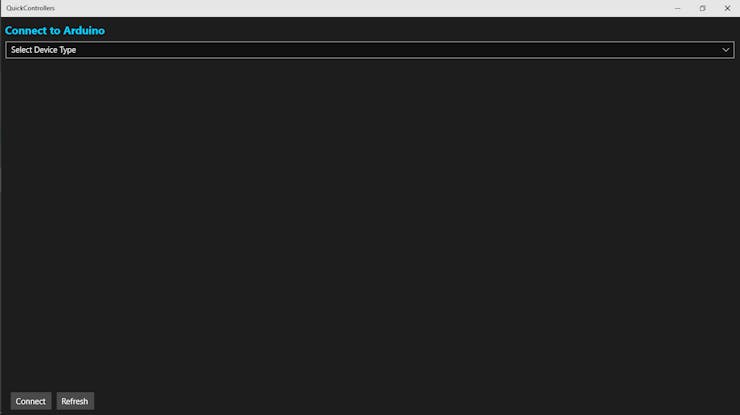
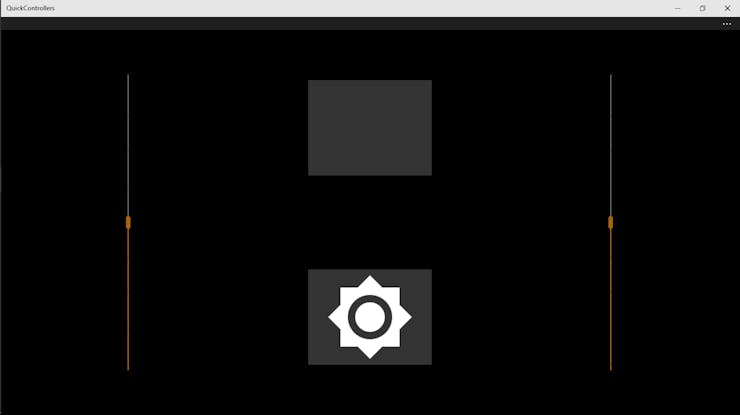
Choose your device type
To ensure you are able to build and install applications, confirm developer mode is enabled on your Windows device[s]. On each device, go to "Settings >> Update & security >> For developers", then enable "Developer mode".
Once your device[s] are in developer mode, you will need to:
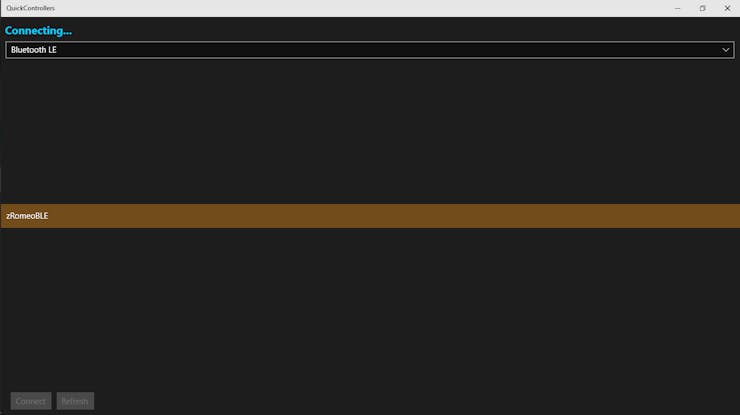
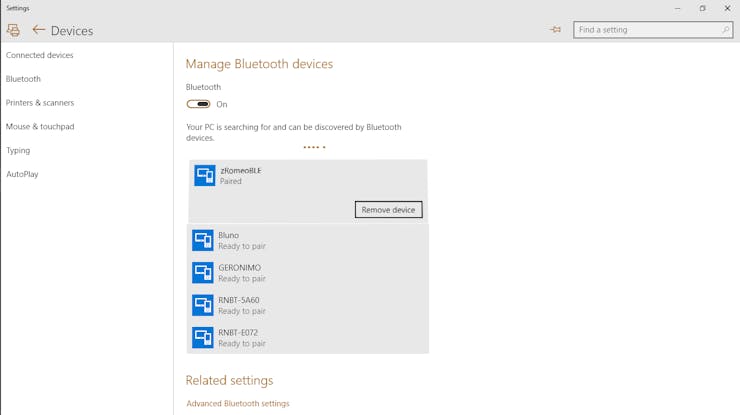
Pair the your BLE enabled, Windows desktop, laptop, tablet or phone with the Romeo board (the pin is `0000`)
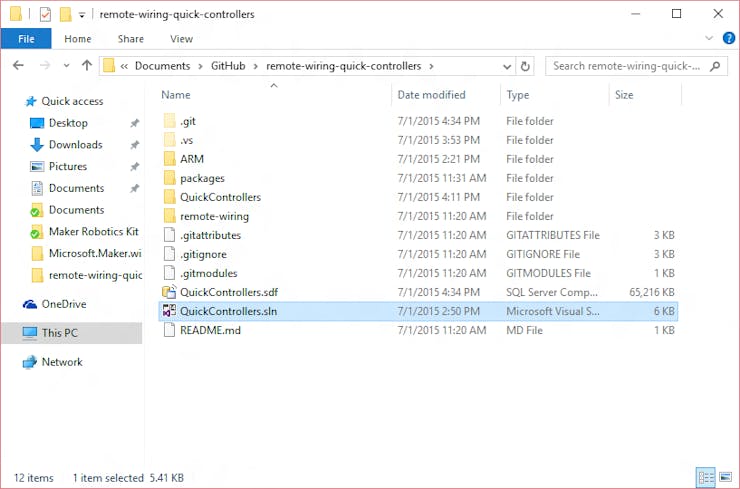
Clone the remote-wiring-quick-controllers repository (linked below)
Navigate to the solution folder and open `QuickControllers.sln`
Configure the deployment settings (i.e. "Release", "ARM" and "Device" for the Windows Phone)
Press the green, play button to deploy the application to your Windows device
RomeoBLE Preparation:
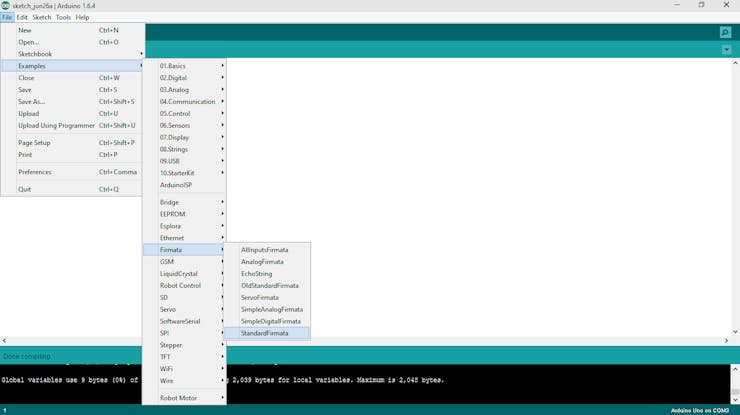
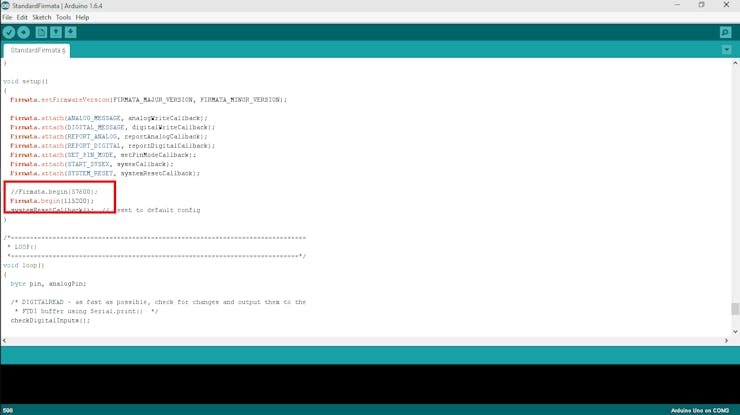
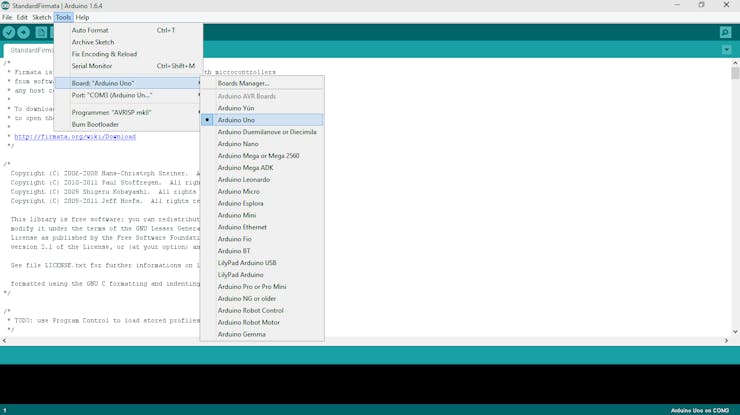
Select `StandardFirmata` from the list of example sketches.
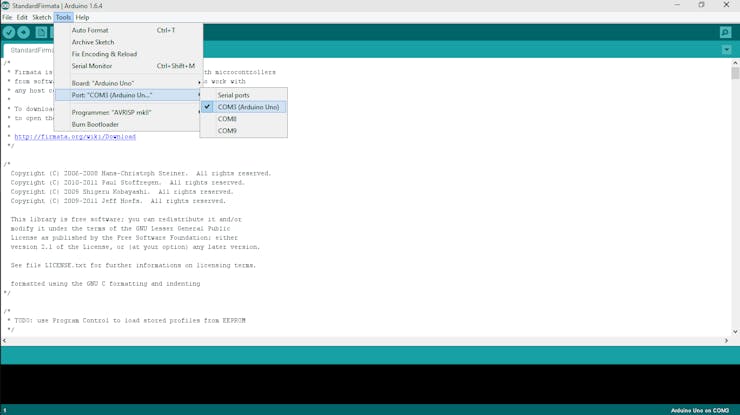
The RomeoBLE board is an Arduino Uno clone (and reports itself as such to the operating system), which allows you to use the Arduino IDE to deploy Firmata to the board. Navigate to "File >> Examples >> Firmata" and select "StandardFirmata". Then under "Tools >> Board" choose "Arduino Uno", and for "Tools >> Port" choose "Arduino Uno" from your list of COM ports.
Software challenges:
To create the RemoteWiringQuickControllers application, we originally used the RemoteDevice layer (Arduino wiring syntax) of the RemoteWiring library to drive the RomeoBLE's motor controller. However we were noticing some latency issues due to the nature of Bluetooth LE. Ultimately, we ended up using a hybrid approach that access the UwpFirmata layer directly. The hybrid approach allows us to batch instructions for more efficient radio usage, which results in much more optimal performance (code segment provided below).
Additional Information
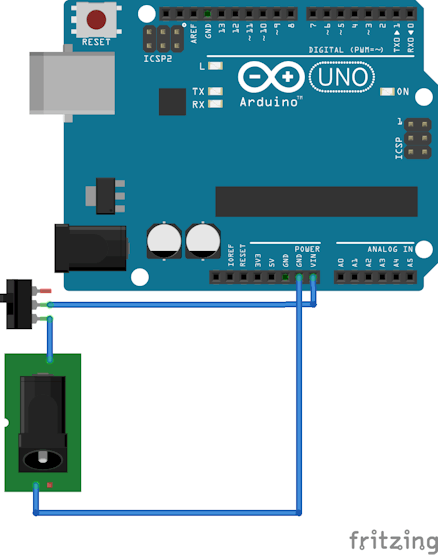
Actual wiring that will need to be done to supply power
Project Notes:
There are no wiring directions included in the kit, however they do have illustrations and instructions located on DFRobot.com (shown above).
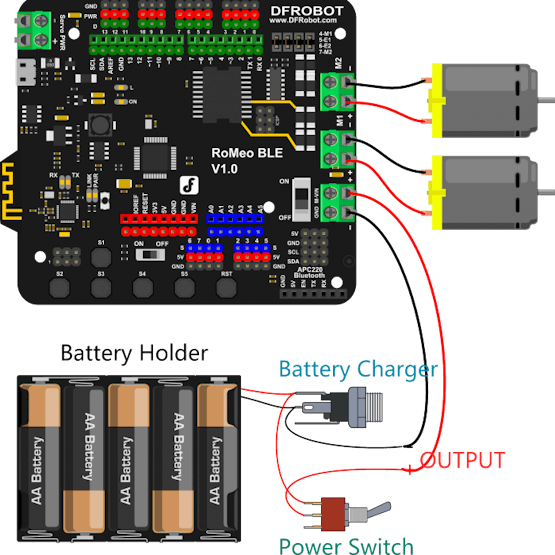
The Devastator + RomeoBLE combo is battery hungry! When the battery level drops, the behavior becomes erratic and the RomeoBLE browns out and reboots, so be sure to keep fresh batteries for the best experience.
DF Robot BLE Details:
Service
UUID: 0000dfb0-0000-1000-8000-00805f9b34fb
Characteristics
Name: Serial Port UUID: 0000dfb1-0000-1000-8000-00805f9b34fb Name: CommandUUID: 0000dfb2-0000-1000-8000-00805f9b34fb
Bluetooth LE:
Code
RemoteWiring library
C#
Snippet of hybrid RemoteDevice layer (Arduino wiring syntax) used in conjunction with the UwpFirmata layer of RemoteWiring to drive the RomeoBLE motor controller board.
        public RobotControl()
        {
            // setup
            App.arduino.pinMode(E1, PinMode.PWM);
            App.arduino.pinMode(E2, PinMode.PWM);
            App.arduino.pinMode(M1, PinMode.OUTPUT);
            App.arduino.pinMode(M2, PinMode.OUTPUT);
        }

        public void forward(byte l, byte r)
        {
            App.firmata.@lock();
            App.firmata.write(0x90);
            App.firmata.write(0x00);
            App.firmata.write(0x00);

            App.firmata.write(0xE5);
            App.firmata.sendValueAsTwo7bitBytes(r);
            App.firmata.write(0xE6);
            App.firmata.sendValueAsTwo7bitBytes(l);

            App.firmata.flush();
            App.firmata.@unlock();
        }
The article was first published in hackster, July 11, 2015
cr: https://www.hackster.io/windowsiot/windows-10-dfrobot-kit-1acdaf
author: Team Windows IoT: Zachary J. Fields, Windows IoT, Conner Brooks, tom kennard, DFRobot


