
Keep your plants watered even when you forget or go on vacation with this automatic watering system.
Things used in this project
Hardware components
Story
Have trouble remembering to water those tomatoes? Want to go on vacation but fear the worst for your container garden if you do? Fear no more with an automatic plant watering system! With a little bit of preparation and Arduino on your side, you can make a system that will make sure your plants are watered right, giving you freedom to tend to whatever you need to while still producing those healthy tomatoes.
Step 1: Plan it out!

To have a successful garden, planning is essential. We drafted some ideas out, decided on what we needed, and put the physical build together so that we could make sure that the pump was strong enough to deliver water to 12 different exit points we had planned. You might want a different set up, so make sure you give it some forethought before going out and buying a bunch of stuff.
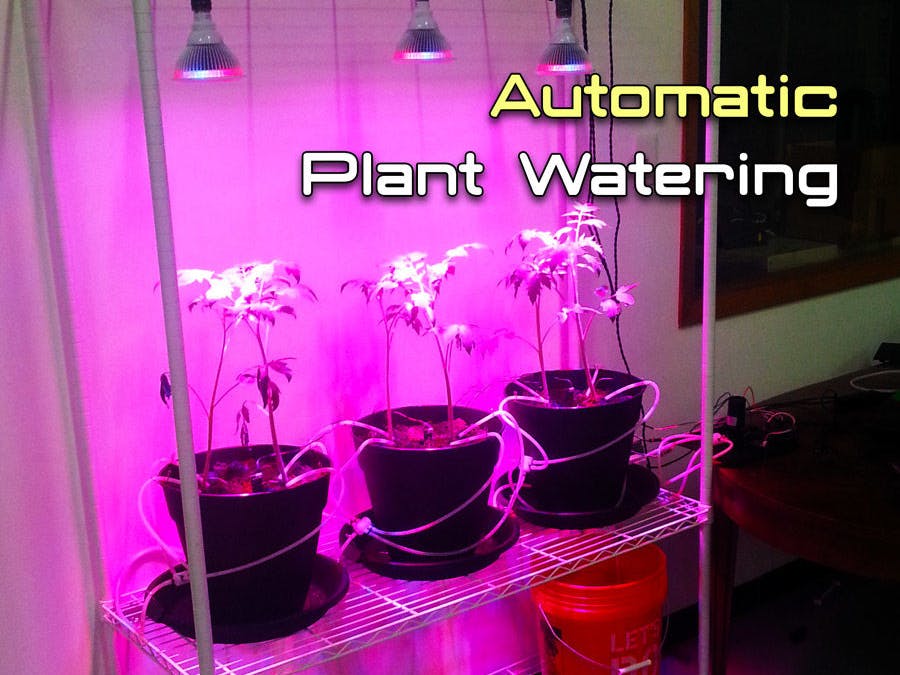
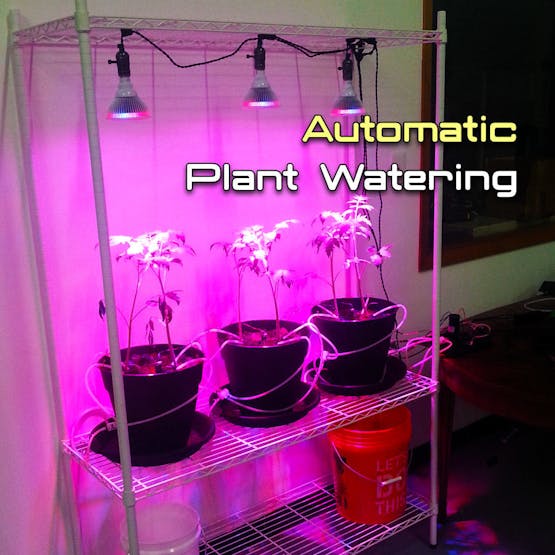
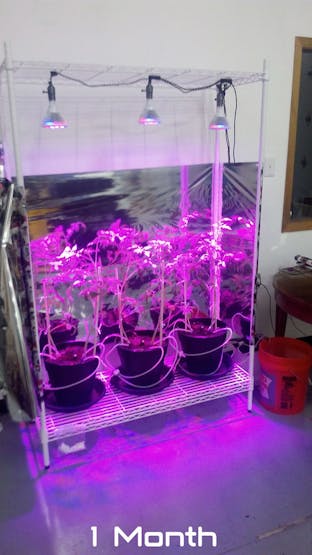
Step 2: Physical Build and Planting
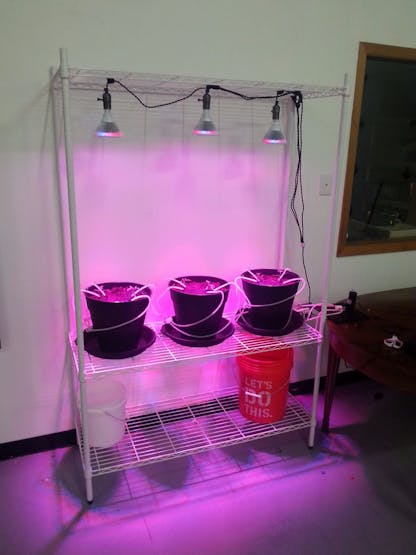
Everything is going on the shelf. If you're using a wire frame shelf, it's easy to set the heights optimally. Put the bottom shelf as low as possible for your bucket, set up the second shelf as low as possible while still leaving you room to access the bucket, so that the plants have as much room to grow as they can. Set the third shelf as high up as you can, giving you room to adjust your lights for optimal plant growth.
Fill the bucket with water, place on the bottom shelf.
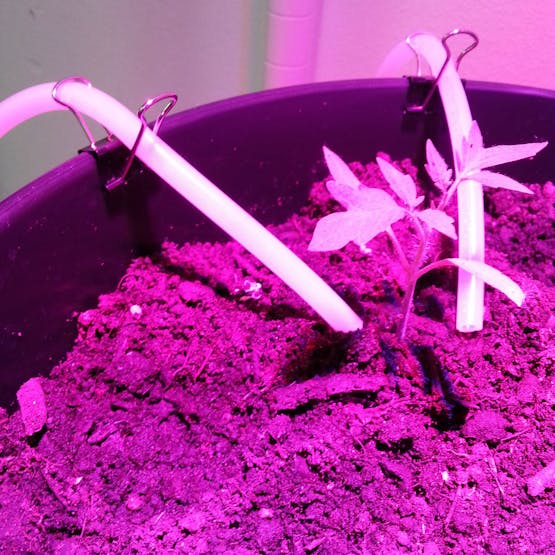
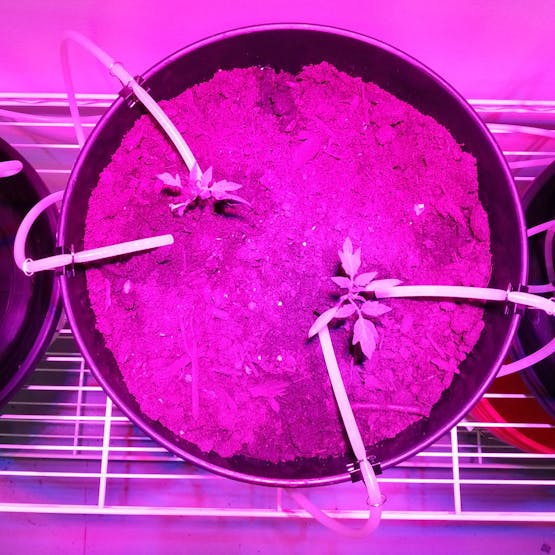
Put your dirt in the planters, and introduce your plants to the new dirt.
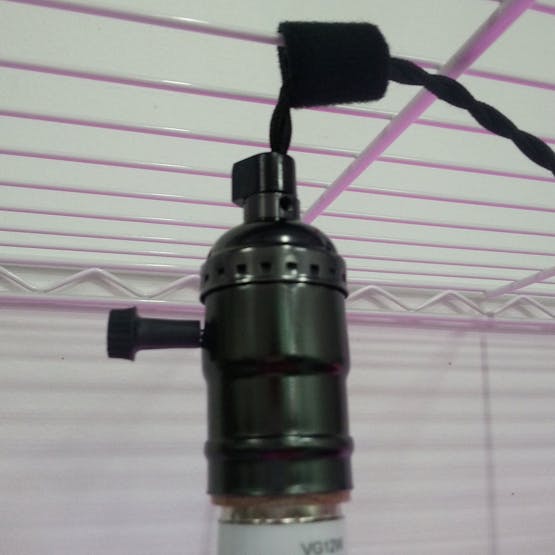
Hang your lights however works best for the type of light. We just used some Velcro straps to attach the cables to the wire frame shelf, but there are a ton of different styles of grow lights and fixtures, and there are a million ways to do it. Refer to the manual that came with your grow light for optimal positioning.
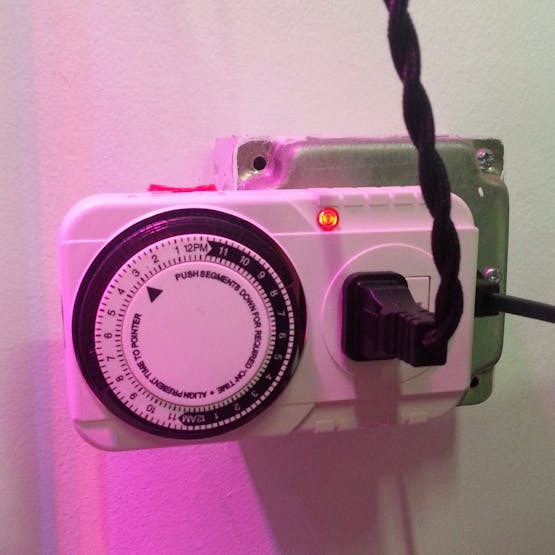
Plug your lights into the timer, and set your timer to a provide a reasonable amount of light for the plant. Ours are set to 12 hours on, 12 hours off, as that was suggested for the type of light and the tomatoes we're growing.
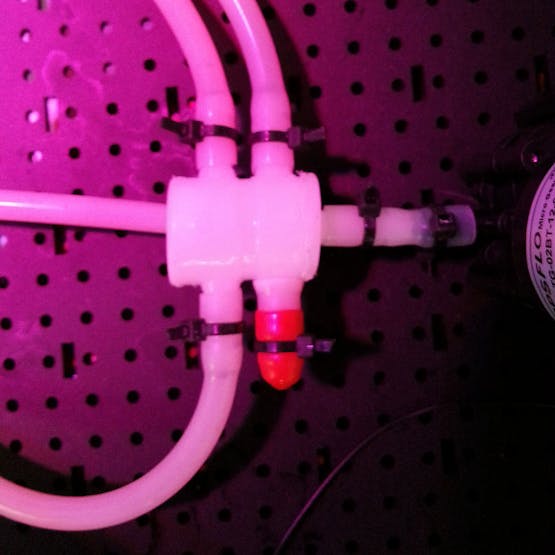
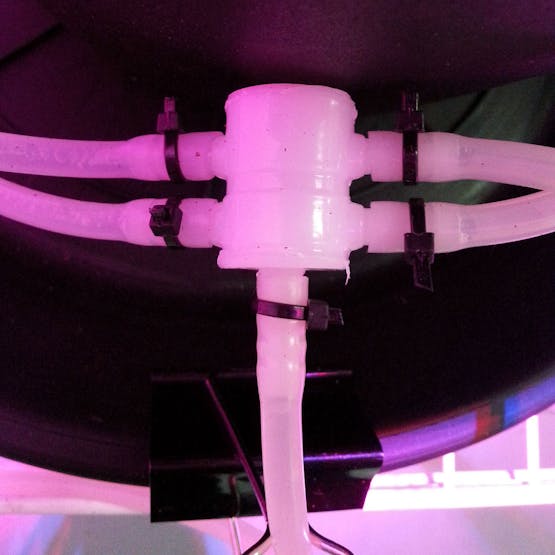
Find a good spot to place your electronics, and start running your tubes to where you're going to keep the pump. We used binder clips to hold the tubes where we wanted them, and they work phenomenally well. As far as positioning the pump, you should aim for putting it higher than the water reservoir and lower than the outlet tubes. This ensures proper operation of the pump. Position the end of the tubes near the base of the plant, allowing water to flow directly to the roots.
Now let's wire everything and start programming our micro-controller!
Step 3: Wiring and Programming
You will need to set up the RTC, which you can do by following this instructable.
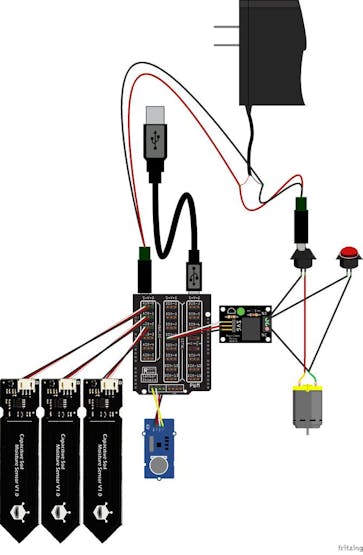
Once your RTC is set, follow the diagram above to wire your system.

You will need to grab the Automatic Plant Watering Sketch from HERE, and load it onto your GeekDuino through the Arduino IDE.
Step 5: Testing and Tweaking
Once you have everything hooked up, power it on, and watch it run! Well, don't literally sit there and wait for it to run. Use the test button to run and prime the pump, making sure the flow rate isn't so powerful that it is blasting the plants, and not so weak that you're only getting drips at each outlet. Plants are living things, so if you want to avoid damaging them when you're testing, put your outlets on a bucket and watch it go.
If the stream is too powerful, you can split the tube off to have more outlets or increase the length of the tube after the pump. If the stream is too weak, you can lower the length of the tubes or lower the amount of outlets in the system. Once you're satisfied that the flow rate is good, check back on your plants around the time you set to water to watch the system in action.
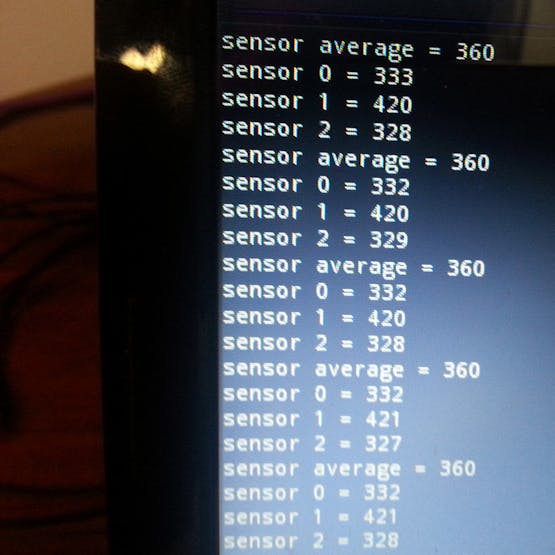
Another point to consider is in the code. You can set the watering times and moisture average to whatever works best for your plants! We've set it to always water once a day and check every minute that the value doesn't get drier than an average reading of 420, but you can set it to what works best for your plants or specific sensors. You can watch the sensor readings by hooking the USB port of the ~duino into your pc and opening the Arduino IDE's Serial Monitor. Every minute, the sensor readings will update. With the DFRobot Moisture sensor, a high reading is a dry reading. If you're getting a reading around 500, your soil is completely dry. A reading of about 300-400 is typical for reasonably wet soil.
Step 6: And you're done!
Well, you're done building the system. It is advisable to keep an eye on it, even if you're getting good results. The water bucket will eventually need to be refilled, the plants will eventually need trimming and harvesting, the usual container gardening things still apply. Granted you now need to worry much less about water and ample light reaching your plants, things can still go wrong. Always check your lines for leaks, and keep the moisture away from the electronics as much as possible.
This system is inherently flawed in that it uses an average of the moisture between the 3 points to decide when to water beyond the daily watering cycle, which could result in the plants being unevenly watered. If you add more pumps to the system, you can use the individual readings from the sensors instead of the average to water each plant as necessary instead of the whole lot, possibly giving you better results! We've had fantastic results in the month that the plants have been in the system! We're looking forward to having some massive heirloom tomatoes at our next cookout, for sure.
Step 7: Update
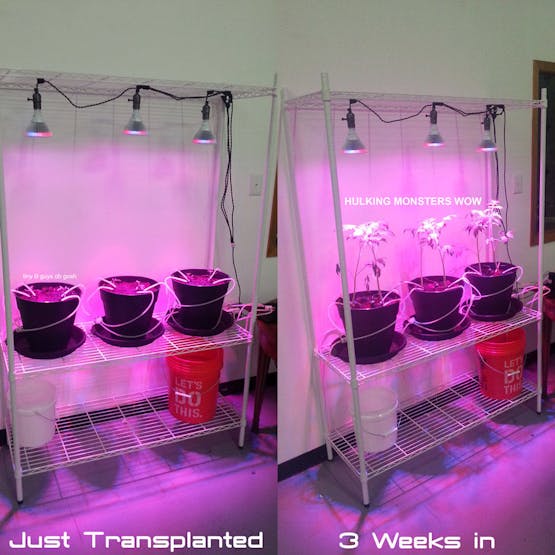
Our tomato plants are doing very well, but they got way tall, forcing us to move the shelf down to the bottom. We added reflectors so that the light would hit the plants from the sides, as well. One of the reasons they grew so tall was to get closer to the single light source on all of them. Now they will hopefully start bushing out and producing tomatoes!
Code
Github file
https://github.com/robotgeek/robotGeekLibrariesAndtools/blob/master/RobotGeekSketches/Demos/autoPlantWatering/autoPlantWatering.ino
The article was first published in hackster, October 18, 2016
cr: https://www.hackster.io/robotgeek-projects-team/automatic-plant-watering-system-with-arduino-9d3d8e
author: RobotGeek Projects Team: RobotGeek Team, Wade Filewich


