

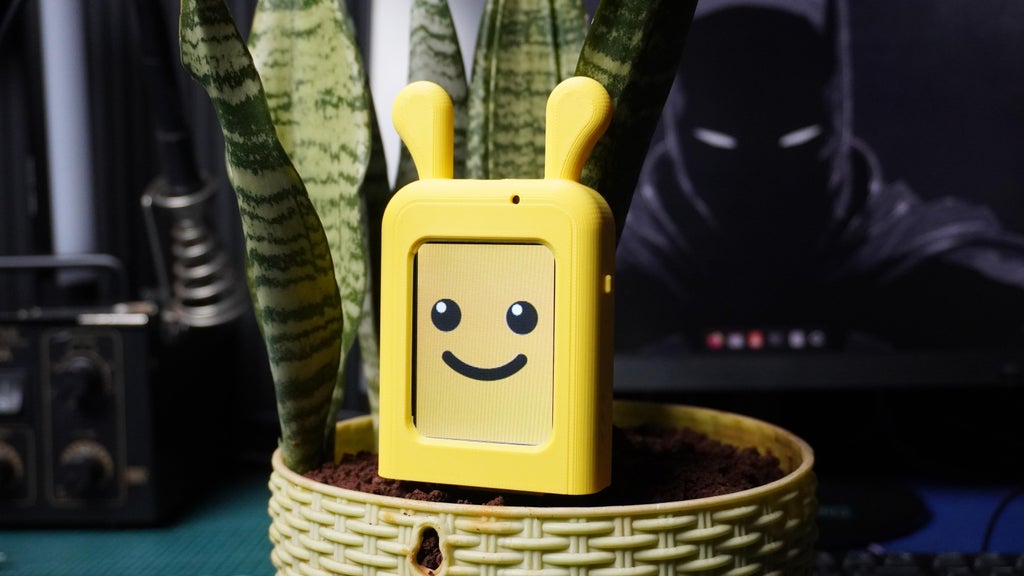
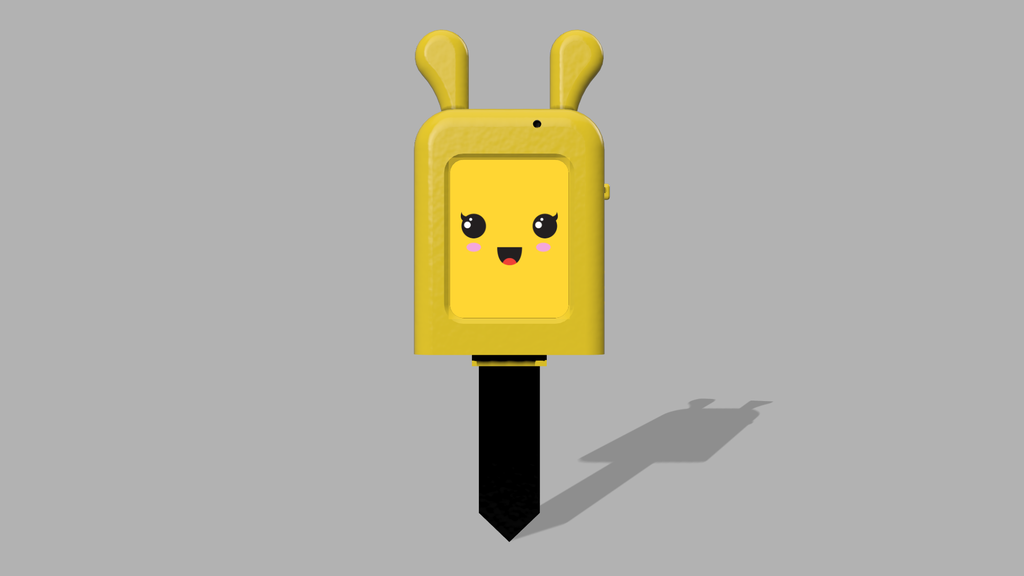
Meet Bloom Buddy - your plant's new best friend! 🌼
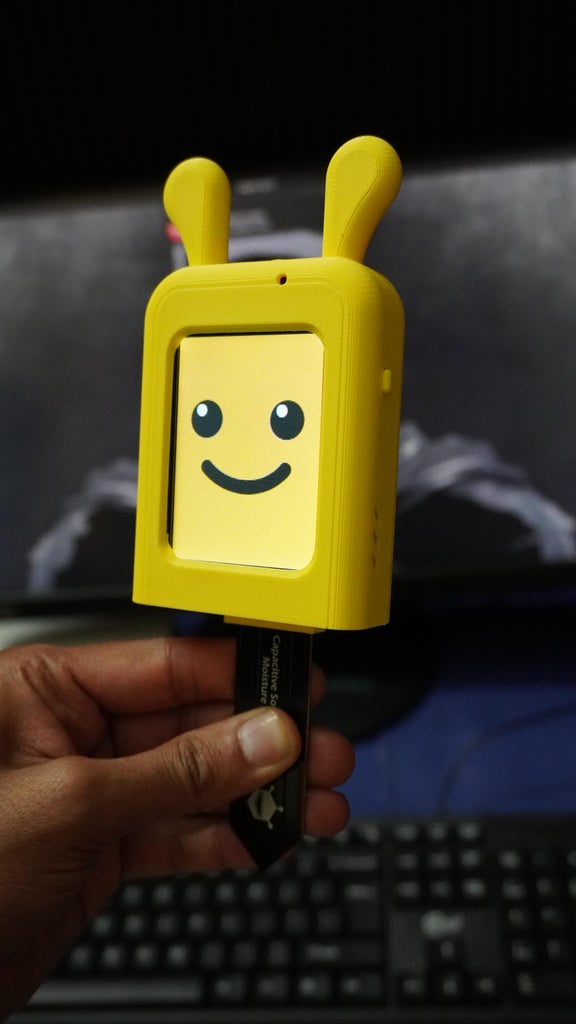
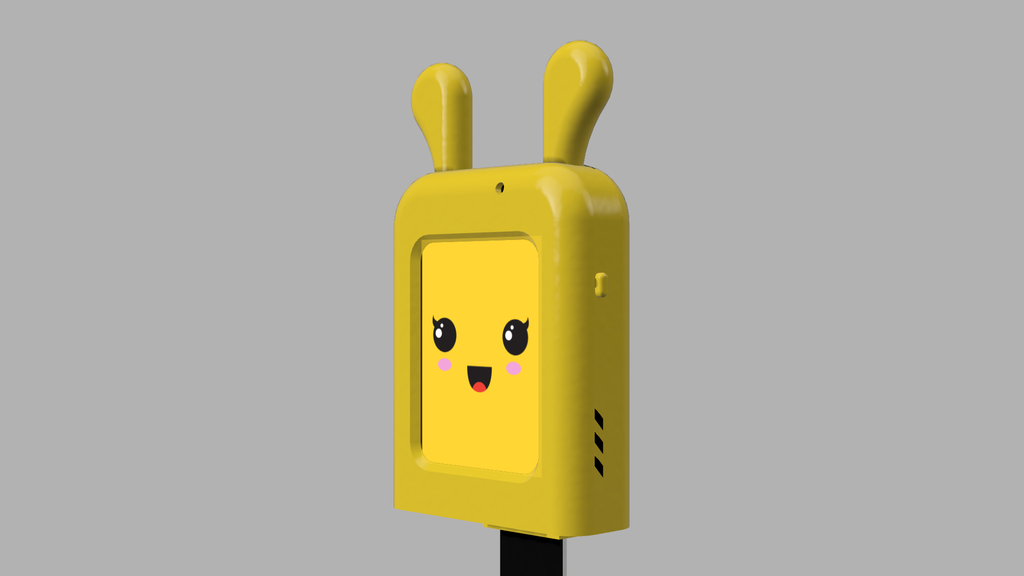
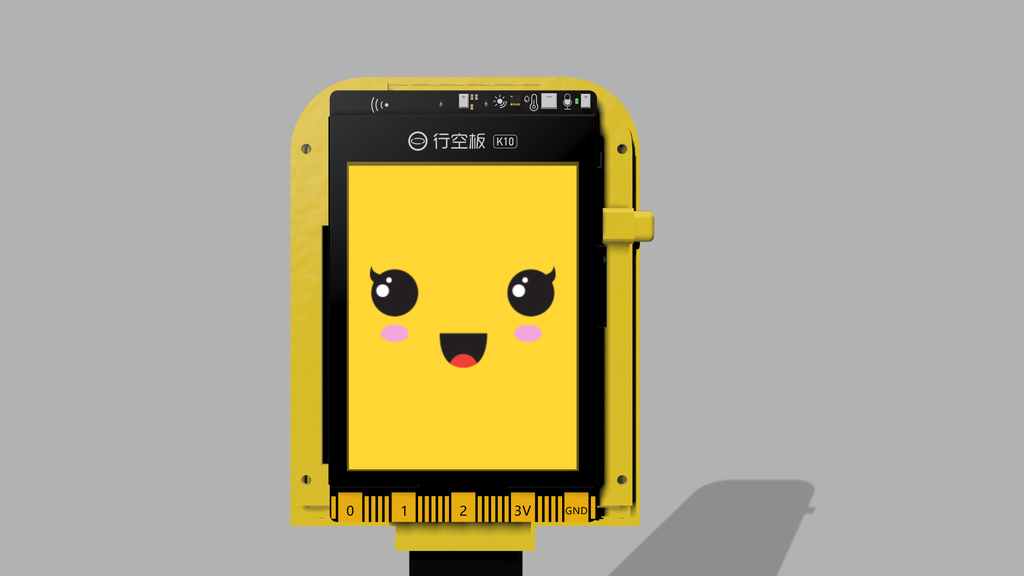
Bloom Buddy is an intelligent and interactive soil moisture monitoring device designed to help you care for your plants in a fun and engaging way. Powered by an Unihiker K10 - a ESP32 based Dev Board, this adorable gadget is more than just a sensor. It features a cheerful face, expressive animations, voice feedback, and real-time environmental monitoring.
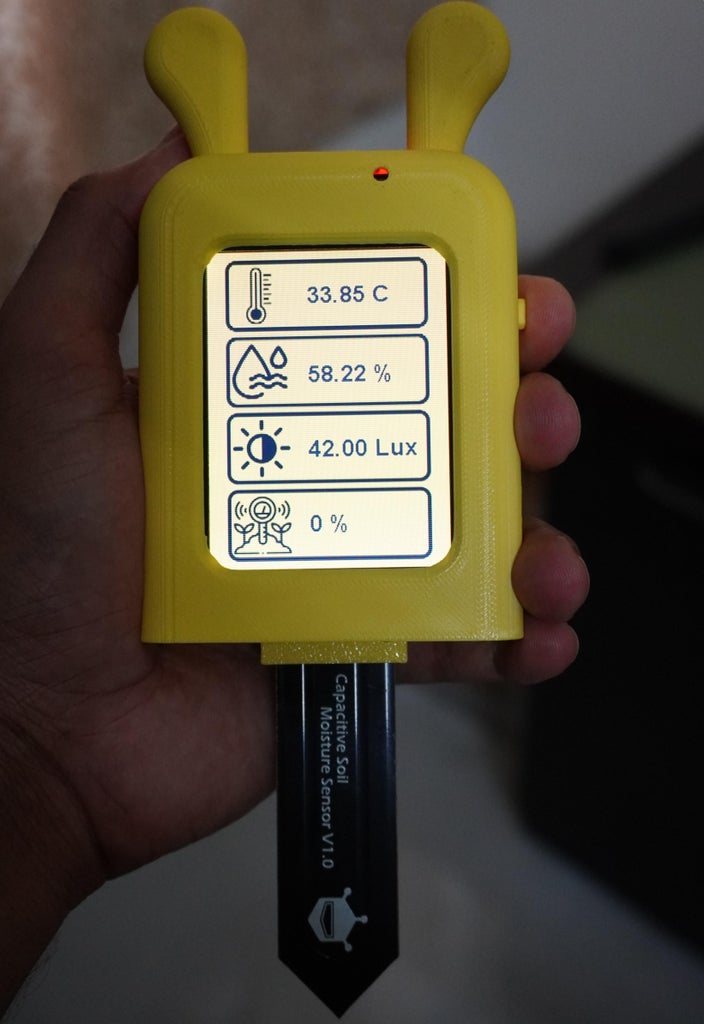
With a built-in display, speaker, SD card, microphone, and sensors for soil moisture, temperature, humidity, and light, Bloom Buddy provides clear, playful responses to your plant's needs. It celebrates when your plant is well-watered, gets sad when thirsty, sleeps at night, and reacts to temperature changes with unique personalities.
Whether you are a seasoned plant parent or just starting your indoor garden, Bloom Buddy will bring joy and intelligence to your plant care routine. In this project, I will show you how to build your own Bloom Buddy, program its smart behavior, and bring your plants to life with interactive technology.
Let's get started and make your plants feel heard! 🌱✨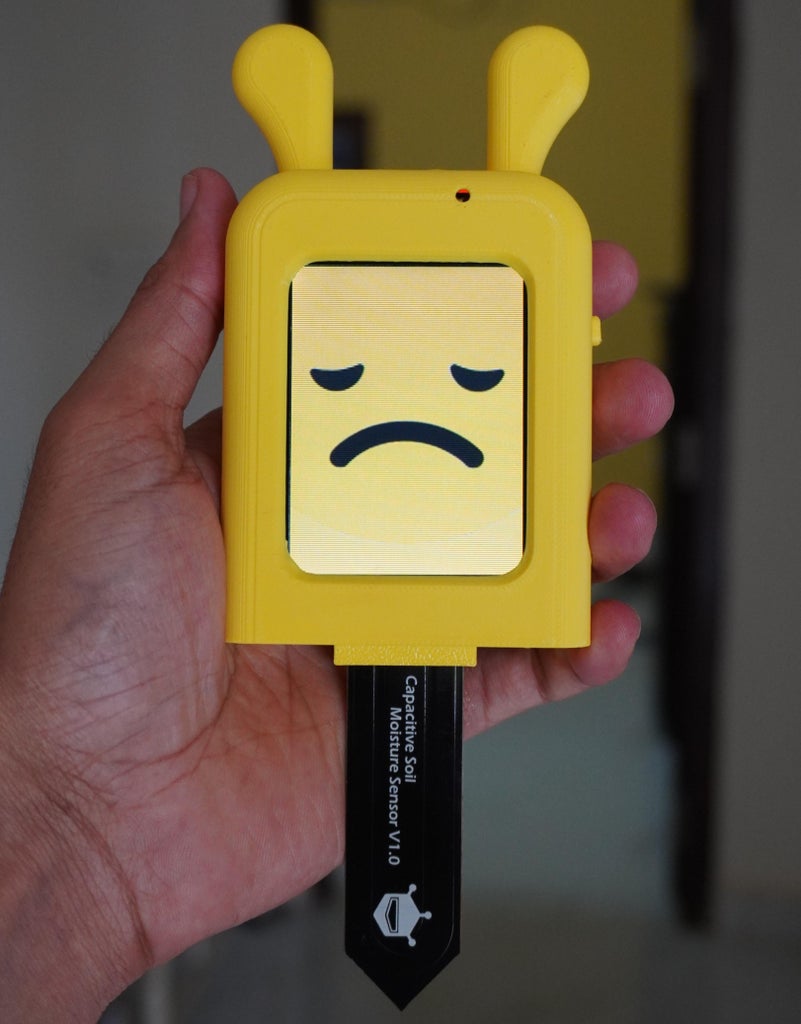
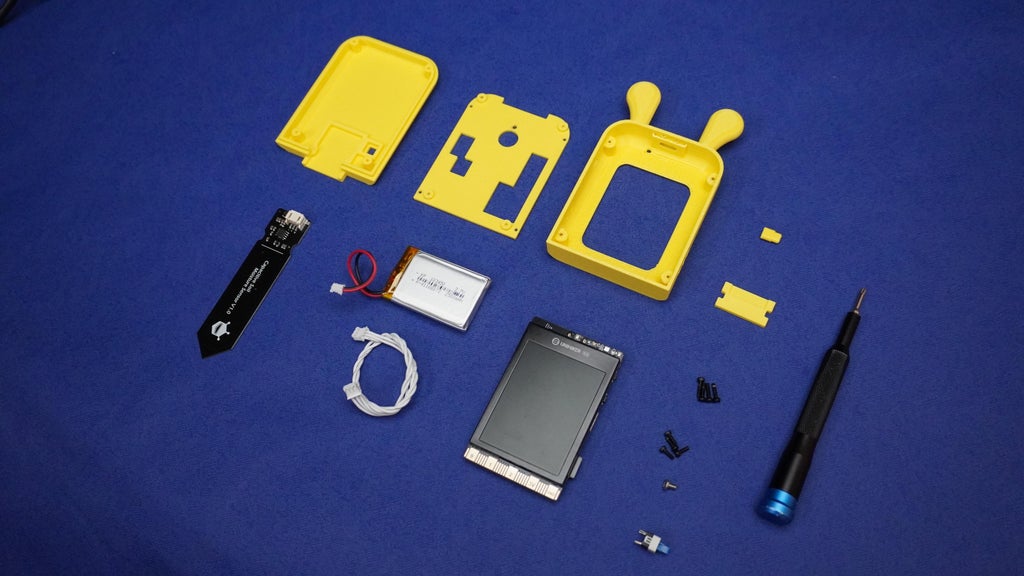
Supplies
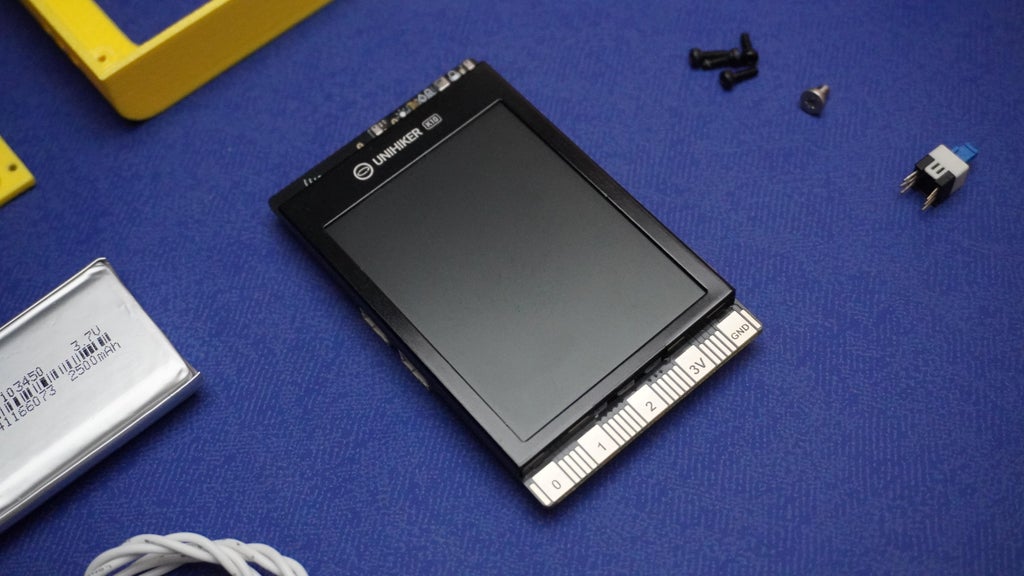
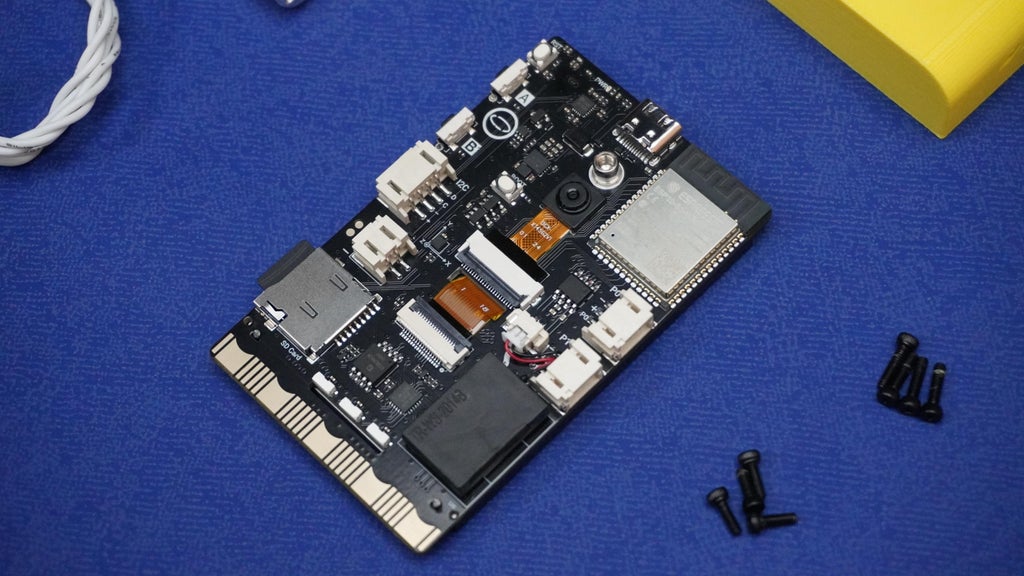
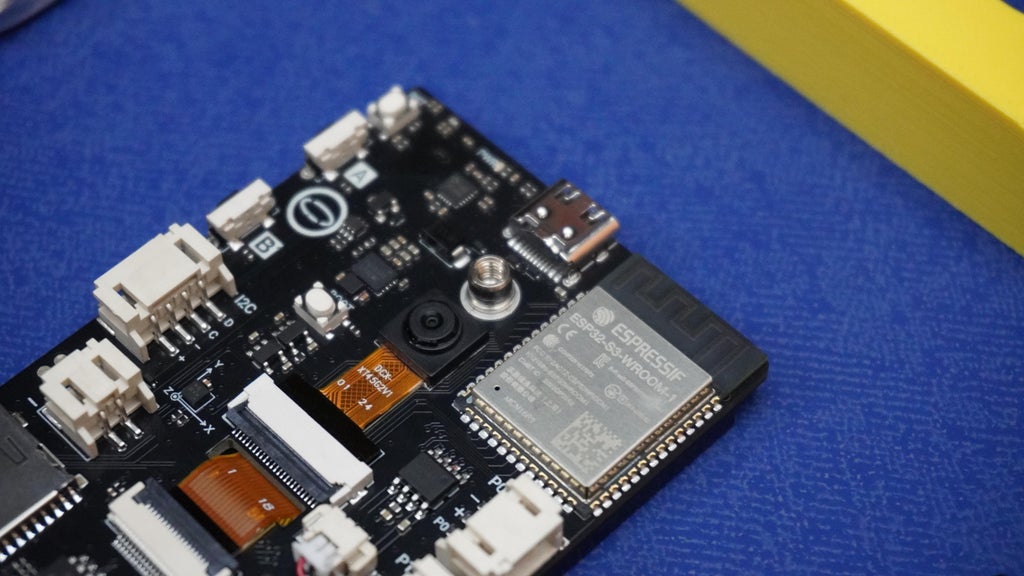
1x Unihiker K10
1x 3 Pin Cable
1x Switch
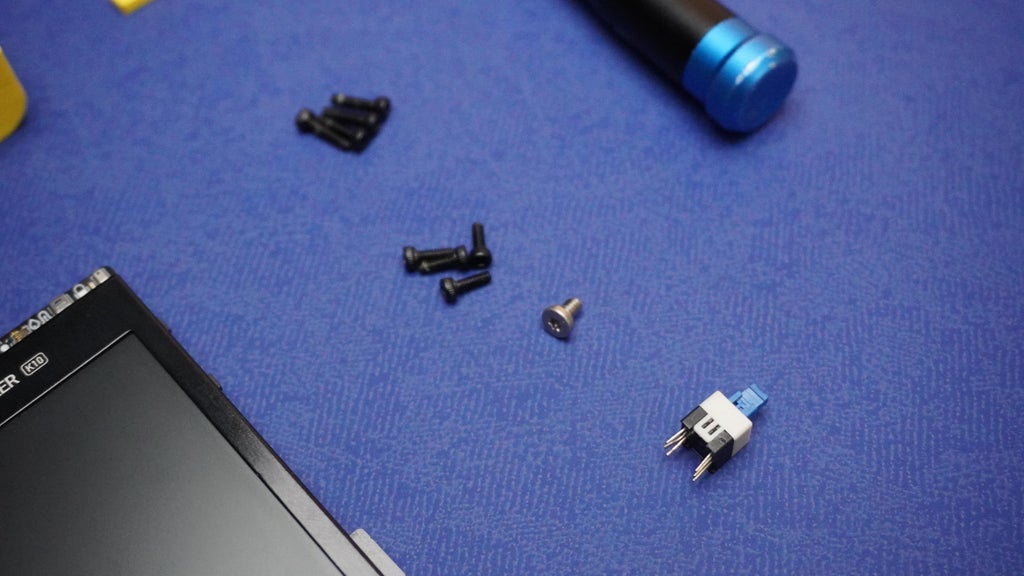
1x M3 Screw
4x M2 5mm Screw
4x M4 8mm Screw
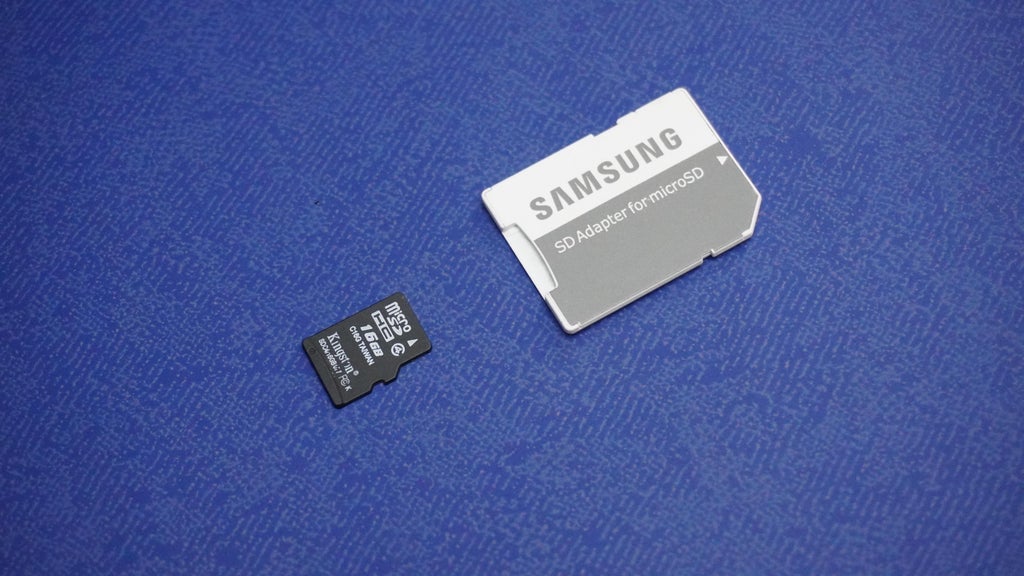
1x SD Card
1x Card Reader
Tools:
 To enable Bloom Buddy's voice feedback and animated personality, we need to properly set up the SD card with the required audio files.
Visit the Bloom Buddy GitHub Repository and download the complete project as a ZIP file.
Once downloaded, extract the ZIP archive to your computer.
Insert the connect the SD card to PC using SD Card Reader.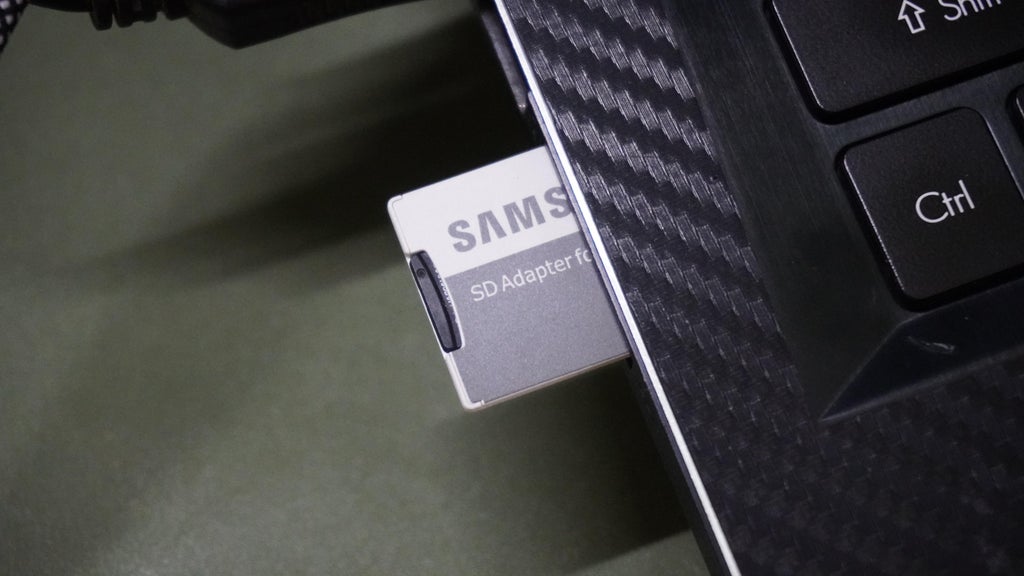
Copy the Voice, Emoji, Face folder as shown
SD/
  ├── Voice/
  │   ├── All Audio Files
  ├── Emoji/
  │   ├── All Frames
  ├── Face/
  │   ├── All Images
Remove SD from PC and insert it into K10
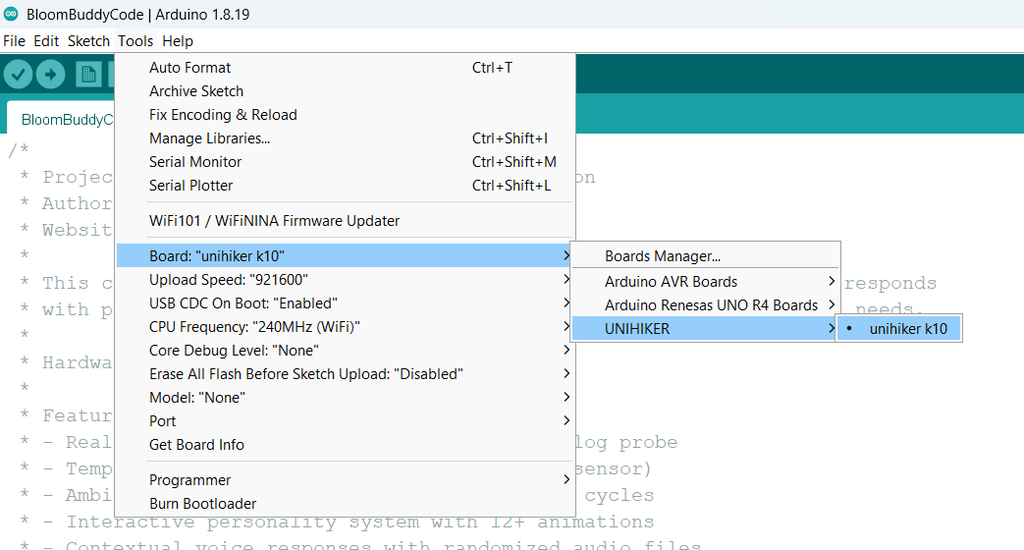
To program the Bloom Buddy, we will use the Arduino IDE along with the UNIHIKER K10 board support package.
Requirements: Arduino IDE version 1.8.19 or earlier (not compatible with Arduino IDE 2.0+)
Install Arduino IDE
If you do not already have it, download and install Arduino IDE 1.8.19 or an earlier version. Newer versions are not compatible with the K10 board at this time.
Add the UNIHIKER K10 Board Support URL
Open Arduino IDE.
Go to File > Preferences.
In the Additional Board Manager URLs field, paste the following URL: https://downloadcd.dfrobot.com.cn/UNIHIKER/package_unihiker_index.jsonSet Compiler Warnings to None for cleaner output.
Click OK to save your changes.
Install the UNIHIKER K10 Board
Go to Tools > Board > Boards Manager.
In the search bar, type unihiker.
Click Install on the result for the UNIHIKER K10 SDK.
Verify Board Installation
Once installed, UNIHIKER K10 should now appear under Tools > Board.
Select UNIHIKER K10 from the list to start programming the device.
Now that the Arduino IDE is set up and the board is installed, it's time to upload the Bloom Buddy code to your UNIHIKER K10.
Locate the file named BloomBuddyCode.ino that you downloaded from the GitHub repository earlier.
Double-click it or open it from Arduino IDE by going to File > Open and navigating to the file location.
In Arduino IDE, go to Tools > Board and select UNIHIKER K10.
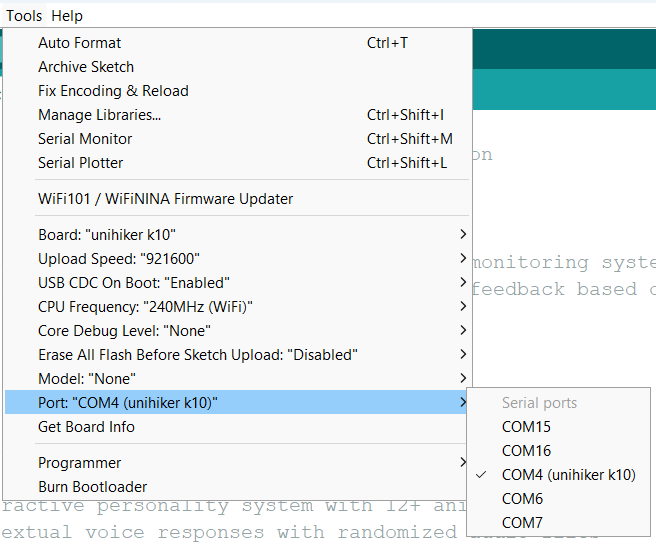
Then go to Tools > Port and choose the correct COM port for your K10 device. If you are unsure, unplug the device, check the available ports, then plug it back in to see which port is newly listed.
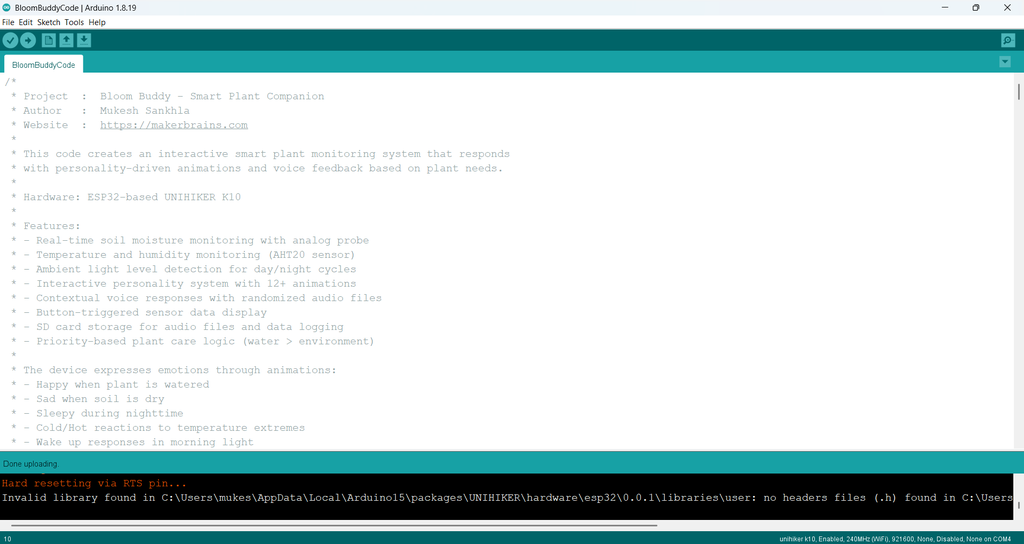
Click the Upload button (right arrow icon) at the top-left corner of the Arduino IDE.
Wait for the code to compile and upload. You should see a message that says “Done uploading” when it finishes successfully.
Once the upload is complete, Bloom Buddy will come to life!
You will see animations on the display and hear sounds from the speaker if the SD card is set up correctly.
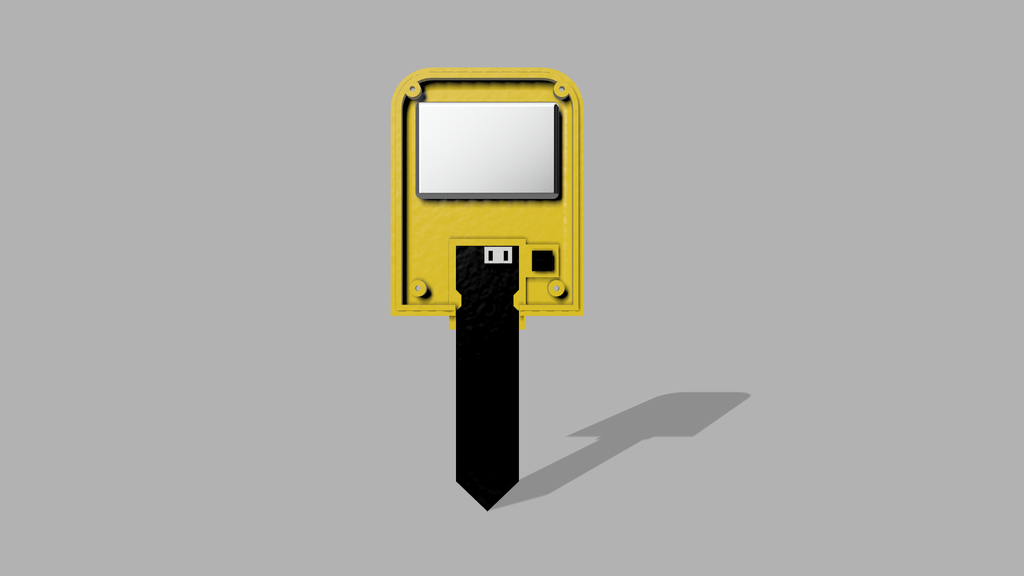
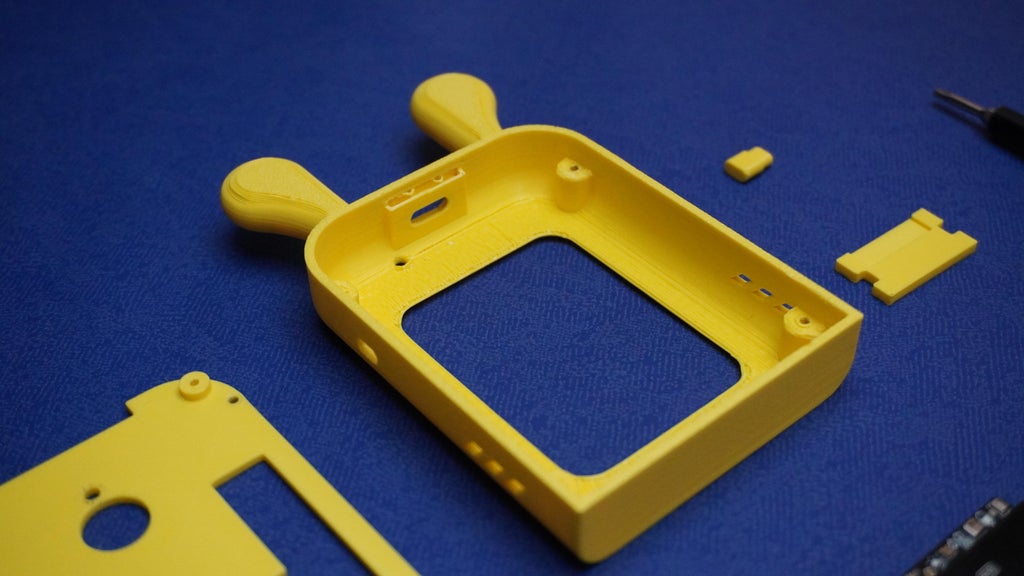
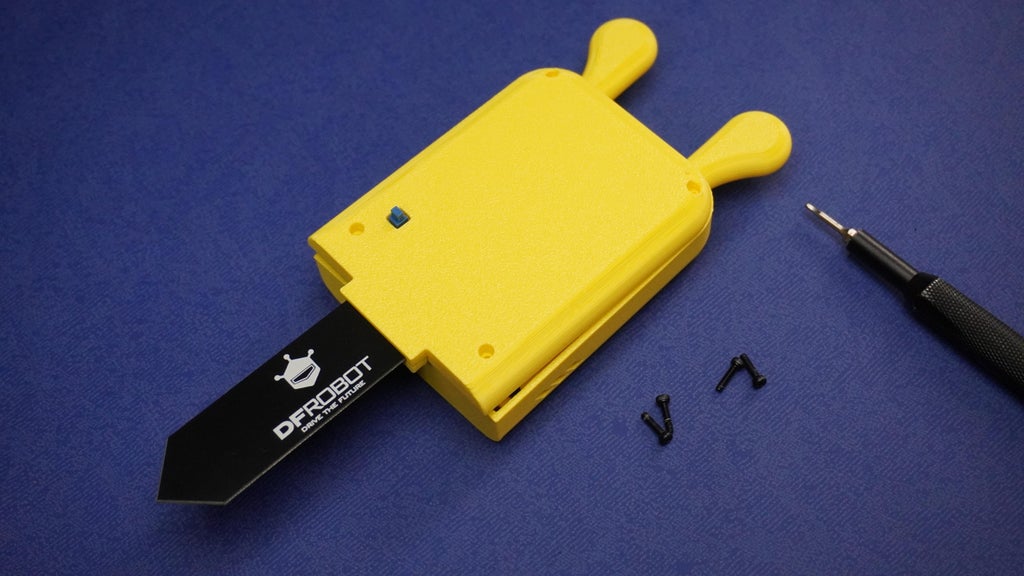
 To bring Bloom Buddy to life physically, I have designed a custom enclosure using Fusion 360. This enclosure protects the electronics and adds a friendly, finished look to the device.
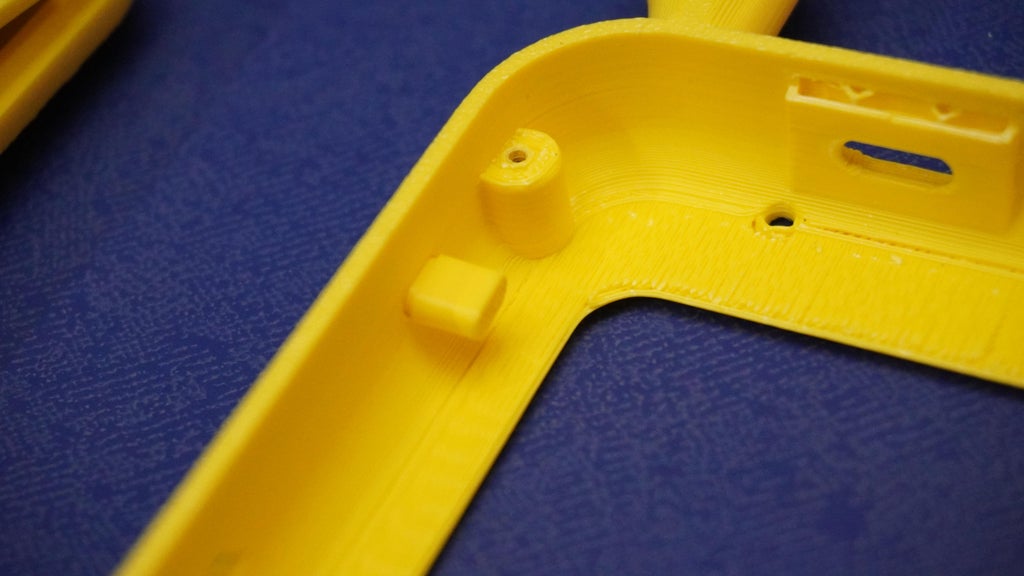
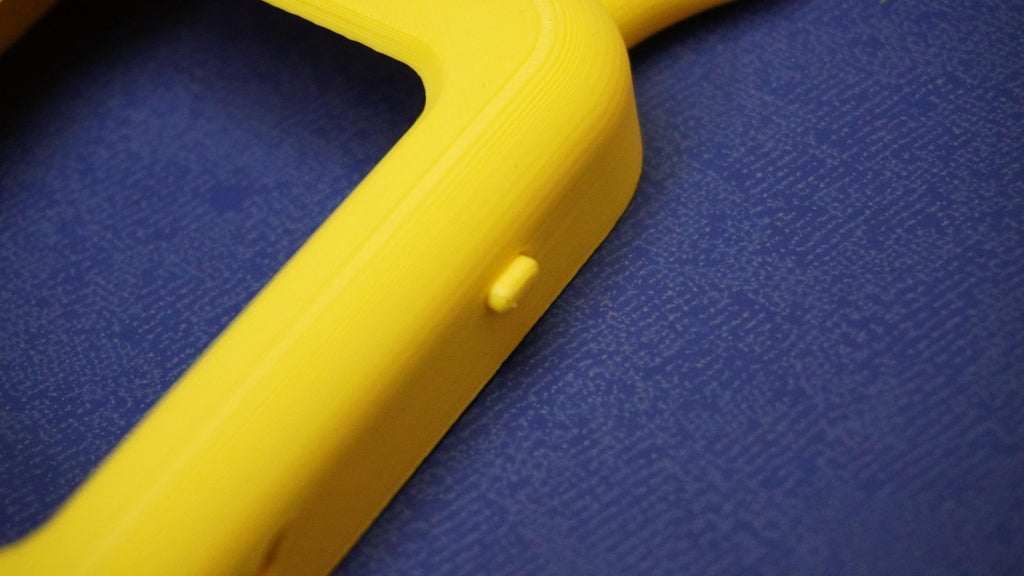
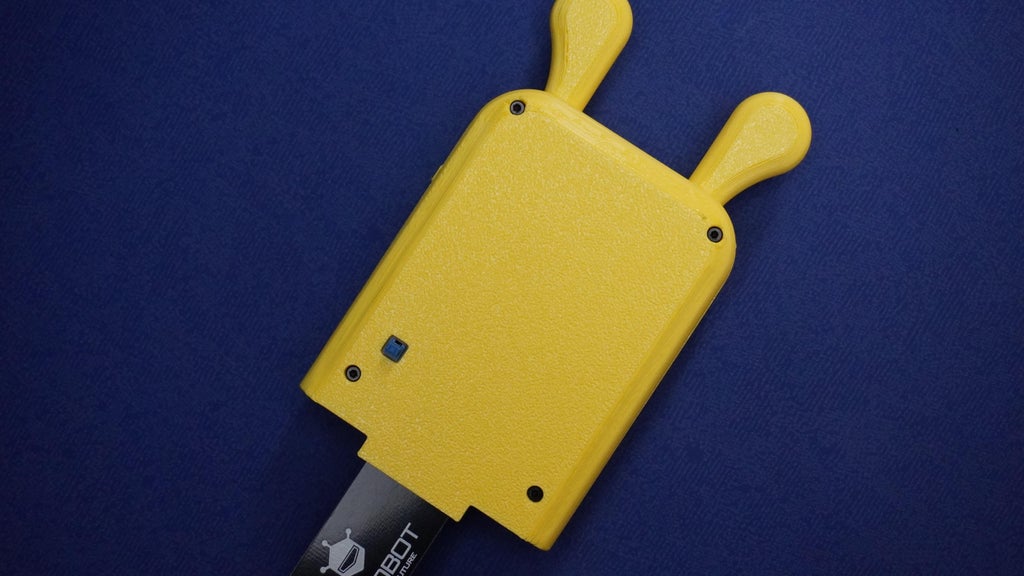
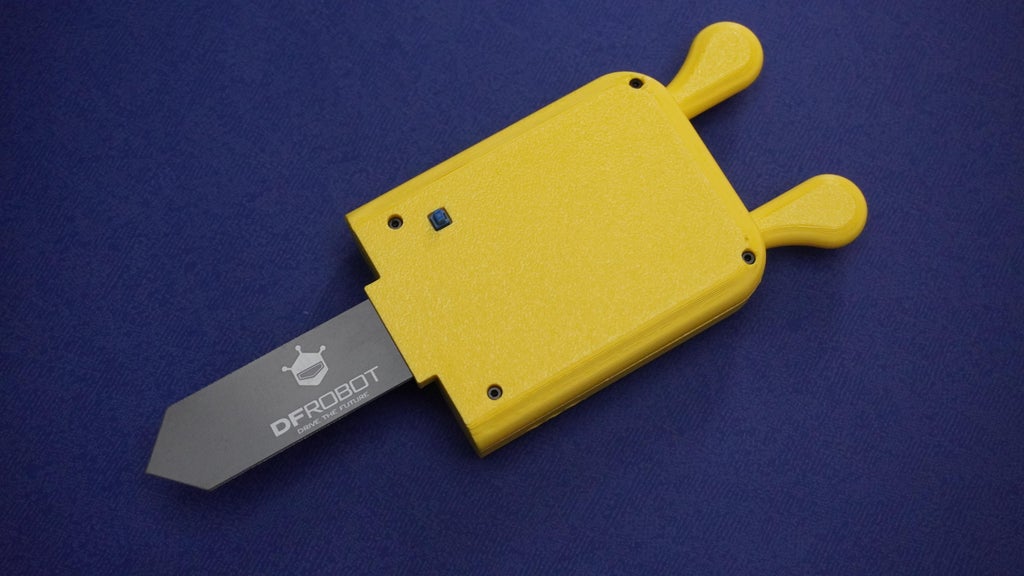
The enclosure consists of five 3D-printable parts:
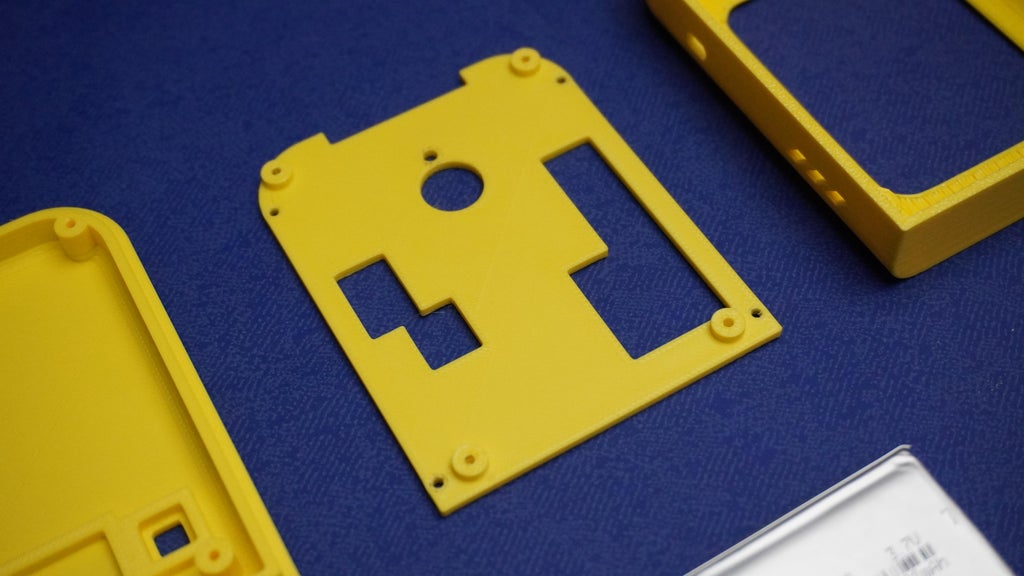
Housing – Main body that holds the entire setup
Mount Plate – Securely mounts the UNIHIKER K10 board inside the housing
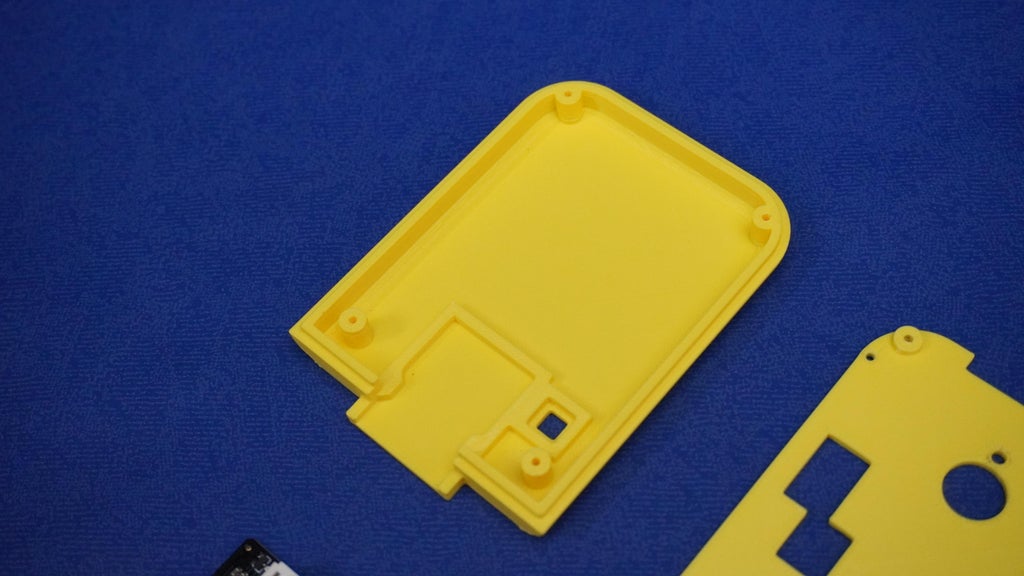
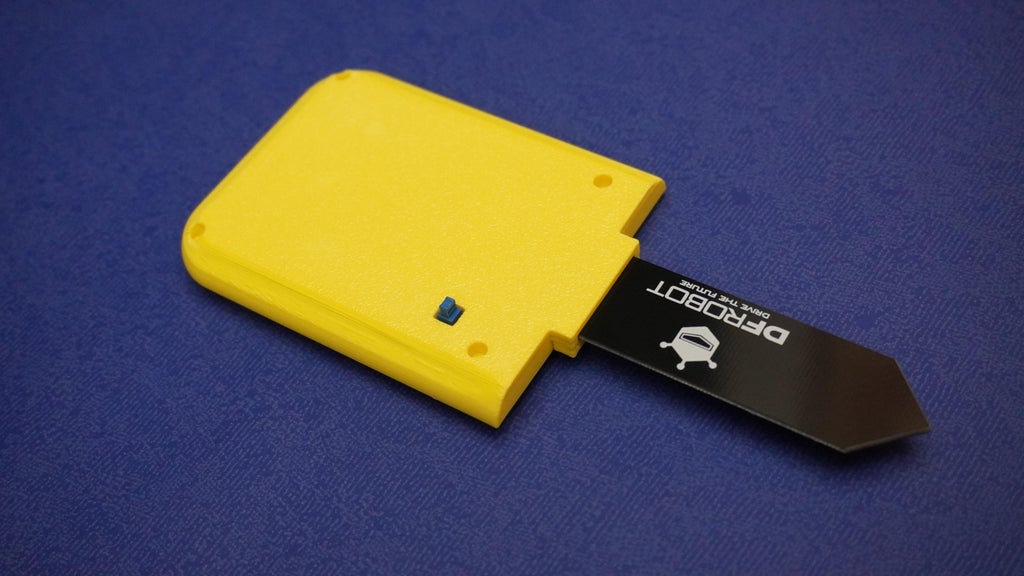
Cover – Part with a custom slot for the soil moisture sensor
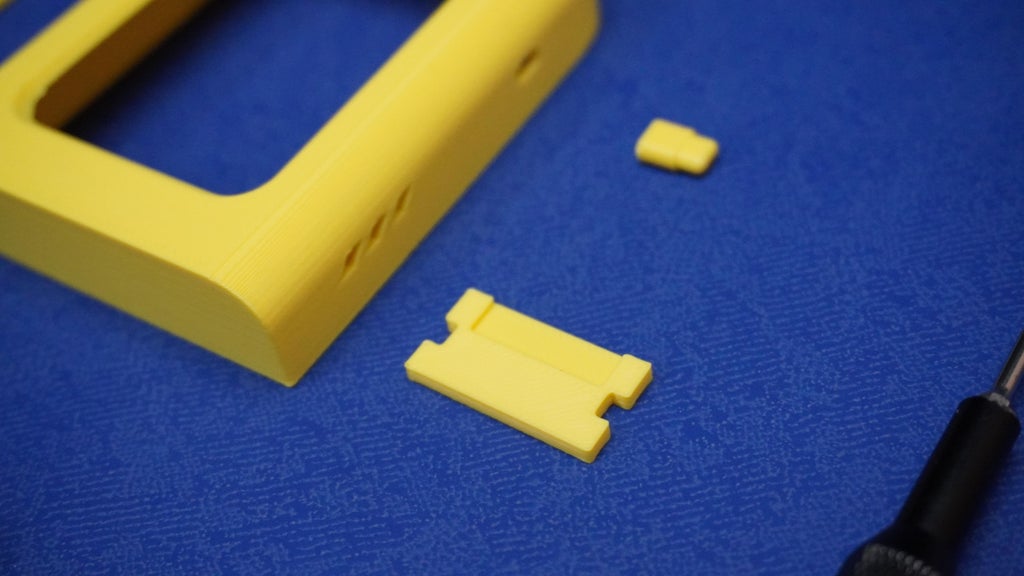
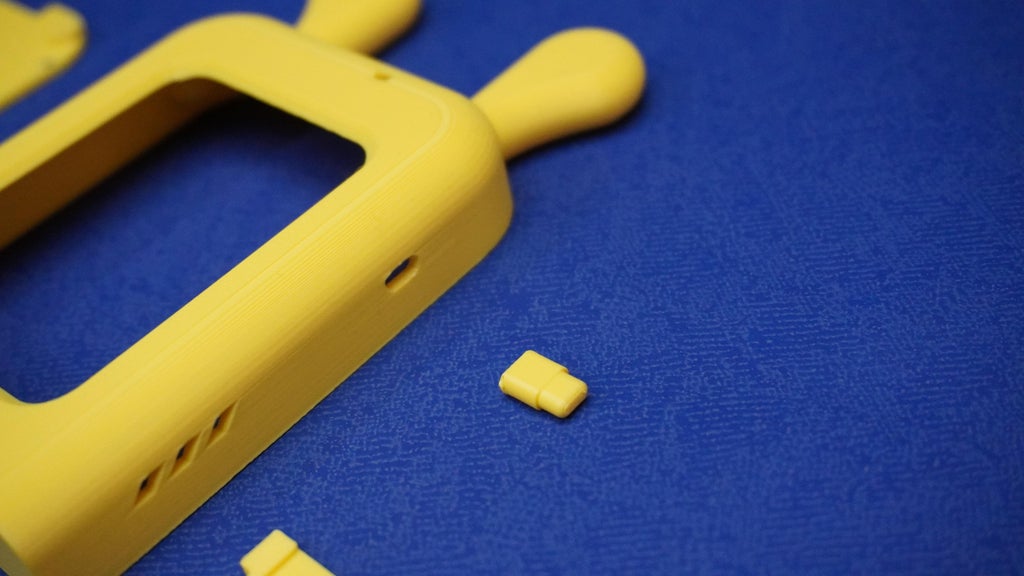
Clip – Locks the soil moisture sensor into the slot on the cover
Button – Acts as a physical extension for onboard Button B on the K10
You can Download the source CAD file if you want to modify the design or
Directly download the .stl files from below and 3D print them.
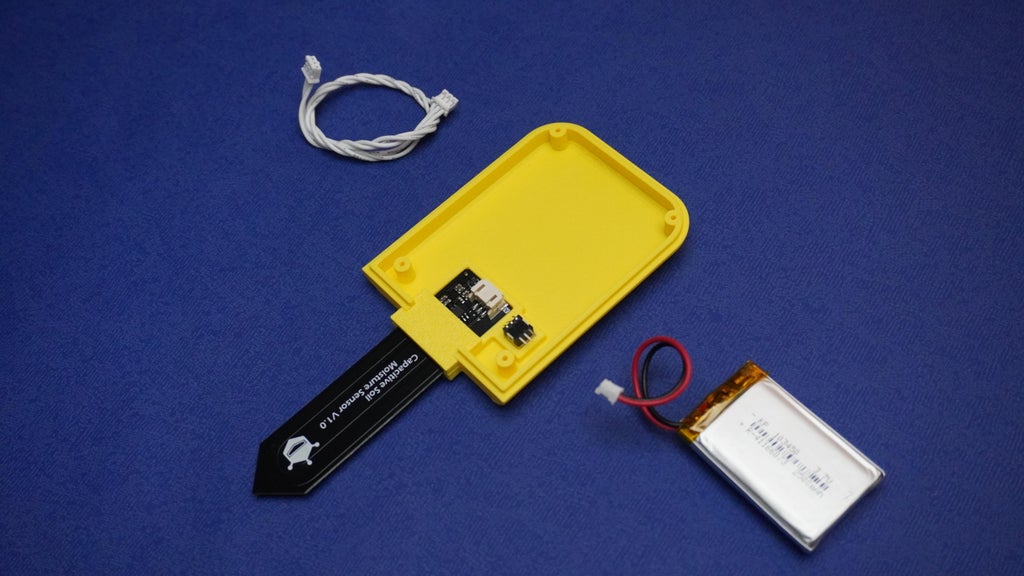
Parts Needed:
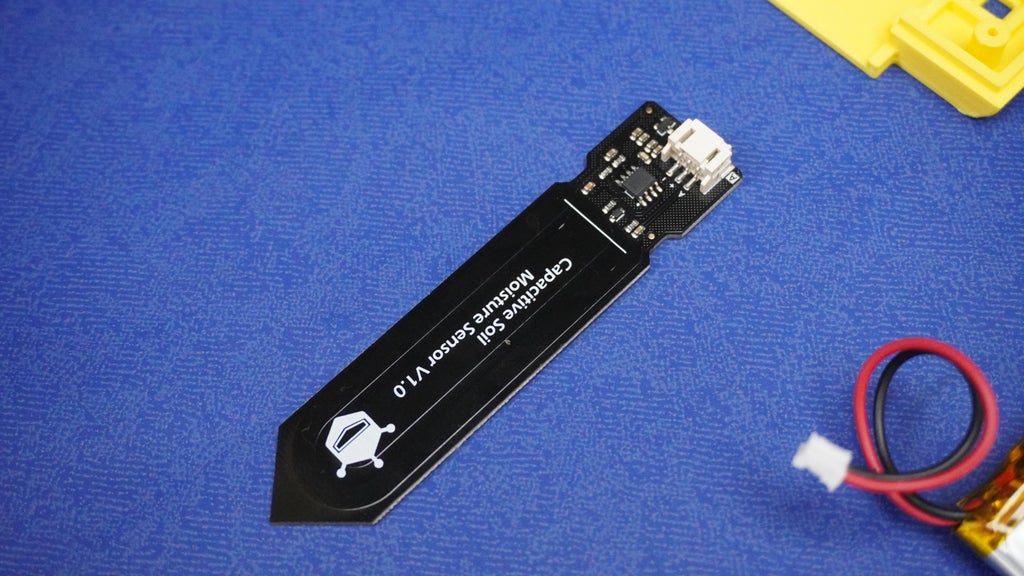
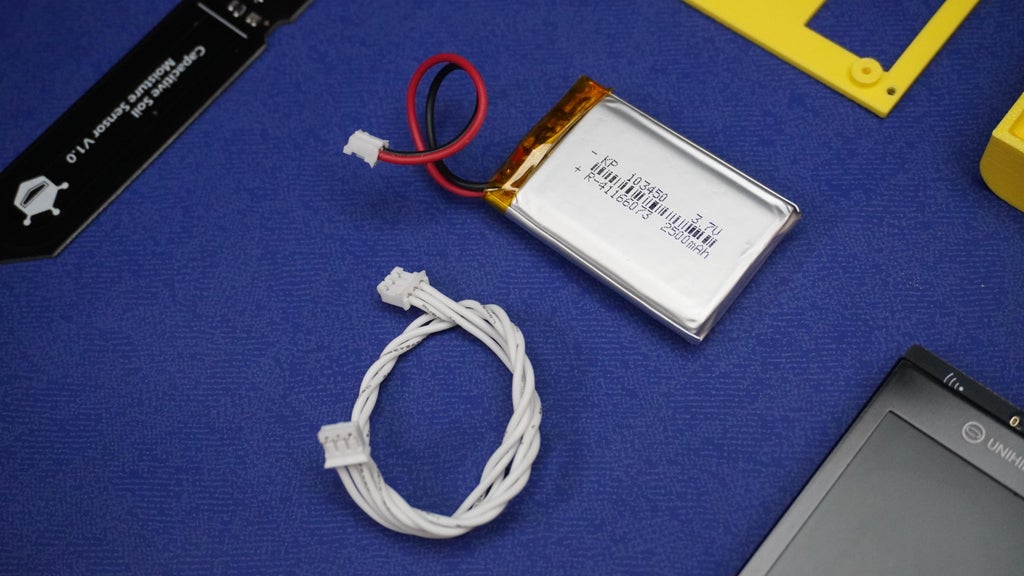
3D-printed cover, 3D-printed clip, Soil moisture sensor, SwitchQuick-drying glue
Assembly Instructions:
Take the 3D-printed cover and align the soil moisture sensor with the dedicated slot on the front. Gently push the sensor into place until it fits snugly into the slot. Place the clip over the sensor to lock it into the cover. If the fit is slightly loose, apply a small amount of quick-drying glue to secure it. Insert the tactile switch into its designed slot and apply a small amount of glue.

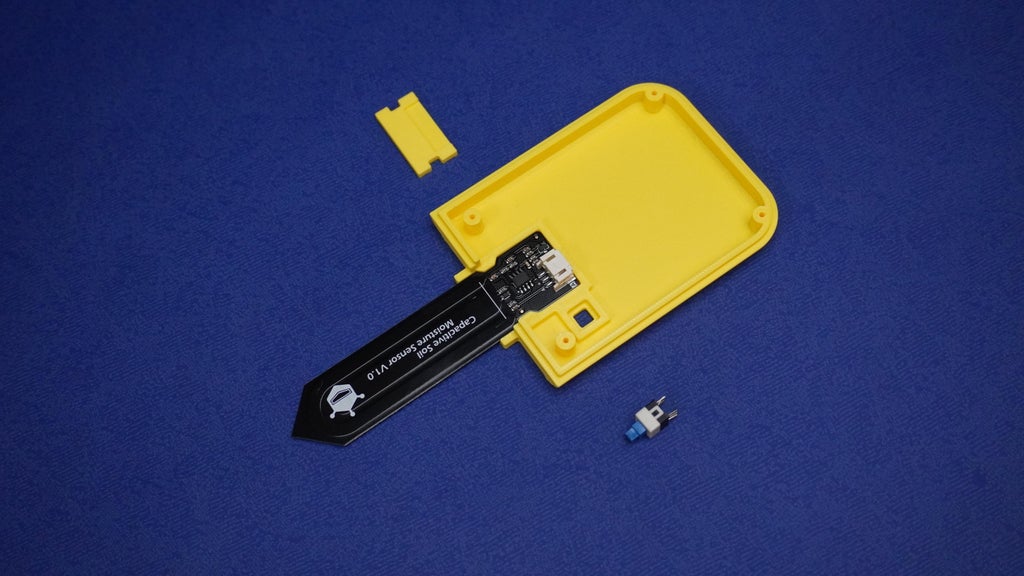
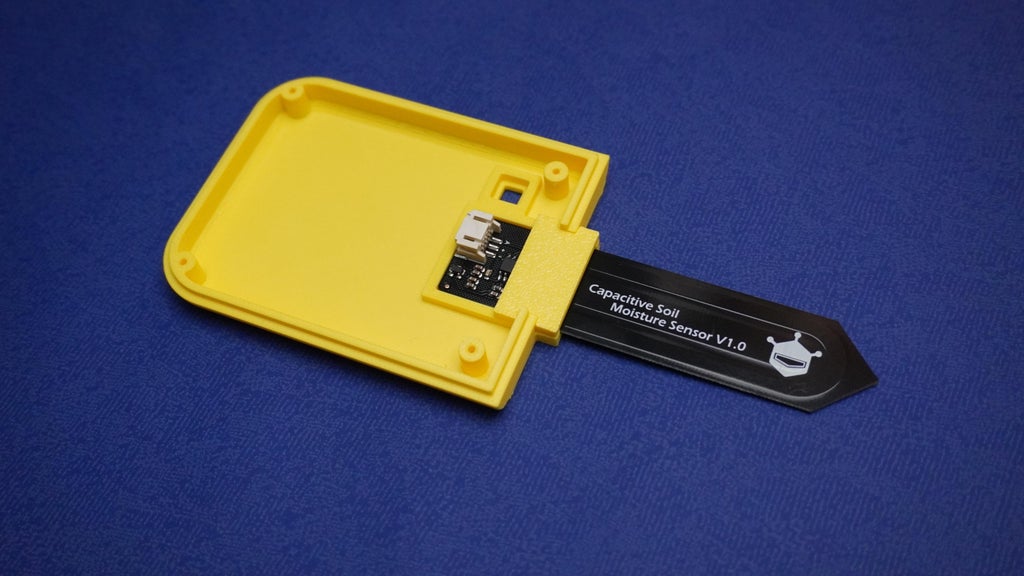
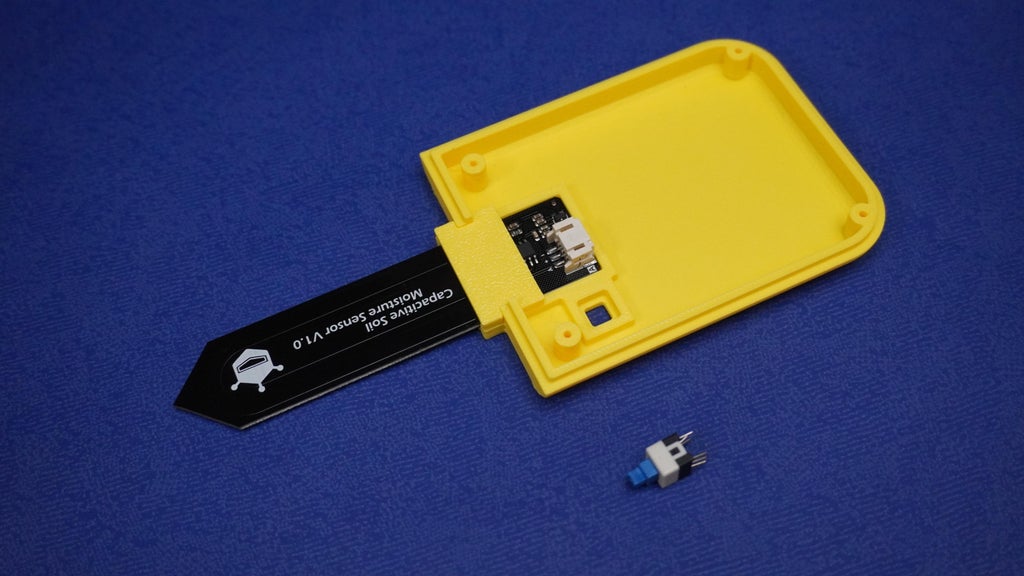
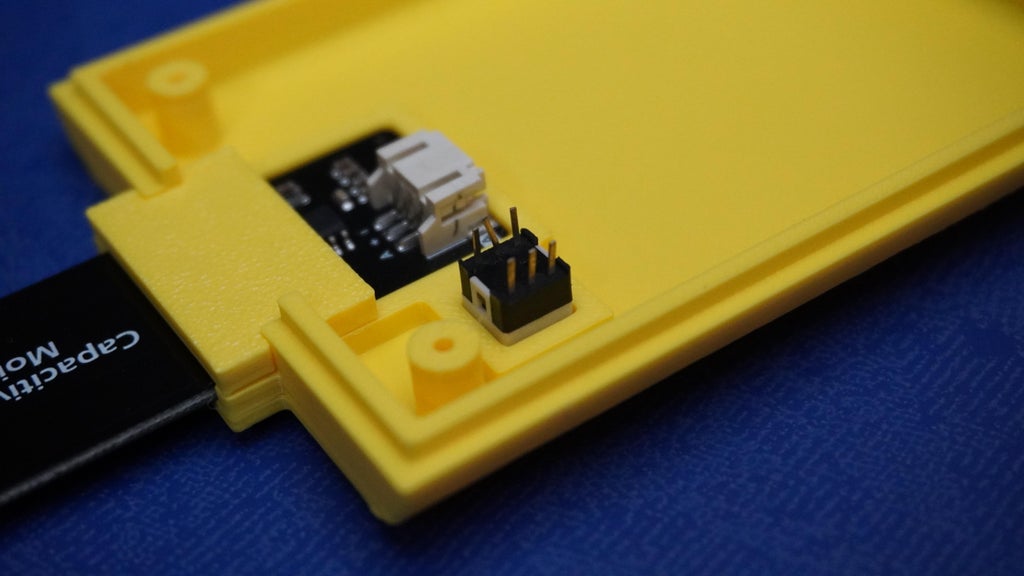

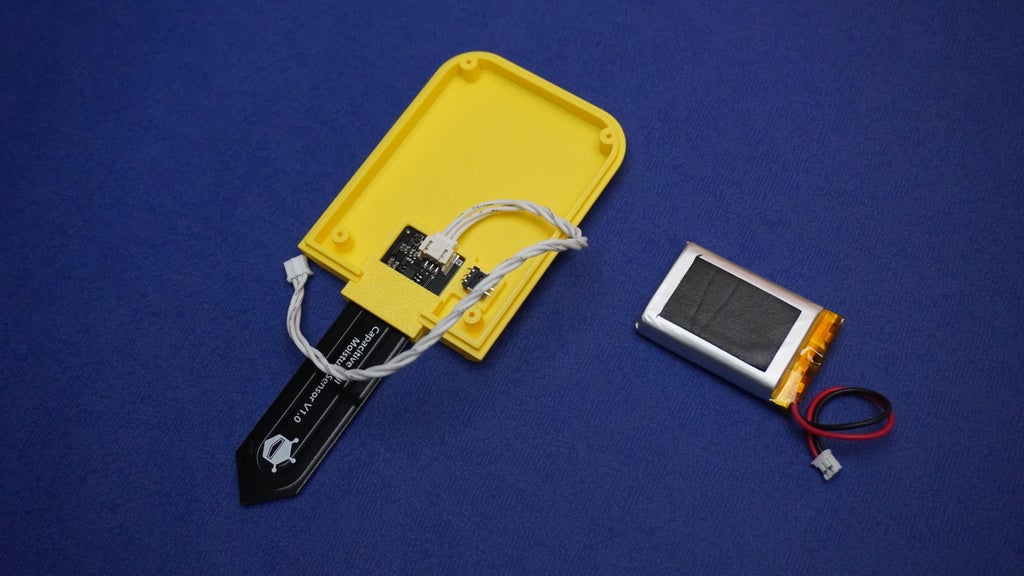
Take the 3-pin connector and plug it into the back of the soil moisture sensor.
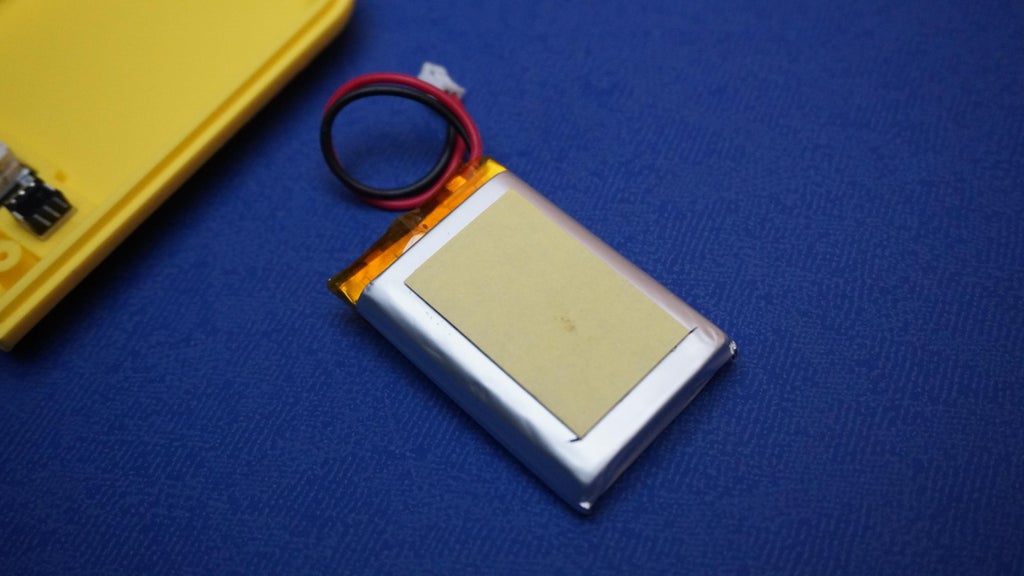
Peel off the protective layer from the double-sided tape on the back of the battery.
Stick the battery onto the cover, as shown in the reference image.
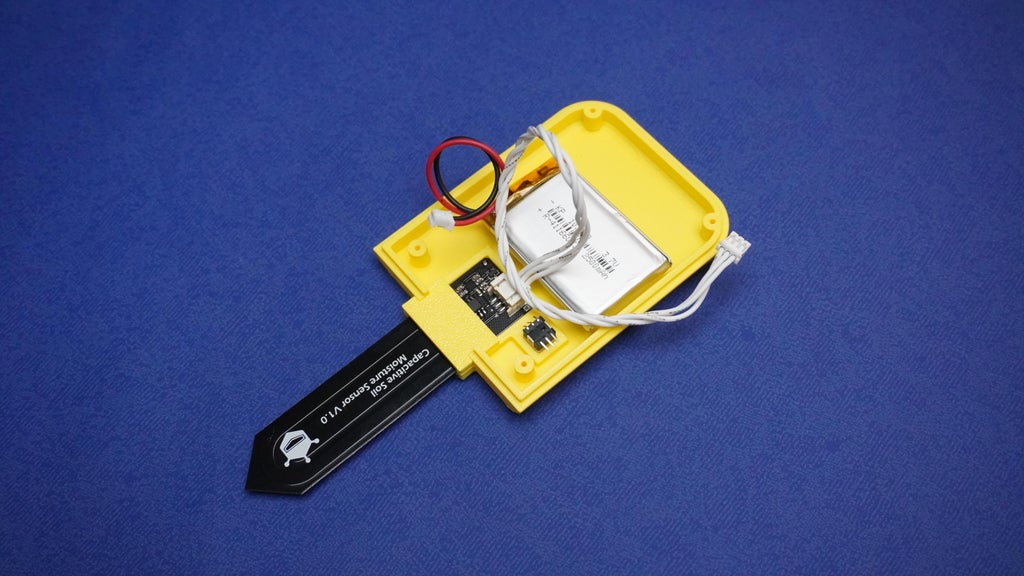
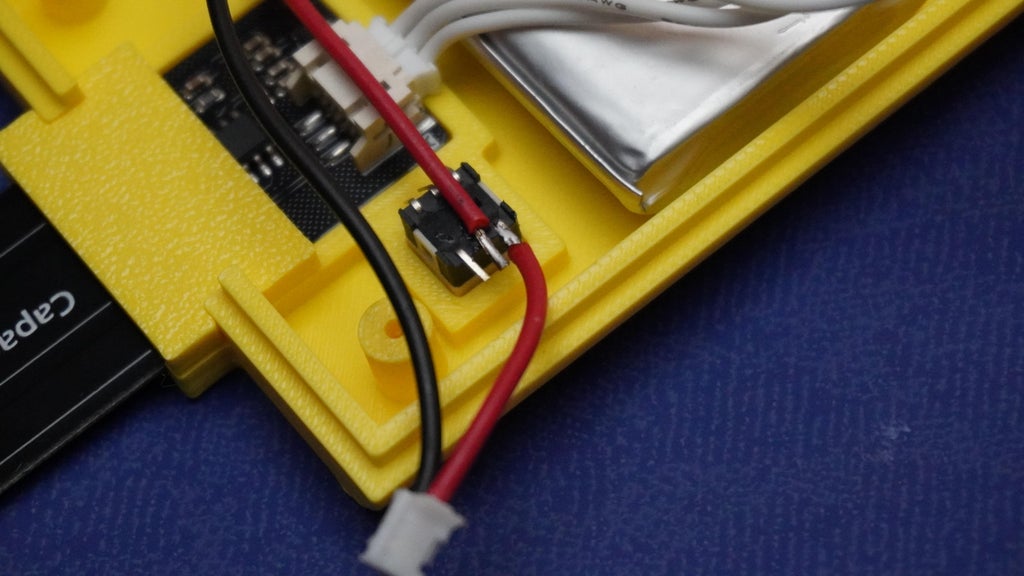
 In this step, you will wire the power switch to the battery so you can easily turn Bloom Buddy on and off.
Carefully cut the red (positive) wire coming from the battery.
Strip a small amount of insulation from both cut ends.
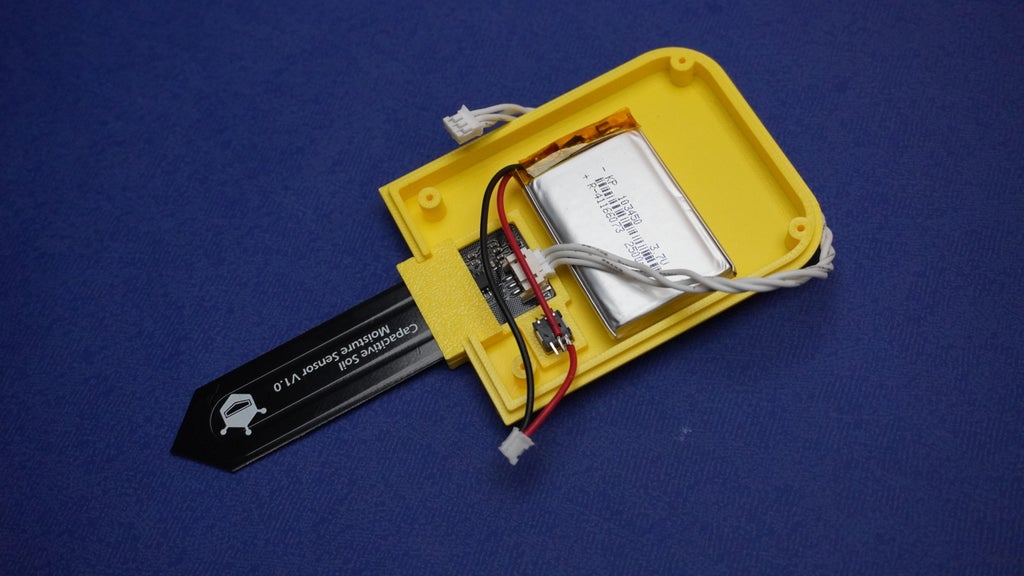
Take the two stripped red wire ends and solder them to the terminals of the switch as shown in the diagram above.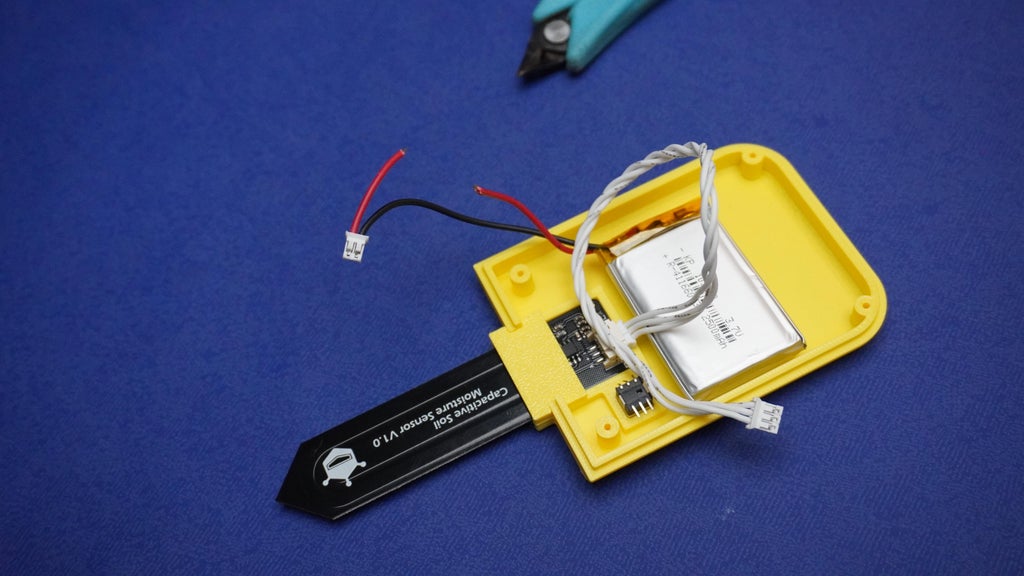
 Parts Needed:
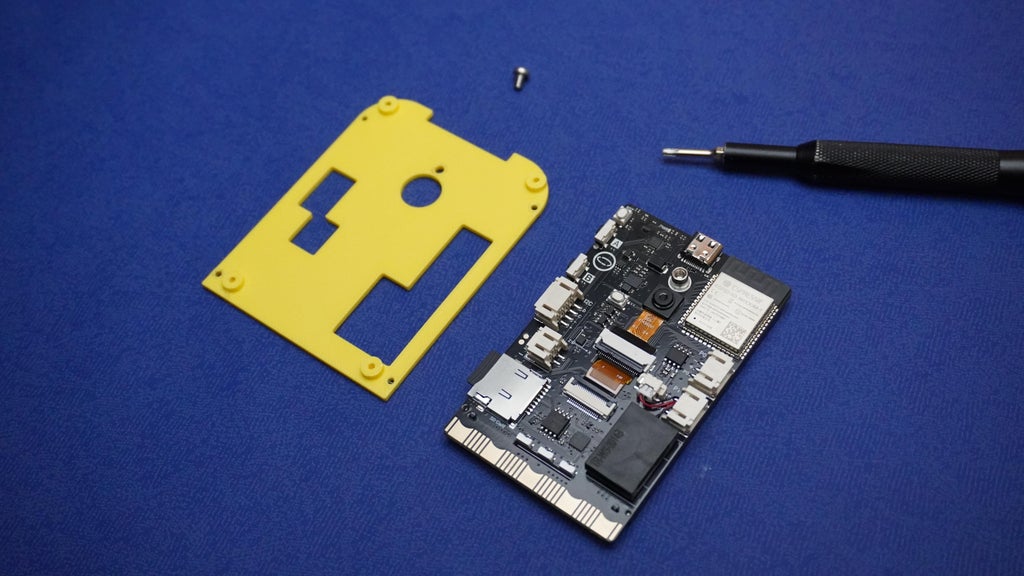
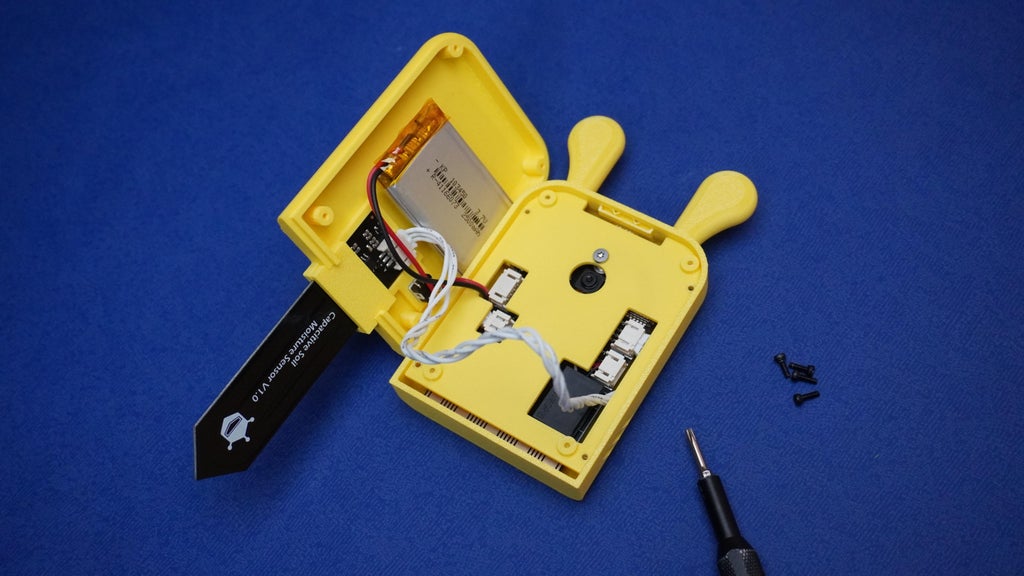
UNIHIKER K10 board, 3D-printed mount, Assembled cover with sensor and battery, 1x M3 screw
Instructions:
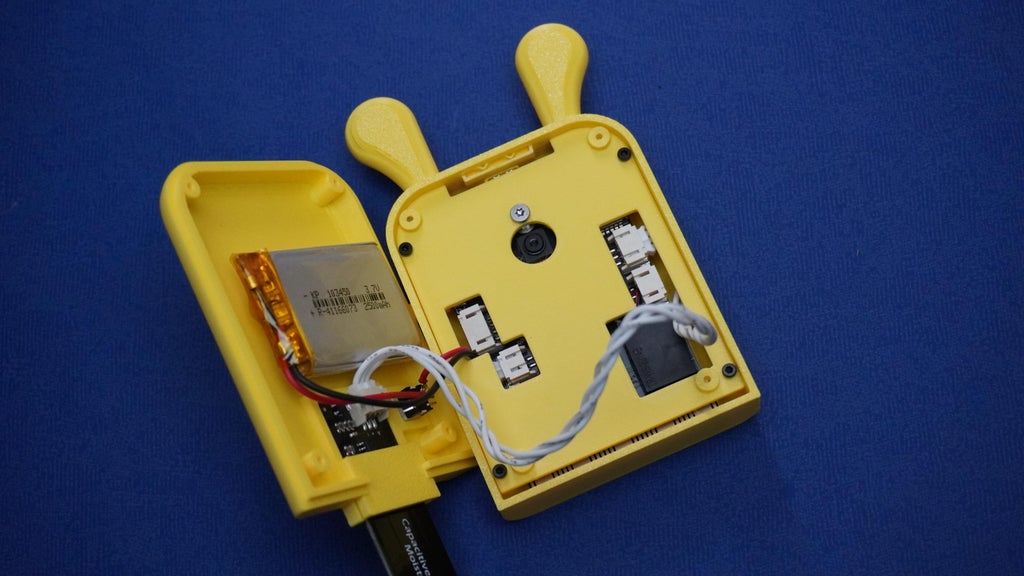
Ensure the microSD card (with files already copied) is properly inserted into the UNIHIKER's SD card slot. Take the battery and soil moisture sensor connector through the opening in the mount. Plug the battery into the battery connector on the UNIHIKER board. Connect the 3-pin soil moisture sensor cable to Port P0 on the UNIHIKER. Place the UNIHIKER onto the 3D-printed mount, aligning the screw hole(s). Use an M3 screw to securely fasten the UNIHIKER to the mount.
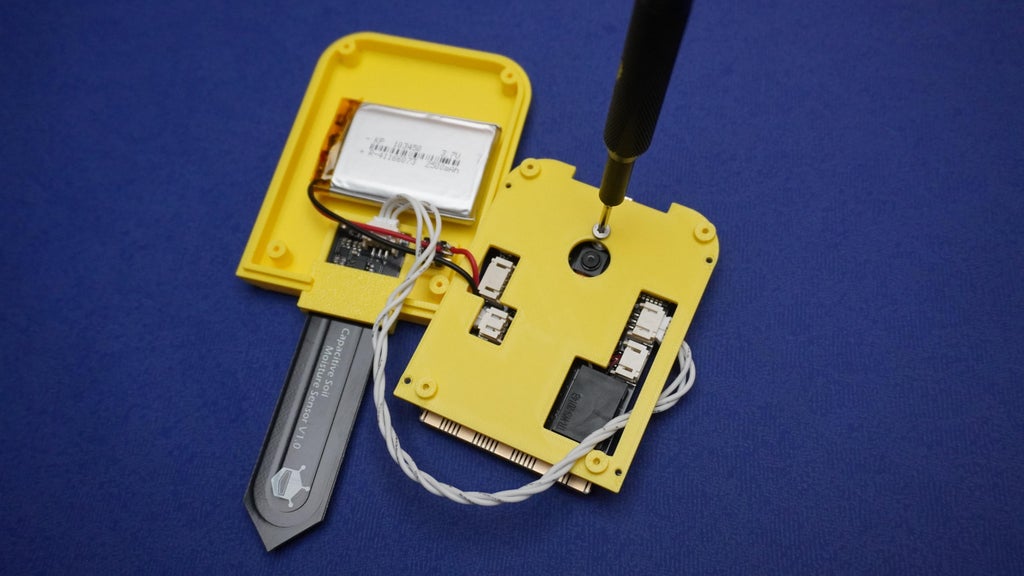
Parts Needed:
3D-printed housing, 3D-printed button, Completed mount & Cover assembly
Instructions:
Insert the 3D-printed button into its designated slot in the housing. Carefully lower the mount assembly into the housing. Make sure all components fit without stress and the cables are not pinched. Align the mounting holes on the mount with those in the housing. Use 4x M2 screws to fasten the mount securely into the housing. Tighten just enough to hold the components firmly, without cracking the plastic.
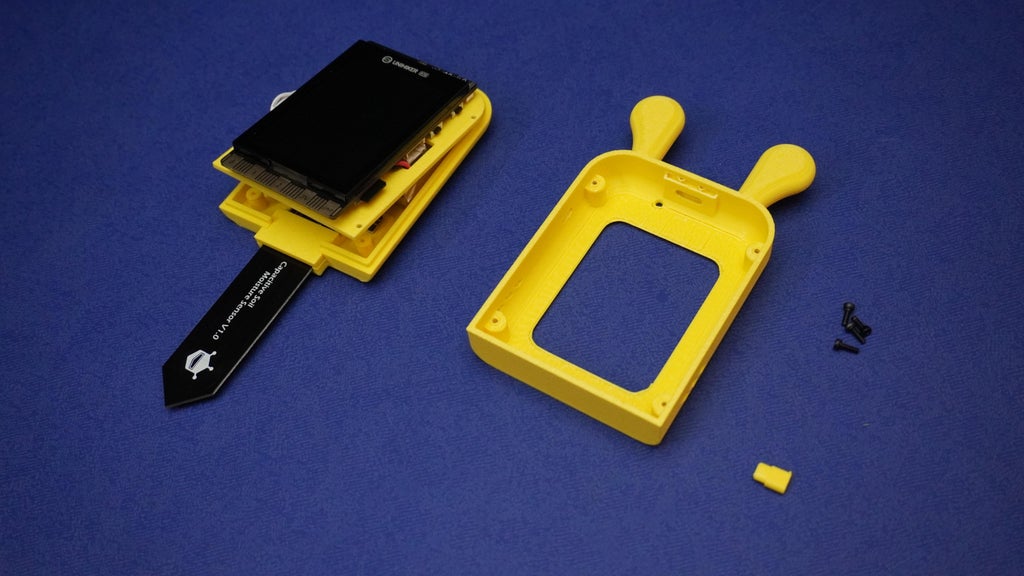

Take the cover assembly and carefully align it with the main housing.
Ensure the components inside are not stressed or pinched.
Use 4x M2 screws to fasten the cover securely to the housing.
Verify the button moves freely and presses Button B on the UNIHIKER mand the switch is accessible.
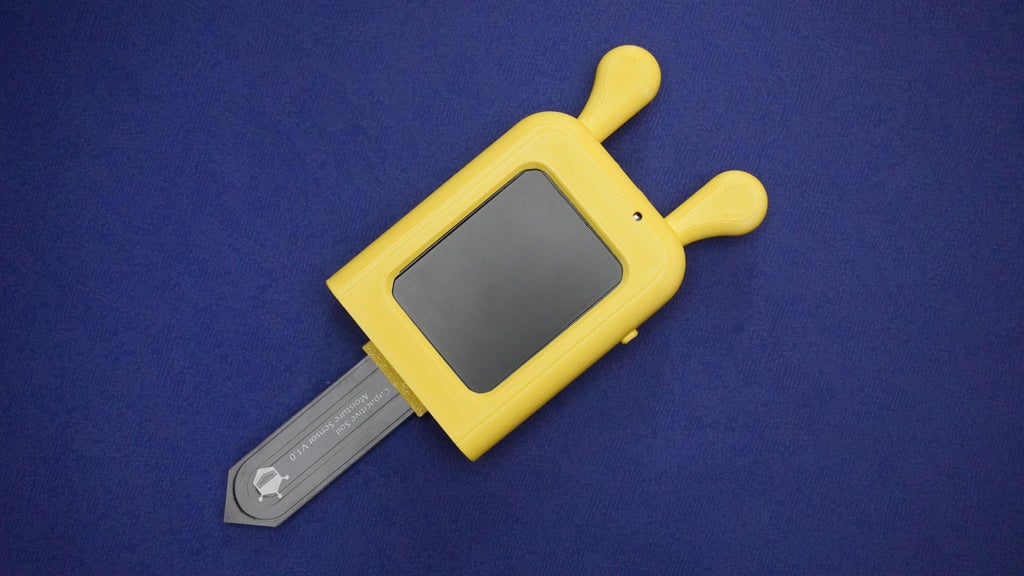
Your Bloom Buddy is now fully assembled, expressive, and ready to monitor your plants with personality.
How It Works?
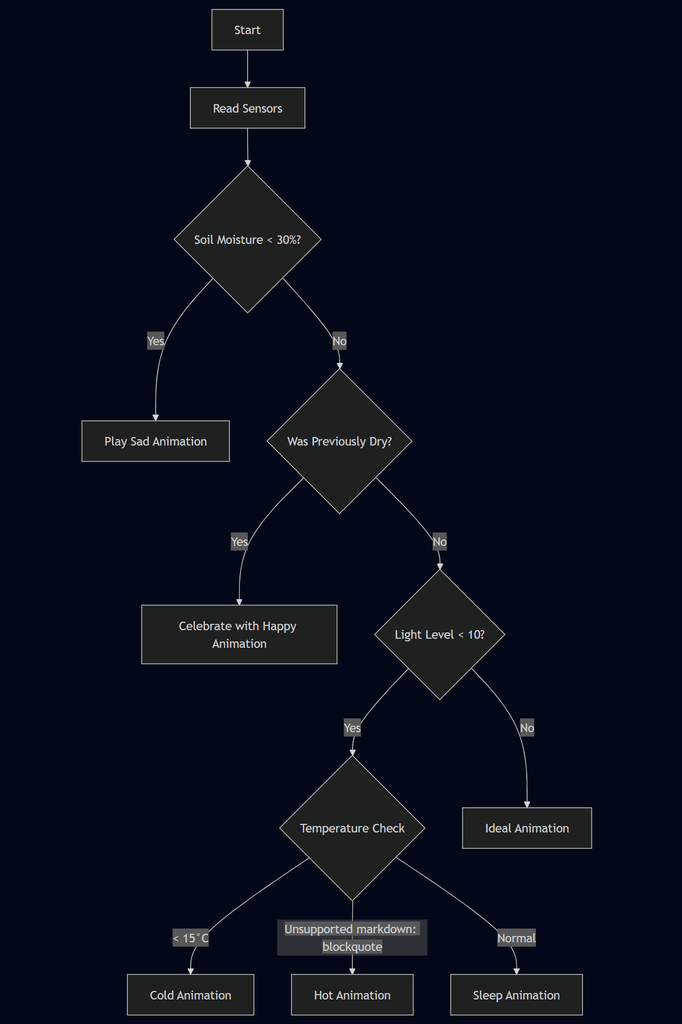
Sensor Thresholds & Calibration
To ensure Bloom Buddy behaves accurately and consistently, it uses threshold values to interpret the sensor data and respond accordingly. These values can be tweaked to suit your specific plant and environment needs.
Sensor Thresholds:
These constants define when Bloom Buddy reacts to environmental changes:
const int DRY_THRESHOLD = 30;      // Moisture % threshold for dryness
const int DARK_THRESHOLD = 10;     // Light level threshold for nighttime
const int COLD_THRESHOLD = 15;     // Temperature below this is considered cold (°C)
const int HOT_THRESHOLD = 40;      // Temperature above this is considered hot (°C)
These thresholds are used in the behavior logic (see Step 11) to decide how the device reacts with animations and sounds.
Moisture Sensor Calibration
Soil types vary widely, so it is important to calibrate your soil moisture sensor for accurate readings. This is done using two reference values:
const int MOISTURE_WET_VALUE = 600;    // Analog reading for completely wet soil
const int MOISTURE_DRY_VALUE = 3046;   // Analog reading for completely dry soil
The device uses these values to convert the raw sensor reading into a percentage:
100% = MOISTURE_WET_VALUE
0% = MOISTURE_DRY_VALUE
How to Add Custom Animations and Voice Responses to Bloom Buddy
Animations in Bloom Buddy are created by sequentially displaying image frames stored on the SD card. Each animation is defined as a function that calls canvasDrawImage() repeatedly to show each frame.
A. Adding Custom Animations
Animations are created by displaying a sequence of images in rapid succession. Each animation function uses canvasDrawImage() to show individual frames stored on the SD card.
1. Prepare Your Images
Create PNG images (preferably 240x320 to match the K10 screen).Name them sequentially (e.g., WAVE1.png, WAVE2.png, ..., WAVE6.png).Save them in the appropriate SD card directory, e.g., S:/Emoji/.
2. Create a New Animation Function
Here's how to create a new animation called WaveAnimation():void WaveAnimation() {
k10.canvas->canvasDrawImage(0, 0, "S:/Emoji/WAVE1.png");
k10.canvas->updateCanvas();
k10.canvas->canvasDrawImage(0, 0, "S:/Emoji/WAVE2.png");
k10.canvas->updateCanvas();
k10.canvas->canvasDrawImage(0, 0, "S:/Emoji/WAVE3.png");
k10.canvas->updateCanvas();
k10.canvas->canvasDrawImage(0, 0, "S:/Emoji/WAVE4.png");
k10.canvas->updateCanvas();
k10.canvas->canvasDrawImage(0, 0, "S:/Emoji/WAVE5.png");
k10.canvas->updateCanvas();
k10.canvas->canvasDrawImage(0, 0, "S:/Emoji/WAVE6.png");
k10.canvas->updateCanvas();
}3. Trigger the Animation
Call WaveAnimation(); inside your loop() or based on a condition (e.g., when the temperature is just right).B. Adding Custom Voice Responses
Voice responses are .WAV files stored on the SD card and played using the Music object.
1. Record or Get WAV Files
Format: .wav (mono or stereo, 8-bit or 16-bit PCM)Filenames like FUN1.wav, FUN2.wav, etc., are recommended2. Copy Files to SD Card
Place the voice files in the S:/Voice/ folder on the SD card.3. Play Voice File in Code
You can play a specific or random file like this:
int index = random(1, 4);  // FUN1.wav to FUN3.wav
String file = "S:Voice/FUN" + String(index) + ".wav";
music.stopPlayAudio();
music.playTFCardAudio(file.c_str());Conclusion
The Bloom Buddy – Smart Plant Companion brings emotional intelligence to plant care by combining sensor-based monitoring, interactive animations, and context-aware voice feedback. Built on the UNIHIKER K10 platform, it not only measures vital plant conditions like soil moisture, light, temperature, and humidity, but also expresses the plant's “mood” through rich visual and audio personality cues.
This Project transforms simple environmental readings into a lively, engaging experience. Whether your plant is “sad” from dryness or “happy” after watering, Bloom Buddy offers a fun and intuitive way to understand and respond to plant needs.
What You've Learned:
✅ How to read and process sensor data
✅ How to manage SD card media for animations and audio
✅ How to trigger events based on environmental thresholds
✅ How to build engaging UI/UX on embedded platforms
What You Can Do Next:
Add Wi-Fi/Bluetooth to log data online or send mobile notificationsTrain a machine learning model to predict watering schedulesInclude voice recognition for user commandsDesign your own custom emojis, animations, or personalities
🌱 Bloom Buddy isn't just a plant monitor, it's a plant companion that speaks your plant's language.


