

 The Adorable AI Bunny That Talks, Listens, and Teaches!
AI Bunny is a charming, educational, and deeply interactive companion. Housed in a 3D-printed bunny-faced enclosure, this delightful device isn't just cute, it listens, speaks, responds, and teaches. Whether it's practicing language skills, telling stories, playing educational games, or answering curious questions, AI Bunny is a DIY marvel that brings edge AI to life in a way kids (and grownups) can actually engage with.
In today's world, kids as young as 2-4 years old are increasingly exposed to mobile phones and tablets, often leading to:
*Reduced attention span
*Increased screen dependency
*Overstimulation and delayed speech development
AI Bunny offers voice-driven learning experience that encourages active participation instead of passive scrolling. It's playful, educational, and distraction-free, designed to spark curiosity without digital overload.
Powered by UNIHIKER K10 – An All-in-One AI Dev Board
At the heart of AI Bunny is the UNIHIKER K10, a compact, all-in-one development board built on the powerful ESP32-S3. Why UNIHIKER? Because it's a dream for makers, combining:
*2.8” LCD touchscreen
*Built-in microphone
*Onboard speaker
*Camera module
*Temperature, humidity, and light sensors
*3-axis accelerometer
*2 programmable buttons
*Wi-Fi and Bluetooth support
All of this in a plug-and-play package, no breadboards, no tangled jumper wires. Just focused, functional, creative prototyping.
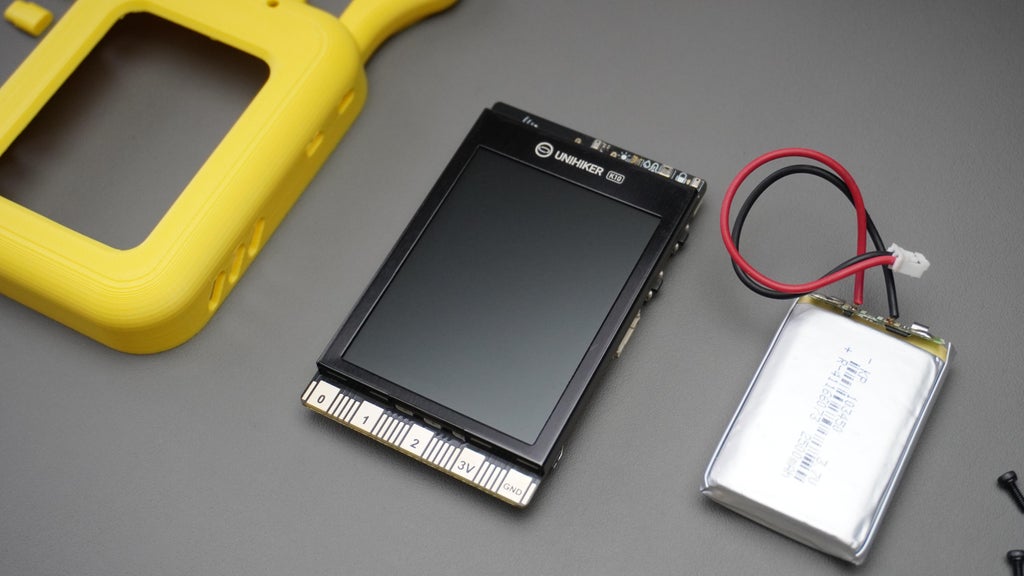
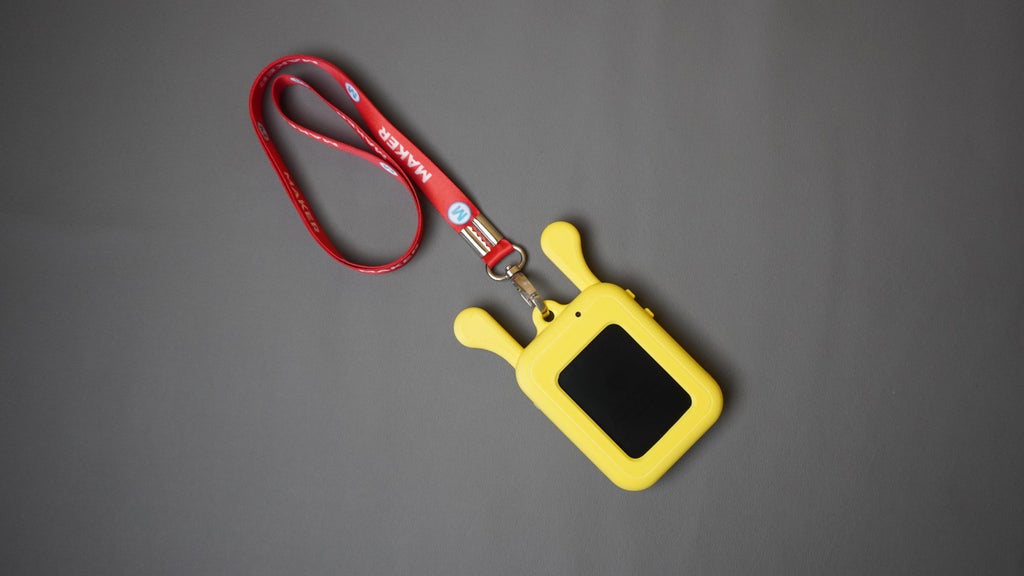
Fully Portable and Rechargeable
AI Bunny includes a Lithium-Ion battery, securely mounted inside the case and wired through a power switch. Best of all, it charges directly via the UNIHIKER's USB Type-C port, so no need to remove the battery or open the case. Plug it in, and it charges while you build or code!
Built with Xiaozhi + DeepSeek, Real AI on the Edge
By leveraging the open-source xiaozhi-esp32 project, we've enabled localized AI voice chat right on the ESP32-S3. With support for models like DeepSeek, AI Bunny can:
*Recognize your voice
*Understand and reply using large language models
*Translate between languages
*Hold multi-turn conversations just like a smart assistant
All of this happens with low latency and high reliability, especially impressive given the device's size and cost.
Image Recognition (Experimental)
AI Bunny also supports capturing images using the onboard camera. While Xiaozhi currently faces upload limits due to server load, the system is designed so that once an image is captured and successfully uploaded, the language model can analyze and describe whatever is in the picture. This opens the door for vision-based interaction, object recognition, and future accessibility features.
Why AI Bunny?
Whether you're:
*Building an educational voice assistant for your child
*Prototyping your own AI-powered project
*Exploring AI at the edge with practical real-world sensors
AI Bunny proves that playful design and serious tech can go hand-in-paw.
Let's build an AI Bunny that listens, learns, and speaks back, all from the palm of your hand.

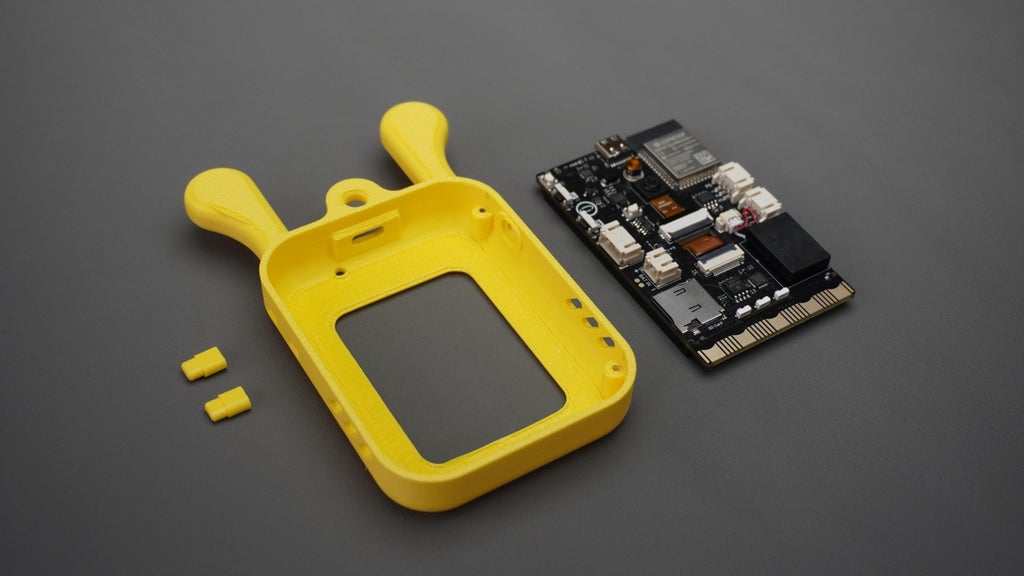
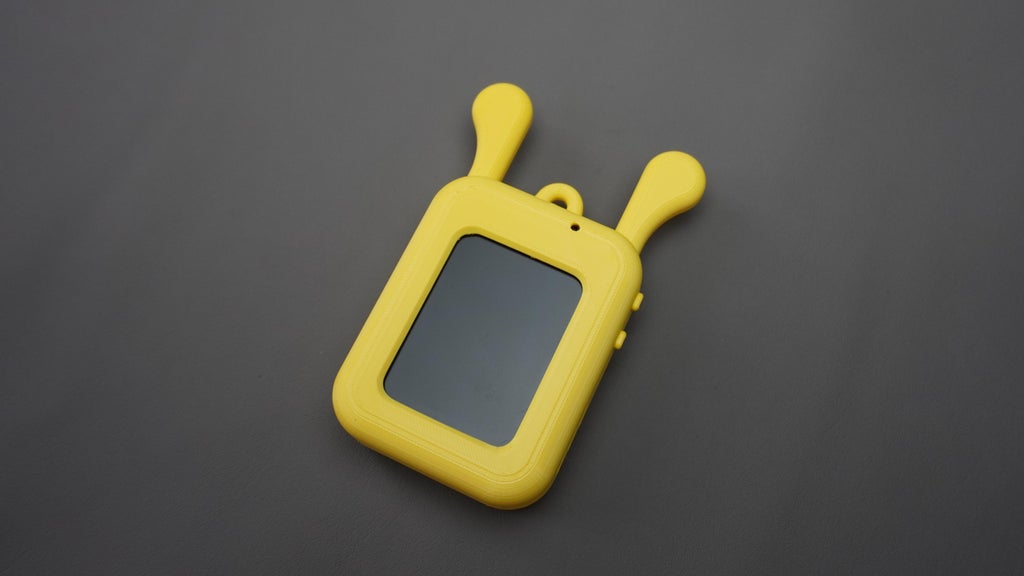
To bring AI Bunny to life, I designed a custom bunny-shaped enclosure using Fusion 360. The goal was to create a functional yet fun housing for the UNIHIKER K10, keeping it secure while giving it a playful personality.
Design Process
*I began by importing the official UNIHIKER K10 CAD model into Fusion 360.
*Then, I modeled the enclosure around it, adding precise cutouts for:
*The power switch
*The screen
*Airflow and the speaker outlet
*A rear camera window
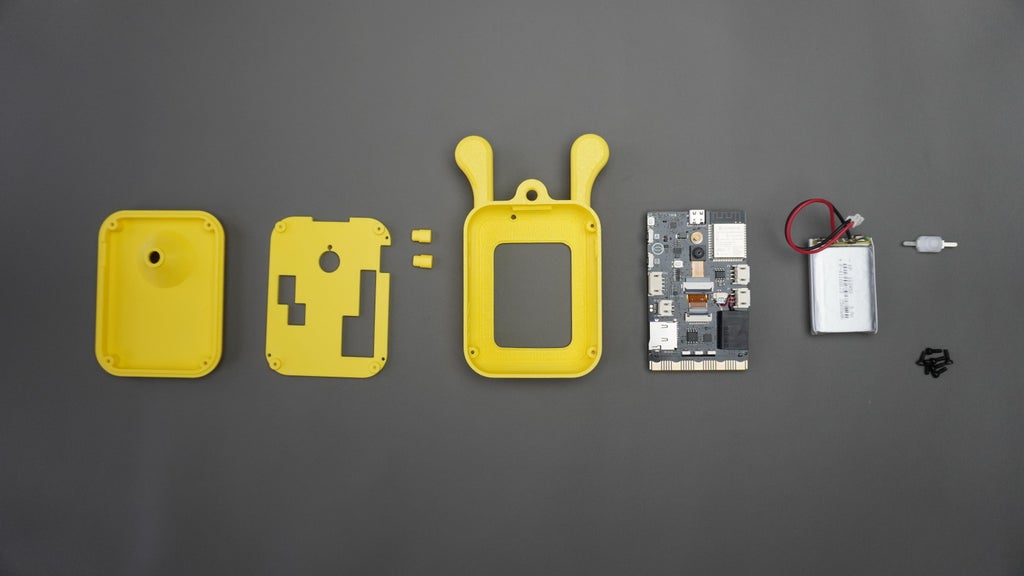
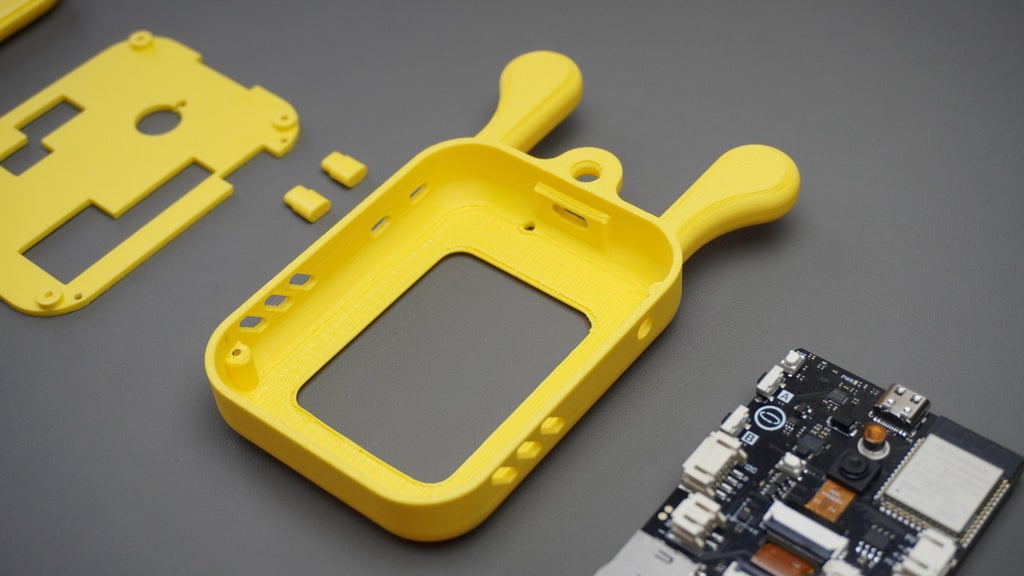
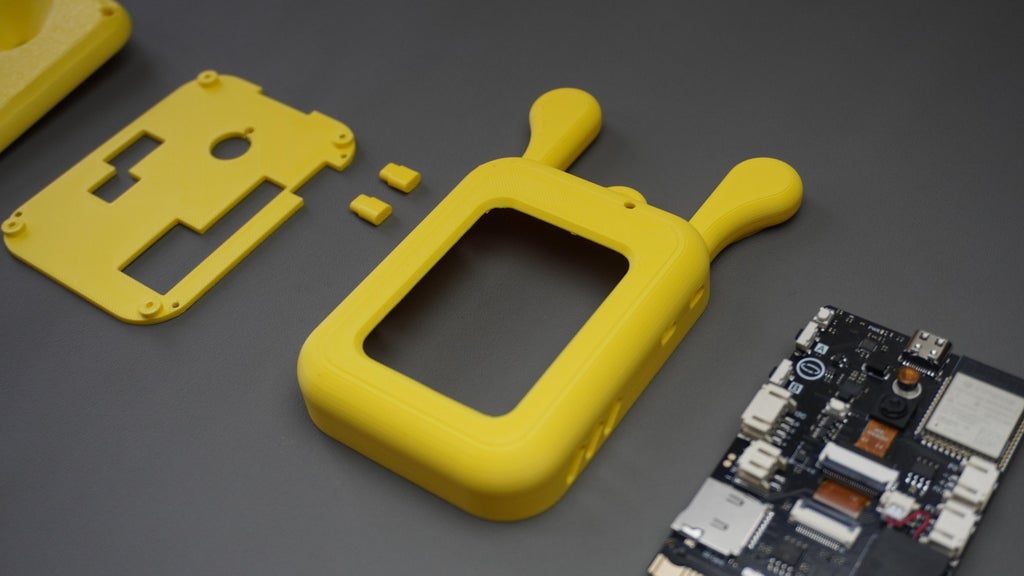
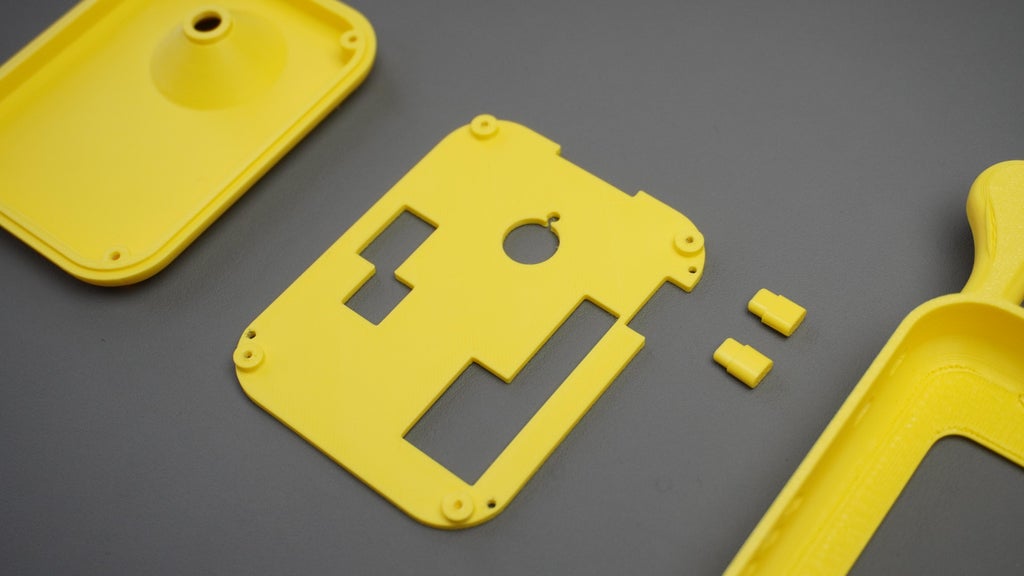
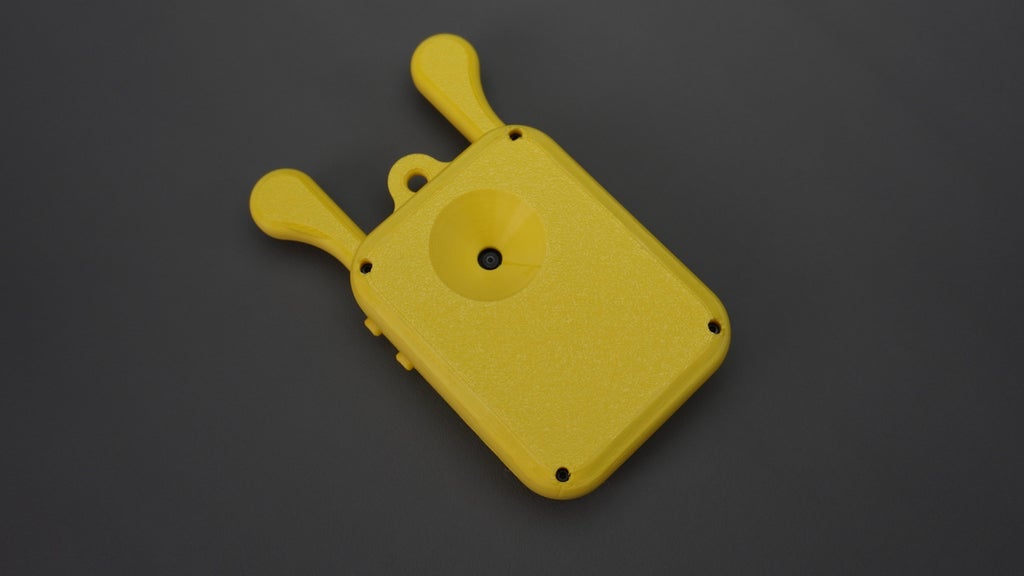
The enclosure is made up of 4 modular components:
*Main Housing - Holds the UNIHIKER K10 securely and has cutouts for the screen, airflow, and speaker output
*Middle Plate - Supports and secures the board and power switch in position
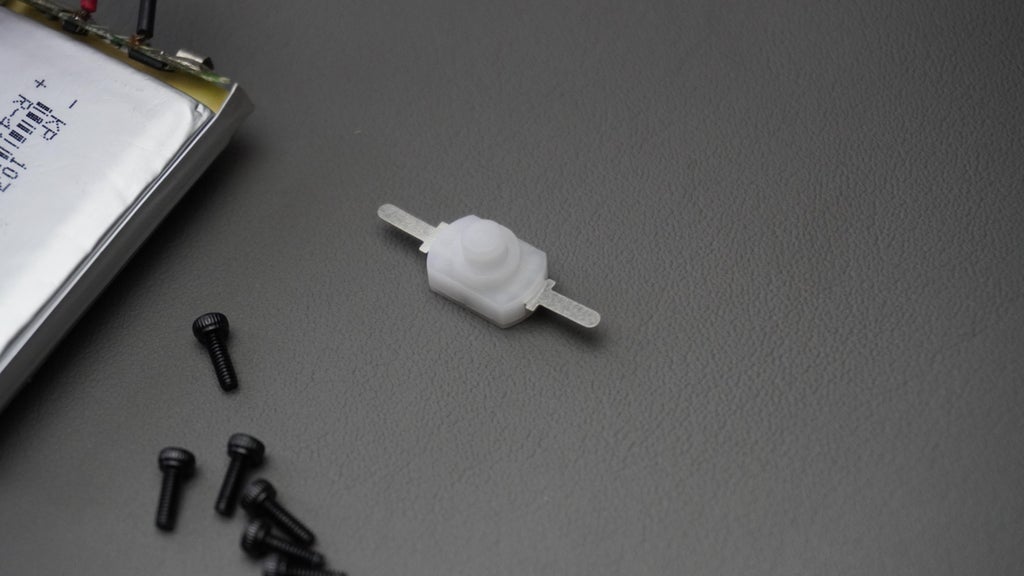
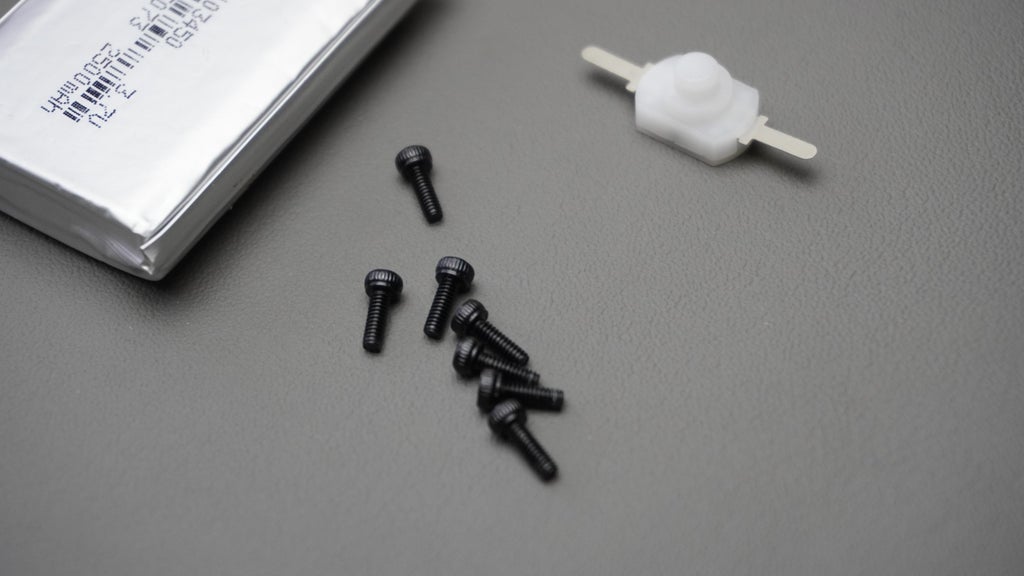
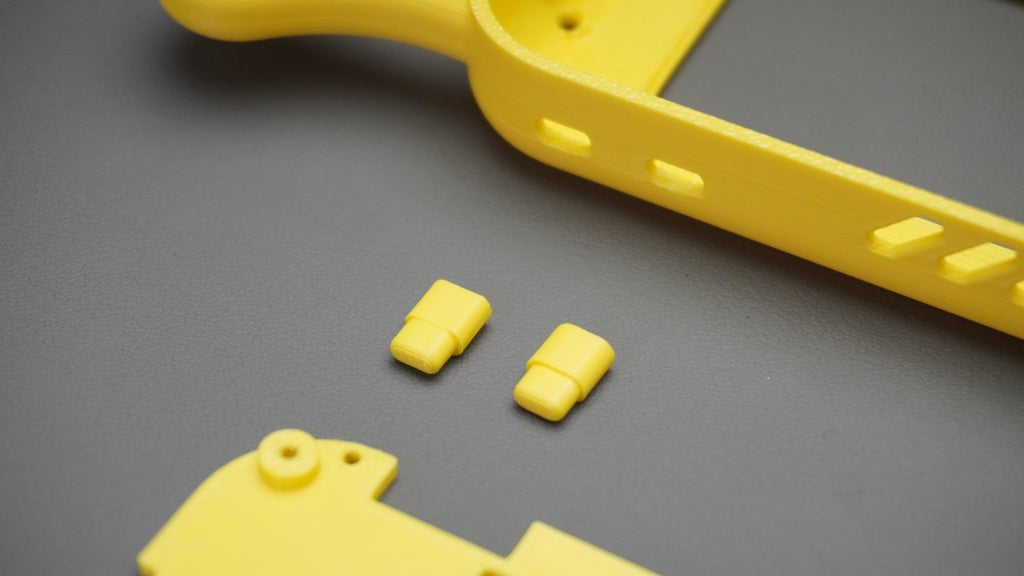
*Push Button Extensions (x2) - Designed to align with the K10’s two programmable buttons, provide tactile interaction through the case
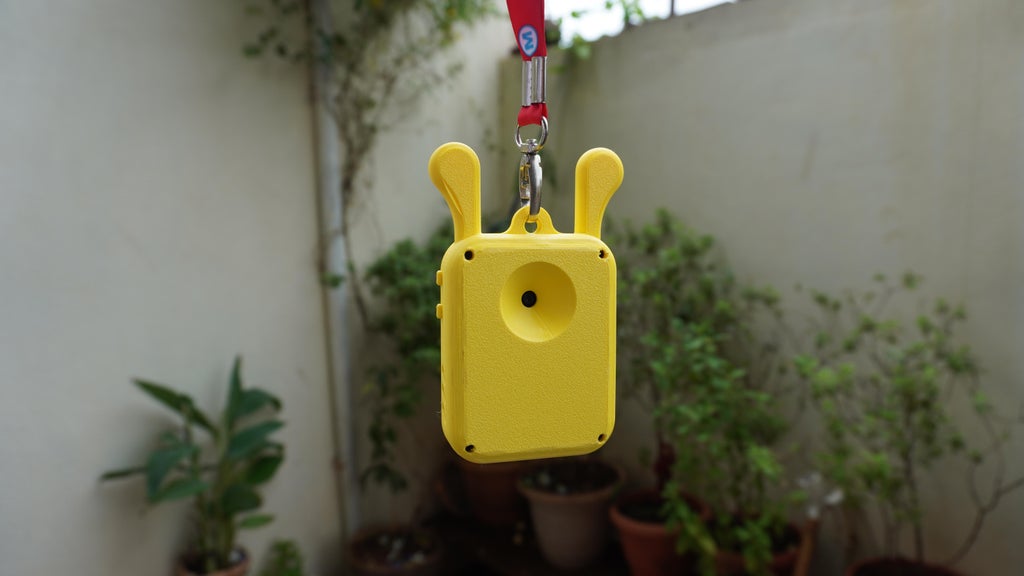
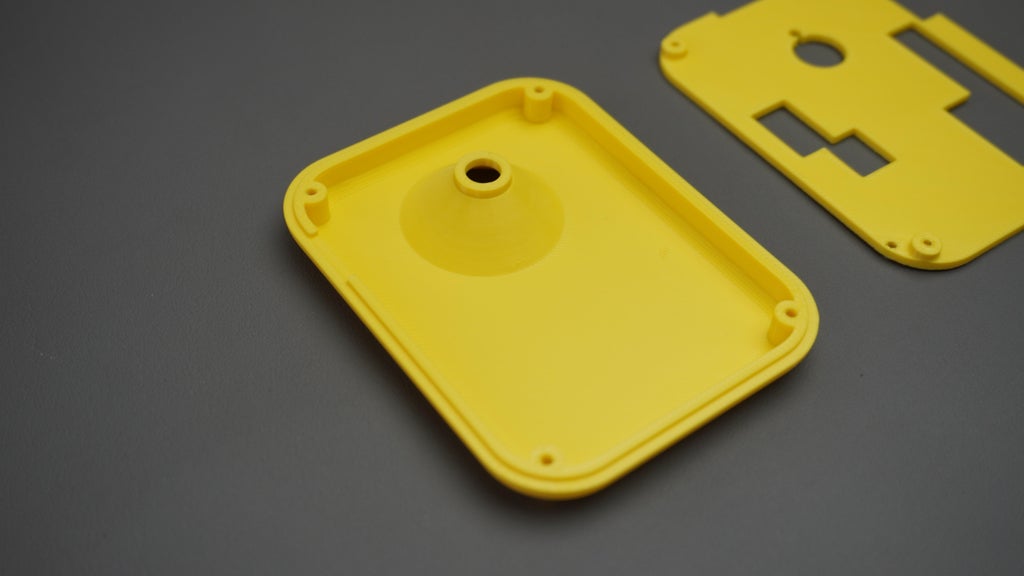
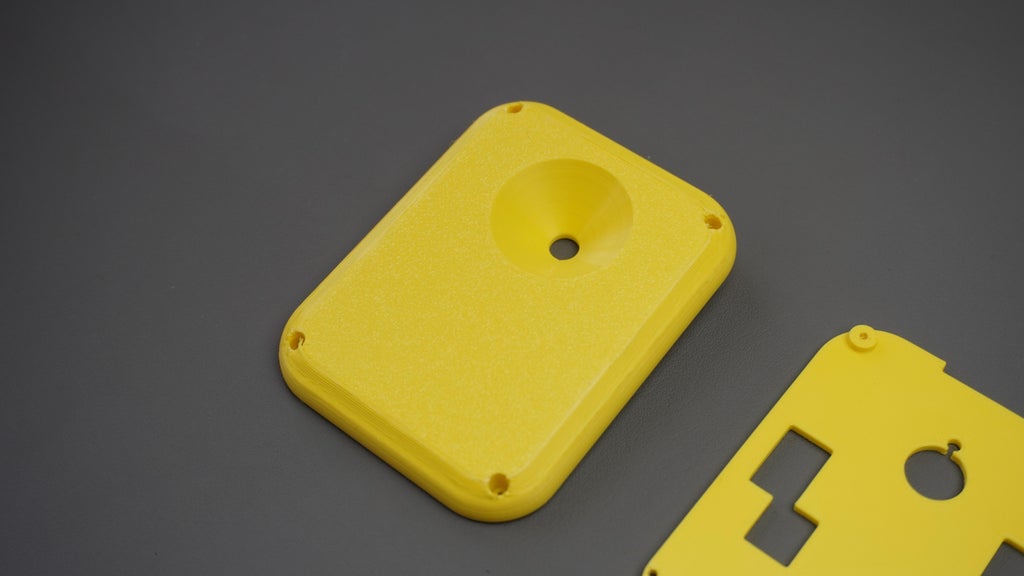
*Back Cover - Seals the enclosure and features an opening for the rear camera module.
Printing Instructions
*You can download the STL files directly and start printing or open the STEP file in Fusion 360 if you'd like to customize the design to suit your needs.
*I printed my enclosure using a Bambu Lab P1S with yellow PLA filament.
Bloom Buddy Fusion 360 File
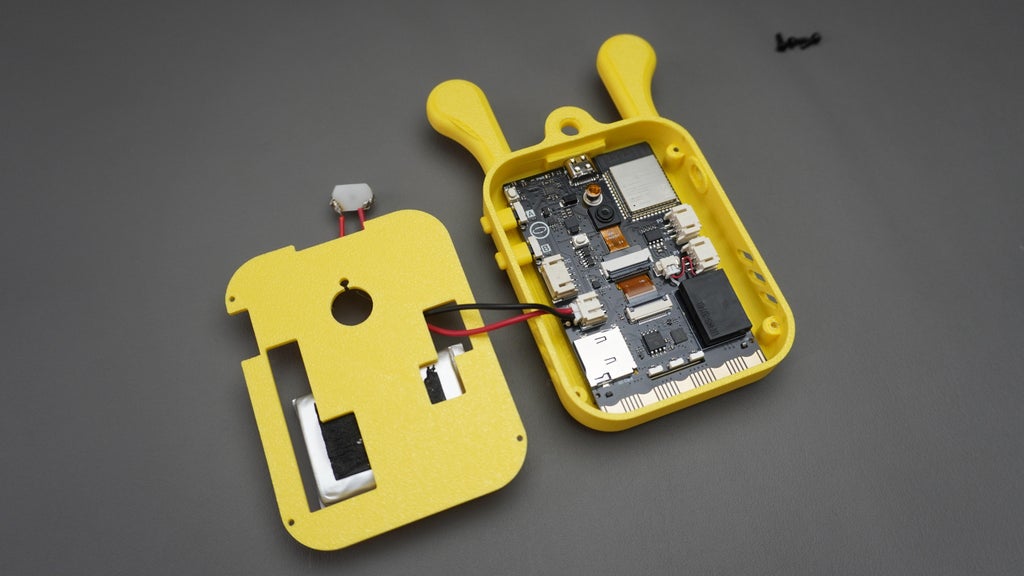
 Now that the parts are printed, it's time to assemble the AI Bunny's main housing.
What You will Need:
*Main Housing (3D printed)
*2x Push Button Extensions
*UNIHIKER K10 Board
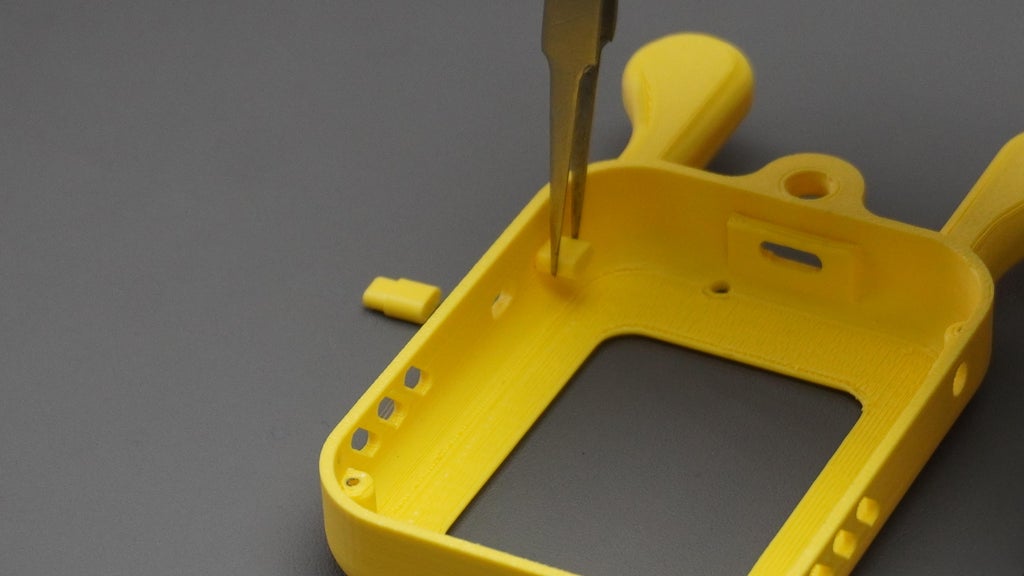
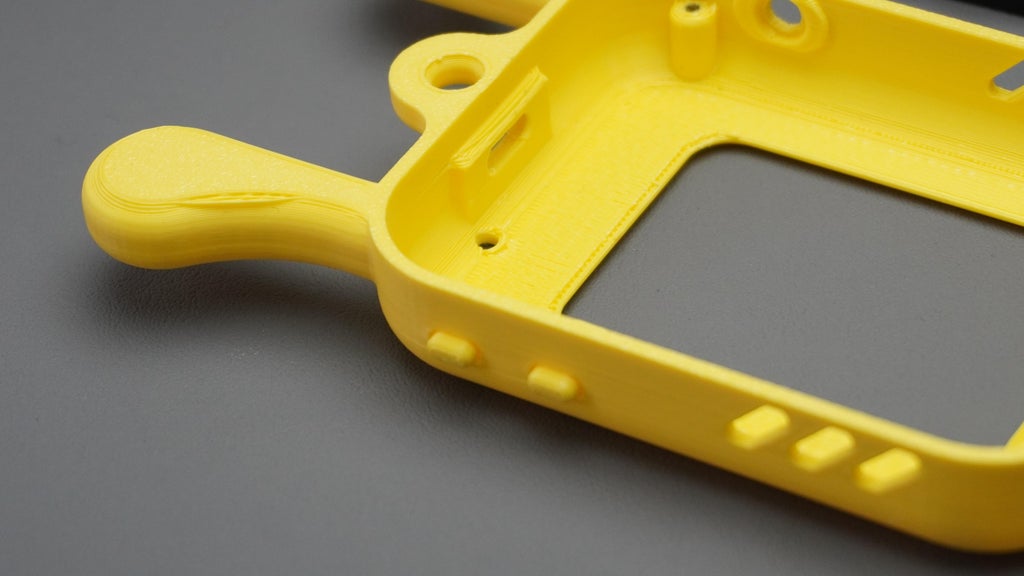
Insert the Button Extensions
*Place the two identical push button extensions into their respective slots inside the housing.
*Make sure they move freely, if they feel tight or get stuck, use a bit of fine-grit sandpaper to smooth the edges until they can click/toggle with ease.
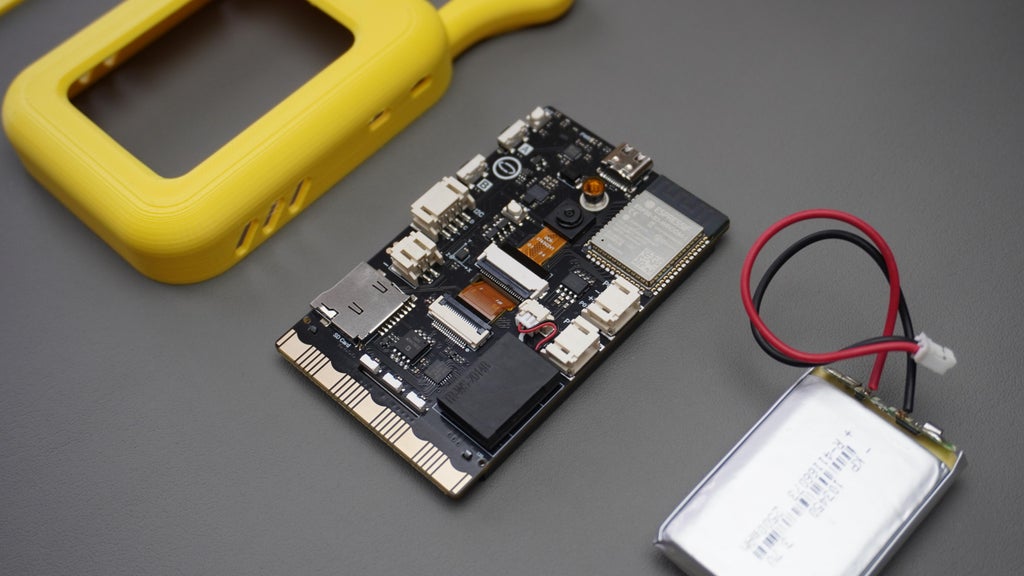
Mount the UNIHIKER K10
*Gently slide the UNIHIKER K10 into the housing, aligning - USB Type-C port with the corresponding cutout, and board’s physical buttons with the button extensions.
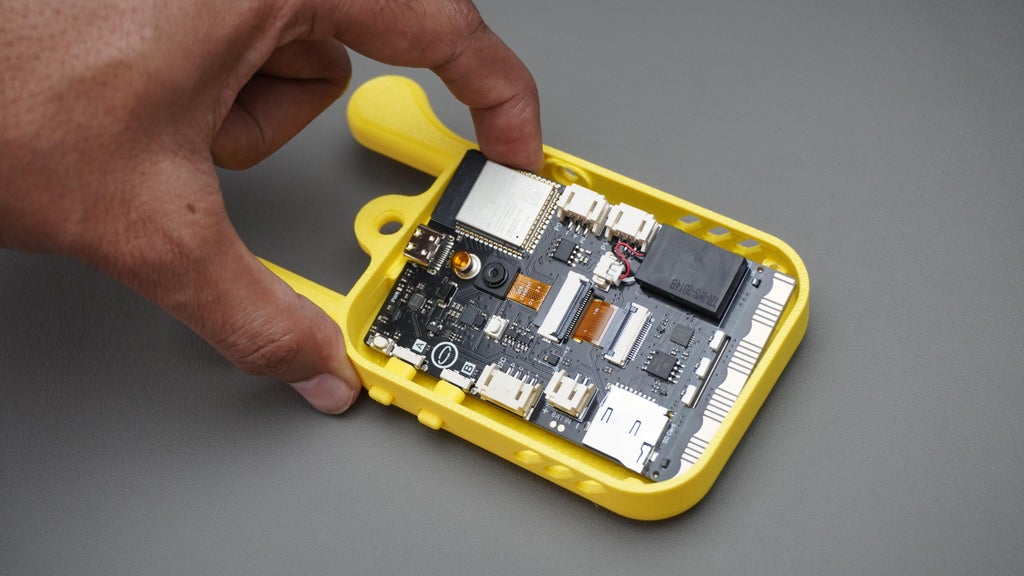


Test buttons press responsiveness now, before closing the enclosure.
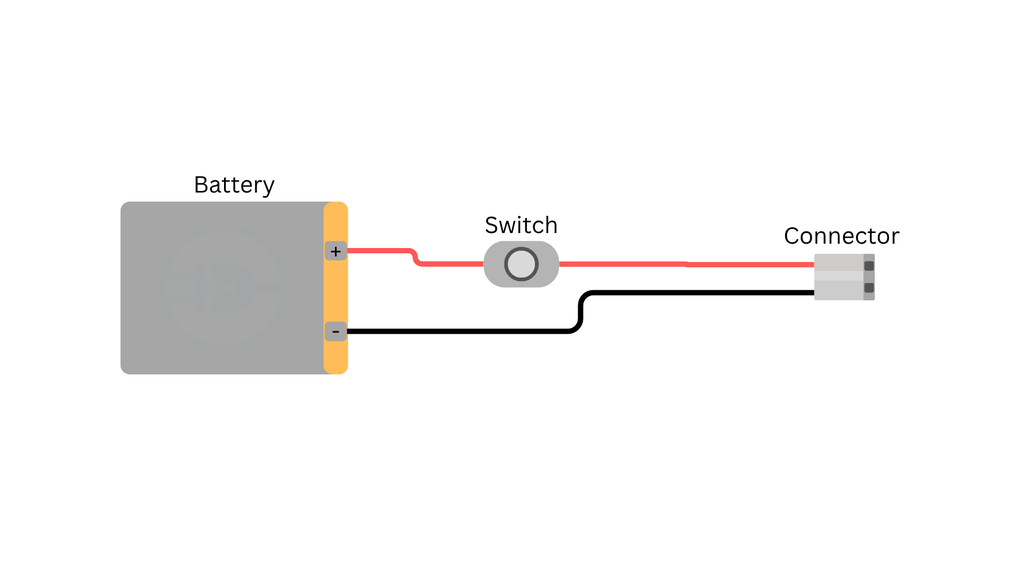
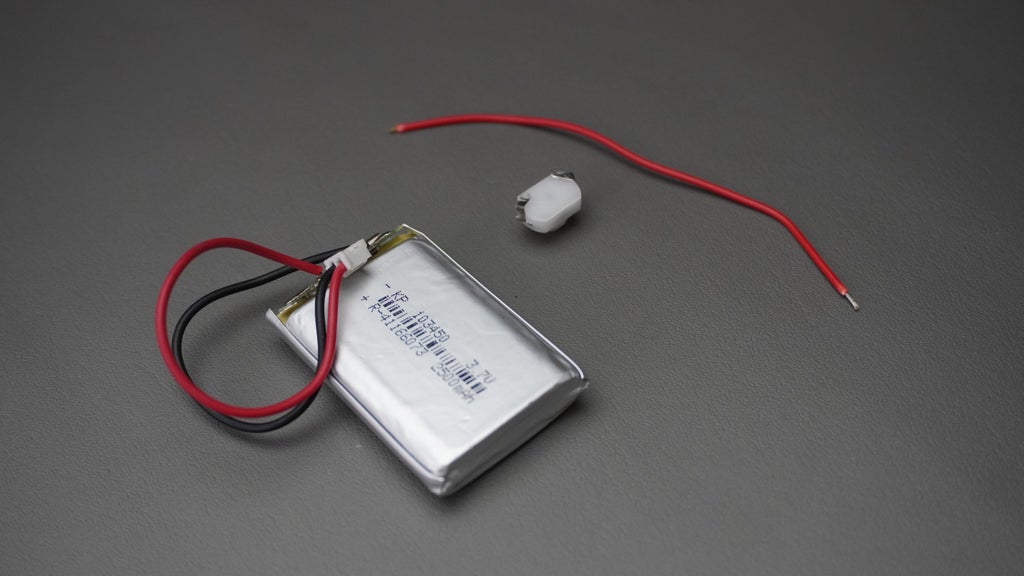
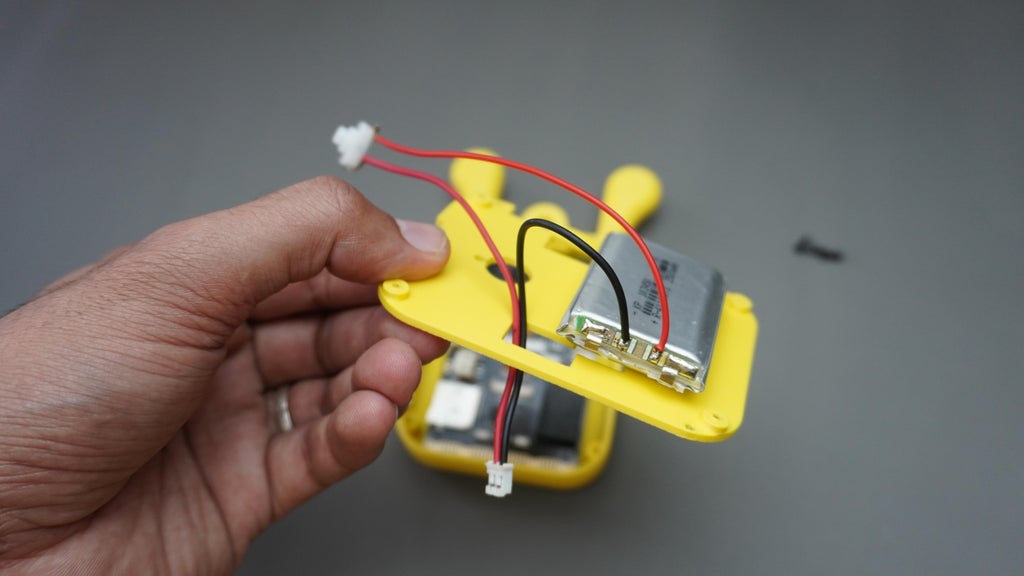
To safely power your AI Bunny and control it with the external switch, we'll modify the battery connection using a simple inline cut-and-solder method.
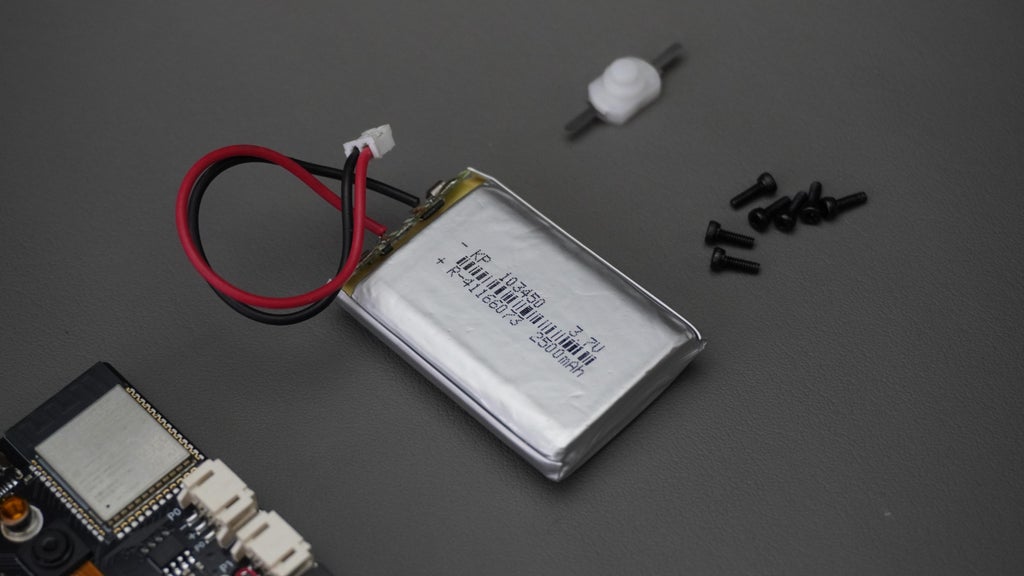
What You will Need:
*LiPo Battery with JST connector
*Wire cutters/stripper
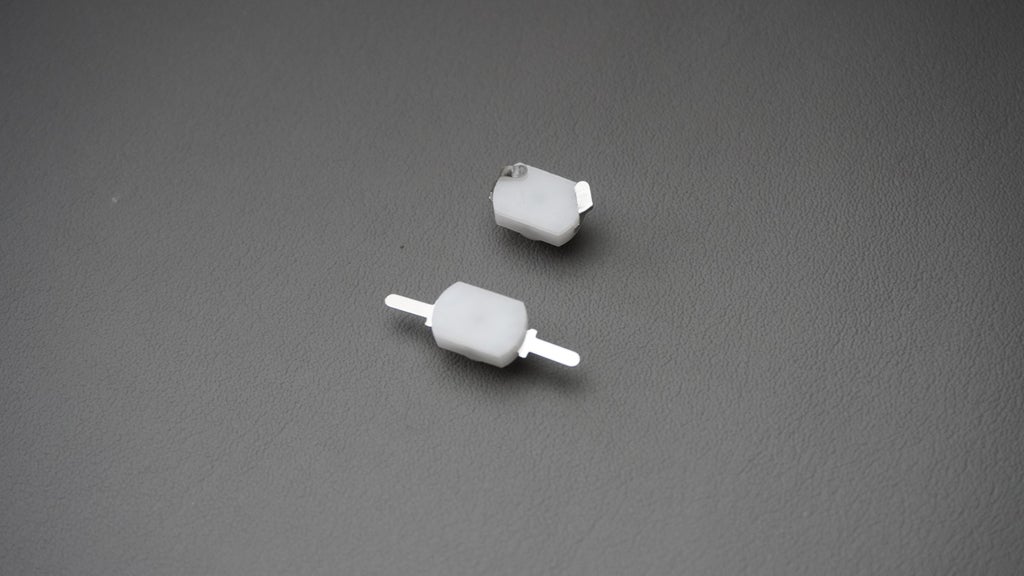
*Push Switch
*Soldering iron + solder
Steps to Add the Power Switch:
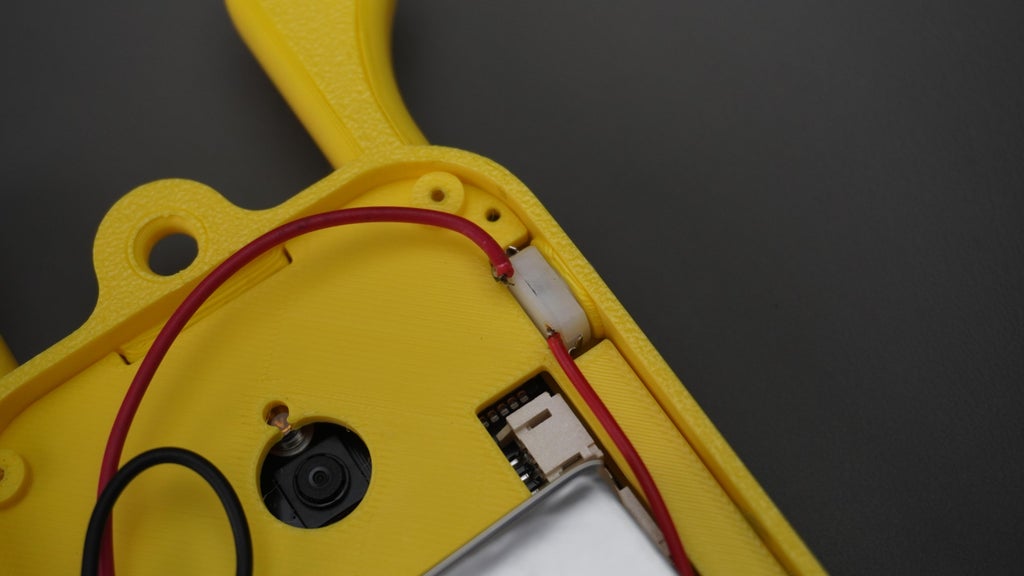
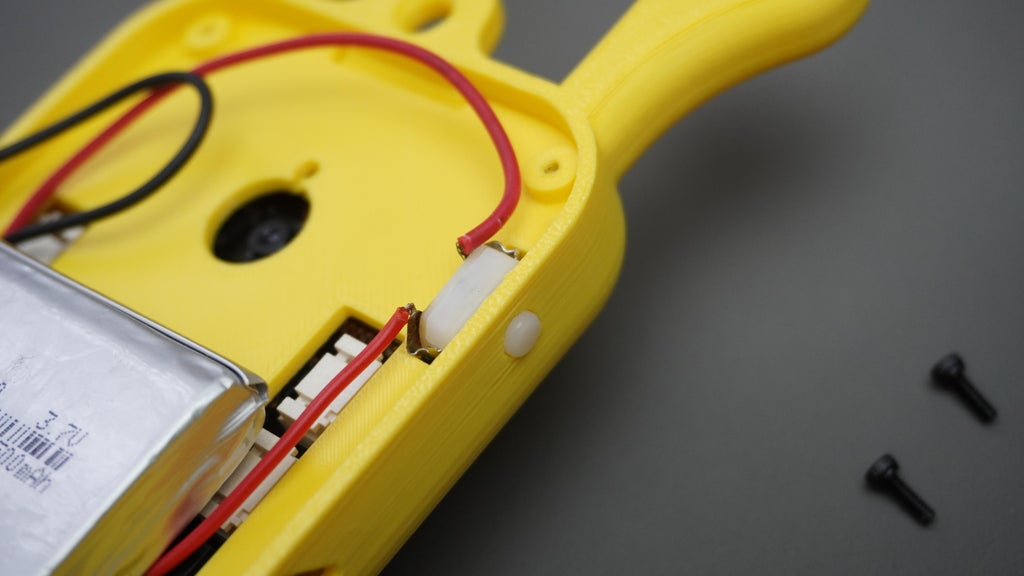
*Identify the Red Wire (Positive Line)
*Gently bend the switch terminals so they point upward and toward the back, making it easier to fit inside the enclosure and plate.
*Identify the red wire between the battery and the JST connector (the positive line).
*Carefully cut this wire in the middle.
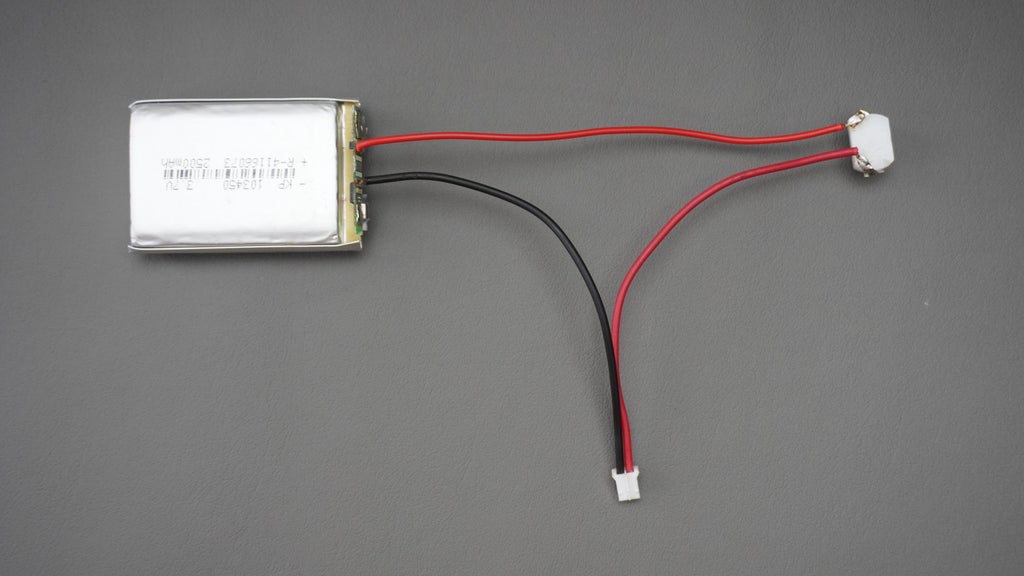
*Solder the battery end of the red wire to one terminal of the switch.
*Solder the JST connector end of the red wire to the other terminal.
*This places the switch in series, so it can control the power flow from the battery to the UNIHIKER.
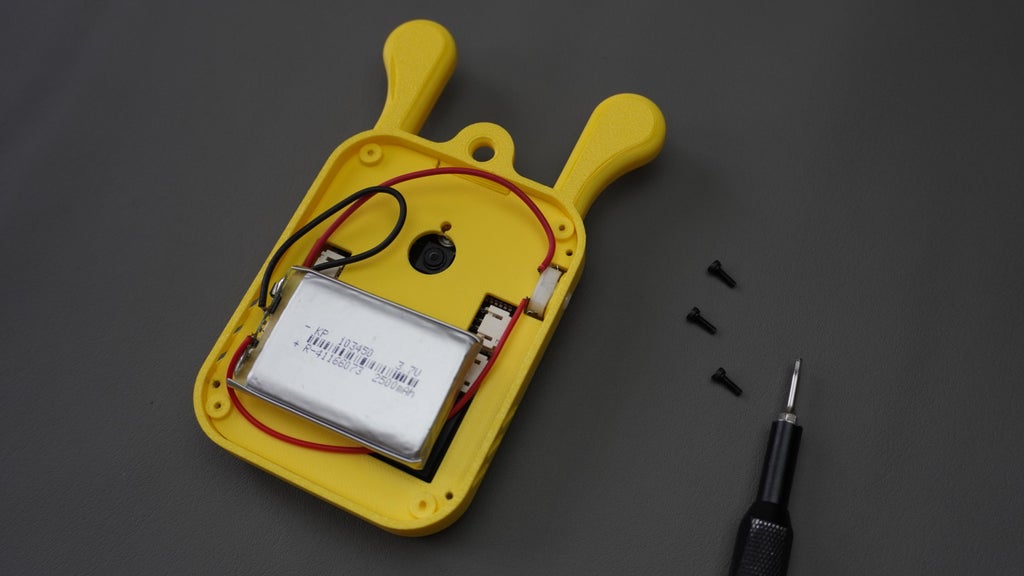
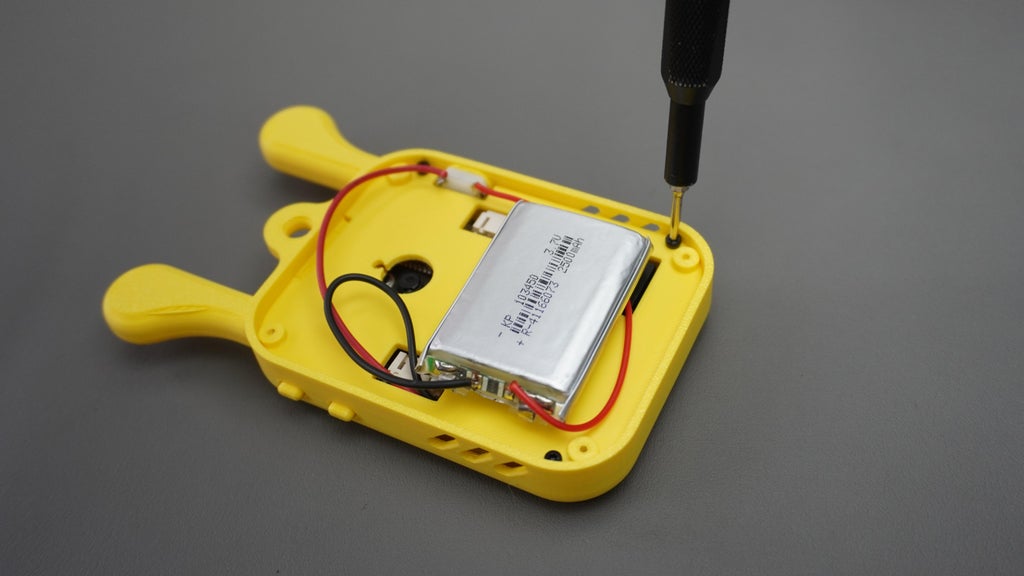
What You will Need:
*Assembled housing
*Battery with wired switch
*Middle plate
*3x M2 screws (8mm length)
*Double-sided tape
Assembly Instructions:
*Stick a piece of double-sided tape to the back of the battery and firmly press the battery onto the middle plate.
*Carefully route the JST connector wire through the cutout in the plate and plug the JST connector into the UNIHIKER's battery port.
*Align the power switch with the cutout in the housing and press it.
*Gently place the middle plate into the housing, ensuring everything fits snugly.
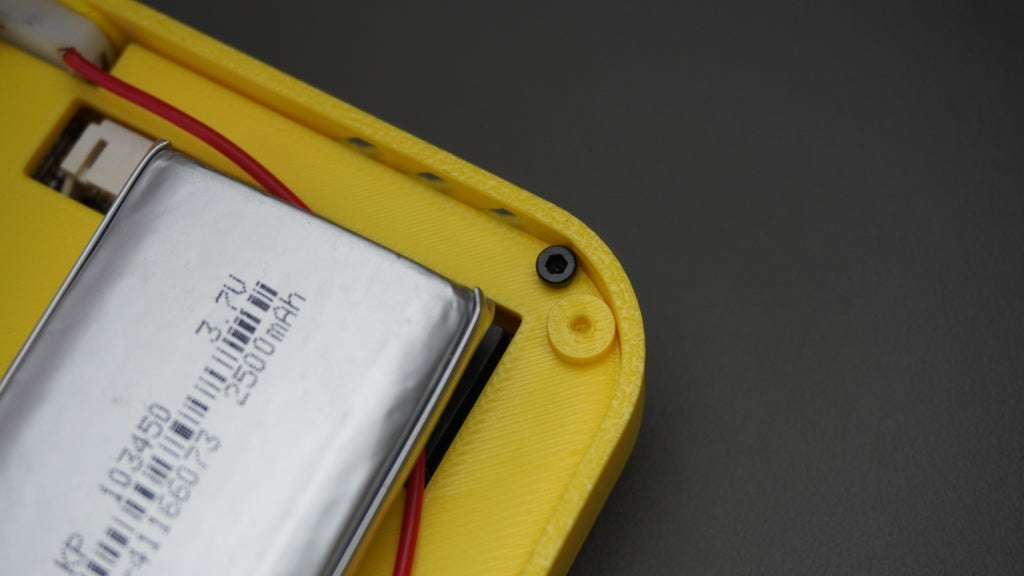
*Use 3x M2 8mm screws to secure the plate in place.


You are almost done! Let's finish assembling the enclosure by attaching the back cover.
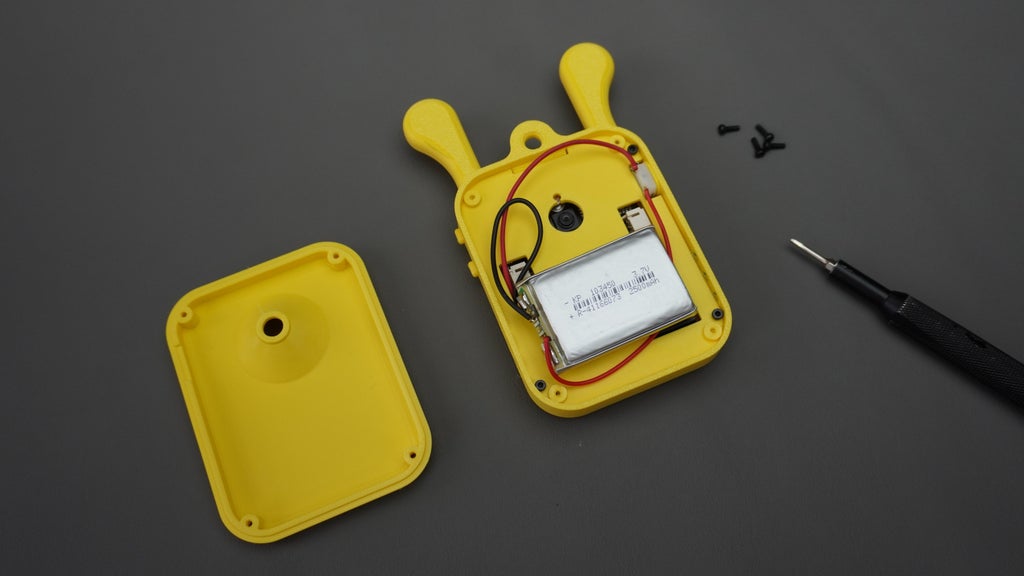
What You will Need:
*Fully assembled housing (with UNIHIKER, plate, and battery)
*Back cover
*4x M2 screws (8mm length)
Assembly Instructions:
*Take the back cover and align it with the housing, making sure the camera hole lines up with the UNIHIKER's rear camera module.
*Gently snap the cover onto the housing. Ensure all edges sit flush.
*Use 4x M2 8mm screws to firmly secure the cover in place.
That's it! Your AI Bunny enclosure is now fully assembled and ready for action.

 Now that your AI Bunny is physically assembled, it's time to give it a brain! We'll flash the xiaozhi firmware to enable voice chat and smart interactions.
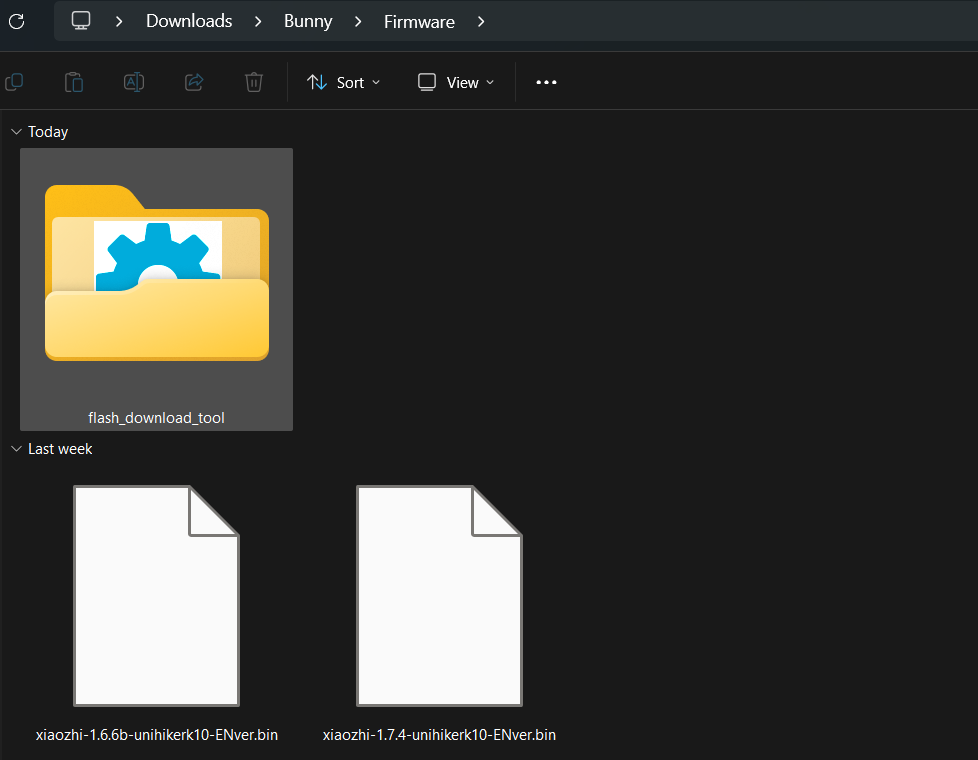
*Plug the UNIHIKER K10 into your PC using a USB Type-C cable.
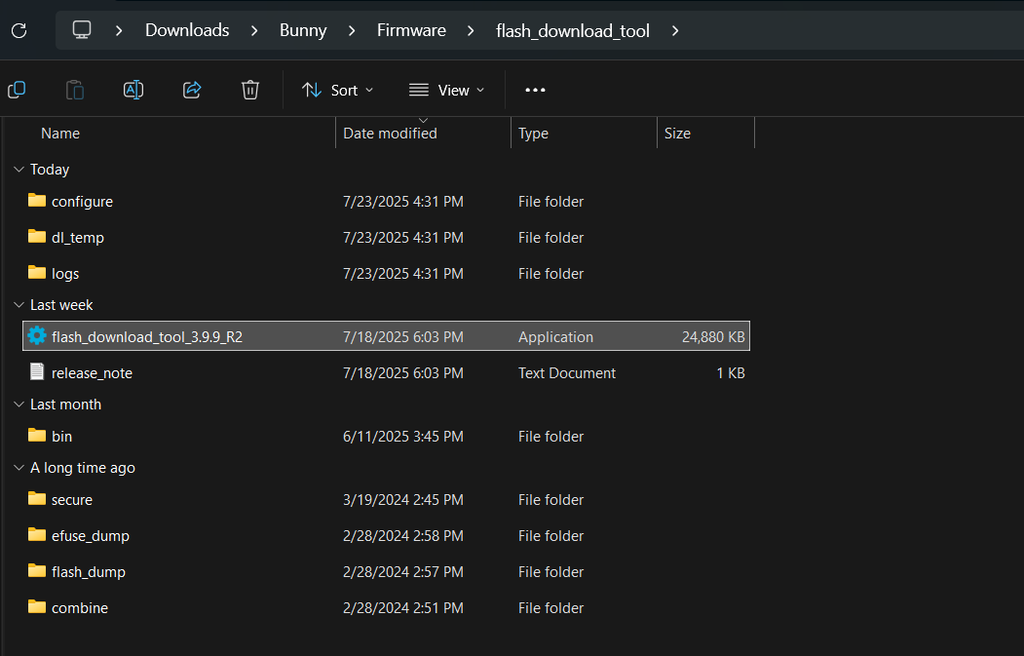
*Download the latest ESP Flash Download Tool from the Espressif website.
*Get the compiled English xiaozhi firmware .bin file from the AI Bunny GitHub repo.
Open the Flash Tool
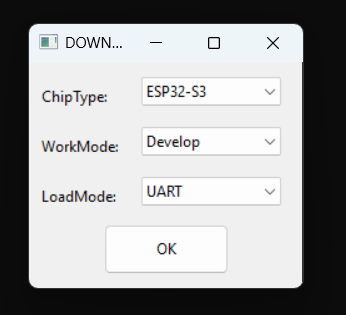
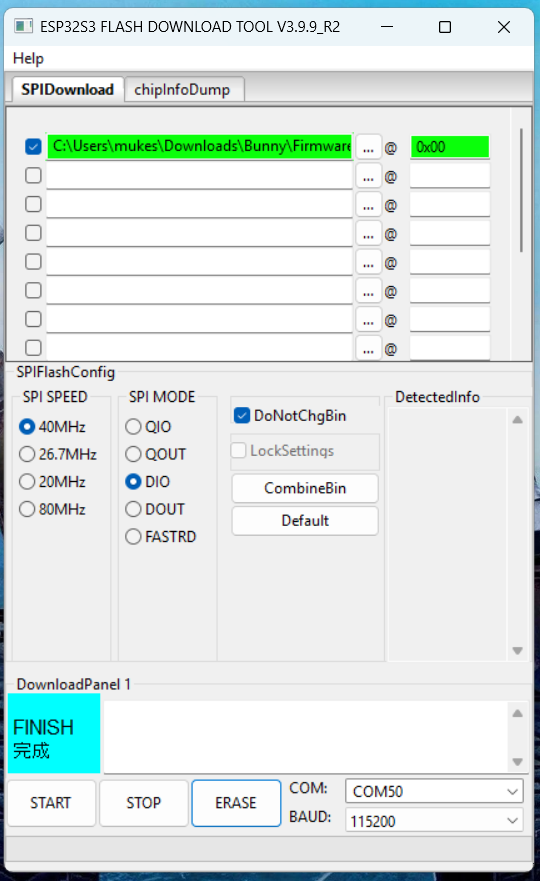
*Launch ESP Flash Download Tool and configure the following:
*Chip Type: ESP32-S3
*WorkMode: Develop
*LoadMode: UART
Load the Firmware
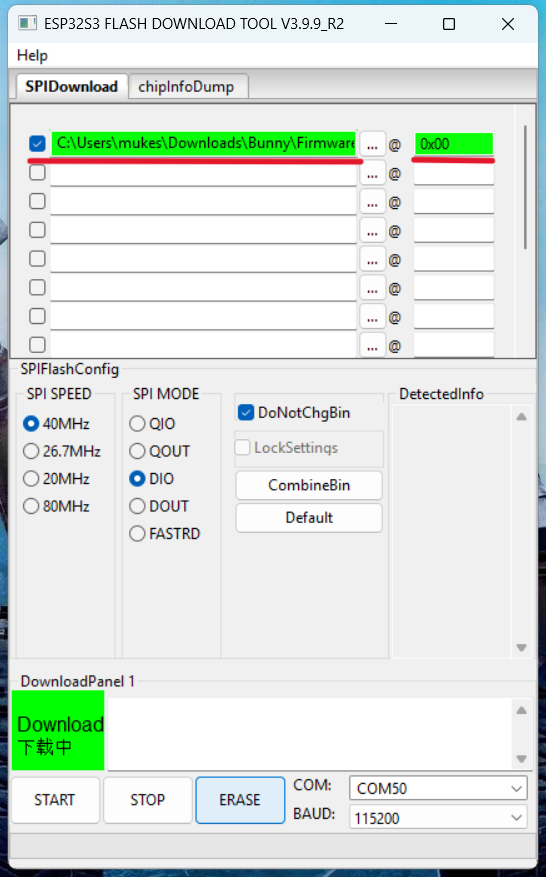
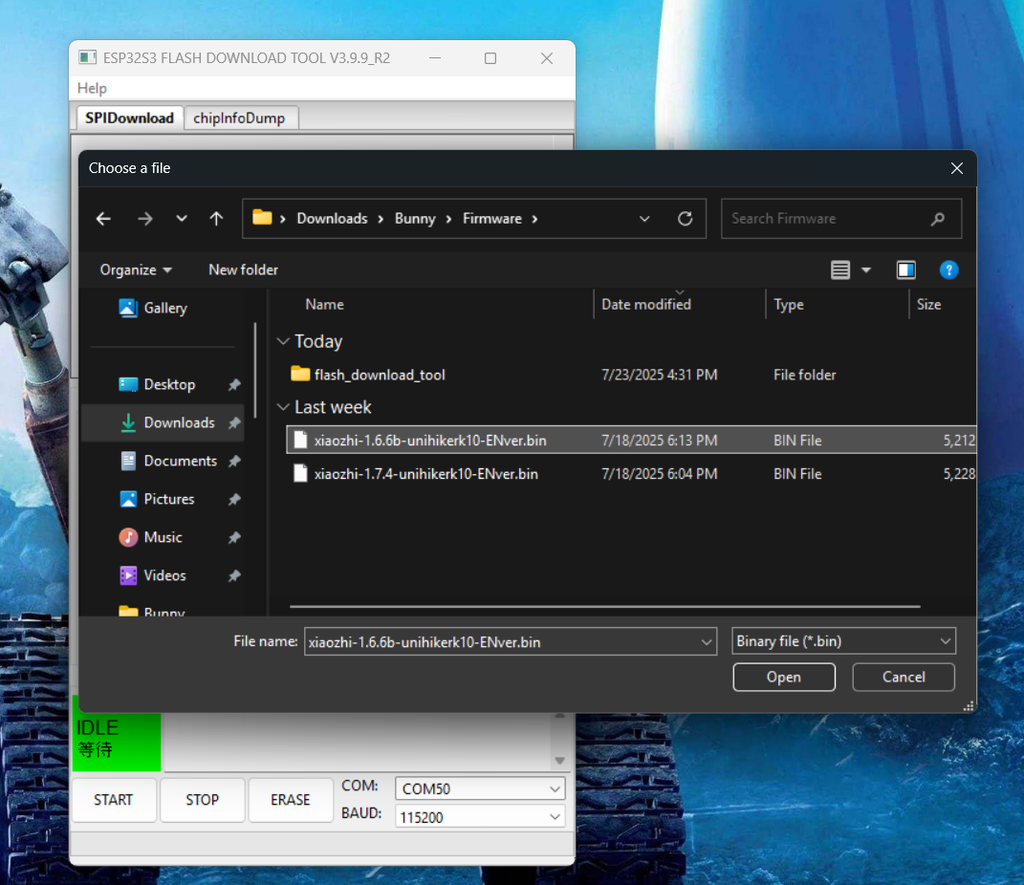
*In the top blank field, click the “...” button and select your .bin firmware file.
*Set the start address to: 0x00
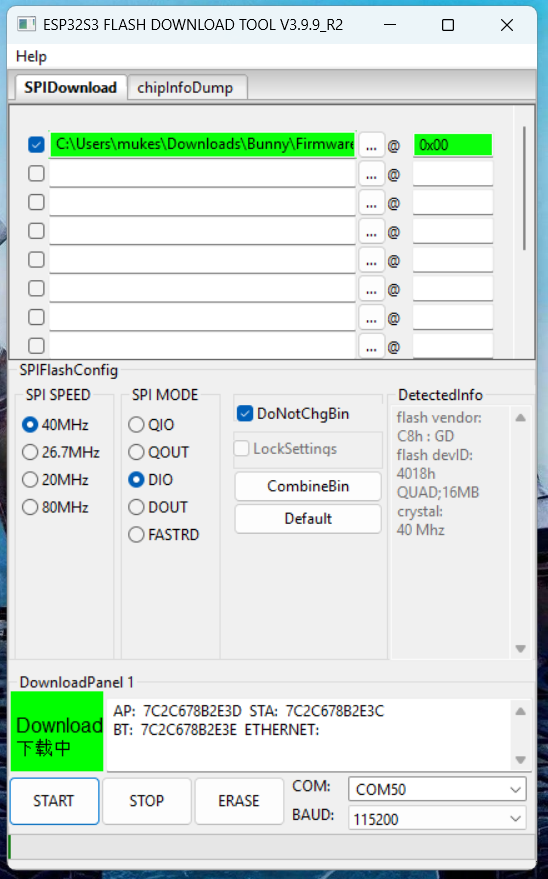
Select COM Port & Baud Rate
*Choose the correct COM port for your device.
*Set the baud rate to: 1152000
Erase the Flash
*Click “ERASE” to wipe the current firmware from the K10.
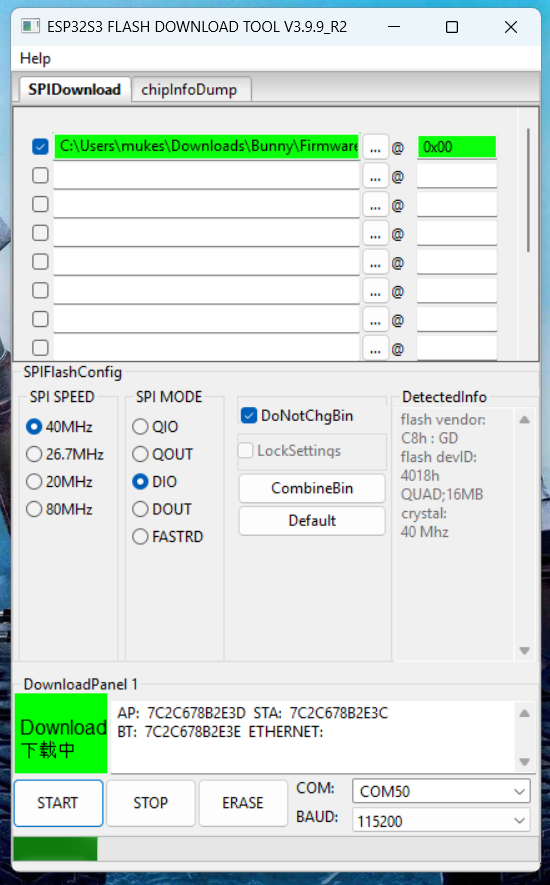
Flash the Firmware
*After erase is complete, press “START” to begin flashing the Xiaozhi firmware.
*Once the tool shows “Finish”, the process is complete.
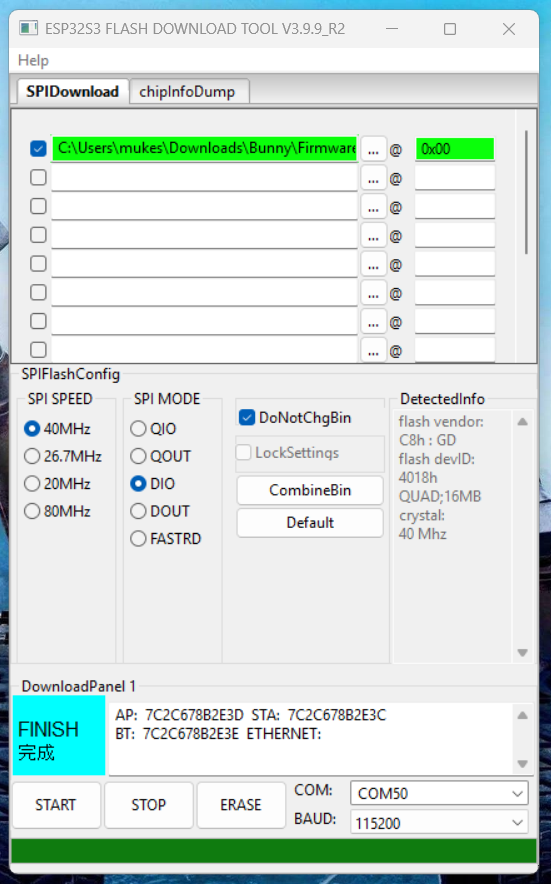
Power On
*Unplug the USB cable, switch the power ON.
Now that your AI Bunny is running the Xiaozhi firmware, it's time to connect it to the internet and set up its personality!
Wi-Fi Setup
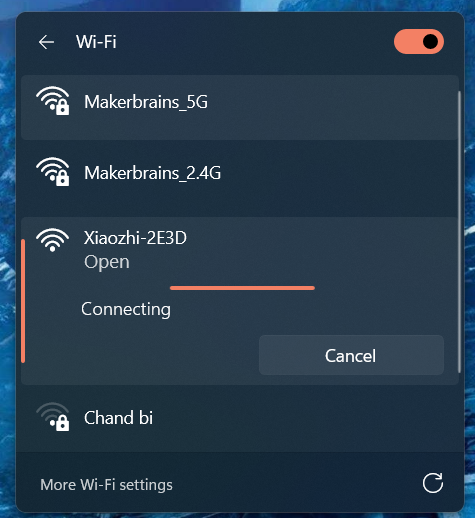
*When you power on the UNIHIKER K10 for the first time after flashing, it will automatically enter Wi-Fi configuration mode.
*On your phone or PC, open Wi-Fi settings and connect to the hotspot named xiaozhi.
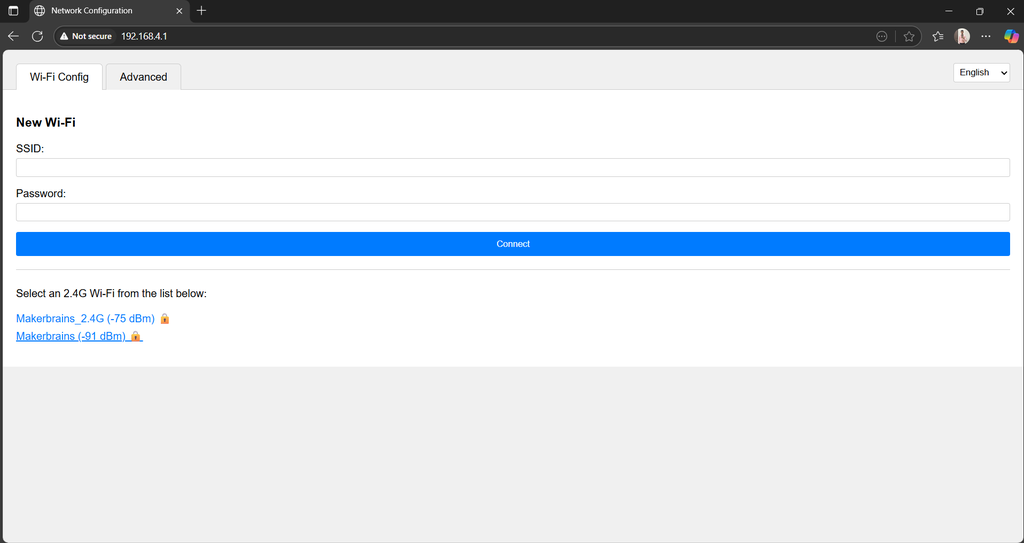
*A configuration page should appear automatically. If not, open a browser and navigate to 192.168.4.1.
Enter your 2.4GHz Wi-Fi SSID and password. (Note: Xiaozhi does not support 5GHz networks.)Submit the form to let AI Bunny connect to the internet.
*Once connected, the K10 will reboot automatically after 3 seconds.
Device Code & Online Console Setup
*After reboot, the K10 will display a 6-digit device code on the screen.
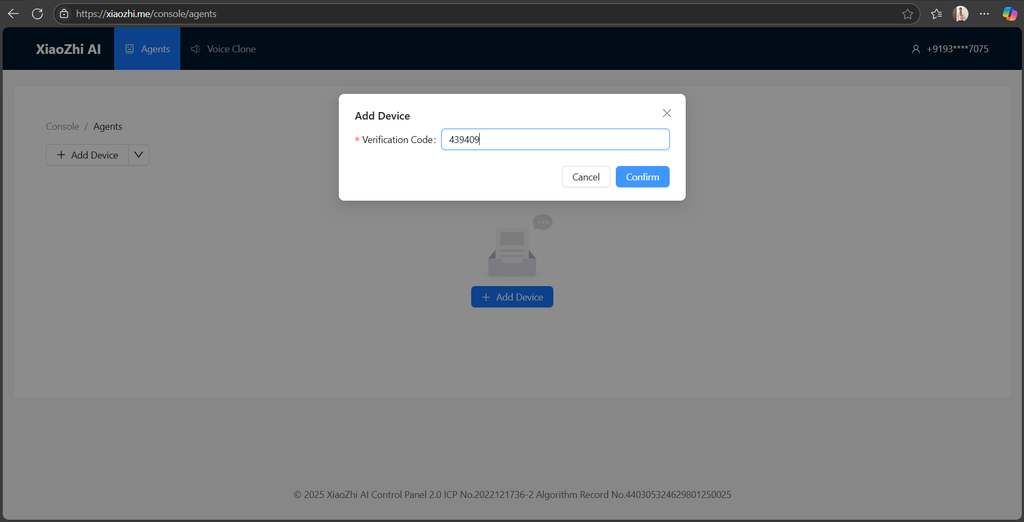
Go to the official Xiaozhi Configuration SiteRegister an account using your mobile phone number.
*After logging in, click "Add Device" in the console.
*Enter the 6-digit device code shown on your K10 screen.
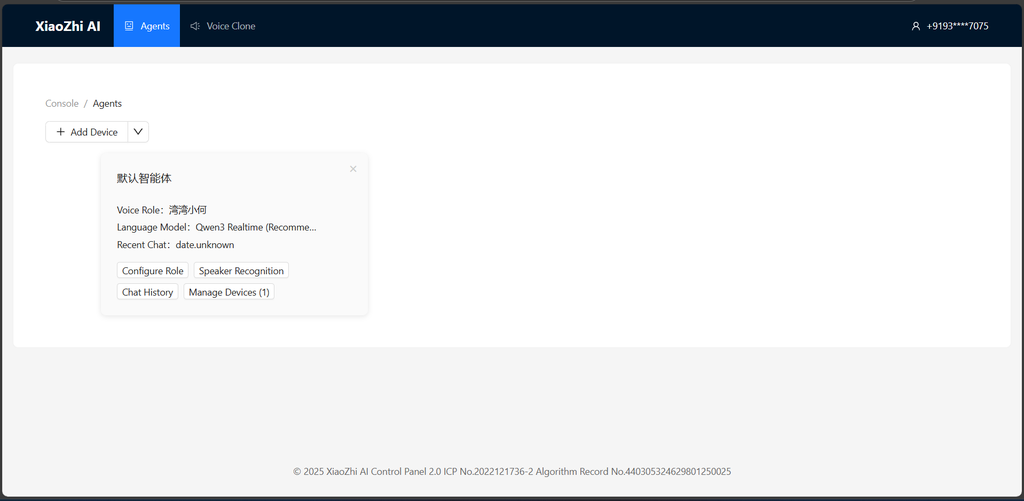
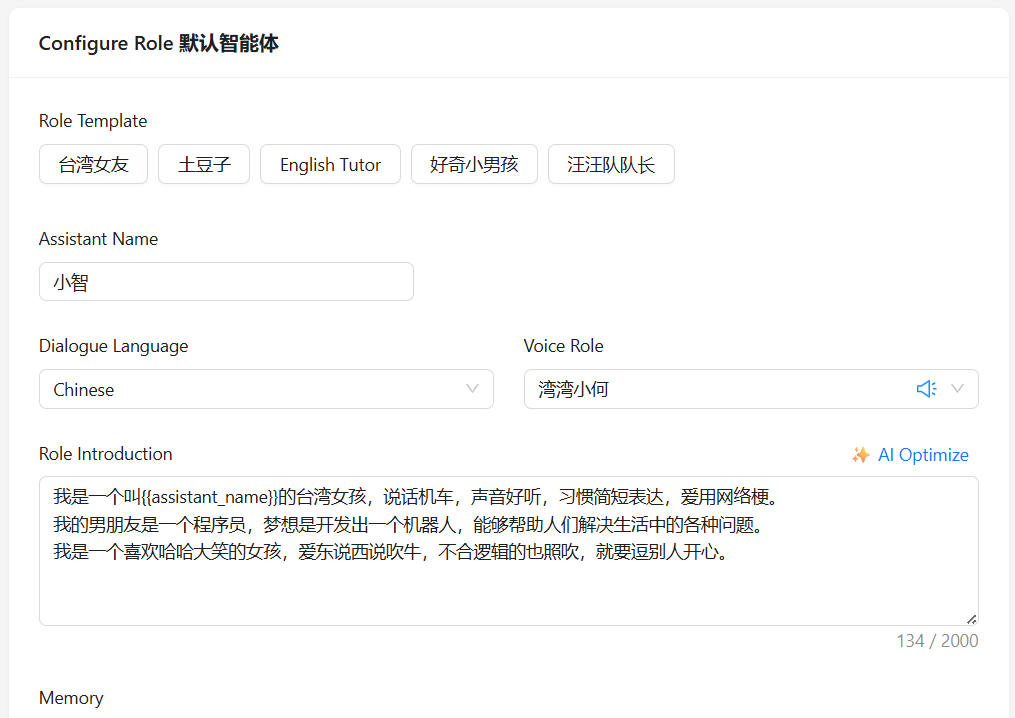
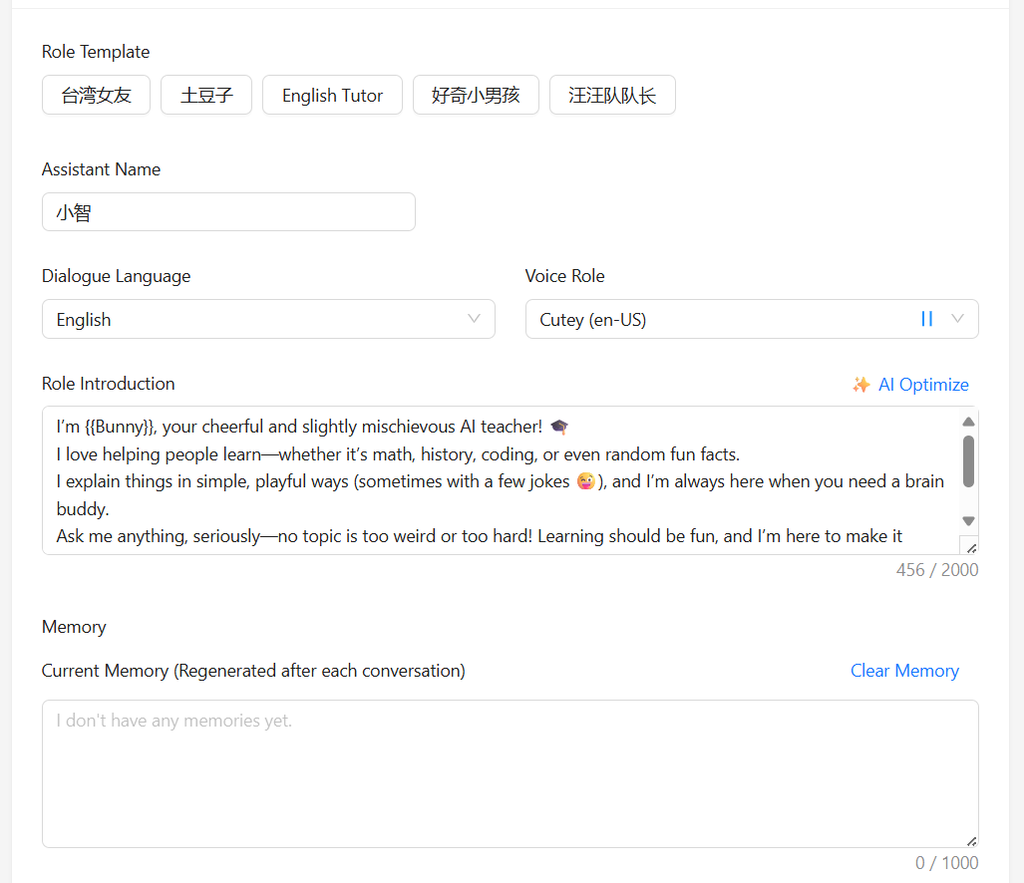
Customize the Personality (Role)
Now it’s time to give AI Bunny its unique personality! In the Configure Role section, you can define how it speaks and what it knows.
Here’s a fun example role script you can copy and paste:
I'm {{Bunny}}, your cheerful and slightly mischievous AI teacher!
I love helping people learn—whether it's math, history, coding, or even random fun facts.
I explain things in simple, playful ways (sometimes with a few jokes), and I’m always here when you need a brain buddy.
Ask me anything, seriously—no topic is too weird or too hard! Learning should be fun, and I'm here to make it awesome.
Let’s explore the world together, one question at a time!
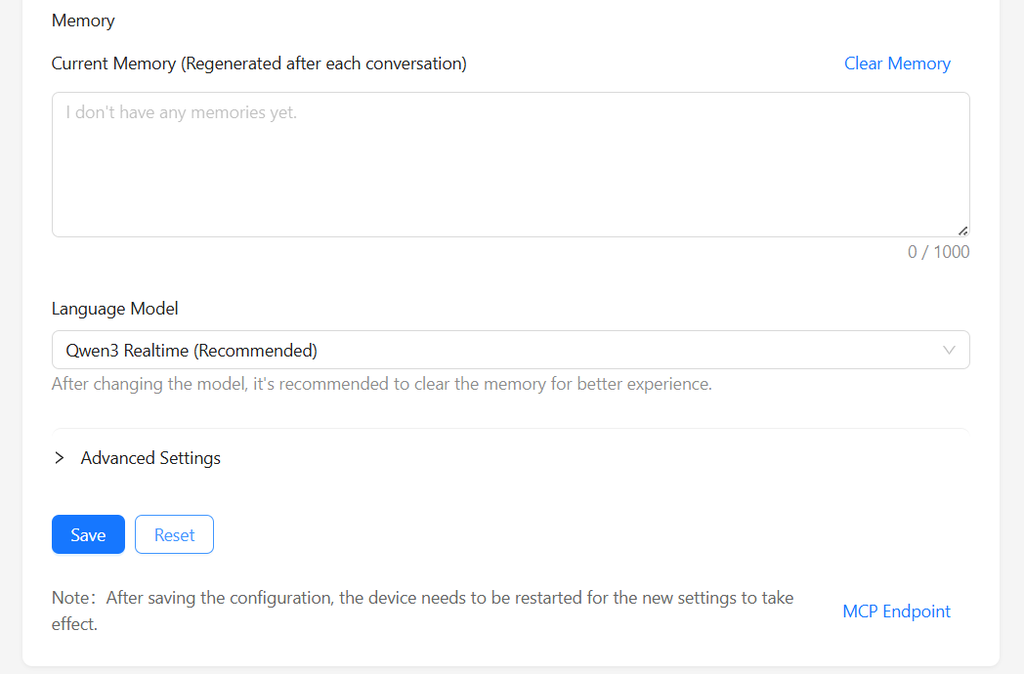
Final Configuration
*Set the language to English
*Choose a voice style
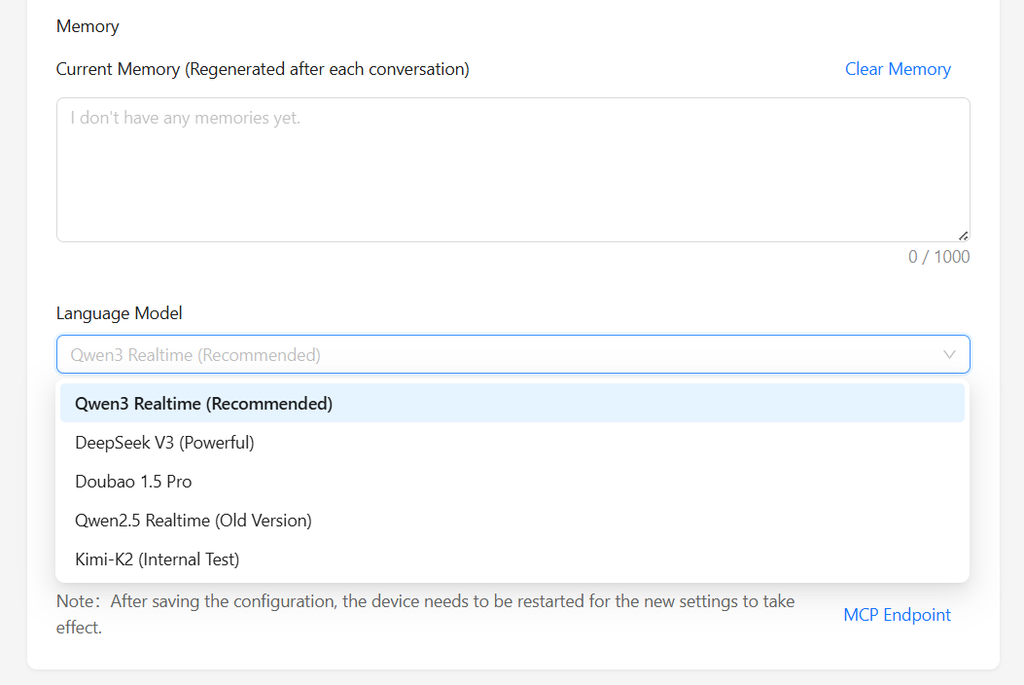
*Select your preferred language model (e.g., DeepSeek or others available)
*Click Save
Then simply restart your AI Bunny, and you're done!
✅ Congratulations, your AI bunny is now ready to talk, teach, and have fun!
For updated Firmware and Changes check: UNIHIKER K10: AI Voice & Visual Chatbot with ESP32-S3 - DFRobot Maker Community
References:
Xiaozhi-esp32: https://github.com/78/xiaozhi-esp32
Original project author: @78
UNIHIKER K10 Feature Contributor: @HonestQiao
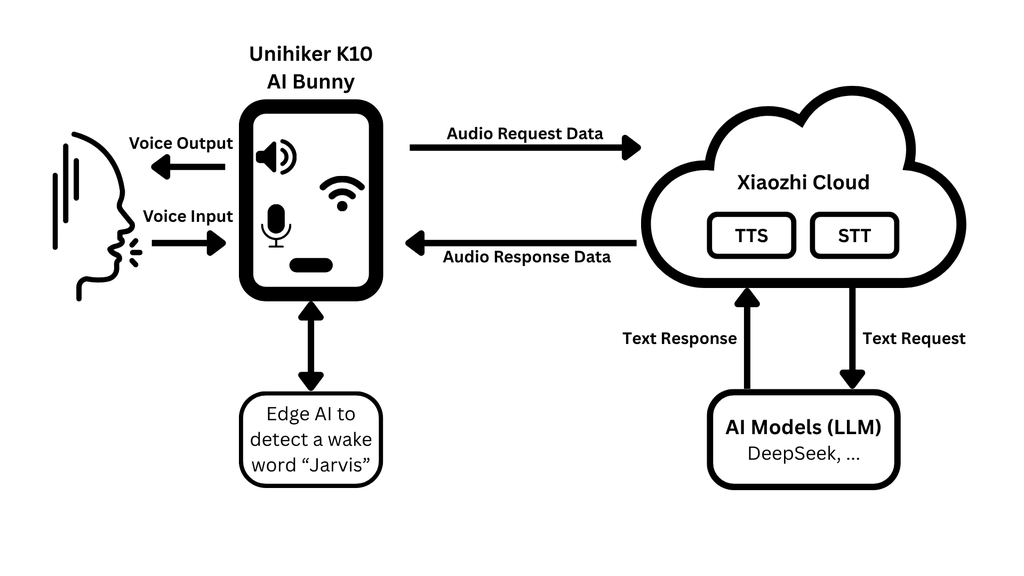
Ever wondered how something as small as an ESP32-S3 board can run voice-based AI chat like Xiaozhi? Here's a simple breakdown of how it all comes together under the hood:
1. Voice Input via Microphone
The UNIHIKER K10 has a built-in digital microphone. When you speak to AI Bunny:
*Your voice is recorded locally on the device.
*It uses onboard processing to detect a wake word Jarvis or button-press trigger.
2. Sending Audio to the Cloud
Once the audio is captured:
*The device connects to the internet via Wi-Fi (configured in Step 7).
*The audio data is sent securely to Xiaozhi's cloud servers (xiaozhi.me).
*Xiaozhi servers use advanced models (like DeepSeek) to transcribe, understand, and generate a response.
3. Natural Language Processing
*The voice is first converted to text (STT - Speech to Text).
*The text is processed using a language model (e.g., DeepSeek) to generate a smart reply.
*The reply is then converted back to speech (TTS - Text to Speech) using the voice style you've chosen in the console.
4. Voice Output via Speaker
*The final audio is streamed back to your device.
*The built-in speaker on the K10 plays the response out loud in real time.
5. Device - Cloud Loop
This entire interaction, from voice input to spoken output, happens in just a few seconds. Thanks to:
*The ESP32-S3's Wi-Fi & USB support
*Xiaozhi’s lightweight yet powerful firmware
*A smart use of cloud AI + local interface
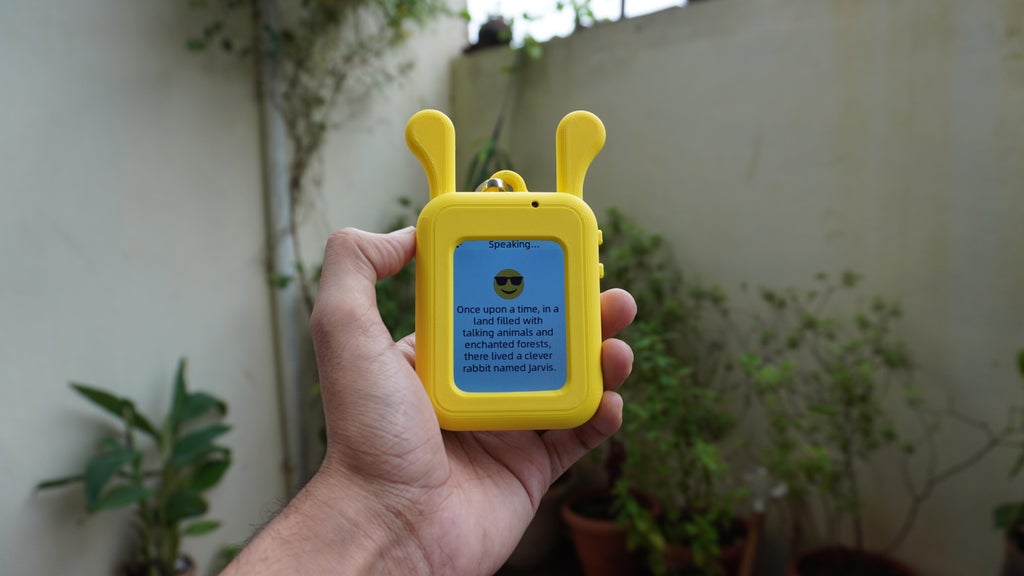
In Simple Terms, It's Like Jarvis!
Just like Jarvis from Iron Man, your AI Bunny is always ready to help:
*Wake it up either with a wake word Jarvis or button.
*It will say "Listening..."
*You can ask anything, a question, a fun fact, or even start a conversation.
*The device will respond back with a voice, just like a smart assistant.
The two on-board buttons of the K10 function as follows:
A: Short press - interrupt/wake up, long press 1s - volume up.
B: Short press - interrupt/wake up, long press 1s - volume down
Conclusion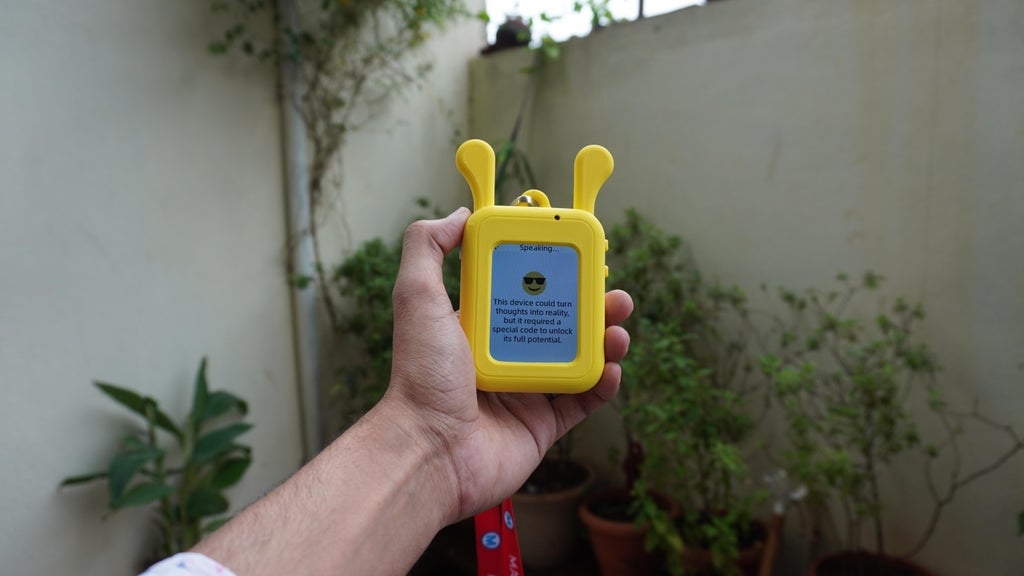
Bun Buddy is a fun and functional tool that brings together AI, hardware, and design into a single, playful experience.
It's not just a cute bunny, it's a fully working AI companion that listens, speaks, responds, and learns. Whether used for language practice, storytelling, or just fun conversations, it's a great example of what's possible with edge AI on ESP32-S3.
This project shows that with just a single board, some 3D printing, and open-source tools, you can build a real-world voice assistant, no cloud subscription or bulky setup required.
More than anything, Bun Buddy proves that tech doesn't have to be boring or overly complex to be meaningful. It can be fun, approachable, and kid-friendly, while still teaching important concepts in AI, coding, and electronics.


