
Ever want to just stay in your warm bed on those cold, dreary autumn mornings? Now you can!
Things used in this project
Hardware components
Story
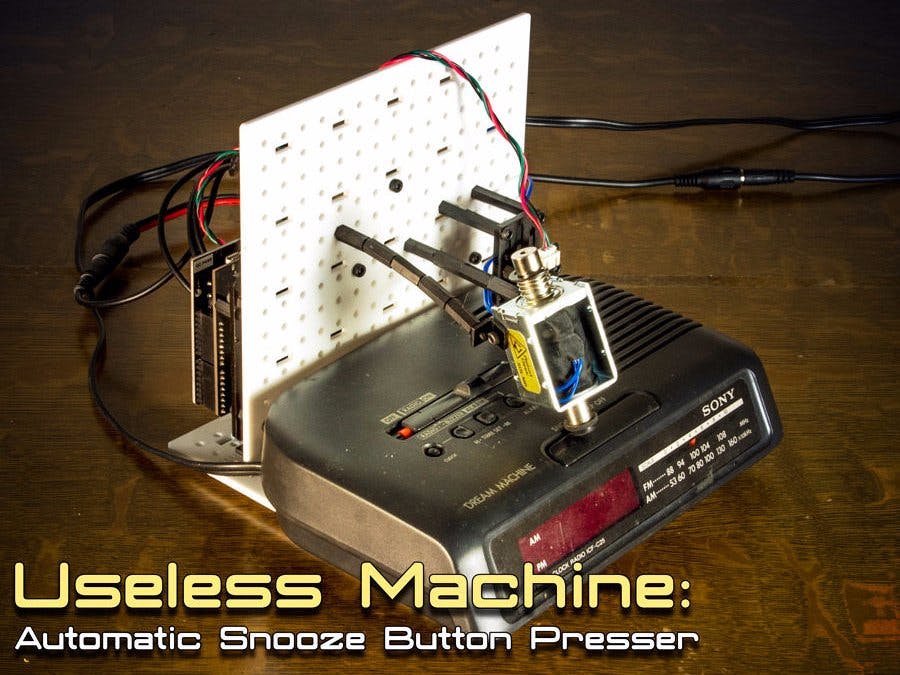
Ever want to just stay in your warm bed on those cold, dreary autumn mornings? Now you can! With Snoozebot, you will be able to keep your alarm set, mitigating any guilt you might feel for hitting the snooze button on your alarm when it goes off! Just set up Snoozebot and it will hit the snooze button so you don't have to wake up and deal with the fact that humans do not have a natural hibernation cycle! This is a simple build using an Arduino, Sound Sensor, Relay, and Solenoid. Want your own Snoozebot? Let's get started!
Step 1: Project Parts
Snoozebot is made with the RobotGeek system. These parts are designed to work well together, and with the RobotGeek Sensor Shield. You can use any variation of parts you would like, but the parts suggested here have been tested and work splendidly! The RobotGeek Sensor Shield makes it so that you don't have to breadboard anything, so it comes highly recommended.
Step 2: Build and Wiring

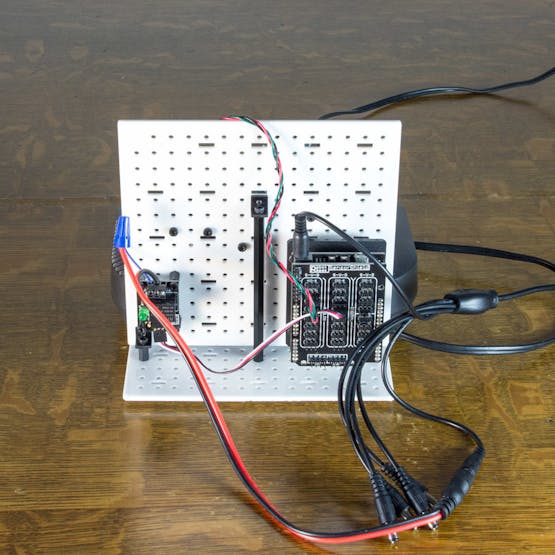
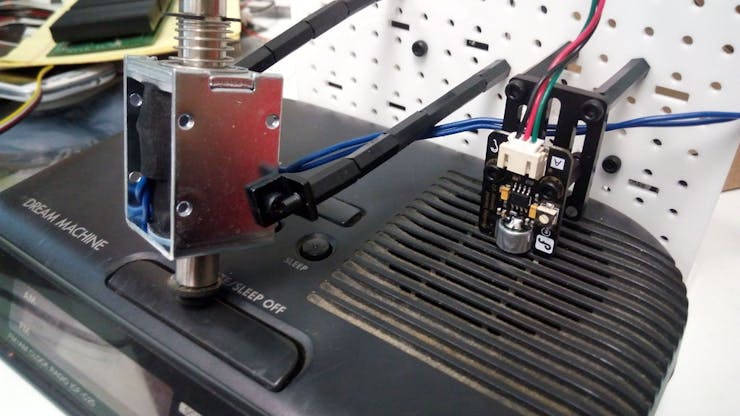
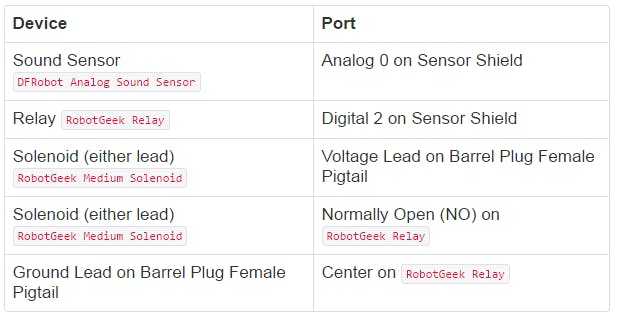
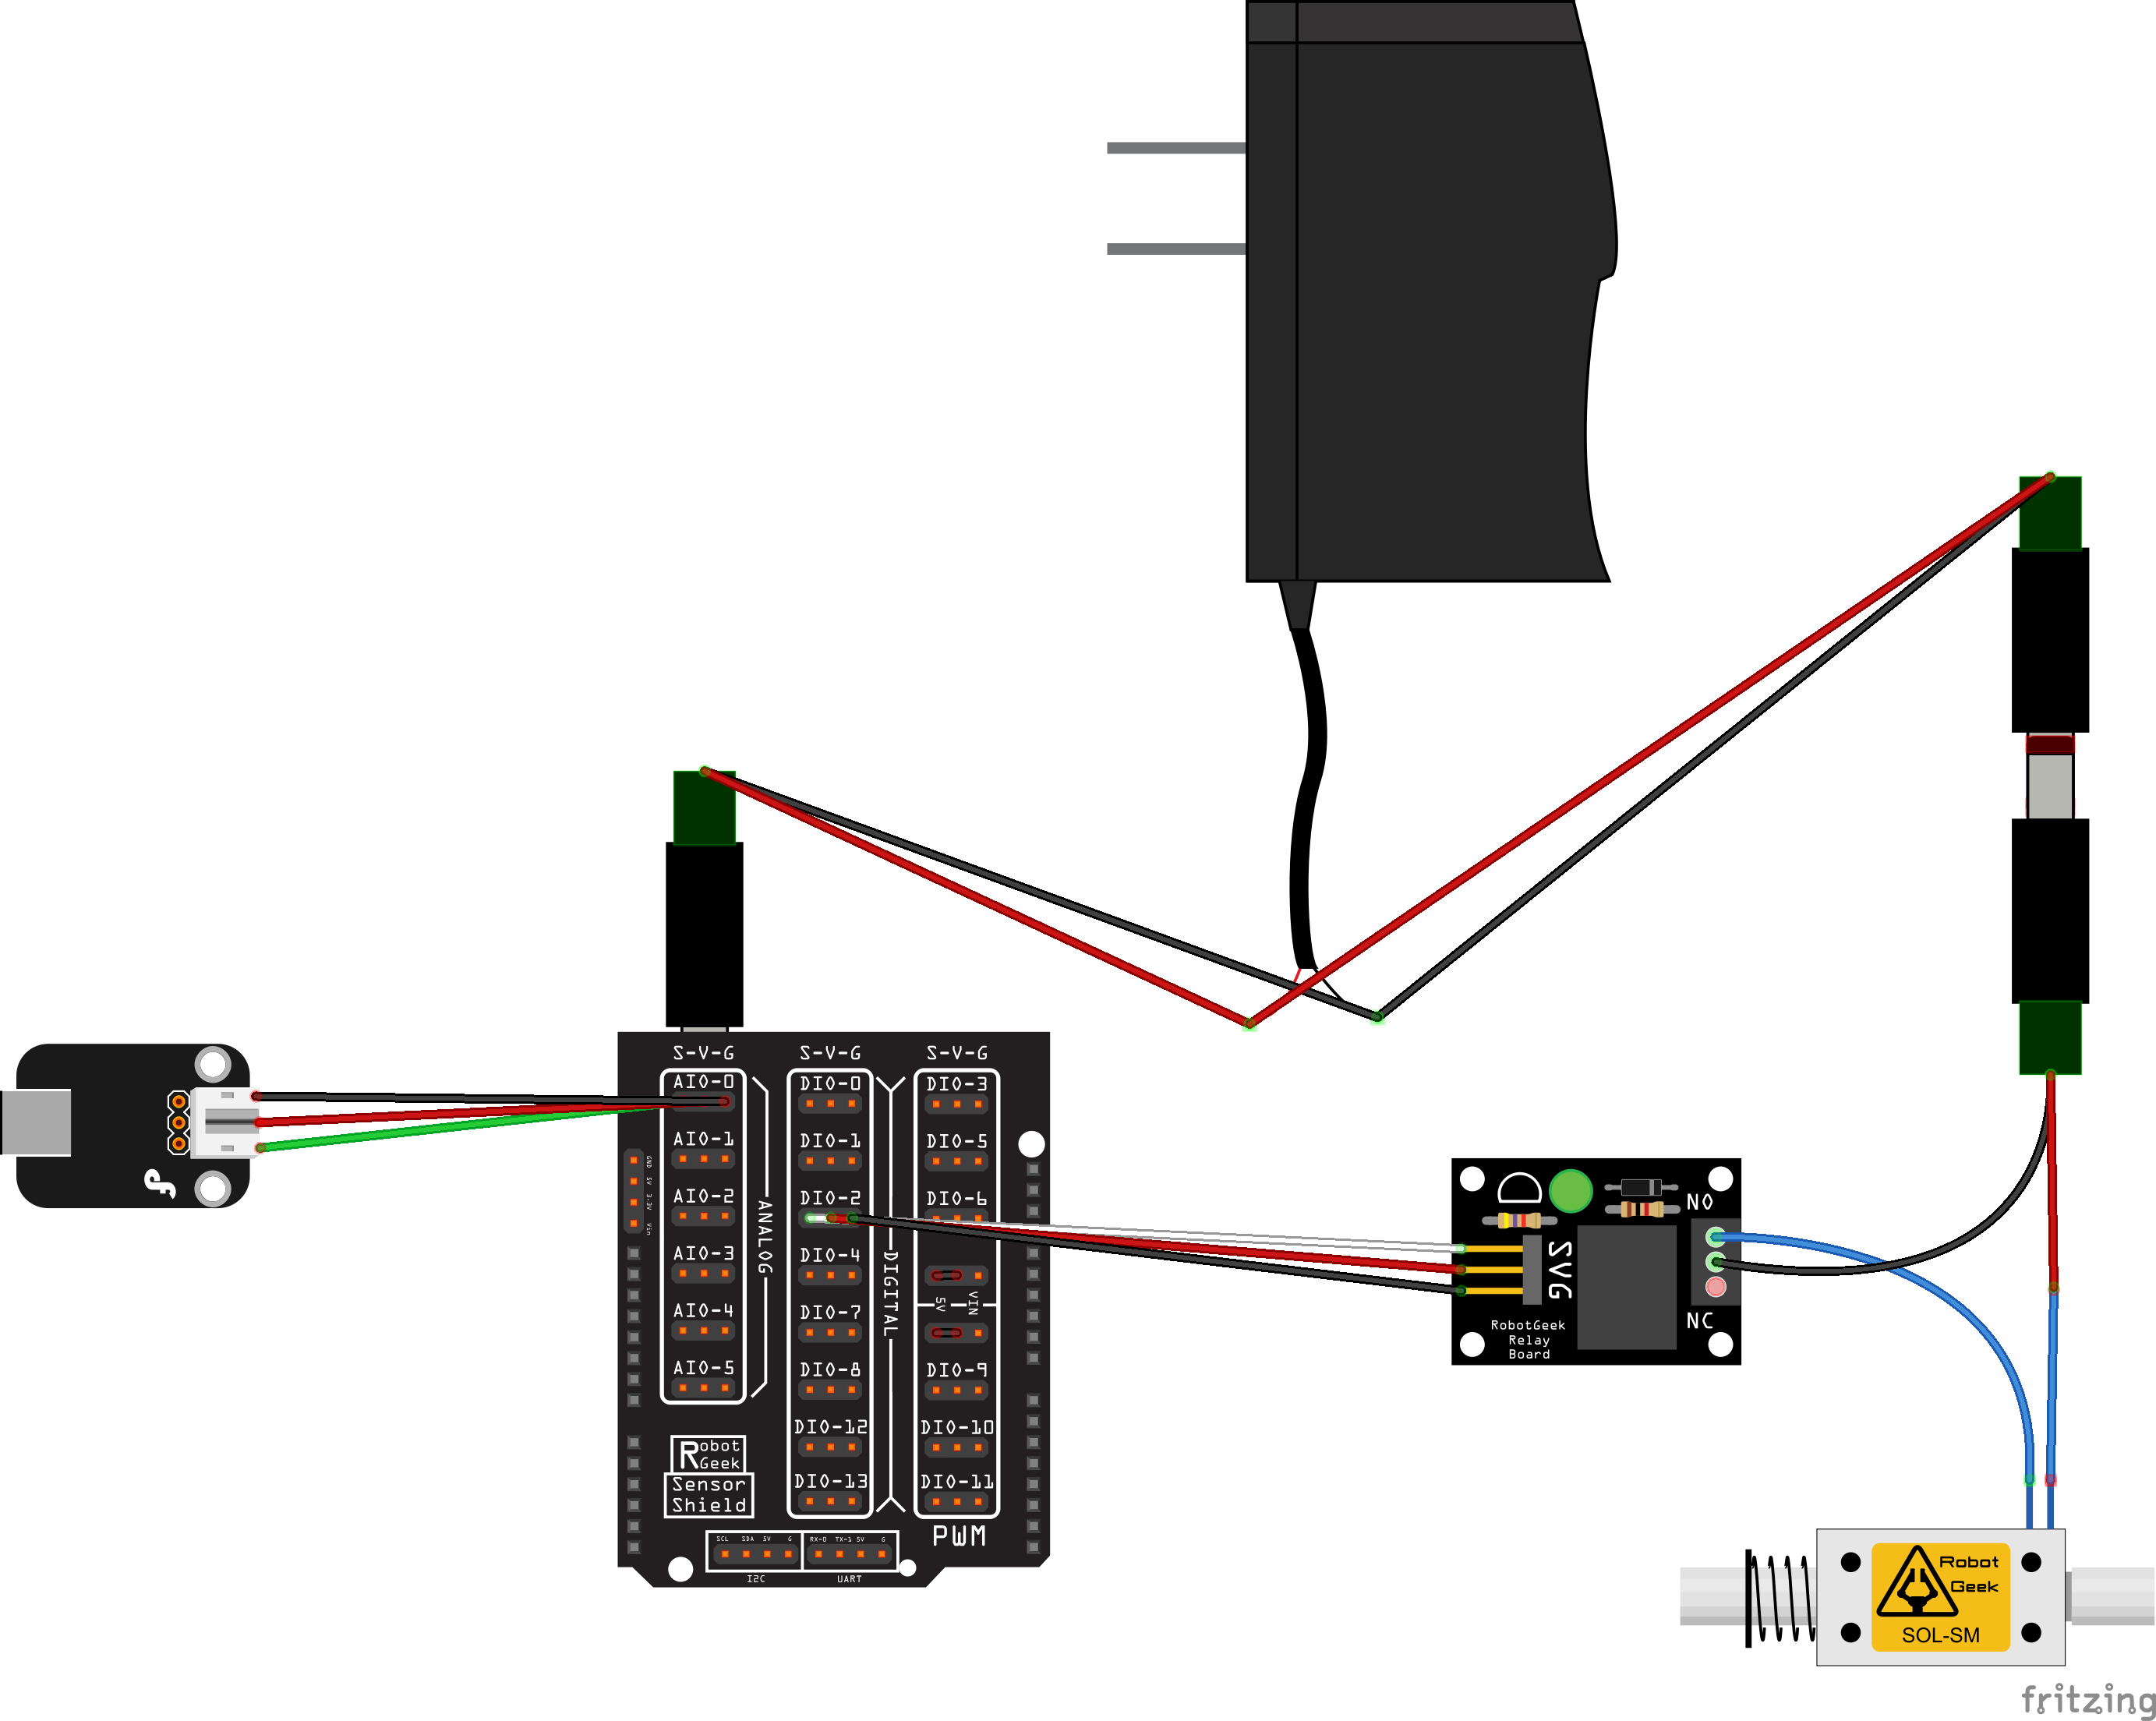
The main idea is to build around your Alarm Clock, Keeping the power cords, duino, and relay out of the way, while positioning the sound sensor closest to the alarm clock's speaker, and positioning the solenoid so that it rests on top of the snooze button. Check out the pictures above and follow the wiring diagram to build your Snoozebot.
Step 3: Programming
Grab the RobotGeek Libraries and Tools from Github, and extract it to your arduino folder.
Open up:
File → Sketchbook → RobotGeekSketches → Demos → angryAlarmin the Arduino IDE and upload it to your board.
Test it out by setting up some false alarms to see if the sound sensor reacts. If it doesn't activate the solenoid, you can adjust the sensitivity in one of two ways. The easiest way is to turn the potentiometer on the Sound Sensor board, which increases/decreases the sensitivity of the sensor as you turn it clockwise/counterclockwise. You can also adjust the sensitivity in code by altering this line:
if(soundValue > 175) //if the sound value variable is higher than 175 (on a scale of 0-255)175 might be a little high, so lowering this number will make the sound sensor react to quieter noises.
Step 4: Set it and forget it!

Congratulations, you now have a sound activated solenoid! Can you think of other ways to use this that aren't so self-defeating? We'd love to see what you come up with!
Schematics
Wiring Snoozebot
Wiring Snoozebot
Code
Github file
https://github.com/robotgeek/robotGeekLibrariesAndtools/archive/master.zip
The article was first published in hackster, October 20, 2016
cr: https://www.hackster.io/robotgeek-projects-team/snoozebot-the-tired-grumpy-robot-useless-machine-0f373e
author: RobotGeek Projects Team: RobotGeek Team, Wade Filewich


