

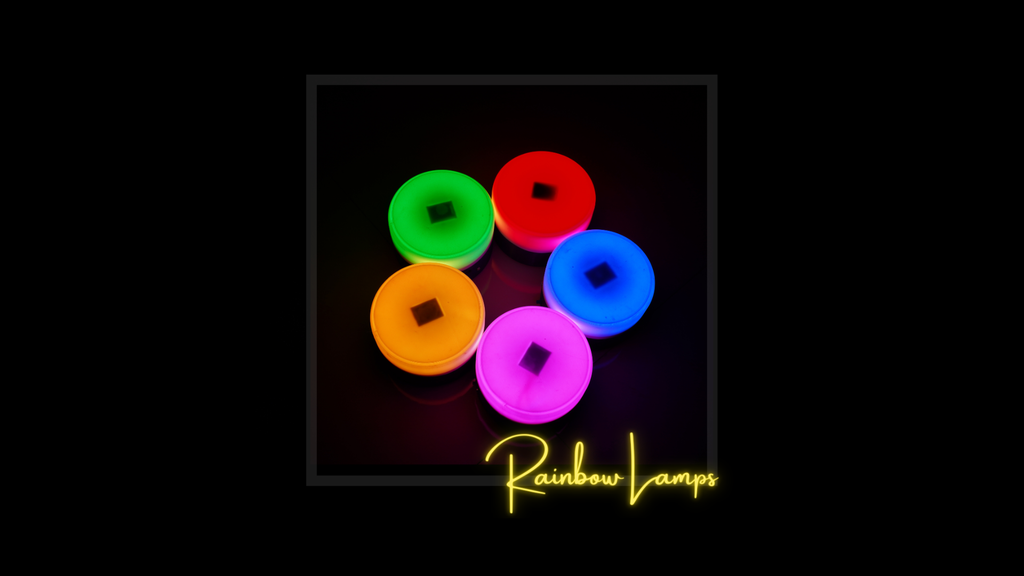
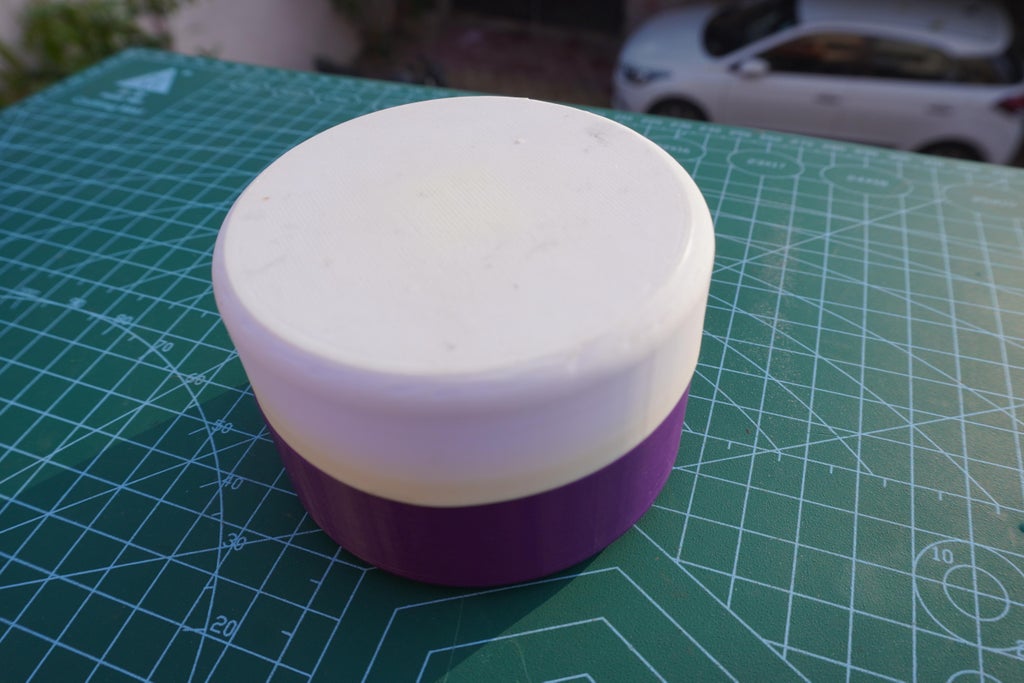
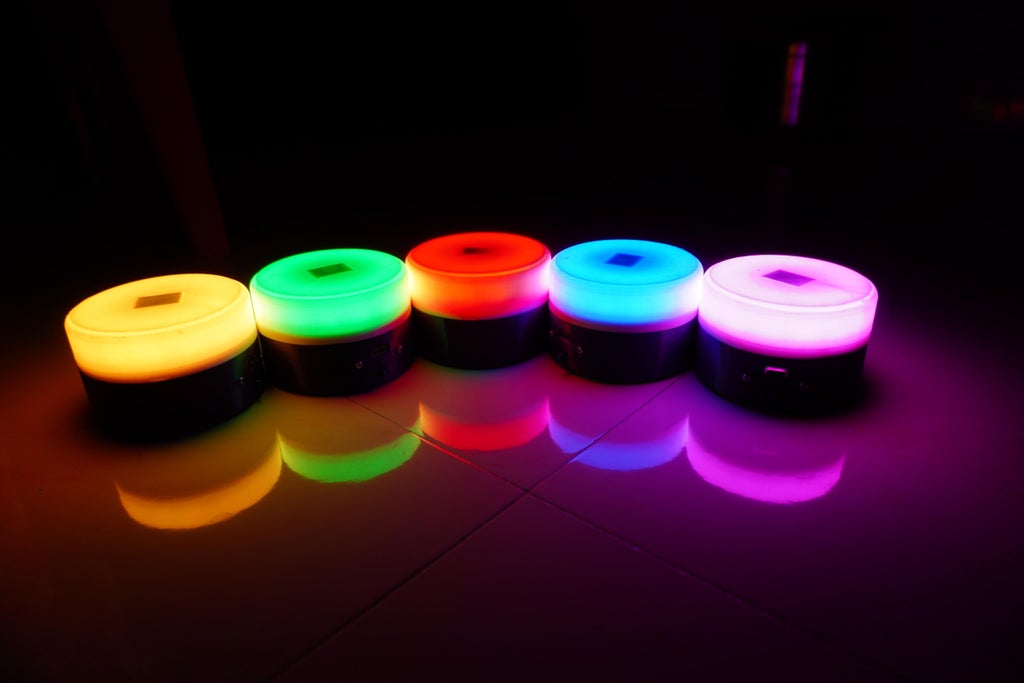
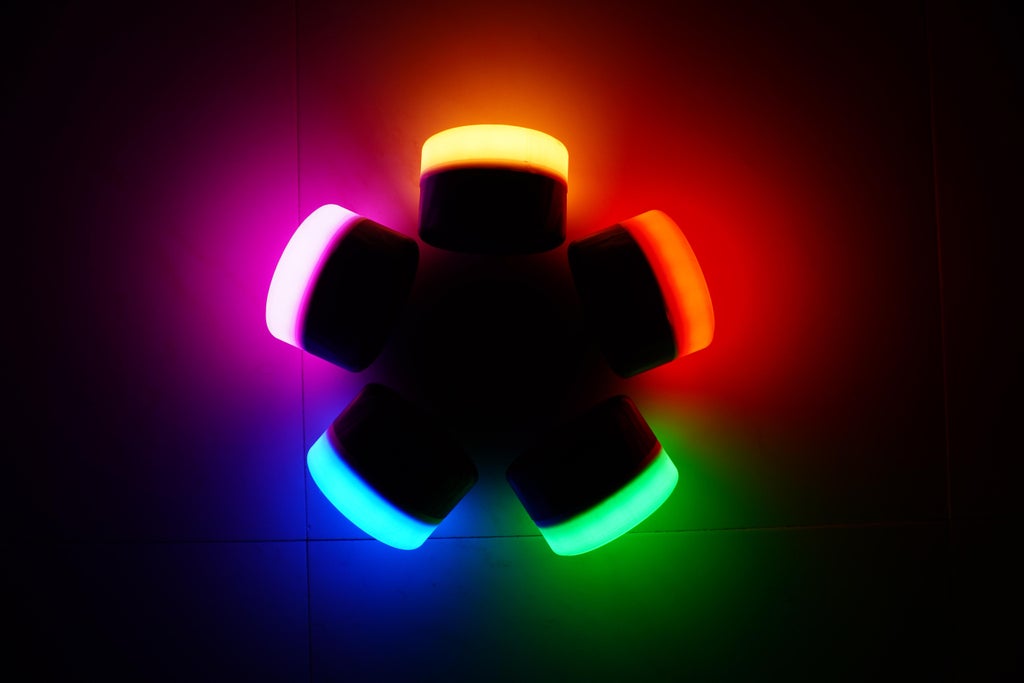
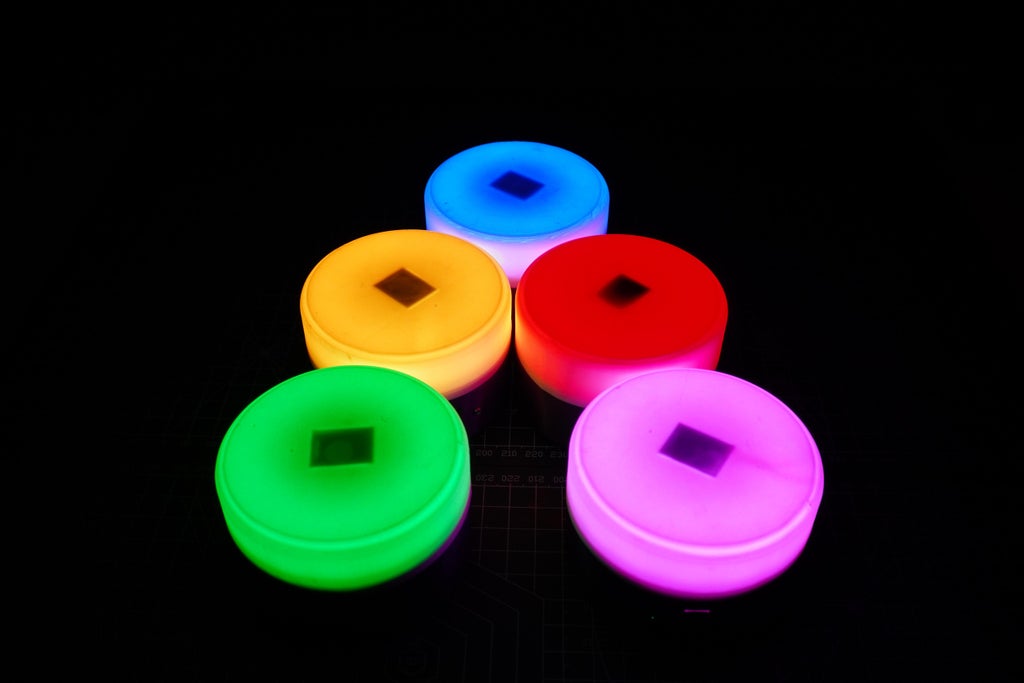
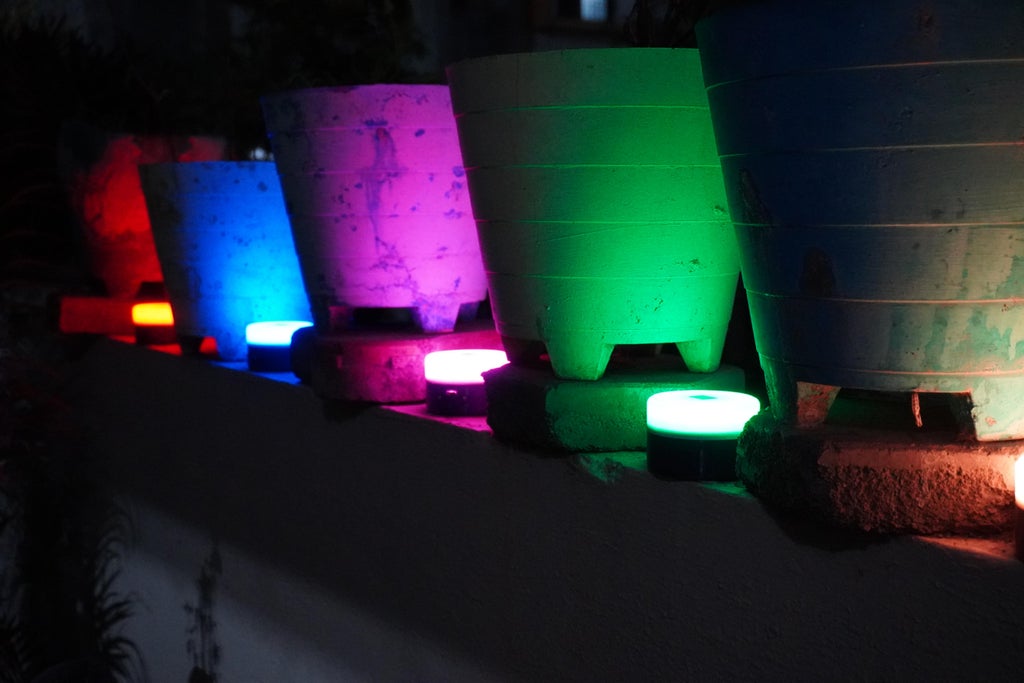
Rainbow Lights are ESP32-C3 based RGB lamps which are synchronised using ESP-Now Communication Protocol. The Lamps are designed in Fusion360 and 3D printed in Ender3. Adafruits 16LED Neopixels rings are used in these lamps.
The basic functionality of these lamps is to be in wireless sync and change the colours according to the program. So currently I have programed them in two modes:
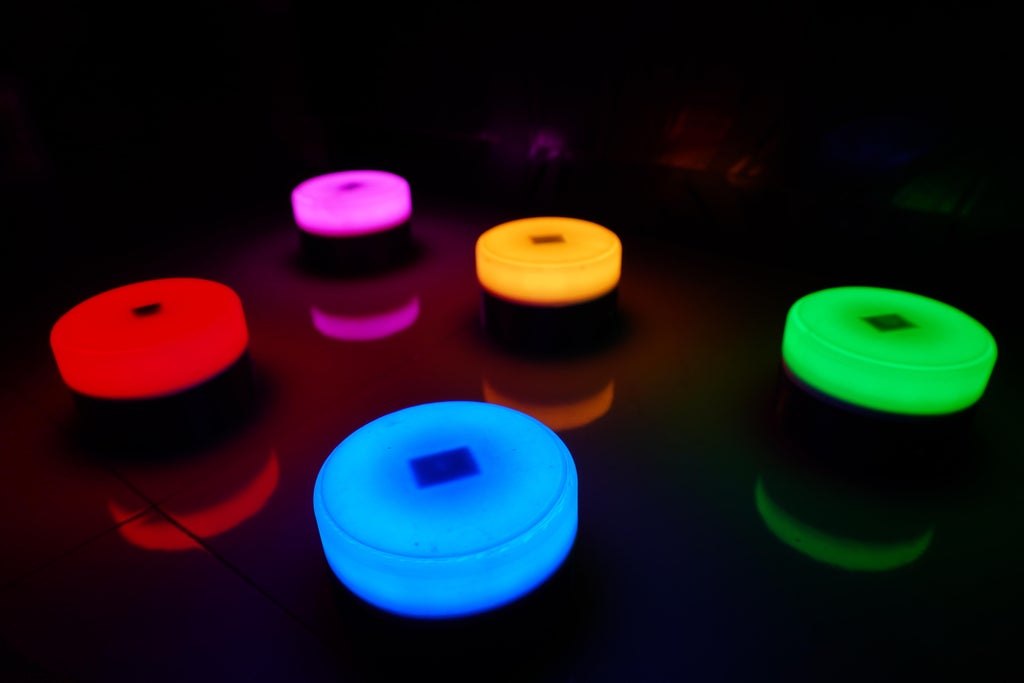
Mode 1: When we touch any one coloured lamp, all the lamps glow in that colour, stay for 2 seconds and go back to their original colour.
Mode 2: In second mode the colour we touched stays as long as power shutdown or unless we touch any other lamp.
We can use this lamps as Childrens Play Lamps, Mood Lamps, Photo/Videography, Background fill lights and more.....


Step 1: 3D Design:

*I have designed this lamps in Autodesk Fusion 360, You can simply download the .stl files.
*You can even modify my design in Fusion 360 software by downloading the Rainbow Lamps File(Click to view the 3D Design in your browser and Download the fusion file).
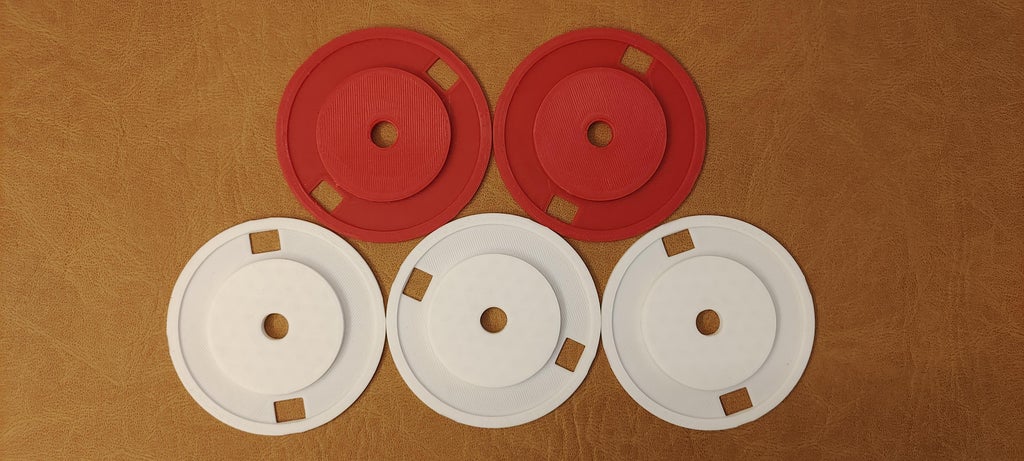
Step 2: 3D Printing

*3D Print the .stl files:
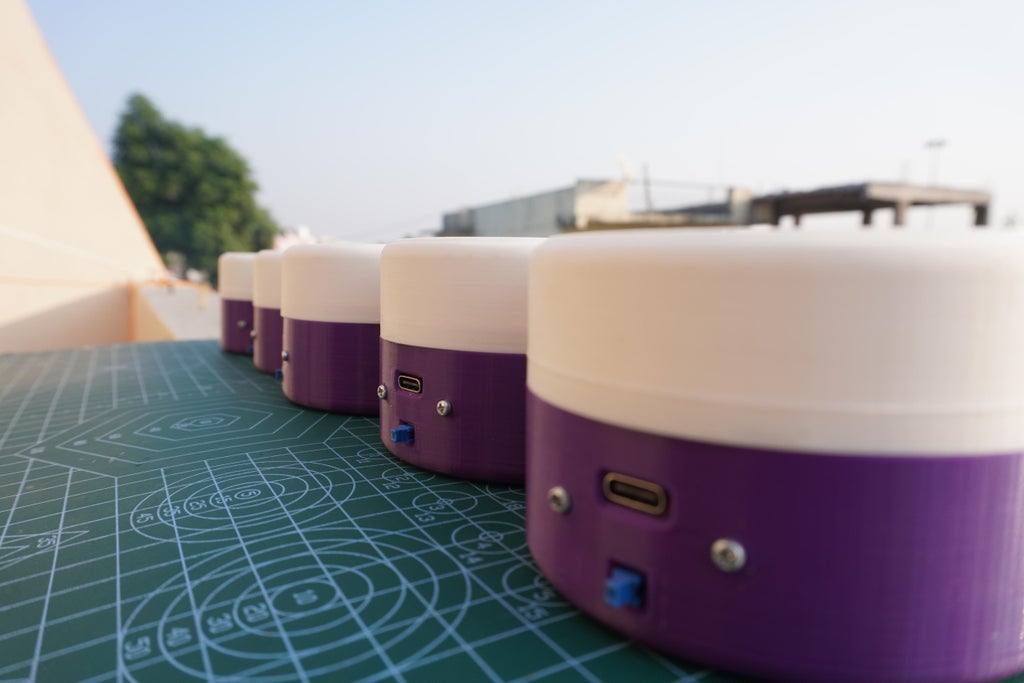
5x Housing in any color you want
5x Cover in white color filament
5x ESP32-C3-Mount in any color
5x Neopixel-Plate in any color
I used Ultimaker Cura for slicing.
Settings:
Layer height: 2mm
Print speed: 100
No SupportPrinted on Ender3

Step 3: Soldering

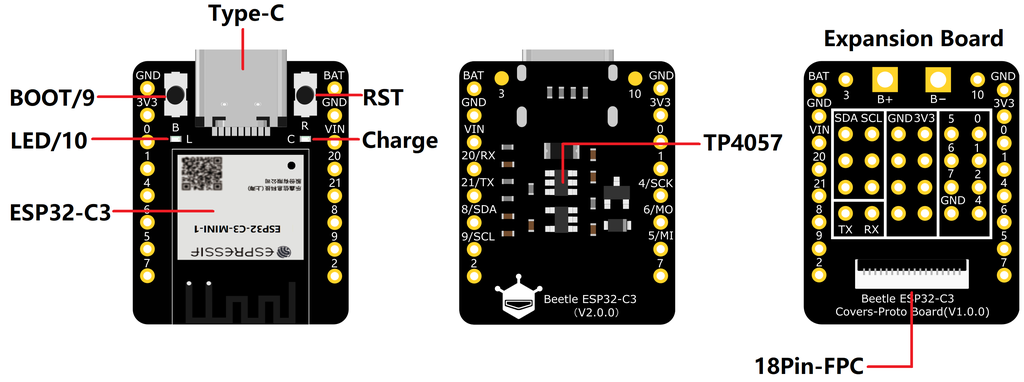
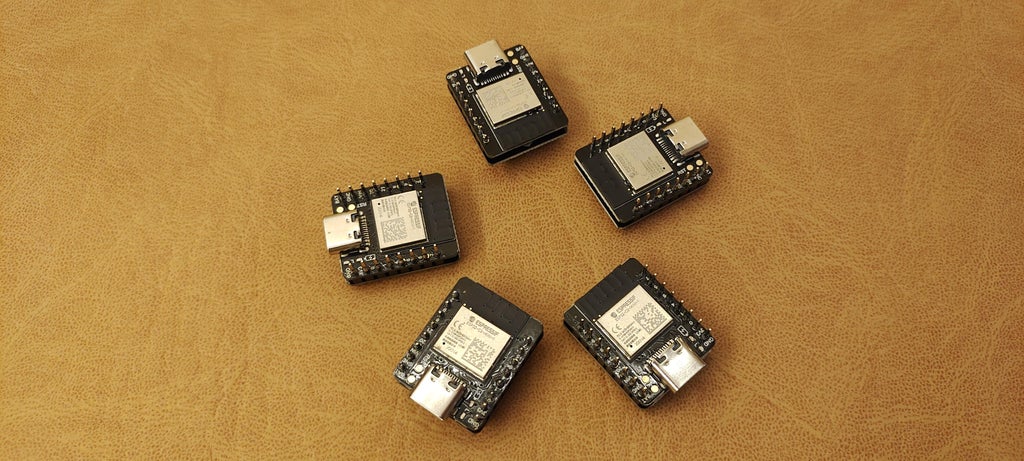
*Solder the ESP32-C3 Module and Expansion board together using header thats provided in the same pack.
*Take reference of the image provided above or align the pins naming properly.
Step 4: Connections
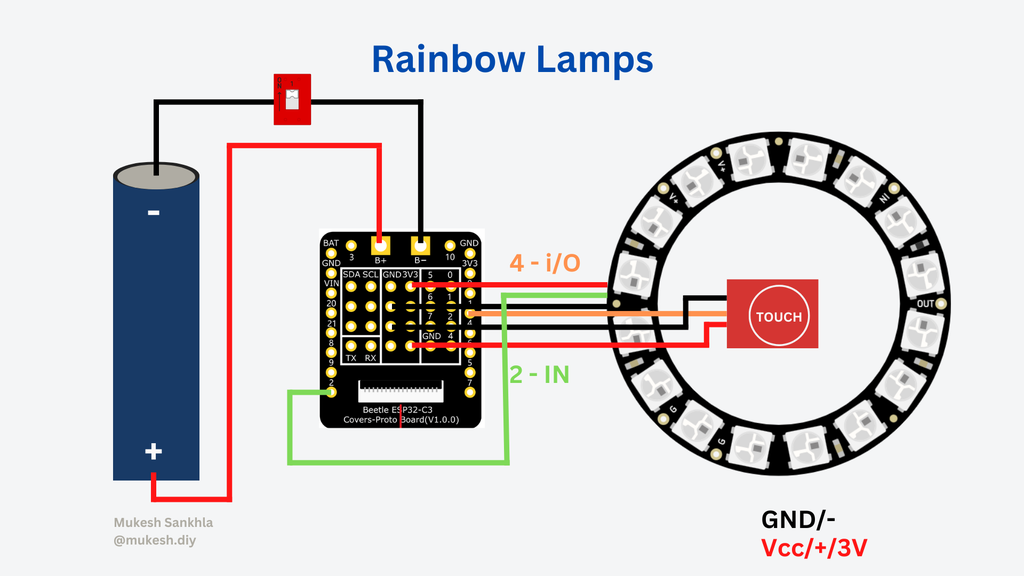
*Connect all the electronic components as shown in the circuit diagram.
*Make sure everything is connected as per diagram before you power it on.
Step 5: Assembly

*Place the battery in its holder.
*Push the Push Switch in its slot use glue if necessary.
*Place the ESP32C3 Module in its mount and screw them.
*Put the Neopixel ring in the base plate and use some glue.
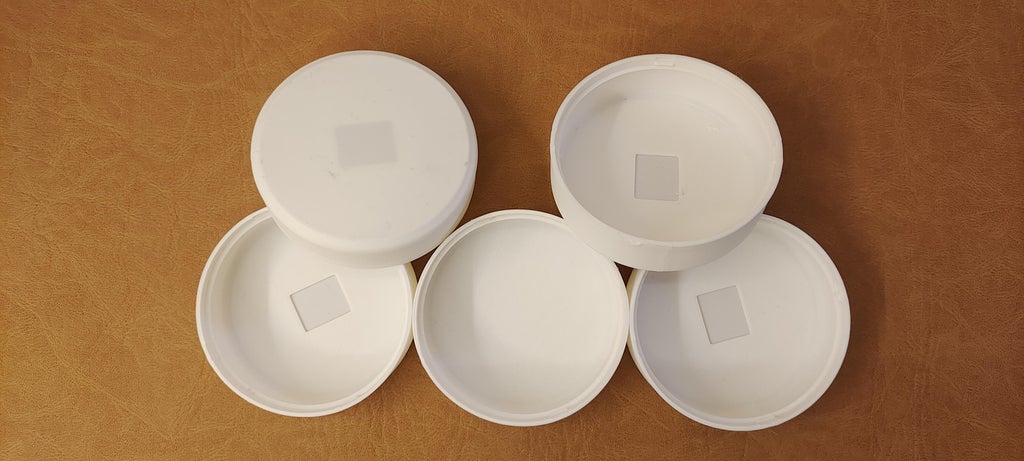
*Stick the Touch sensor on to the Cover.
Step 6: Snap Fit

*The lamp parts are designed in such a way that they can snap fit together.
*Align the teeths of the parts correctly and snap them together.*The Neopixel Plate can snap fit in the Cover and then the Cover can be snaped on to the Housing.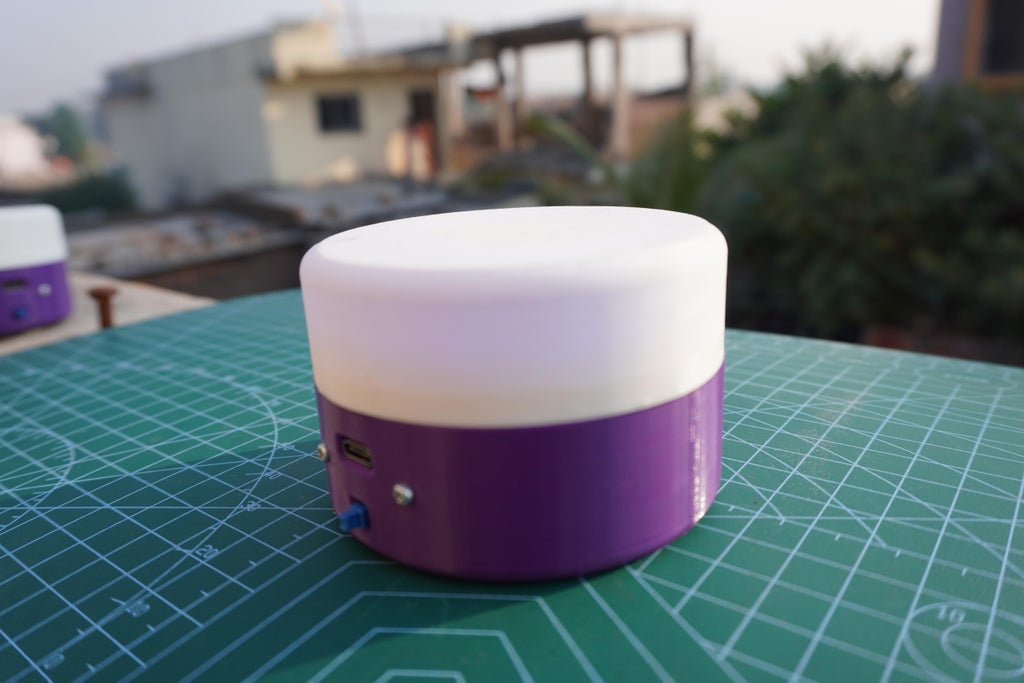
Step 7: Arduino IDE Setup

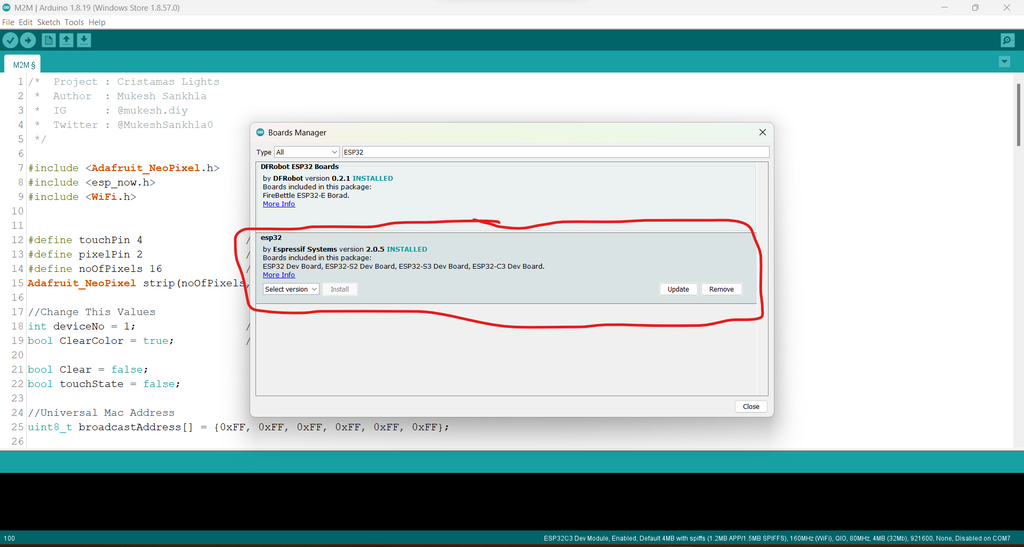
*First go to File->Preferences->Additional Boards Manager URL and paste the following URL
https://raw.githubusercontent.com/espressif/arduino-esp32/gh-pages/package_esp32_index.json
*Then go to Tools->Board->Board Manager and Search for ESP32 and install it.
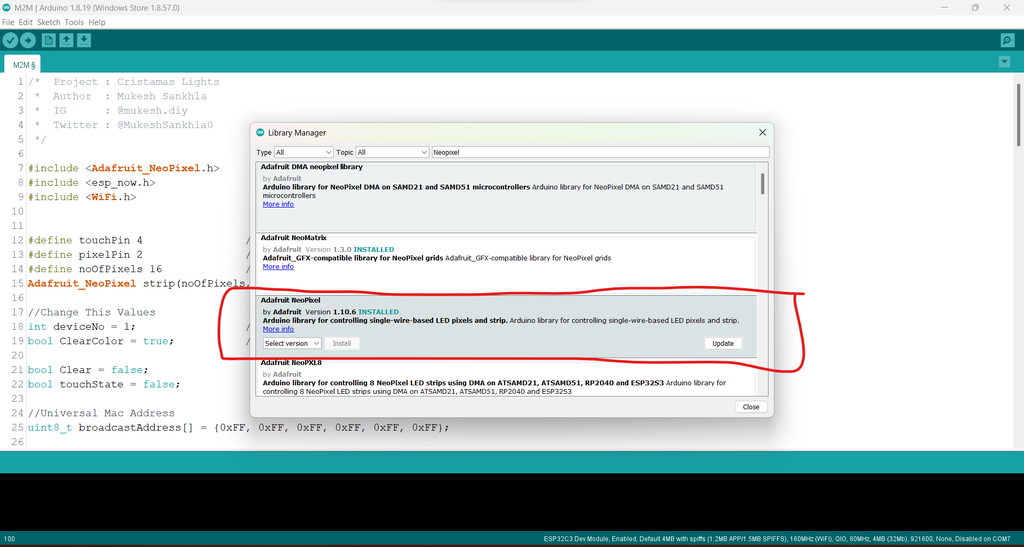
*Go to Sketch->Include Library->Manage Libraries and search for Adafruit NeoPixel and insatll it.
Step 8: Programming
*Click To Download The Code*Open the .ino file in Arduino IDE.
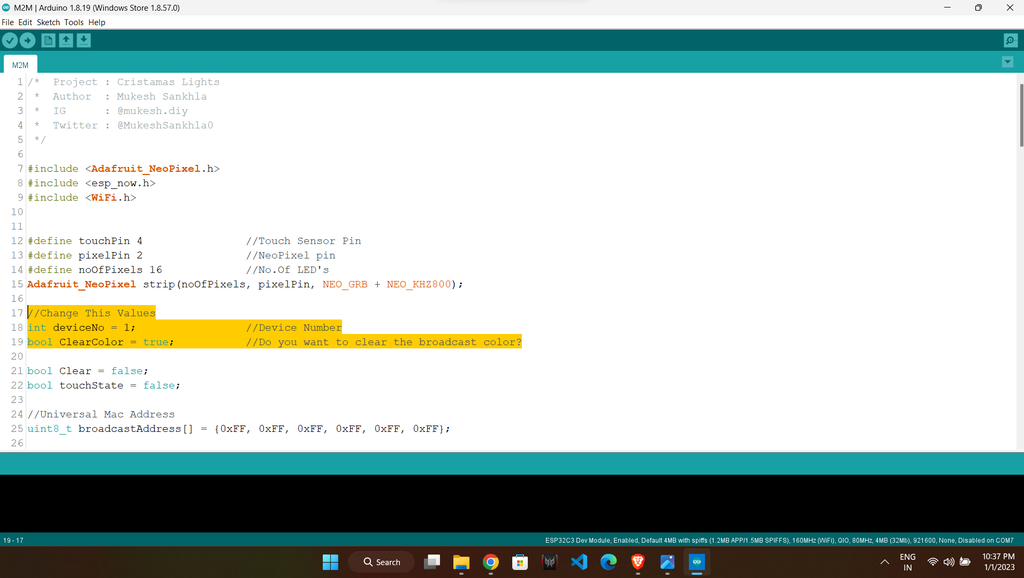
*You have to change the
deviceNo = 1/2/3/4/5 as per your device number.
*You can change the ClearColor = False, to make the changed colour in stay mode.
//Change This Values
int deviceNo = 1; //Device Number
bool ClearColor = true; //Do you want to clear the broadcast color?

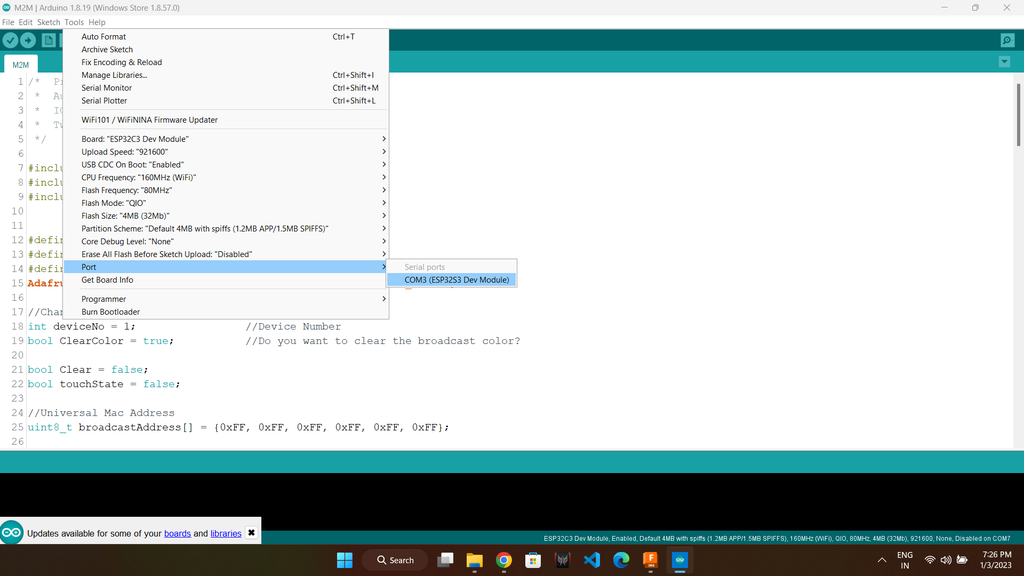
*Now You have to board type from Tools->Board->ESP32 Arduino->ESP32C3 Dev Module.
*Selsct the com port number from Tools->Port
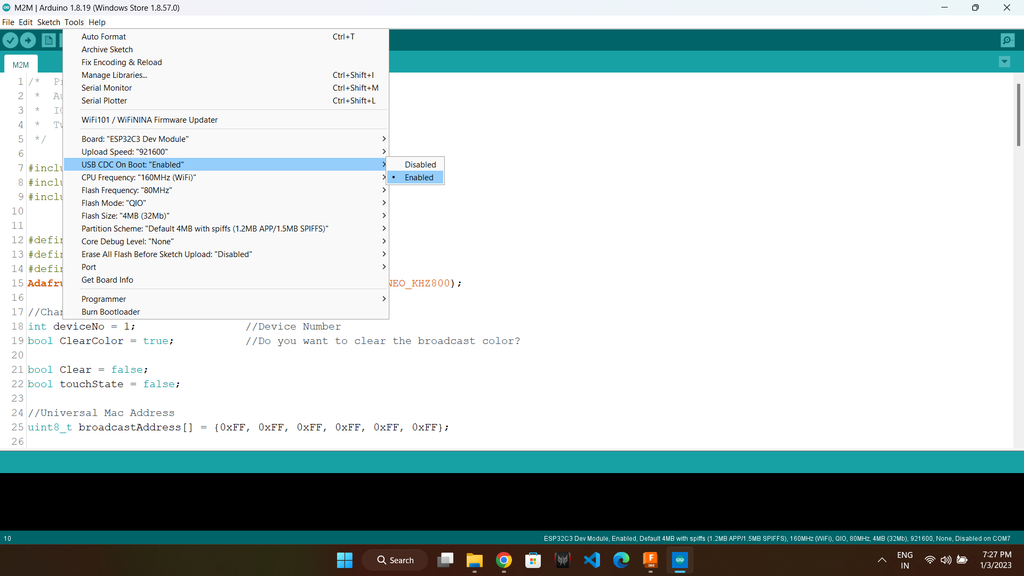
*You can Enable or Disable the Tools->USB CDC On Boot to enable or disable the Serial Monitor. (I prefer disable it unless you are making changes in the code).
*Click on upload the lamp will glow with a particular color that you have specified as deviceNo.
Step 9: Color Change
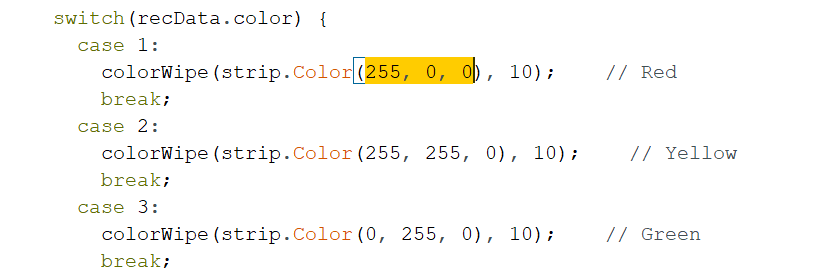
colorWipe(strip.Color(255, 255, 0), 10); // Yellow (Device 2)
colorWipe(strip.Color(0, 255, 0), 10); // Green (Device 3)
colorWipe(strip.Color(255, 0, 255), 10); // Pink (Device 4)
colorWipe(strip.Color(0, 0, 255), 10); // Blue (Device 5)
Step 10: Charging
*You can directly charge the battery though ESP32-C3 Modules Type C, since this module have on board charging and overcarge protection feture.
Step 11: Showcase


I hope you have fun making this project.
Thank You!


