
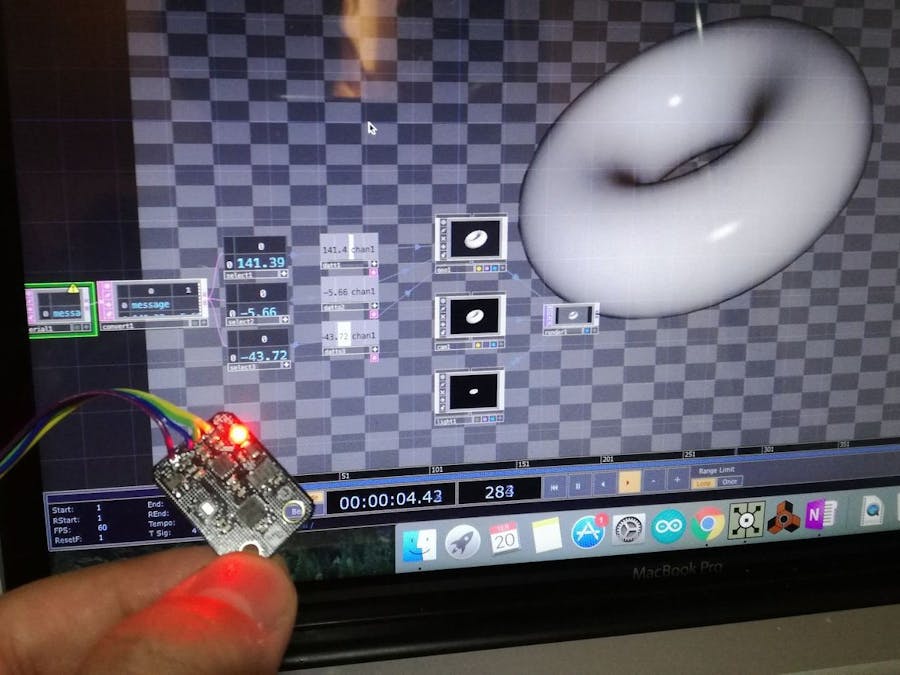
I controlled 3DCG object using TouchDesigner. The object moves according to the value of the sensor connected Arduino.
Things used in this project
Hardware components
Story
I controlled 3DCG object using TouchDesigner. The object moves according to the value of the sensor connected Arduino.
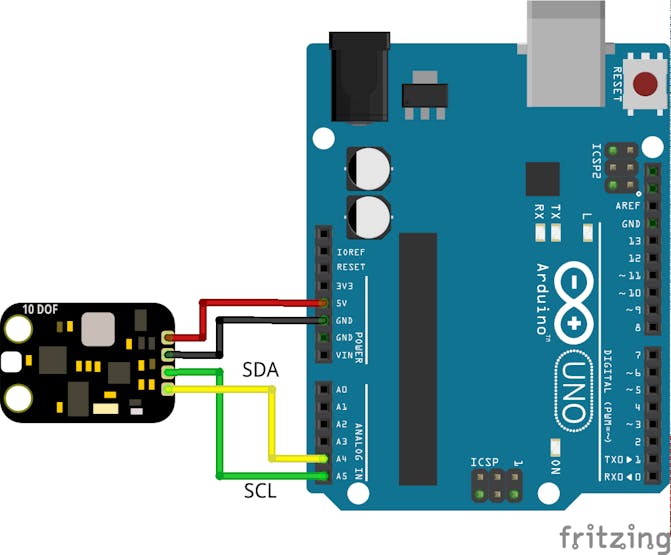
10 DOF Mems IMU Sensor
https://www.dfrobot.com/product-818.html
This sensor has:
ADXL 345: 3-axis acceleration sensorITG 3200: 3-axis gyroHMC 5883 L: 3-axis geomagnetic sensorBMP 085: Barometric pressure sensorThe interface of the module is I2C.
Configuration
Arduino IDE Program
It is based on the library and sample code which can be downloaded below. https://www.dfrobot.com/wiki/index.php/10_DOF_Sensor_(SKU:SEN0140)
Serial output of sensor attitude angle "yaw, pitch, roll". Use the attached code.
Connection diagram
The following is the total connection diagram.
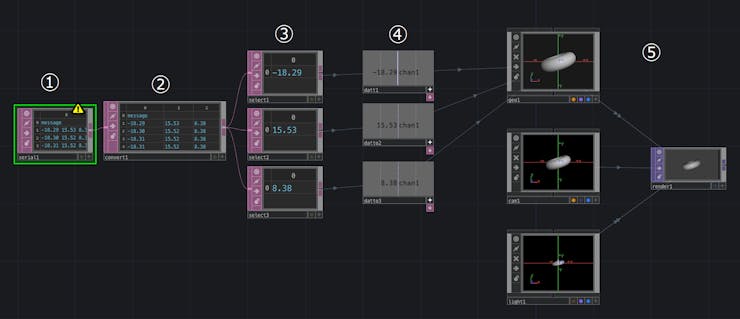
1. Serial data from Arduino acquisition
Select and place the Serial operator from the DAT (Data) tab and obtain serial data from Arduino.
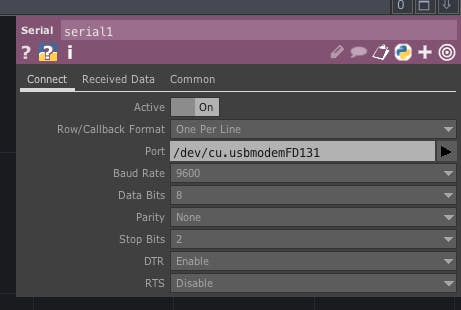
Port: Select the Arduino port connected to the PC
2. Split serial data
Select and place the Convert operator from the DAT tab and wire it with the Serial operator. Since three data of yaw pitch roll has been sent in one row, Tab divides the data into three columns.
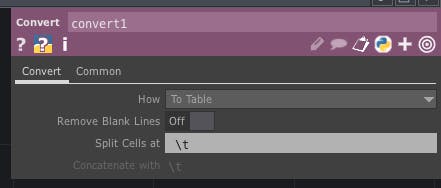
Data division with Tab (\ t)
3. Selection of serial data.
Select and place the Select operator from the DAT tab and connect with the Convert operator so that only the latest serial data is acquired. Place three and get the latest data of yaw pitch roll respectively.
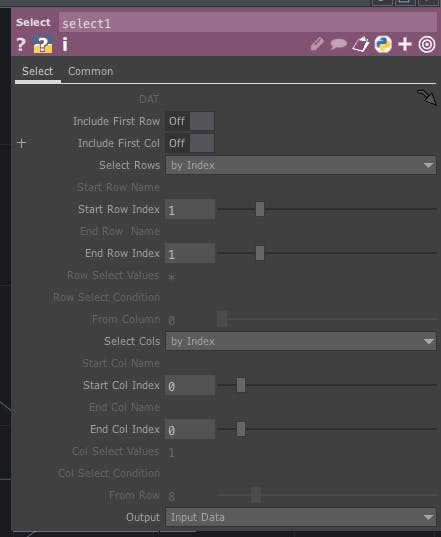
Select Rows: By IndexStart Row Index, End Row Index: 1Select Cols: by IndexStart Col Index, End Col Index: Select 0, 1, 2 respectively to get yaw pitch roll
4. Convert latest serial data to CHOP data
Select and place the DAT to operator from the CHOP tab and convert the serial data of the DAT value to the value for CHOP. Place three for yaw pitch roll.
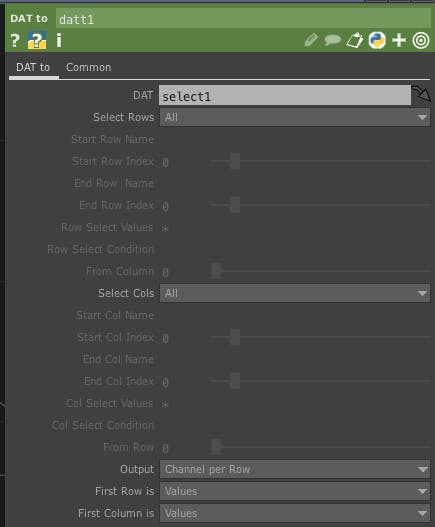
Drag each Select operator to DATFirst Column is: Values
5. Place 3DCG and enter yaw pitch roll data
Select and place the Geometry, Camera, Light Operator from the COMP tab and the Render operator from the TOP tab. When placed, they are wired automatically and CG is displayed by clicking the blue circle on the lower right of the Render operator. Connect Geometry operator and yaw pitch roll data and move CG.
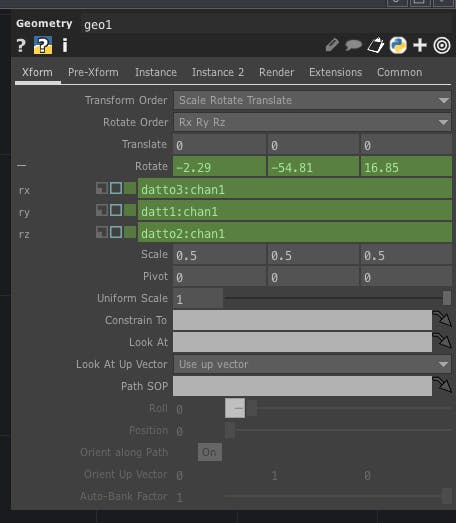
Geometry Operator Properties
Rotate: Drag the DAT to operator to roll to x, yaw to yaw, and z to pitch respectively (Before dragging, it is necessary to click "+" in the lower right of DAT to operator and put it in View mode) Scale: Set x, y, z to 0.5
Code
Untitled file
Arduino
#include <Wire.h>
#include <FreeSixIMU.h>
#include <FIMU_ADXL345.h>
#include <FIMU_ITG3200.h>
#include <HMC5883L.h>
#include <BMP085.h>

float angles[3]; // yaw pitch roll
float heading;
BMP085 dps = BMP085();
long Temperature = 0, Pressure = 0, Altitude = 0;

// Set the FreeSixIMU object
FreeSixIMU sixDOF = FreeSixIMU();

HMC5883L compass;
// Record any errors that may occur in the compass.
int error = 0;

void setup(){
    Serial.begin(9600);
    Wire.begin();
    delay(1000);
    dps.init();
    dps.dumpCalData();
    delay(5000);

    delay(5);
    sixDOF.init(); //init the Acc and Gyro
    delay(5);
    compass = HMC5883L(); // init HMC5883

    error = compass.SetScale(1.3); // Set the scale of the compass.
    error = compass.SetMeasurementMode(Measurement_Continuous); // Set the measurement mode to Continuous
    if(error != 0) // If there is an error, print it out.
        Serial.println(compass.GetErrorText(error));
}

void loop(){
    sixDOF.getEuler(angles);
    Serial.print(angles[0]); //yaw
    Serial.print('\t');
    Serial.print(angles[1]); //pitch
    Serial.print('\t');
    Serial.println(angles[2]); //roll
    delay(10);
}
The article was first published in hackster, December 21, 2017
cr: https://www.hackster.io/H0meMadeGarbage/3dcg-control-using-touchdesigner-10-dof-mems-imu-sensor-2e6fd8
author: HomeMadeGarbage


