
Setup a home temperature monitoring system on your phone within minutes! Literally just copy and paste!
Things used in this project
Hardware components
Story
As my first attempt to automate my electric heater, I have decided to develop a remote temperature monitoring system. This is the Part I of this project.
My background is mechanics and hydraulics so don't expect details on why do electrons flow opposite to the theoretical representation of current! :)
I will try to be as thorough as possible on my explanations.
Step One: First Things First
Install libraries:

Blynk

DHT-22

NodeMCU
Don't know how? Check the link below:
https://www.arduino.cc/en/guide/libraries
Visual guy? Get sleepy reading? Check this youtube video:
https://www.youtube.com/watch?v=A5eakzVo5mY
Step Two: Setting Up for Sketch Upload
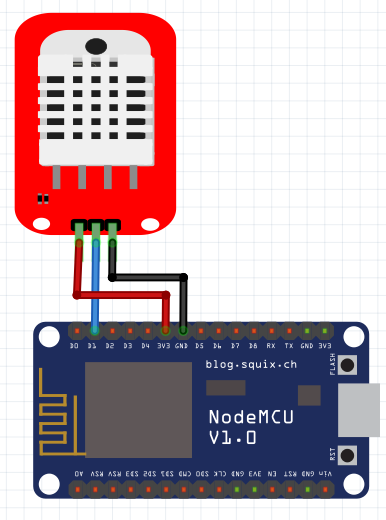
Set up as per Fritzing schematics.

Step Three: Creating Your Blynk App
Extracted of instructions from: http://docs.blynk.cc/
Getting Started With The Blynk App
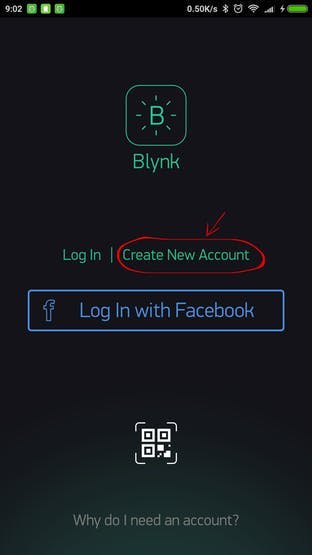
1. Create a Blynk Account
After you download the Blynk App, you’ll need to create a New Blynk account. This account is separate from the accounts used for the Blynk Forums, in case you already have one.
We recommend using a real email address because it will simplify things later.
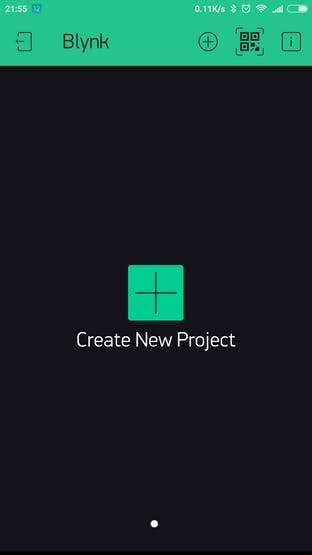
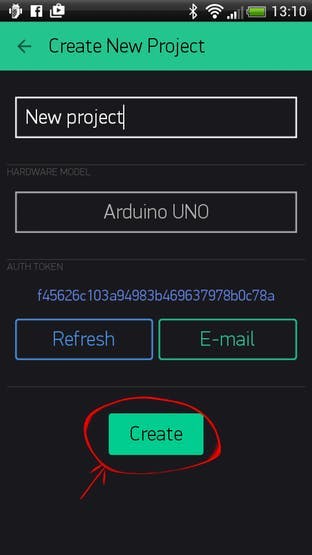
2. Create a New Project
After you’ve successfully logged into your account, start by creating a new project.
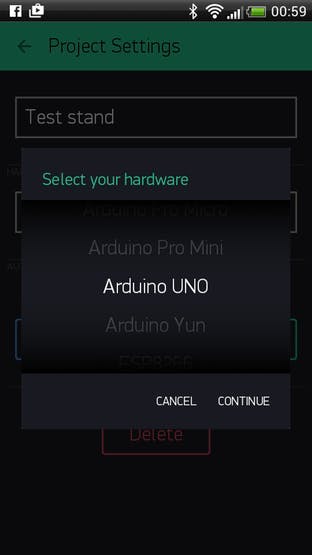
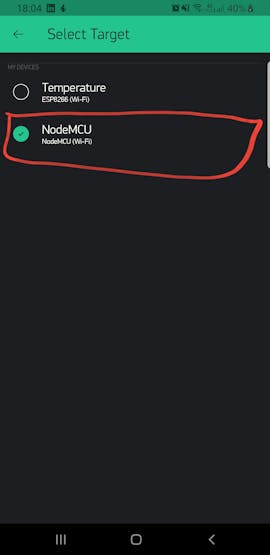
3. Choose Your Hardware
Select the hardware model you will use. Check out the list of supported hardware!
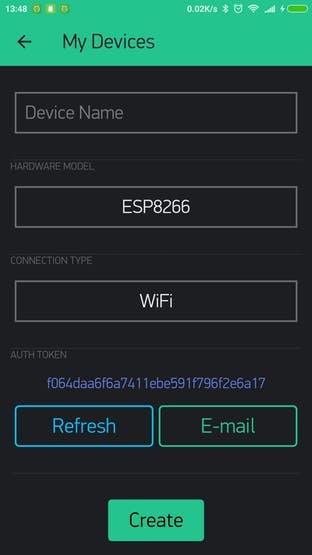
4. Auth Token
Auth Token is a unique identifier which is needed to connect your hardware to your smartphone. Every new project you create will have its own Auth Token. You’ll get Auth Token automatically on your email after project creation. You can also copy it manually. Click on devices section and selected required device :
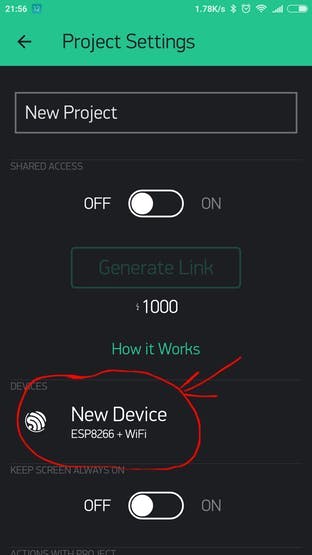
And you’ll see token :
NOTE: Don’t share your Auth Token with anyone, unless you want someone to have access to your hardware.
It’s very convenient to send it over e-mail. Press the e-mail button and the token will be sent to the e-mail address you used for registration. You can also tap on the Token line and it will be copied to the clipboard.
Now press the “Create” button.
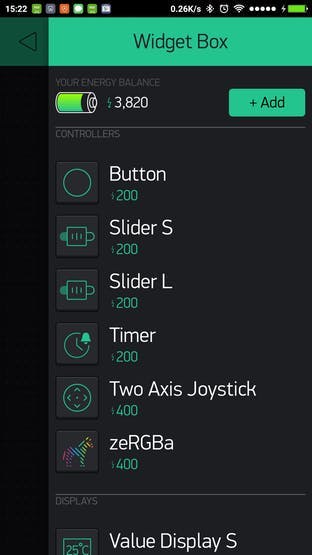
5. Add a Widget
Your project canvas is empty, let’s add a button to control our LED.
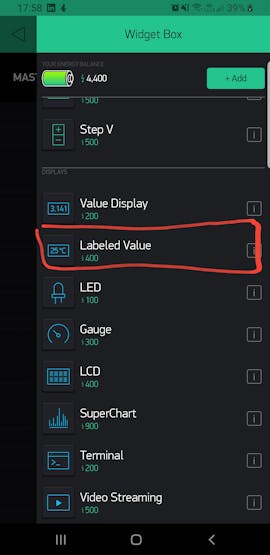
Tap anywhere on the canvas to open the widget box. All the available widgets are located here. Now pick a button.
Widget Box
Drag-n-Drop - Tap and hold the Widget to drag it to the new position.
Widget Settings - Each Widget has it’s own settings. Tap on the widget to get to them.
Select "Labeled Value".
Drag-n-Drop - Tap and hold the Widget to drag it to the new position.
Widget Settings - Each Widget has it’s own settings. Tap on the widget to get to them.
Choose a name for your widget.
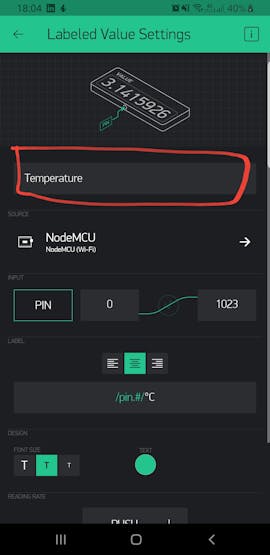
Select the source of data. My case I am using NodeMCU.
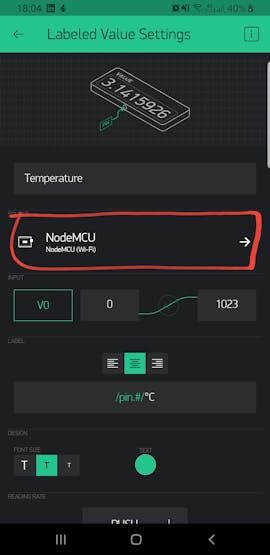
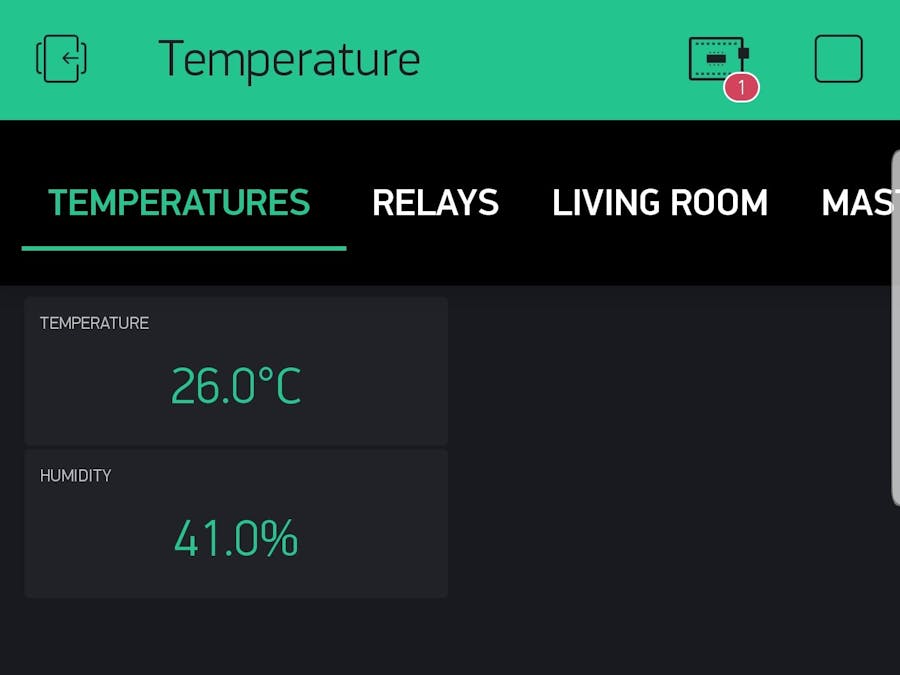
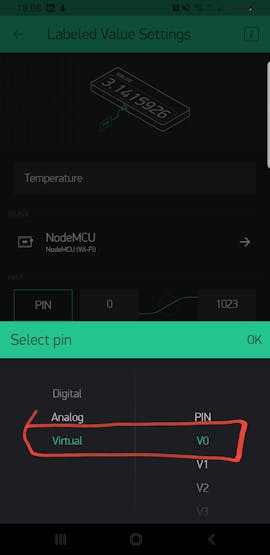
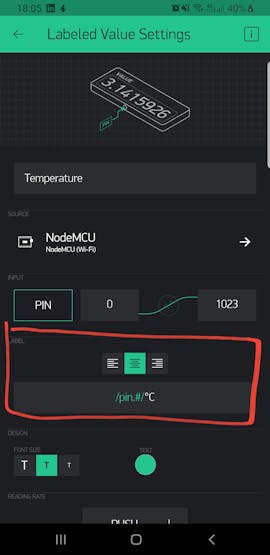
The most important parameter to set is PIN. The list of pins reflects physical pins defined by your hardware. If your value is connected to Virtual Pin 0 - then select V0 (V - stands for Virtual).
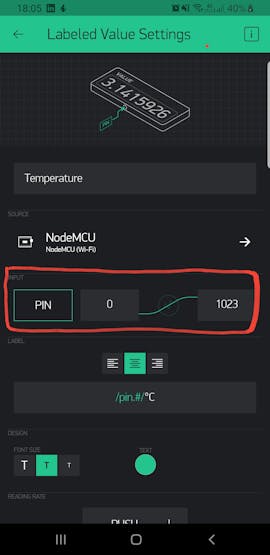
You can add a label to it.
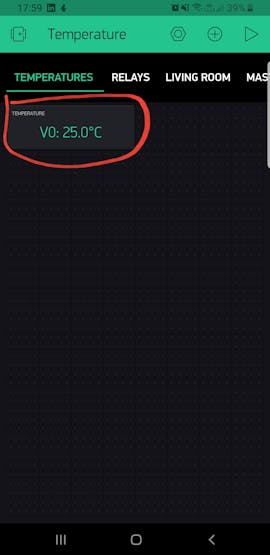
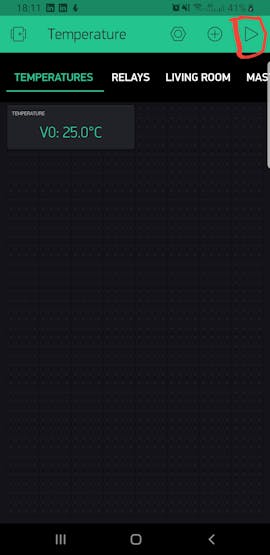
6. Run The Project
When you are done with the Settings - press the PLAY button. This will switch you from EDIT mode to PLAY mode where you can interact with the hardware. While in PLAY mode, you won’t be able to drag or set up new widgets, press STOP and get back to EDIT mode.
You will get a message saying “Arduino UNO is offline”. We’ll deal with that in the next section.

Click on Play Icon.
Here's how it looks like when the project is running with no connection.
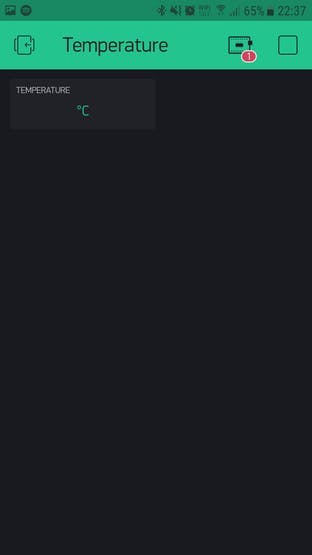
The red number one should go once it is connected.
Enjoy! Try adding graphs and other sensors to it! Next I am including a relay to turn a heater on and off remotely pressing a button and/or using a timer on Blynk!
Step Four: Open a beer!
Schematics
Wiring Diagram
Code
NodeMCU
Arduino
Upload to your NodeMCU
#include "DHT.h"                              // DHT Sensor
#include <ESP8266WiFi.h>
#include <BlynkSimpleEsp8266.h>

char auth[] = "Blynk Auth";
char ssid[] = "SSID";
char pass[] = "Password";

DHT dhtA(5, DHT22);                           // DHT instance named dhtA, D1 and sensor type

void setup() {
  Blynk.begin(auth, ssid, pass);              // Connecting to blynk
  dhtA.begin();                               // Starting the DHT-22
}

void loop() {
  Blynk.run();
  climateRoutine();                           // Climate routine
  delay(4700);                                // 4.7 sec between routines
}

void climateRoutine() {
    byte h1 = dhtA.readHumidity();            // f1 and h1 are celsius and humidity readings
    // byte t1 = dhtA.readTemperature(true);  // for temperature in farenheits
    byte t1 = dhtA.readTemperature();         // from DHT/A
    Blynk.virtualWrite(V0, t1);               //  Set Virtual Pin 0 frequency to PUSH in Blynk app
    Blynk.virtualWrite(V1, h1);               //  Set Virtual Pin 1 frequency to PUSH in Blynk app
}
The article was first published in hackster, April 8, 2019
cr:https://www.hackster.io/Cmtelesann/blynk-nodemcu-and-dht-22-8220ab
author: Cmtelesann


