A DIY Bluetooth speaker using ESP32 with built-in voice recognition that lets you control music playback and volume using voice commands.
Story
Ever found yourself with messy hands while cooking, deep in a project, working out, or singing in the shower, wishing you could control your music without touching anything? That's exactly why I built this voice-controlled speaker.
While smart speakers like Amazon Echo, Google Home, and Apple HomePod have transformed how we interact with music, they all require internet connectivity and cloud processing to function - meaning no connection, no music control.
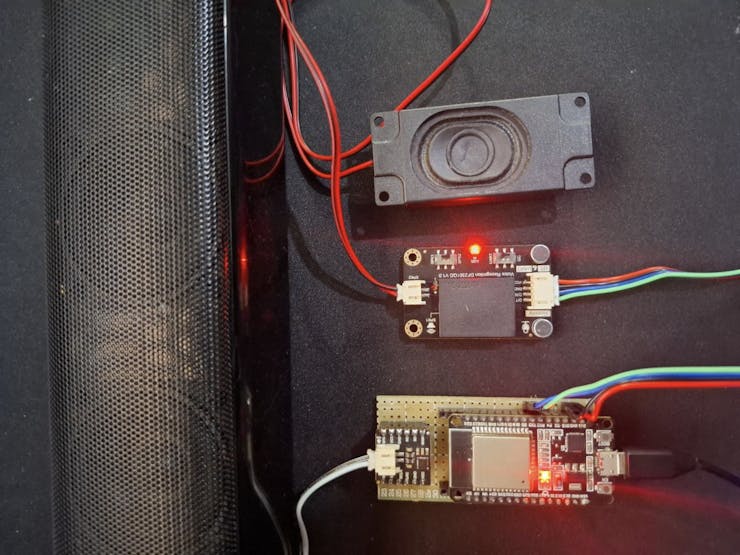
This project takes a different approach by creating a smart speaker that processes voice commands completely offline using DFRobot's Offline Language Learning Voice Recognition Sensor. The ESP32 microcontroller works double duty - handling Bluetooth audio streaming while managing voice commands, while the MAX98357A I2S amplifier ensures high-quality sound output.
What sets this project apart is its independence and simplicity. Once programmed, it works like any Bluetooth speaker but responds to natural voice commands like "play music, " "stop playing, " or "volume up" without needing apps or internet connection. The voice recognition happens instantly on-device, ensuring quick response times and complete privacy.

Hardware Required
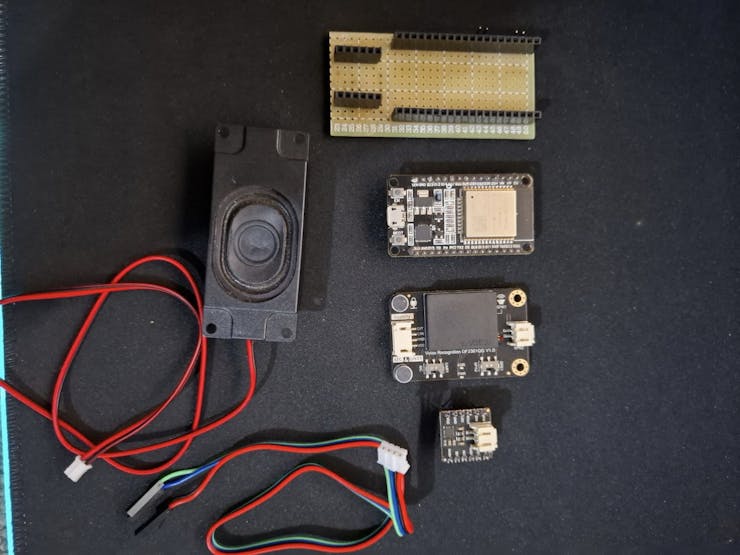
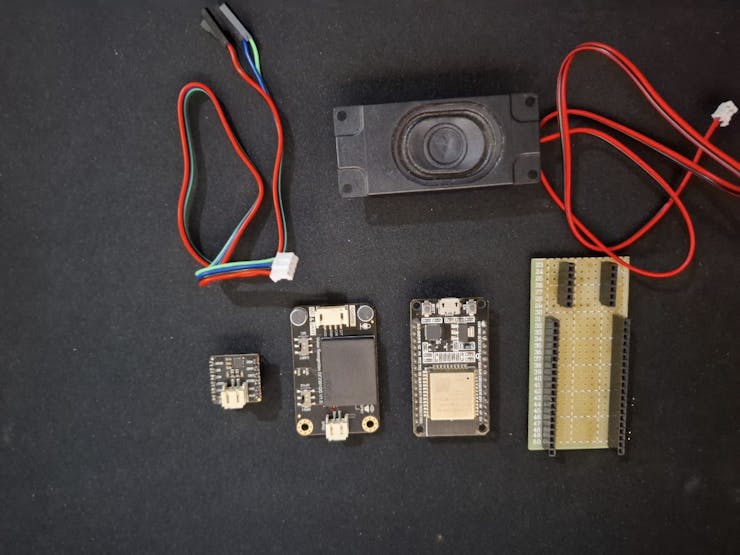
1. ESP32 Development Board
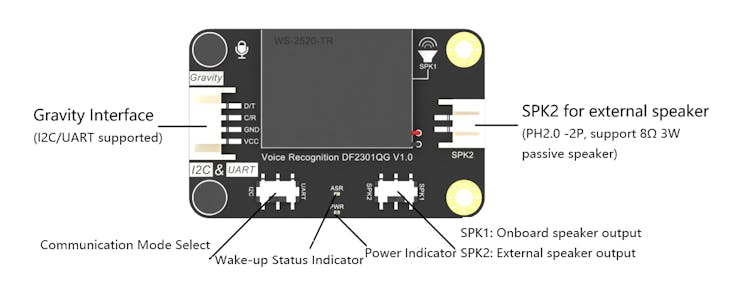
2. DFRobot DF2301Q Voice Recognition Module
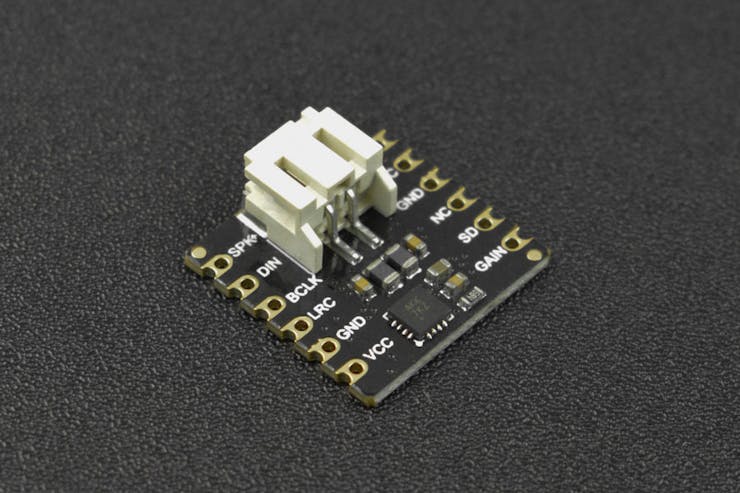
3. DFRobot MAX98357A I2S Audio Amplifier
4. Speaker (8 ohms recommended)
5. Power Supply (5V)
6. Connecting Wires
7. Project Box/Enclosure (optional)
Pin Connections
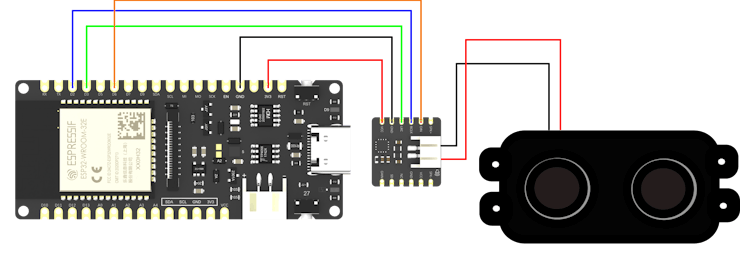
Voice Recognition Module (DF2301Q)
RX - GPIO16 (ESP32)
TX - GPIO17 (ESP32)
VCC - 5V
GND - GND
Audio Amplifier (MAX98357A)
BCLK - GPIO25
LRCLK - GPIO26
DIN - GPIO14
VCC - 5V
GND - GND
Software Dependencies
Make sure to install the two required Libraries below
1. DFRobot_DF2301Q Library for the voice recognition module
2.DFRobot_MAX98357A for the amplifier Module
It is is included in the code as shown below
#include
#include "DFRobot_DF2301Q.h"
How It Works
Voice Recognition Communication
The DF2301Q voice recognition module communicates with the ESP32 using UART protocol. While the module supports I2C communication, UART was chosen for its simplicity and straightforward implementation. The connection requires just two data pins (TX and RX) plus power and ground
Learn more about the module and how to use it here
// Configure voice recognition sensor on Serial2 for ESP32
DFRobot_DF2301Q_UART DF2301Q(/*hardSerial =*/&Serial2, /*rx =*/16, /*tx =*/17);
When the module recognizes a voice command, it sends a corresponding command ID (CMDID) through the serial connection. Each command has a unique ID that triggers specific actions:
// Voice command IDs
const uint8_t CMD_PLAY = 92;
const uint8_t CMD_STOP = 93;
const uint8_t CMD_PREVIOUS = 94;
const uint8_t CMD_NEXT = 95;
const uint8_t CMD_REPEAT = 96;
const uint8_t CMD_VOLUME_UP = 97;
const uint8_t CMD_VOLUME_DOWN = 98;
const uint8_t CMD_VOLUME_MAX = 99;
const uint8_t CMD_VOLUME_MIN = 100;
const uint8_t CMD_VOLUME_MID = 101;
The main loop continuously monitors for command IDs:
void loop() {
uint8_t commandID = DF2301Q.getCMDID();
if (commandID != 0) {
Serial.print("Received command ID: ");
Serial.println(commandID);
switch (commandID) {
case CMD_VOLUME_UP:
if (currentVolume < 9) {
currentVolume++;
amplifier.setVolume(currentVolume);
}
break;
// Other cases...
}
}
}
Audio System
The MAX98357A amplifier connects to the ESP32 via I2S (Inter-IC Sound), a dedicated digital audio interface. This ensures high-quality audio transmission from Bluetooth to the speaker. The ESP32 handles Bluetooth A2DP (Advanced Audio Distribution Profile) for streaming audio from your devices.
Software Setup
Install Required Libraries
DFRobot_MAX98357ADFRobot_DF2301Q
Arduino IDE Settings
Board: ESP32 Dev ModuleUpload Speed: 115200Flash Frequency: 80MHzCPU Frequency: 240MHz
Upload the Code
Open the provided code in Arduino IDESelect the correct portUpload to your ESP32
Initial Configuration
The setup function initializes both the voice recognition module and amplifier:
void setup() {
// Initialize voice recognition sensor
while (!DF2301Q.begin()) {
Serial.println("Voice sensor initialization failed!");
delay(3000);
}
// Initialize amplifier
while (!amplifier.begin("Nick Smart Speaker", GPIO_NUM_25, GPIO_NUM_26, GPIO_NUM_14)) {
Serial.println("Amplifier initialization failed!");
delay(3000);
}
// Configure voice module settings
DF2301Q.settingCMD(DF2301Q_UART_MSG_CMD_SET_MUTE, 0); // Unmute
DF2301Q.settingCMD(DF2301Q_UART_MSG_CMD_SET_VOLUME, 10); // Set recognition volume
DF2301Q.settingCMD(DF2301Q_UART_MSG_CMD_SET_WAKE_TIME, 10); // Wake time in seconds
}
Voice Commands
The system recognizes these commands:
- "Play Music" - Start playback
- "Stop" - Stop playback
- "Next track" - Skip to next track
- "Previous Track" - Go to previous track
- "Volume Up" - Increase volume
- "Volume Down" - Decrease volume
- "Change Volume to Maximum " - Set volume to maximum
- "Change Volume to Minimum " - Set volume to minimum
- "Change Volume to Medium " - Set volume to middle level
Troubleshooting
Voice Recognition Issues
Ensure you're speaking clearly and within 1 meter of the deviceCheck if TX/RX pins are correctly connectedVerify Serial2 initialization in codeCheck serial monitor for command ID feedback
Audio Issues
Verify I2S pin connectionsCheck speaker connections and impedanceEnsure Bluetooth device is properly pairedMonitor serial output for initialization success
Connection Problems
Reset both ESP32 and Bluetooth deviceCheck power supply stabilityVerify all ground connectionsMonitor serial output for debugging informationA startup sound will play when successfully initialized
Operation Guide
Power on the deviceWait for the initialization confirmation
The device will appear as "Nick Smart Speaker" in your Bluetooth settings
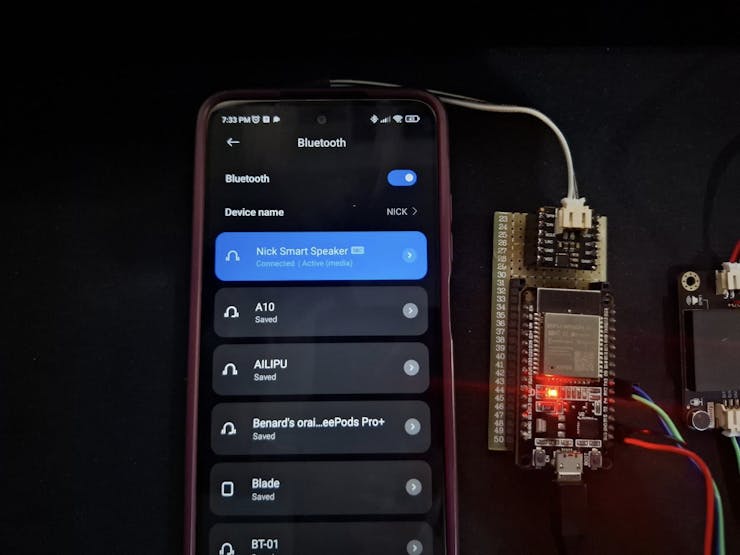
Pair with your deviceUse voice commands to control playback and volume
Future Enhancements
Implement playlist controlAdd ability to play music from SD-CardAdd LED indicators for visual feedbackDevelop a mobile app for additional control
Credits
Special Thanks to DFRobot for providing the components used in this project.
Contribution and Collaboration
Want to help make this project even better? Join in! Whether you have ideas for new features, improvements, or just want to collaborate, your contributions are welcome. Feel free to fork the project, make changes, and submit them. Let us build something awesome together!
Github link https://github.com/tech-nickk/Smart-Voice-controlled-Bluetooth-Speaker
Don't forget to leave a like
Thankyou :)
Gallery
#include <DFRobot_MAX98357A.h>
#include "DFRobot_DF2301Q.h"

// Create amplifier instance
DFRobot_MAX98357A amplifier;

// Configure voice recognition sensor on Serial1
#if defined(ESP32)
  DFRobot_DF2301Q_UART DF2301Q(/*hardSerial =*/&Serial2, /*rx =*/16, /*tx =*/17);
#else
  DFRobot_DF2301Q_UART DF2301Q(/*hardSerial =*/&Serial1);
#endif


// Voice command IDs
const uint8_t CMD_PLAY = 92;
const uint8_t CMD_STOP = 93;
const uint8_t CMD_PREVIOUS = 94;
const uint8_t CMD_NEXT = 95;
const uint8_t CMD_REOEAT = 96;
const uint8_t CMD_VOLUME_UP = 97;
const uint8_t CMD_VOLUME_DOWN = 98;
const uint8_t CMD_VOLUME_MAX = 99;
const uint8_t CMD_VOLUME_MIN = 100;
const uint8_t CMD_VOLUME_MID = 101;


// Current volume level
int currentVolume = 5;

void setup() {
  Serial.begin(115200);

  // Initialize voice recognition sensor
  while (!DF2301Q.begin()) {
    Serial.println("Voice sensor initialization failed!");
    delay(3000);
  }
  Serial.println("Voice sensor initialized successfully!");

  // Initialize amplifier
  while (!amplifier.begin("Nick Smart Speaker", GPIO_NUM_25, GPIO_NUM_26, GPIO_NUM_14)) {
    Serial.println("Amplifier initialization failed!");
    delay(3000);
  }
  Serial.println("Amplifier initialized successfully!");

  // Set initial volume
  amplifier.setVolume(currentVolume);

  // Initial voice module settings
  DF2301Q.settingCMD(DF2301Q_UART_MSG_CMD_SET_MUTE, 0);  // Unmute
  DF2301Q.settingCMD(DF2301Q_UART_MSG_CMD_SET_VOLUME, 10); // Set voice recognition volume
  DF2301Q.settingCMD(DF2301Q_UART_MSG_CMD_SET_WAKE_TIME, 10); // Wake time in seconds

  // Play startup sound
  DF2301Q.playByCMDID(23);  // You can change this ID to any appropriate sound
}

void loop() {
  // Get voice command ID
  uint8_t commandID = DF2301Q.getCMDID();

  // Process voice commands
  if (commandID != 0) {
    Serial.print("Received command ID: ");
    Serial.println(commandID);

    // Execute command based on ID
    switch (commandID) {
      case CMD_PLAY:
        Serial.println("Command: Play");
        esp_avrc_ct_send_passthrough_cmd(0, ESP_AVRC_PT_CMD_PLAY, ESP_AVRC_PT_CMD_STATE_PRESSED);
        break;

      case CMD_STOP:
        Serial.println("Command: Stop");
        esp_avrc_ct_send_passthrough_cmd(0, ESP_AVRC_PT_CMD_STOP, ESP_AVRC_PT_CMD_STATE_PRESSED);
        break;

      case CMD_NEXT:
        Serial.println("Command: Next Track");
        esp_avrc_ct_send_passthrough_cmd(0, ESP_AVRC_PT_CMD_FORWARD, ESP_AVRC_PT_CMD_STATE_PRESSED);
        break;

      case CMD_PREVIOUS:
        Serial.println("Command: Previous Track");
        esp_avrc_ct_send_passthrough_cmd(0, ESP_AVRC_PT_CMD_BACKWARD, ESP_AVRC_PT_CMD_STATE_PRESSED);
        break;

      case CMD_VOLUME_UP:
        if (currentVolume < 9) {
          currentVolume++;
          amplifier.setVolume(currentVolume);
          Serial.print("Volume increased to: ");
          Serial.println(currentVolume);
        }
        break;

      case CMD_VOLUME_DOWN:
        if (currentVolume > 0) {
          currentVolume--;
          amplifier.setVolume(currentVolume);
          Serial.print("Volume decreased to: ");
          Serial.println(currentVolume);
        }
        break;

      case CMD_VOLUME_MAX:
        if (currentVolume < 9) {
          currentVolume = 9;
          amplifier.setVolume(currentVolume);
          Serial.print("Volume increased to: ");
          Serial.println(currentVolume);
        }
        break;

      case CMD_VOLUME_MIN:

          currentVolume = 1;
          amplifier.setVolume(currentVolume);
          Serial.print("Volume increased to: ");
          Serial.println(currentVolume);

        break;

      case CMD_VOLUME_MID:

          currentVolume = 5;
          amplifier.setVolume(currentVolume);
          Serial.print("Volume increased to: ");
          Serial.println(currentVolume);

        break;
    }
  }

  delay(100);  // Small delay to prevent overwhelming the system
}


