
This radio was made by using TEA5767 module radio.

Things used in this project
Hardware components
Story
IN GENERAL
This radio use the radio module TEA5767 which can operate from 76Mhz to 108Mhz. Furthermore, using a spst switch, we can turn on and off the radio and see the frequency chosen on the LCD (this use I2C protocol) by two buttons that change the frequency value. In the last we can change the volume thanks to a potentiometer on an amplificator to whom are connected two speakers and save through the EEPROM the last frequency chosen.
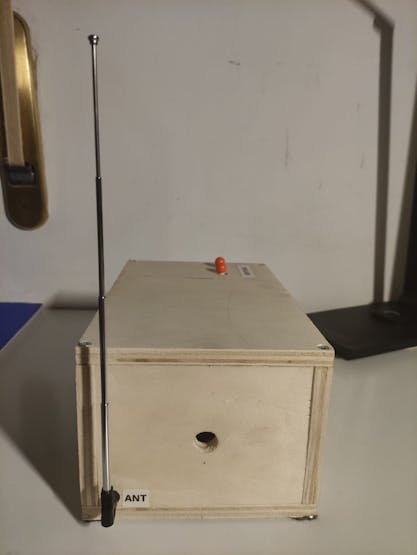
PHOTOS

Front side
Left side
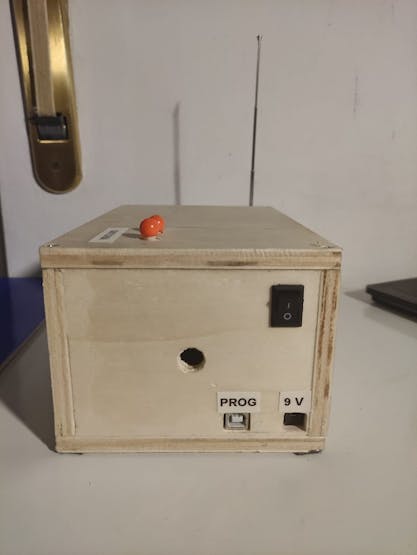
Right side
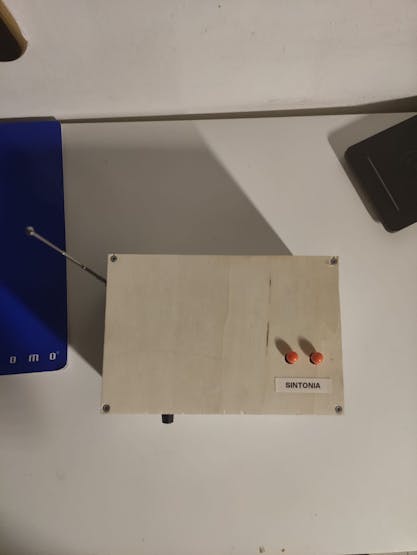
Top side
VIDEO
Schematics
Circuit diagram

Circuit diagram
The circuit diagram contains some parts not very accurate

Code
Code
Arduino
/*
   This example was based on the TEA5767 library published by
   Marcos R. Oliveira at: https://github.com/mroger/TEA5767
   This example was provided by Csongor Varga watch a video on this
   example at: https://youtu.be/yp0HVGjakMs
   This example is available at: https://github.com/nygma2004/tea5657_station_selector
   Copyright 2014 Marcos R. Oliveira
   Licensed under the Apache License, Version 2.0 (the "License");
   you may not use this file except in compliance with the License.
   You may obtain a copy of the License at
       http://www.apache.org/licenses/LICENSE-2.0
   Unless required by applicable law or agreed to in writing, software
   distributed under the License is distributed on an "AS IS" BASIS,
   WITHOUT WARRANTIES OR CONDITIONS OF ANY KIND, either express or implied.
   See the License for the specific language governing permissions and
   limitations under the License.
*/

#include <EEPROM.h>
#include <Wire.h>
#include <TEA5767N.h>
#include <LiquidCrystal_I2C.h>
#define LED_PIN 3 //pin connected to LED terminal on the LCD

LiquidCrystal_I2C lcd(0x27, 16, 2);

//Constants:
TEA5767N Radio = TEA5767N(); // Using standard I2C pins A4 and A5

//Variables:
int P1 = 2;
int B2 = 4;
float freq = 87.60;
int address=0;

void setup () {
  //Init
  lcd.init();
  lcd.backlight();
  pinMode(LED_PIN, OUTPUT);
  analogWrite(LED_PIN, 50); //you can modify the value of LCD LED from 0 to 255 in order to regular the brightness contrast


  lcd.setCursor(0, 0);
  lcd.print(EEPROM.get(address,freq));
  lcd.setCursor(6, 0);
  lcd.print("MHz");
  Radio.selectFrequency(EEPROM.get(address,freq));
  pinMode(P1, INPUT);
  pinMode(B2, INPUT);
}

void loop () {


  if (digitalRead(P1)==HIGH) {
    freq+=0.1;
    EEPROM.put(address, freq);
    Radio.selectFrequency(EEPROM.get(address,freq));
       lcd.setCursor(0, 0);
       lcd.print(EEPROM.get(address,freq));
       lcd.setCursor(6, 0);
       lcd.print("MHz");

    }

    else if(digitalRead(B2)==HIGH) {
       freq-=0.1;
    EEPROM.put(address, freq);
    Radio.selectFrequency(EEPROM.get(address,freq));
       lcd.setCursor(0, 0);
       lcd.print(EEPROM.get(address,freq));
       lcd.setCursor(6, 0);
       lcd.print("MHz");
    }


    }
The article was first published in hackster, June 2, 2022
cr: https://www.hackster.io/valerioceccoli/radio-arduino-uno-tea5767-e6c506
author: valerioceccoli


