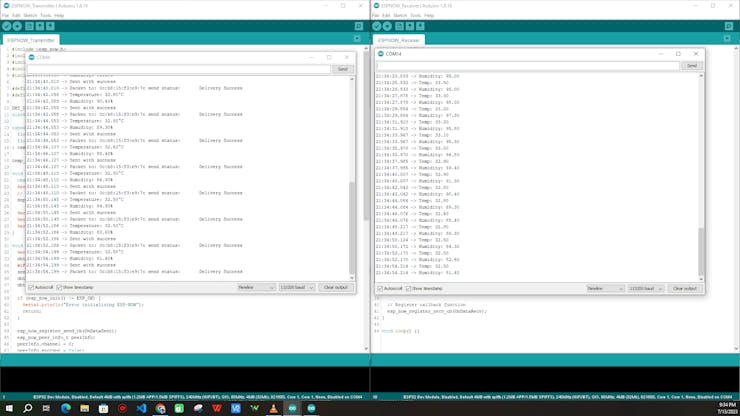
This tutorial will guide you to transfer the DHT11 sensor data from ESP32 with the help of the ESP-NOW protocol, all will receive the same DHT11 data in another ESP32 board using the same ESP-NOW protocol.
Things needed:
ESP32
DHT11
Get PCBs for Your Projects Manufactured

You must check out PCBWAY for ordering PCBs online for cheap!
You get 10 good-quality PCBs manufactured and shipped to your doorstep for cheap. You will also get a discount on shipping on your first order. Upload your Gerber files onto PCBWAY toget them manufactured with good quality and quick turnaround time. PCBWay now could provide a complete product solution, from design to enclosure production. Check out their online Gerber viewer function. With reward points, you can get free stuff from their gift shop.
Step1: Installing DHT11 Libraries
To interface with the DHT11 sensor, we’ll use the DHT library from Adafruit. To use this library you also need to install the Adafruit Unified Sensor library. Follow the next steps to install those libraries.
Open your Arduino IDE and go to Sketch > Include Library > Manage Libraries. The Library Manager should open.
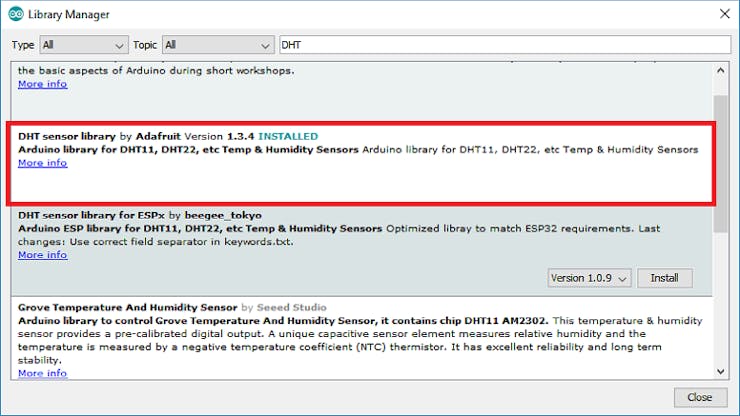
Search for “DHT” in the Search box and install the DHT library from Adafruit.
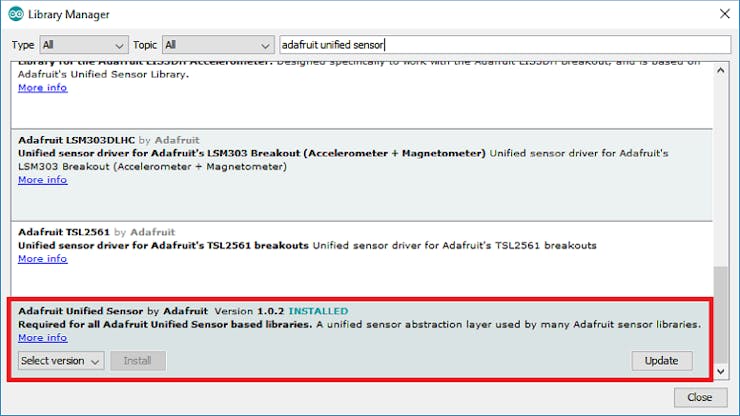
After installing the DHT library from Adafruit, type “Adafruit Unified Sensor” in the search box. Scroll all the way down to find the library and install it.
That's all let's test the DHT11.
Step2: DHT11 with ESP32
Connect the DHT11 data pin to esp32 pin 12, and just upload the code. Then wait for the serial monitor results.
#include "DHT.h"
#define DHTPIN 12     // Digital pin connected to the DHT sensor
#define DHTTYPE DHT11   // DHT 11

DHT dht(DHTPIN, DHTTYPE);

void setup() {
  Serial.begin(9600);
  Serial.println(F("DHTxx test!"));

  dht.begin();
}

void loop() {
  // Wait a few seconds between measurements.
  delay(2000);

  // Reading temperature or humidity takes about 250 milliseconds!
  // Sensor readings may also be up to 2 seconds 'old' (its a very slow sensor)
  float h = dht.readHumidity();
  // Read temperature as Celsius (the default)
  float t = dht.readTemperature();
  // Read temperature as Fahrenheit (isFahrenheit = true)
  float f = dht.readTemperature(true);

  // Check if any reads failed and exit early (to try again).
  if (isnan(h) || isnan(t) || isnan(f)) {
    Serial.println(F("Failed to read from DHT sensor!"));
    return;
  }

  // Compute heat index in Fahrenheit (the default)
  float hif = dht.computeHeatIndex(f, h);
  // Compute heat index in Celsius (isFahreheit = false)
  float hic = dht.computeHeatIndex(t, h, false);

  Serial.print(F("Humidity: "));
  Serial.print(h);
  Serial.print(F("%  Temperature: "));
  Serial.print(t);
  Serial.print(F("°C "));
  Serial.print(f);
  Serial.print(F("°F  Heat index: "));
  Serial.print(hic);
  Serial.print(F("°C "));
  Serial.print(hif);
  Serial.println(F("°F"));
}
Here is the serial monitor results.
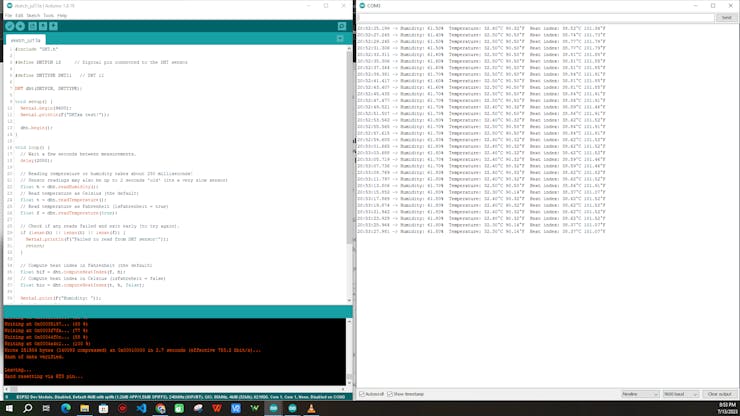
Okay, now everything is good.
Step3: Transmitter setup
Just keep the same DHT11 sensor connection and upload this code to the ESP32 board.
#include <esp_now.h>
#include <WiFi.h>
#include <Adafruit_Sensor.h>
#include <DHT.h>
#include <DHT_U.h>

#define DHTPIN 12
#define DHTTYPE DHT11

DHT_Unified dht(DHTPIN, DHTTYPE);
uint8_t broadcastAddress1[] = {0x0C,0xB8,0x15,0xF3,0xE9,0x7C};//Receiver Board MAC Address 0C:B8:15:F3:E9:7C

typedef struct temp_struct {
  float x;
  float y;
} temp_struct;

temp_struct test;

void OnDataSent(const uint8_t *mac_addr, esp_now_send_status_t status) {
  char macStr[18];
  Serial.print("Packet to: ");
  // Copies the sender mac address to a string
  snprintf(macStr, sizeof(macStr), "%02x:%02x:%02x:%02x:%02x:%02x",
           mac_addr[0], mac_addr[1], mac_addr[2], mac_addr[3], mac_addr[4], mac_addr[5]);
  Serial.print(macStr);
  Serial.print(" send status:\t");
  Serial.println(status == ESP_NOW_SEND_SUCCESS ? "Delivery Success" : "Delivery Fail");
}

void setup() {
  Serial.begin(115200);
  dht.begin();
  WiFi.mode(WIFI_STA);
  sensor_t sensor;
  dht.temperature().getSensor(&sensor);
  dht.humidity().getSensor(&sensor);

  if (esp_now_init() != ESP_OK) {
    Serial.println("Error initializing ESP-NOW");
    return;
  }

  esp_now_register_send_cb(OnDataSent);
  esp_now_peer_info_t peerInfo;
  peerInfo.channel = 0;
  peerInfo.encrypt = false;
  memcpy(peerInfo.peer_addr, broadcastAddress1, 6);
  if (esp_now_add_peer(&peerInfo) != ESP_OK){
    Serial.println("Failed to add peer");
    return;
  }
}

void loop() {

  sensors_event_t event;
  dht.temperature().getEvent(&event);
    test.x = event.temperature;

    Serial.print(F("Temperature: "));
    Serial.print(event.temperature);
    Serial.println(F("°C"));

    dht.humidity().getEvent(&event);
     test.y = event.relative_humidity;

    Serial.print(F("Humidity: "));
    Serial.print(event.relative_humidity);
    Serial.println(F("%"));

  esp_err_t result = esp_now_send(0, (uint8_t *) &test, sizeof(temp_struct));

  if (result == ESP_OK) {
    Serial.println("Sent with success");
  }
  else {
    Serial.println("Error sending the data");
  }
  delay(2000);
}
Note: Change the mac address of your receiver
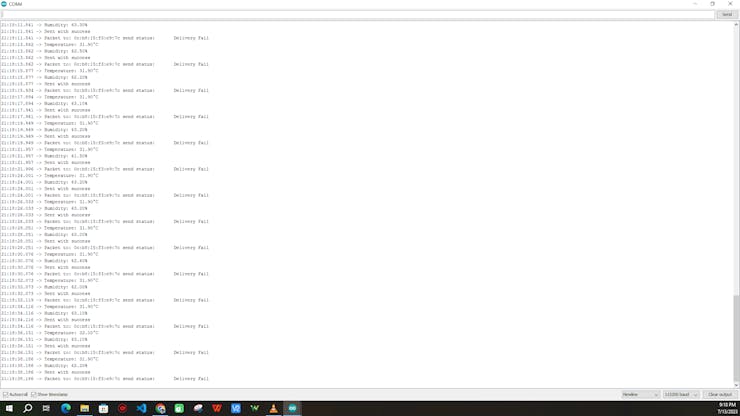
Here is the serial monitor results.
Step4: Receiver setup
Next, we need to set up our receiver to get the DHT11 data from the transmitter via ESPNOW. Upload the following code and wait for the serial monitor results.
#include <WiFi.h>
#include <esp_now.h>

// Define data structure
typedef struct struct_message {
    float a;
    float b;
} struct_message;

// Create structured data object
struct_message myData;

// Callback function
void OnDataRecv(const uint8_t * mac, const uint8_t *incomingData, int len)
{
  // Get incoming data
  memcpy(&myData, incomingData, sizeof(myData));

  // Print to Serial Monitor
  Serial.print("Temp: ");
  Serial.println(myData.a);

  Serial.print("Humidity: ");
  Serial.println(myData.b);
}

void setup() {
  // Set up Serial Monitor
  Serial.begin(115200);

  // Start ESP32 in Station mode
  WiFi.mode(WIFI_STA);

  // Initalize ESP-NOW
  if (esp_now_init() != 0) {
    Serial.println("Error initializing ESP-NOW");
    return;
  }

  // Register callback function
  esp_now_register_recv_cb(OnDataRecv);
}

void loop() {}
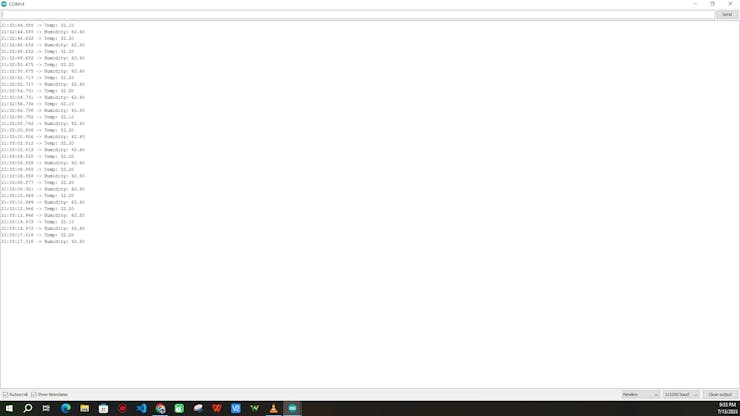
Here is the serial monitor results.
Wrap-Up:
Finally, now we can transfer our DHT11 data between two ESP32 boards without any internet. In upcoming tutorials will see some real-time use cases with ESPNOW.
