
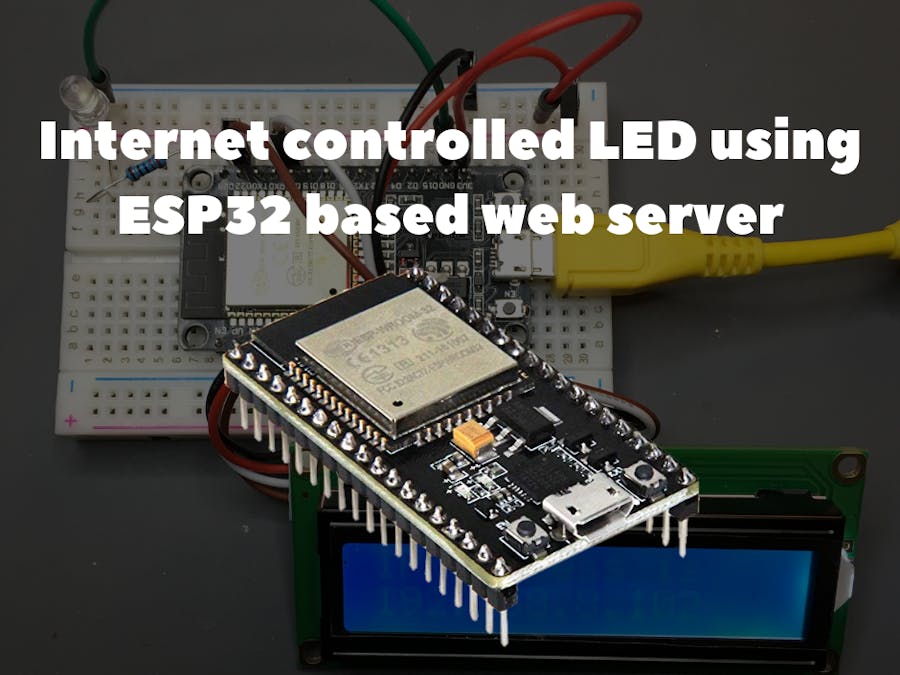
In this article I will explain how to use the Arduino IDE to create a web server based on ESP32 that allows to turn on/off LED remotely.
Software apps and online services
Story
Project overview
In this example, we will figure out how to make an ESP32-based web server to control LED state, which is accessible from anywhere in the world.
I used a Mac computer for this project, but you can do it in any computer that can run the Arduino IDE , even on an inexpensive and low-power computer like the Raspberry Pi.
Preparation of the ESP32 with the Arduino IDE
In order to start to program the ESP32 using the Arduino IDE and the Arduino programming language, you will need a special add-on. Read about how to prepare the Arduino IDE for ESP32 on Mac OS by the following link.
Materials required
For this tutorial you’ll need the following items:
- ESP32 development board
- 5mm LED
- Resistor 220ohm
- 16x2 LCD display with I2C module
- Breadboard
- Jumper wires
- Micro USB cable
Building the circuit
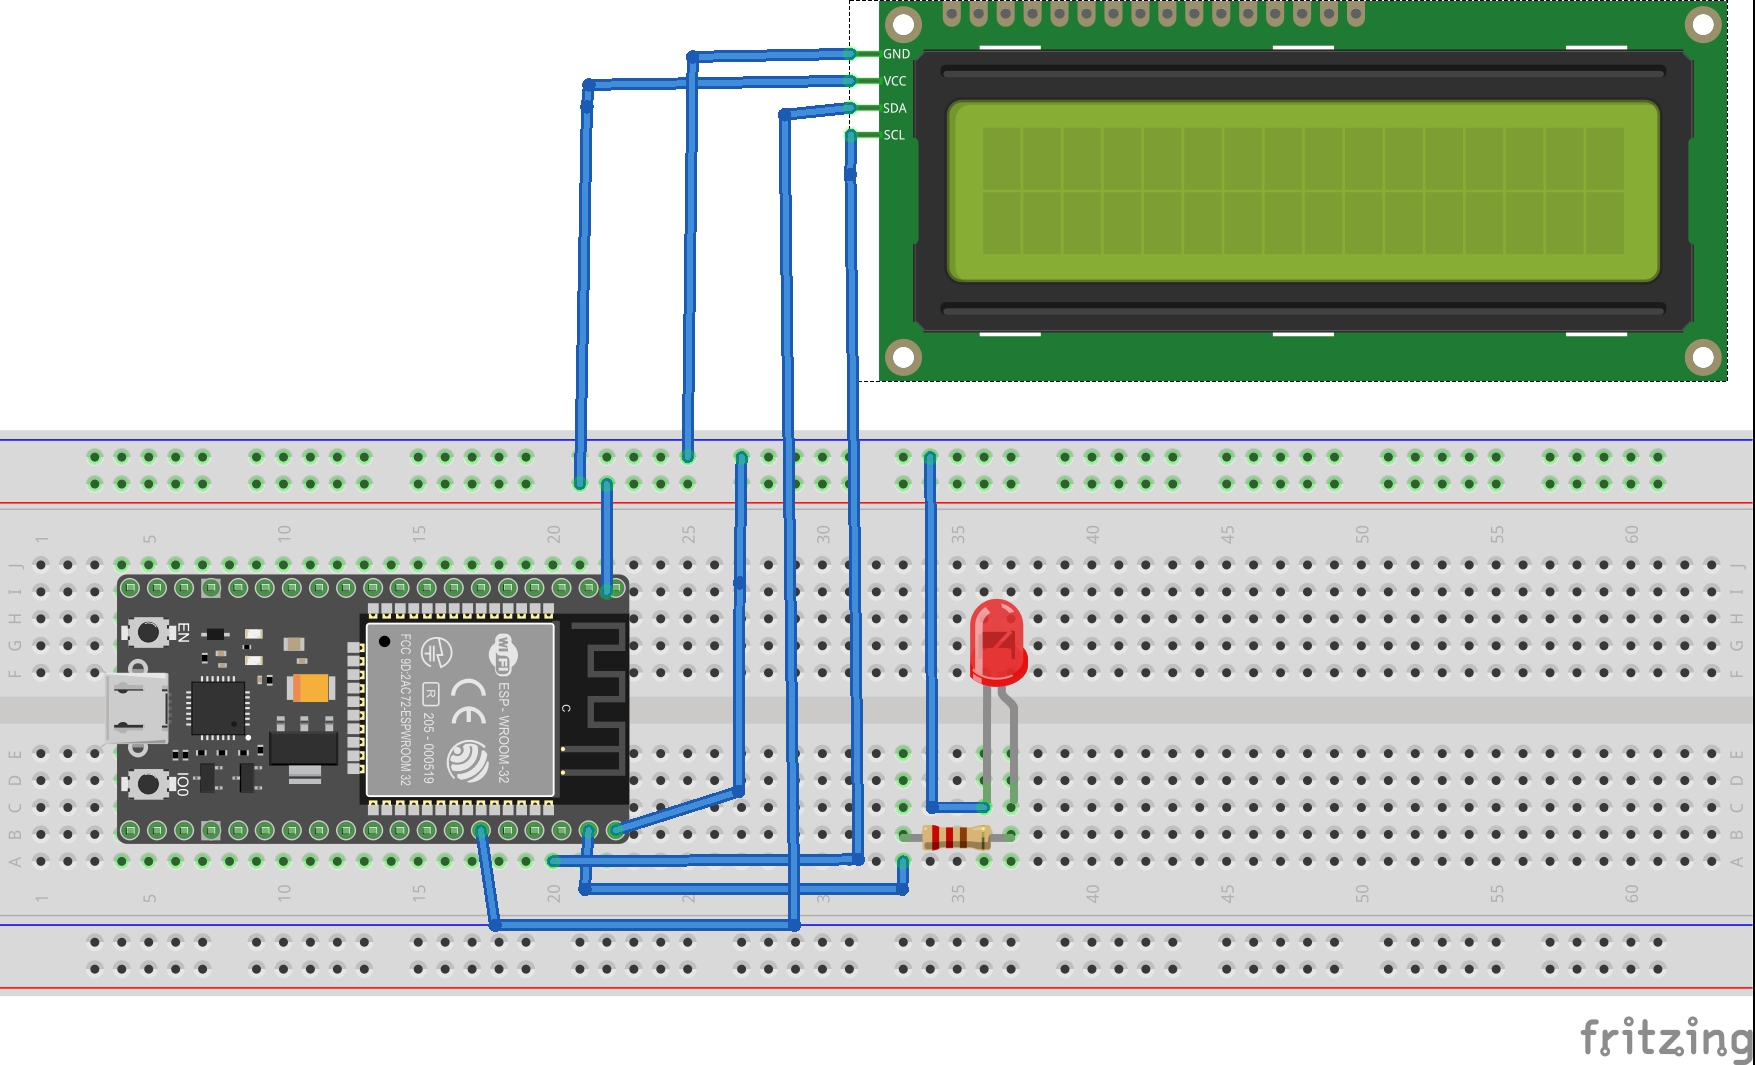
Perform connections as shown in the following schematic diagram below.
Start by connecting 3V3 supply voltage output on the ESP32 and GND to breadboard. Connect LED via resistor to the ESP32 using GPIO pin 23 as digital output pin. After that, connect SDA pin of 16x2 LCD display to GPIO pin 21 and SCL to GPIO pin 22.

Quick overview of SPIFFS Filesystem
SPIFFS stands for "Serial Peripheral Interface Flash File System", i.e file system for flash memory that transfers data through SPI. Accordingly, SPIFFS is a simplified file system designed for microcontrollers with flash chips that transmit data via the SPI bus (such as ESP32 flash memory).
SPIFFS is most useful for use with ESP32 in the following situations:
- Creating files for storing settings.
- Permanent data storage.
- Creating files to store a small amount of data (instead of using a microSD card for this).· Storing HTML and CSS files for creating a web server.
Installation of the SPIFFS bootloader on Mac OS
You can create, save and write data to files stored in the ESP32 file system directly using plugin on Arduino IDE.
First of all, make sure you have the latest version of the Arduino IDE installed, and then do the following:
- Open the following link and download the archive “ESP32FS-1.0.zip”
- Go to the Arduino IDE directory, which is located on Documents folder. Create a tools folder, if it does not exist. Inside of tools directory create another folder ESP32FS. Inside of ESP32FS create another one, which is called tool.
- Unzip the ZIP archive downloaded in step 1 to the tool folder.
- Restart your Arduino IDE.
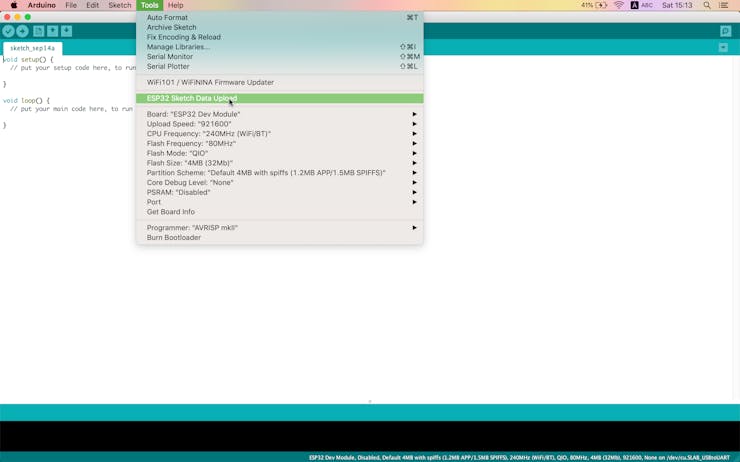
- To check if the plug-in was successfully installed, open the Arduino IDE and click on “Tools” and check if there is an item “ESP32 Sketch Data Upload” in this menu.
Installing libraries
ESPAsyncWebServer and AsyncTCP libraries allow you to create a web server using files from the file system of ESP32. For more information about these libraries, check the following link.
Install the ESPAsyncWebServer library
- Click here to download the ZIP archive of the library.· Unzip this archive. You should get the ESPAsyncWebServer-master folder.
- Rename it to "ESPAsyncWebServer".
- Install the AsyncTCP library
- Click here to download the ZIP archive of the library.
- Unzip this archive. You should get the AsyncTCP-master folder.
- Rename it to “AsyncTCP”.
Move the ESPAsyncWebServer and AsyncTCP folders to the libraries folder, which is located inside the Documents directory.
Finally, restart the Arduino IDE.
Create an index.html file with the following content
HTML/CSS Template for toggle button was taken from the following source. Two JS scripts was created additionally. First one checks the current status of LED before showing HTML page. Second one is used to change the state of LED by changing the status of checkbox.
<!DOCTYPE html>
<html>
<head>

<title>Internet controlled LED using ESP32 based web server</title>
<meta name="viewport" content="width=device-width, initial-scale=1">
<link rel="icon" href="data:,">
<link rel="stylesheet" type="text/css" href="style.css">

// Verify the current status of LED
<script type="text/javascript">
    document.addEventListener("DOMContentLoaded", function(event) {
    var button_text = "";
    button_text = document.getElementById("status").innerHTML;
    if (button_text == "ON") {
        document.getElementById("switch1").checked = true;
    }
    else if (button_text == "OFF") {
        document.getElementById("switch1").checked = false;
    }
});
</script>

// Change the state of LED
<script type="text/javascript">
    function fun1()
    {
    var text = document.getElementById("status").innerHTML;
    var chbox=document.getElementById("switch1");
        if (chbox.checked == true && text == "OFF") {
            window.location.pathname = '/on';
            chbox.checked = true;
        }
        else
        {
            window.location.pathname = '/off';
            chbox.checked = false;
        }
    }
</script>
</head>

<body >
    <h1>Internet controlled LED using ESP32 based web server <div id="status" style = "display: none;">%STATE%</div></h1>
        <span class="switch">
            <span class="switch-border1">
                <span class="switch-border2">
                    <input id="switch1" type="checkbox" onclick="fun1()"/>
                    <label for="switch1"></label>
                    <span class="switch-top"></span>
                    <span class="switch-shadow"></span>
                    <span class="switch-handle"></span>
                    <span class="switch-handle-left"></span>
                    <span class="switch-handle-right"></span>
                    <span class="switch-handle-top"></span>
                    <span class="switch-handle-bottom"></span>
                    <span class="switch-handle-base"></span>
                    <span class="switch-led switch-led-green">
                        <span class="switch-led-border">
                            <span class="switch-led-light">
                                <span class="switch-led-glow"></span>
                            </span>
                        </span>
                    </span>
                    <span class="switch-led switch-led-red">
                        <span class="switch-led-border">
                            <span class="switch-led-light">
                                <span class="switch-led-glow"></span>
                            </span>
                        </span>
                    </span>
                </span>
            </span>
        </span>
</body>
</html>
Create an style.css file with the following content
body {
    font-family: arial, verdana, sans-serif;
    font-size: 8px;
    background: #1E1E20;
    text-align: center;
}
h1{
    color: white;
    font-size:30px;
}
.switch {
    display: inline-block;
    margin: 10em 2em;
    position: relative;
    border-radius: 3.5em;
    -webkit-box-shadow: 0 0 0.5em rgba(255,255,255,0.2);
    -moz-box-shadow: 0 0 0.5em rgba(255,255,255,0.2);
    box-shadow: 0 0 0.5em rgba(255,255,255,0.2);
}
.switch label {
    width: 100%;
    height: 100%;
    margin: 0;
    padding: 0;
    display: block;
    position: absolute;
    top: 0;
    left: 0;
    z-index: 10;
}
.switch input {
    display: none;
}
.switch span {
    display: block;
    -webkit-transition: top 0.2s;
    -moz-transition: top 0.2s;
    -ms-transition: top 0.2s;
    -o-transition: top 0.2s;
    transition: top 0.2s;
}
.switch-border1 {
    border: 0.1em solid #000;
    border-radius: 3.5em;
    -webkit-box-shadow: 0 0.2em rgba(255, 255, 255, 0.2);
    -moz-box-shadow: 0 0.2em rgba(255, 255, 255, 0.2);
    box-shadow: 0 0.2em rgba(255, 255, 255, 0.2);
}
.switch-border2 {
    width: 6.6em;
    height: 12.6em;
    position: relative;
    border: 0.1em solid #323232;
    background-image: -webkit-gradient(linear, left top, right top, from(#2D2D2D), color-stop(0.5, #4B4B4B), to(#2D2D2D));
    background-image: -webkit-linear-gradient(left, #2D2D2D, #4B4B4B, #2D2D2D);
    background-image: -moz-linear-gradient(left, #2D2D2D, #4B4B4B, #2D2D2D);
    background-image: -ms-linear-gradient(left, #2D2D2D, #4B4B4B, #2D2D2D);
    background-image: -o-linear-gradient(left, #2D2D2D, #4B4B4B, #2D2D2D);
    background-image: linear-gradient(to right, #2D2D2D, #4B4B4B, #2D2D2D);
    border-radius: 3.4em;
}
.switch-border2:before,
.switch-border2:after {
    content: '';
    display: block;
    width: 100%;
    height: 100%;
    position: absolute;
    top: 0;
    left: 0;
    z-index: 0;
    opacity: .3;
    border-radius: 3.4em;
}
.switch-border2:before {
    background: -webkit-gradient(linear, left top, left bottom, from(#000), to(rgba(0,0,0,0)));
    background: -webkit-linear-gradient(#000, rgba(0,0,0,0));
    background: -moz-linear-gradient(#000, rgba(0,0,0,0));
    background: -ms-linear-gradient(#000, rgba(0,0,0,0));
    background: -o-linear-gradient(#000, rgba(0,0,0,0));
    background: linear-gradient(#000, rgba(0,0,0,0));
}
.switch-border2:after {
    background: -webkit-gradient(linear, left top, left bottom, from(rgba(0,0,0,0)), to(#000));
    background: -webkit-linear-gradient(rgba(0,0,0,0), #000);
    background: -moz-linear-gradient(rgba(0,0,0,0), #000);
    background: -ms-linear-gradient(rgba(0,0,0,0), #000);
    background: -o-linear-gradient(rgba(0,0,0,0), #000);
    background: linear-gradient(rgba(0,0,0,0), #000);
}
.switch-top {
    width: 100%;
    height: 84%;
    position: absolute;
    top: 8%;
    left: 0;
    z-index: 1;
    background-image: -webkit-gradient(linear, left top, right top, from(#2D2D2D),             color-stop(0.5, #4B4B4B), to(#2D2D2D));
    background-image: -webkit-linear-gradient(left, #2D2D2D, #4B4B4B, #2D2D2D);
    background-image: -moz-linear-gradient(left, #2D2D2D, #4B4B4B, #2D2D2D);
    background-image: -ms-linear-gradient(left, #2D2D2D, #4B4B4B, #2D2D2D);
    background-image: -o-linear-gradient(left, #2D2D2D, #4B4B4B, #2D2D2D);
    background-image: linear-gradient(to right, #2D2D2D, #4B4B4B, #2D2D2D);
    border-radius: 3.4em;
}
.switch-shadow {
    width: 100%;
    height: 100%;
    position: absolute;
    top: 0;
    left: 0;
    z-index: 2;
    border-radius: 3.4em;
    -webkit-box-shadow: 0 0 2em black inset;
    -moz-box-shadow: 0 0 2em black inset;
    box-shadow: 0 0 2em black inset;
}
.switch-handle-left,
    .switch-handle-right {
    content: '';
    display: block;
    width: 3.6em;
    height: 0;
    position: absolute;
    top: 6.6em;
    z-index: 2;
    border-bottom: 4.5em solid #111;
    border-left: 0.7em solid transparent;
    border-right: 0.7em solid transparent;
    border-radius: 0;
}
.switch-handle-left {
    left: 0.8em;
}
.switch-handle-right {
    right: 0.8em;
}
.switch-handle {
    width: 3.6em;
    height: 4.5em;
    position: absolute;
    top: 6.6em;
    left: 1.5em;
    z-index: 3;
    background: #333;
    background-image: -webkit-gradient(linear, left top, right top, from(#111), color-stop(0.4, #777), color-stop(0.5, #888), color-stop(0.6, #777), to(#111));
    background-image: -webkit-linear-gradient(left, #111, #777 40%, #888, #777 60%, #111);
    background-image: -moz-linear-gradient(left, #111, #777 40%, #888, #777 60%, #111);
    background-image: -ms-linear-gradient(left, #111, #777 40%, #888, #777 60%, #111);
    background-image: -o-linear-gradient(left, #111, #777 40%, #888, #777 60%, #111);
    background-image: linear-gradient(to right, #111, #777 40%, #888, #777 60%, #111);
    border-radius: 0;
}
.switch-handle-top {
    width: 5em;
    height: 5em;
    position: absolute;
    top: 8.5em;
    left: 0.8em;
    z-index: 4;
    background-color: #555;
    background-image: -webkit-gradient(linear, left top, right top, from(#5F5F5F), to(#878787));
    background-image: -webkit-linear-gradient(left, #5F5F5F, #878787);
    background-image: -moz-linear-gradient(left, #5F5F5F, #878787);
    background-image: -ms-linear-gradient(left, #5F5F5F, #878787);
    background-image: -o-linear-gradient(left, #5F5F5F, #878787);
    background-image: linear-gradient(to right, #5F5F5F, #878787);
    border-top: 0.2em solid #AEB2B3;
    border-radius: 2.5em;
}
.switch-handle-bottom {
    width: 3.6em;
    height: 3.6em;
    position: absolute;
    top: 4.7em;
    left: 1.5em;
    z-index: 3;
    background: #333;
    background-image: -webkit-gradient(linear, left top, right top, from(#111), color-stop(0.4, #777), color-stop(0.5, #888), color-stop(0.6, #777), to(#111));
    background-image: -webkit-linear-gradient(left, #111, #777 40%, #888, #777 60%, #111);
    background-image: -moz-linear-gradient(left, #111, #777 40%, #888, #777 60%, #111);
    background-image: -ms-linear-gradient(left, #111, #777 40%, #888, #777 60%, #111);
    background-image: -o-linear-gradient(left, #111, #777 40%, #888, #777 60%, #111);
    background-image: linear-gradient(to right, #111, #777 40%, #888, #777 60%, #1    11);
    border-top: 0.2em solid #141414;
    border-radius: 1.8em;
}
.switch-handle-base {
    width: 4.2em;
    height: 4.2em;
    position: absolute;
    top: 3.8em;
    left: 1.2em;
    z-index: 2;
    border-top: 0.2em solid rgba(255,255,255,0.35);
    border-radius: 2.1em;
    -webkit-box-shadow: 0 0 0.5em rgba(0,0,0,0.8) inset;
    -moz-box-shadow: 0 0 0.5em rgba(0,0,0,0.8) inset;
    box-shadow: 0 0 0.5em rgba(0,0,0,0.8) inset;
}
.switch-led {
    position: absolute;
    left: 2em;
    border-radius: 1.4em;
}
.switch-led-border {
    border: 0.2em solid black;
    border-radius: 1.3em;
}
.switch-led-light {
    border-radius: 1.1em;
    -webkit-box-shadow: 0 0 0.5em rgba(255,255,255,0.5) inset;
    -moz-box-shadow: 0 0 0.5em rgba(255,255,255,0.5) inset;
    box-shadow: 0 0 0.5em rgba(255,255,255,0.5) inset;
}
.switch-led-glow {
    width: 2em;
    height: 2em;
    position: relative;
    border-radius: 1em;
}
.switch-led-glow:before {
    content: '';
    display: block;
    width: 0.6em;
    height: 0.6em;
    position: absolute;
    top: 0.3em;
    left: 0.7em;
    background: rgba(255,255,255,0.2);
    border-radius: 0.3em;
    -webkit-box-shadow: 0 0 1em rgba(255,255,255,0.75);
    -moz-box-shadow: 0 0 1em rgba(255,255,255,0.75);
    box-shadow: 0 0 1em rgba(255,255,255,0.75);
}
.switch-led-glow:after {
    content: '';
    display: block;
    width: 0;
    height: 0;
    position: absolute;
    top: 0;
    left: 0;
    opacity: 0.2;
    filter: alpha(opacity=20);
    border: 1em solid #fff;
    border-color: transparent #fff transparent #fff;
    border-radius: 1em;
    -webkit-transform: rotate(45deg);
    -moz-transform: rotate(45deg);
    -ms-transform: rotate(45deg);
    -o-transform: rotate(45deg);
    transform: rotate(45deg);
}
.switch-led:after {
    display: block;
    width: 100%;
    position: absolute;
    left: 0;
    color: #666;
    font-family: arial, verdana, sans-serif;
    font-weight: bold;
    text-align: center;
    text-shadow: 0 0.1em rgba(0,0,0,0.7);
}
.switch-led-green:after {
    content: 'ON';
    top: -1.8em;
}
.switch-led-red:after {
    content: 'OFF';
    bottom: -1.8em;
}
.switch-led-green {
    top: -5em;
    border-top: 0.1em solid rgba(0,161,75,0.5);
    border-bottom: 0.1em solid rgba(255,255,255,0.25);
}
.switch-led-green .switch-led-light {
    background: rgb(0,161,75);
    border: 0.1em solid rgb(0,104,56);
}
.switch-led-red {
    bottom: -5em;
    border-top: 0.1em solid rgba(237,28,36,0.2);
    border-bottom: 0.1em solid rgba(255,255,255,0.25);
    -webkit-box-shadow: 0 0 3em rgb(237,28,36);
    -moz-box-shadow: 0 0 3em rgb(237,28,36);
    box-shadow: 0 0 3em rgb(237,28,36);
}
.switch-led-red .switch-led-light {
    background: rgb(237,28,36);
    border: 0.1em solid rgb(161,30,45);
}
.switch-led-red .switch-led-glow {
    background: #fff;
    background: rgba(255, 255, 255, 0.3);
    filter: alpha(opacity=30);
}
/* Switch on */
.switch input:checked~.switch-handle-left, .switch input:checked~.switch-handle-right {
    top: 1.5em;
    border-bottom: 0;
    border-top: 4.5em solid #111;
}
.switch input:checked~.switch-handle {
    top: 1.5em;
}
.switch input:checked~.switch-handle-top  {
    top: -1em;
    border-top: 0;
    border-bottom: 0.2em solid #AEB2B3;
}
.switch input:checked~.switch-handle-bottom {
    top: 4.2em;
    border-top: 0;
    border-bottom: 0.2em solid #141414;
}
.switch input:checked~.switch-handle-base {
    top: 4.5em;
    border-top: 0;
    border-bottom: 0.2em solid rgba(255,255,255,0.35);
}
.switch input:checked~.switch-led-green {
    -webkit-box-shadow: 0 0 3em rgb(0,161,75);
    -moz-box-shadow: 0 0 3em rgb(0,161,75);
    box-shadow: 0 0 3em rgb(0,161,75);
}
.switch input:checked~.switch-led-green .switch-led-glow {
    background: #fff;
    background: rgba(255, 255, 255, 0.4);
    filter: alpha(opacity=40);
}
.switch input:checked~.switch-led-red {
    -webkit-box-shadow: none;
    -moz-box-shadow: none;
    box-shadow: none;
}
.switch input:checked~.switch-led-red .switch-led-glow {
    background: rgba(255, 255, 255, 0);
    filter: alpha(opacity=0);
}
Arduino code
Mainly, code was based on the Arduino code that was taken from ESP32 Web Server using SPIFFS and How to Use I2C LCD with ESP32 on Arduino IDE.
// Import required libraries
#include "WiFi.h"
#include "ESPAsyncWebServer.h"
#include "SPIFFS.h"
#include <LiquidCrystal_I2C.h>
// Replace with your network credentials
const char* ssid = "YourNetworkName";
const char* password = "YourPassword";
// set the LCD number of columns and rows
int lcdColumns = 16;
int lcdRows = 2;
// set LCD address, number of columns and rows
// if you don't know your display address, run an I2C scanner sketch
LiquidCrystal_I2C lcd(0x27, lcdColumns, lcdRows);
// Set LED GPIO
const int ledPin = 23;
// Stores LED state
String ledState;
// Create AsyncWebServer object on port 80
AsyncWebServer server(80);
// Replaces placeholder with LED state value
String processor(const String& var){
Serial.println(var);
if(var == "STATE"){
if(digitalRead(ledPin)){
ledState = "ON";
}
else{
ledState = "OFF";
}
Serial.print(ledState);
return ledState;
}
return String();
}
void setup(){
// initialize LCD
lcd.init();
// turn on LCD backlight
lcd.backlight();
// Serial port for debugging purposes
Serial.begin(115200);
pinMode(ledPin, OUTPUT);
// Initialize SPIFFS file server
if(!SPIFFS.begin(true)){
Serial.println("An Error has occurred while mounting SPIFFS");
return;
}
// Connect to Wi-Fi
WiFi.begin(ssid, password);
while (WiFi.status() != WL_CONNECTED) {
delay(1000);
Serial.println("Connecting to WiFi..");
}
// Print IP address of web server on serial interface
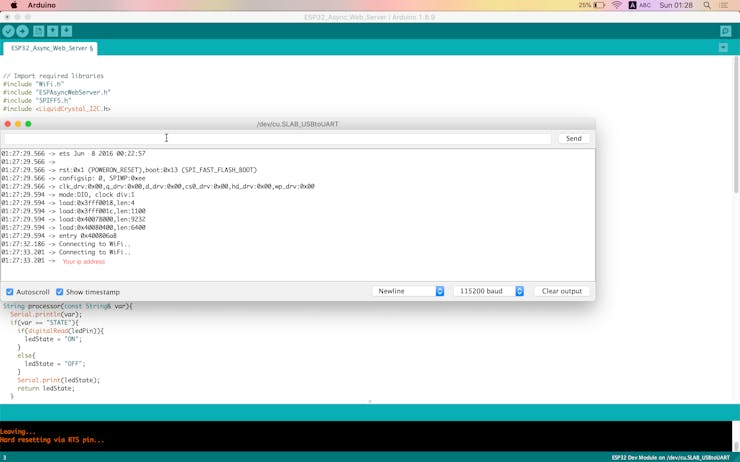
Serial.println(WiFi.localIP());
// Print IP address of web server on LCD display
lcd.setCursor(0, 0);
lcd.print("IP address is ");
lcd.setCursor(0, 1);
lcd.print(WiFi.localIP());
// Route for root / web page
server.on("/", HTTP_GET, [](AsyncWebServerRequest *request){
request->send(SPIFFS, "/index.html", String(), false, processor);
});
// Route to load style.css file
server.on("/style.css", HTTP_GET, [](AsyncWebServerRequest *request){
request->send(SPIFFS, "/style.css", "text/css");
});
// Route to set GPIO to HIGH
server.on("/on", HTTP_GET, [](AsyncWebServerRequest *request){
digitalWrite(ledPin, HIGH);
request->send(SPIFFS, "/index.html", String(), false, processor);
});
// Route to set GPIO to LOW
server.on("/off", HTTP_GET, [](AsyncWebServerRequest *request){
digitalWrite(ledPin, LOW);
request->send(SPIFFS, "/index.html", String(), false, processor);
});
// Start server
server.begin();
}
void loop(){
}Upload the arduino code and files using the SPIFFS loader
- Open the sketch folder of Arduino code.· Inside this folder, create a new folder called “data”.· Inside the data folder, you need to put the index.html and style.css.· Upload Arduino code· Then, to upload the files, click on the Arduino IDE on Tools> ESP32 Sketch Data Upload
Testing the local web server
Determine the ESP32 web server IP address, which can be found in two ways.
- Serial monitor on Arduino IDE (Tools> Serial monitor)
- On LCD display
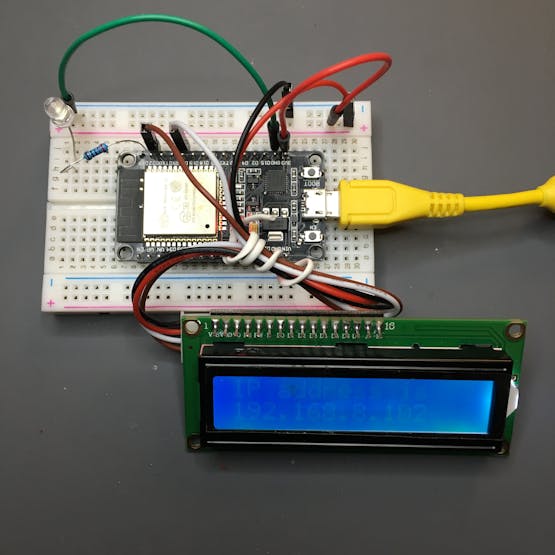
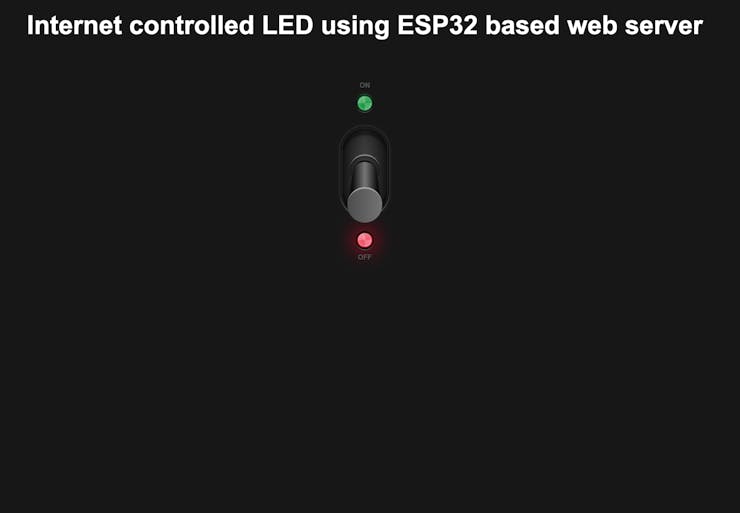
Next, open a web browser of your choice and paste the following IP address in the address bar. You should get an output similar to below screenshot.
Access to a local web server from anywhere in the world using Ngrok
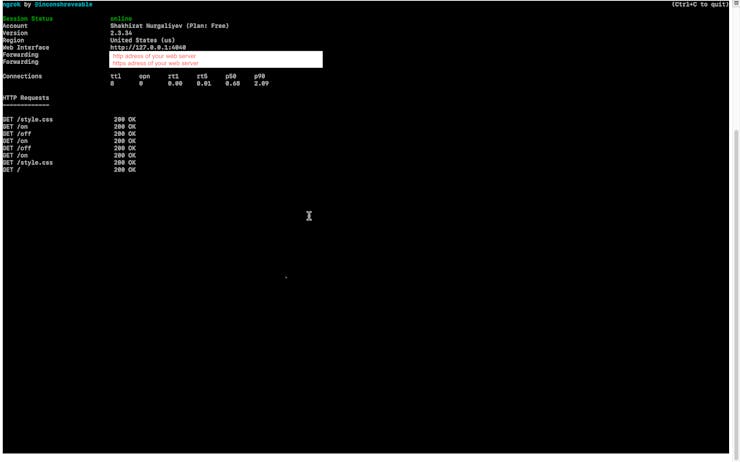
Ngrok is a platform that allows you to organize remote access to a web server or some other service running on your PC from the external internet. Access is organized through the secure tunnel created at the start of ngrok.
- Follow this link and sign up.· After creating an account, log in and go to the "Auth" tab. Copy the line from the “Your Tunnel Authtoken” field.
- Click on the “Download” tab in the navigation bar.
- Select the version of ngrok that matches your OS and download it.
- Unzip the downloaded folder and run command line.
- Connect your account by entering the following command
【./ngrok authtoken
- Start a HTTP tunnel on port 80
【./ngrok http Your_IP_Address:80】
If everything was done correctly, then the tunnel status should change to “online”, and a redirect link should appear in the “Forwarding” column.By entering this link into your browser, you can access the web server from anywhere in the world.
I hope you found this guide useful and thanks for reading. I’ve shown you a simple example that controls LED, but you can complicate the task by replacing LED with another output you want to control (e.g. relay).
If you have any questions or feedback? Leave a comment below. If you like this post, please support me by subscribing to my blog. Thanks for all the thumbs up!
Schematics
Code
ESP32_Web_Server.ino
// Import required libraries
#include "WiFi.h"
#include "ESPAsyncWebServer.h"
#include "SPIFFS.h"
#include <LiquidCrystal_I2C.h>

// Replace with your network credentials
const char* ssid = "#######";
const char* password = "########";

// set the LCD number of columns and rows
int lcdColumns = 16;
int lcdRows = 2;


// set LCD address, number of columns and rows
// if you don't know your display address, run an I2C scanner sketch
LiquidCrystal_I2C lcd(0x27, lcdColumns, lcdRows);

// Set LED GPIO
const int ledPin = 23;
// Stores LED state
String ledState;

// Create AsyncWebServer object on port 80
AsyncWebServer server(80);

// Replaces placeholder with LED state value
String processor(const String& var){
  Serial.println(var);
  if(var == "STATE"){
    if(digitalRead(ledPin)){
      ledState = "ON";
    }
    else{
      ledState = "OFF";
    }
    Serial.print(ledState);
    return ledState;
  }
  return String();
}

void setup(){

 // initialize LCD
  lcd.init();
  // turn on LCD backlight
  lcd.backlight();

  // Serial port for debugging purposes
  Serial.begin(115200);
  pinMode(ledPin, OUTPUT);

  // Initialize SPIFFS
  if(!SPIFFS.begin(true)){
    Serial.println("An Error has occurred while mounting SPIFFS");
    return;
  }

  // Connect to Wi-Fi
  WiFi.begin(ssid, password);
  while (WiFi.status() != WL_CONNECTED) {
    delay(1000);
    Serial.println("Connecting to WiFi..");
  }

  // Print ESP32 Local IP Address
  Serial.println(WiFi.localIP());
  lcd.setCursor(0, 0);
  lcd.print("IP address is ");
  lcd.setCursor(0, 1);
  lcd.print(WiFi.localIP());
  // Route for root / web page
  server.on("/", HTTP_GET, [](AsyncWebServerRequest *request){
    request->send(SPIFFS, "/index.html", String(), false, processor);
  });

  // Route to load style.css file
  server.on("/style.css", HTTP_GET, [](AsyncWebServerRequest *request){
    request->send(SPIFFS, "/style.css", "text/css");
  });

  // Route to set GPIO to HIGH
  server.on("/on", HTTP_GET, [](AsyncWebServerRequest *request){
    digitalWrite(ledPin, HIGH);
    request->send(SPIFFS, "/index.html", String(), false, processor);
  });

  // Route to set GPIO to LOW
  server.on("/off", HTTP_GET, [](AsyncWebServerRequest *request){
    digitalWrite(ledPin, LOW);
    request->send(SPIFFS, "/index.html", String(), false, processor);
  });

  // Start server
  server.begin();
}

void loop(){

}
index.html
https://www.hackster.io/code_files/279944/download
style.css
https://www.hackster.io/code_files/279945/download
The article was first published in hackster, September 15, 2019
author: Nurgaliyev Shakhizat


