
Want to create a smart visitor counter that tracks people entering and exiting a room? With just an Arduino board, and a pair of IR sensors.

Software apps and online services
Story
You might imagine they use advanced AI cameras for counting the visitors, but in reality, a simple sensor-based system does the job efficiently! By placing IR sensors at the entry and exit points, these systems detect movement direction and keep an accurate count. No fancy technology is needed.
What You'll Learn in This DIY Project:
- How to use IR sensors for motion detection
- Displaying real-time data on an LCD screen
Ready to get started? Follow our, How to Build Your Own Bidirectional Counter using Arduino tutorial and add a practical tech skill to your toolbox. Let's create something awesome today!
Step 1: Gather the Required Components
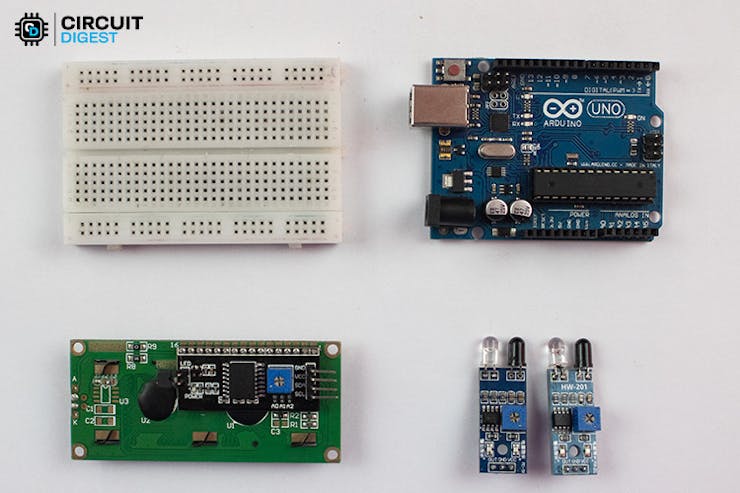
To build your Bidirectional Visitor Counter, you’ll need the following components:
- Arduino UNO R3 development board
- Two IR sensors (for motion detection)
- 16x2 I2C LCD display (to show the visitor count)
- Breadboard (for easy connections)
- Jumper wires (for linking components)
- 12V barrel jack power adapter (to power the circuit)
Before Moving to the Circuit Diagram, It’s helpful to first understand the Block diagram of the Bidirectional Counter. This will give you a clear picture of how the components work together in real-time.
No need to worry about complex technical jargon, this guide keeps it simple and beginner-friendly, making it easy for you to follow along!
Step 2: Build the Circuit Diagram for the Bidirectional Counter
Below is the circuit diagram showing how to connect the Arduino, IR sensors, and the LCD display to create a working visitor counter.
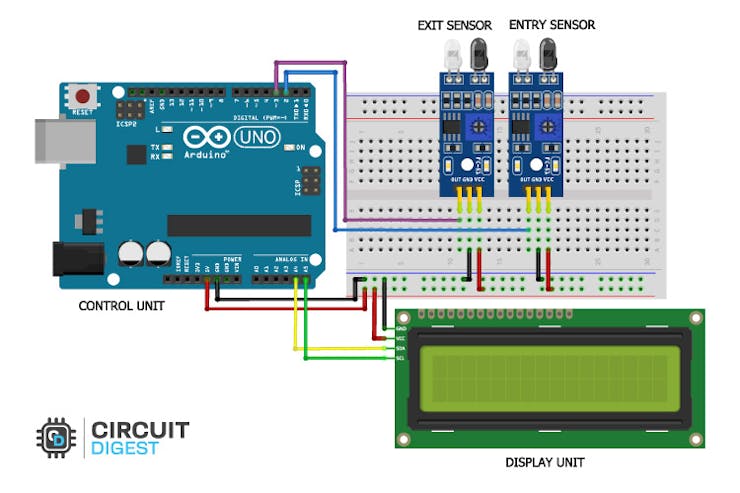
The diagram illustrates how:
- The IR sensors detect movement in both directions.
- The Arduino processes the signals.
- The LCD display shows the updated visitor count.
Why Use Two IR Sensors?To accurately detect whether someone is entering or exiting, two sensors are needed. A single sensor can only detect motion but can’t determine the direction.
Still confused? No worries! You can check out a detailed guide explaining, How IR sensors detect the direction of moving object.
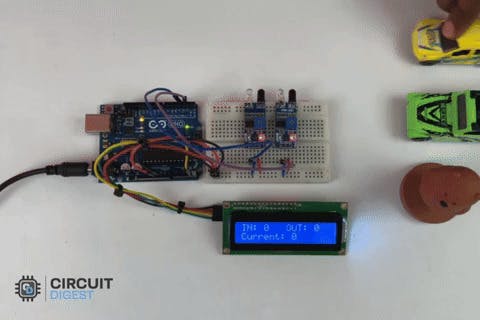
Step 3: Assemble the Hardware for the Bidirectional Counter
Using the circuit diagram as a reference, you can now set up the hardware for your Bidirectional Counter.
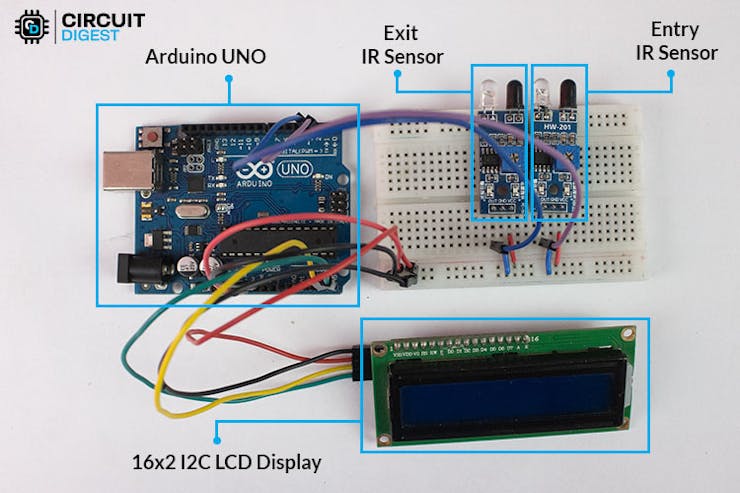
In the image above, you can see the actual hardware setup with the Arduino, IR sensors, and LCD display connected together.
Power Supply: To run the entire system, use a 12V DC power adapter connected through a barrel jack. This will provide stable power to your circuit.
Need a Visual Guide? Check out this Youtube video for Buiding Bidirectional Counter using Arduino from scratch.
Step 4: IR Sensor Hack for Reducing Peripheral Interference
When using IR sensors in your Bidirectional Counter, they might sometimes detect unwanted movements from the surroundings, leading to inaccurate counts. To prevent this, you can limit their peripheral vision using a simple hack.
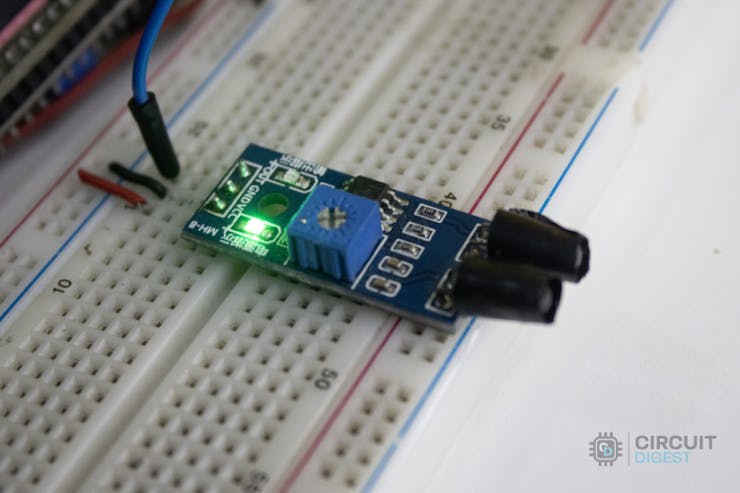
How to Do It:
- Take a small piece of black electrical tape.
- Carefully place the tape around the sides of the IR sensor.
- Leave the front face exposed for accurate detection.
How It Works: The black tape blocks signals from the sides, preventing interference from nearby objects or reflections. This ensures the sensor only detects movement directly in front of it, making the counter more accurate and reliable.
Step 5: Write the Code for Your Arduino
Let’s move on to the coding part!
How the Code Works:
- The Arduino continuously monitors both IR sensors to see which one gets triggered first.
- It then checks if the second sensor is triggered within a certain timeout period.
- Based on the trigger sequence, it determines whether someone is entering or exiting.
- The visitor count is updated accordingly and displayed on the LCD screen.
Want a Detailed Code Breakdown? For a step-by-step code explanation, check out this content, Arduino code for Bidirectional Counter System.
Step 6: Upload the Code to Your Arduino
Once your code is ready, it’s time to upload it to the Arduino.
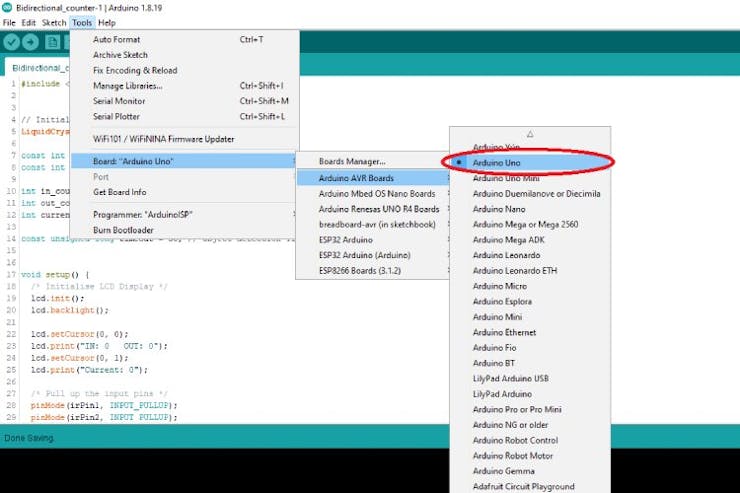
How to Upload:
- Connect your Arduino UNO to your computer using a USB cable.
- Open the Arduino IDE.
- Select the correct board and COM port.
- Click the Upload button to transfer the code.
Troubleshooting Tip:If you run into issues while uploading, check out this article, 10 Most Common Arduino Mistakes done by beginners, to fix the problem quickly.
Step 7: Test and Evaluate Your Project
Now comes the most exciting part—testing your Bidirectional Counter!
What to Expect:
- If everything is working properly, you’ll see the visitor count displayed on the LCD.
- The counter will track how many people or objects enter and exit.
- It will also keep a history of movements, showing the total number of entries and exits.
Want to See It in Action? Watch this Bidirectional Counter System Working Demonstration to see the project working in real-time.
Want to discover more cool projects? Dive into our collection of Arduino IoT Projects| Arduino Robotics Projects| Arduino AI Projects| Arduino Home Automation Projects| Raspberry Pi Projects| ESP32 Projects to inspire your next build!
Schematics
Circuit Diagram for this project

Code
BIdirectional_counter code
#include <LiquidCrystal_I2C.h>
// Initialize the LCD with I2C address 0x27
LiquidCrystal_I2C lcd(0x27, 16, 2);
const int irPin1 = 2; // IR sensor 1(Entrance Detector) connected to digital pin 2
const int irPin2 = 3; // IR sensor 2(Exit Detector) connected to digital pin 3
int in_count = 0;        // Variable to store the number of people went inside
int out_count = 0;       // Variable to store the number of people went outside
int current_count = 0;   // Variable to store the current number of people present inside
const unsigned long timeout = 50; // Object detection Timeout period in milliseconds
void setup() {
	 /* Initialise LCD Display */
	 lcd.init();
	 lcd.backlight();
	 lcd.setCursor(0, 0);
	 lcd.print("IN: 0   OUT: 0");
	 lcd.setCursor(0, 1);
	 lcd.print("Current: 0");

	 /* Pull up the input pins */
	 pinMode(irPin1, INPUT_PULLUP);
	 pinMode(irPin2, INPUT_PULLUP);
}
void loop() {
	 /*  Check if the first sensor is triggered */
	 if (digitalRead(irPin1) == LOW) {
	   unsigned long startTime = millis();
	   while ((millis() - startTime) < timeout) {
	     if(digitalRead(irPin2) == LOW){
	        ++in_count;
	        updateDisplay();
	        break;
	     }
	   }
	   //wait until both sensors return to a normal state
	   while(!digitalRead(irPin1) || !digitalRead(irPin2));
	 }

	 /* Check if the second sensor is triggered */
	 else if (digitalRead(irPin2) == LOW) {
	   unsigned long startTime = millis();
	   while ((millis() - startTime) < timeout) {
	     if(digitalRead(irPin1) == LOW){
	       if(out_count < in_count){
	          ++out_count;
	          updateDisplay();
	          break;
	       }
	     }
	   }
	   //wait until both sensors return to a normal state
	   while(!digitalRead(irPin1) || !digitalRead(irPin2));
	 }

}
void updateDisplay() {
	 lcd.setCursor(4, 0);
	 lcd.print("   ");
	 lcd.setCursor(4, 0);
	 lcd.print(in_count);
	 lcd.setCursor(13, 0);
	 lcd.print("   ");
	 lcd.setCursor(13, 0);
	 lcd.print(out_count);
	 current_count = in_count - out_count;
	 lcd.setCursor(9, 1);
	 lcd.print("   ");
	 lcd.setCursor(9, 1);
	 lcd.print(current_count);
}
This article was first published on Hackster on March 20, 2025
cr: https://www.hackster.io/its_me_yogesh/diy-bidirectional-counter-using-arduino-and-ir-sensors-36ba45
Author: Yogeshwaran


 DFR0868DFR0706-ENSEN0501SEN0193DFR0063DFR0888-12DFR0981DFR0478DFR0658SEN0321SEN0170SEN0471DFR0058FIT0895SEN0305ROB0128DFR0305DFR0282DFR0745FIT0502DFR0554DFR0558FIT0585DFR0181FIT0793DFR0937DFR0439DFR0759SEN0304DFR0483DFR0868DFR0706-ENSEN0501SEN0193DFR0063DFR0888-12DFR0981DFR0478DFR0658SEN0321SEN0170SEN0471DFR0058FIT0895SEN0305ROB0128DFR0305DFR0282DFR0745FIT0502DFR0554DFR0558FIT0585DFR0181FIT0793DFR0937DFR0439DFR0759SEN0304DFR04833163


