
This interactive witch's cauldron gets progressively creepier the closer you come!
Things used in this project
Hardware components
Hand tools and fabrication machines
Soldering iron (generic)
BLACK+DECKER LDX120C 20-Volt MAX Lithium-Ion Cordless Drill/Driver
Hot glue gun (generic)
Story
About a week before Halloween I discovered that my trusty (and cheap) store-bought witch's cauldron, with sound effects, fog, and lights, was no longer working.
Rather than throw the whole thing away, I decided to rip out the guts and retrofit the cauldron with new components and added interactivity.
My idea was to have the lighting and sound effects get increasingly intense as unsuspecting children approach the cauldron. This would be accomplished by an Arduino Uno, MP3 sound module, LED disc, and two ultrasonic foggers.
By the time the parts arrived I only had two days to put it all together, but somehow managed to get a working version ready for Halloween night.
Step 1 - Prepare the Cauldron
I prepared my cauldron by ripping out all of the existing components. (The built-in fogger required messy "fog juice", so I was not sorry to see it go!)
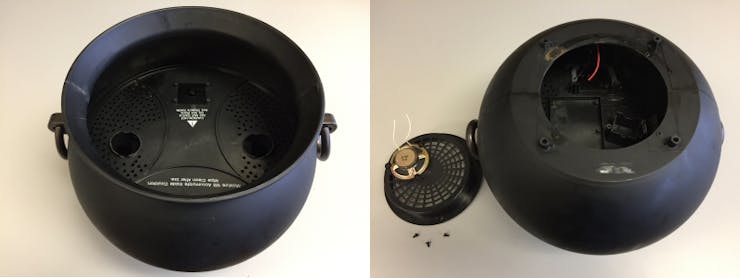
Cauldron with Its Guts Ripped Out
For your build you'll be starting with a new plastic cauldron (see parts list), so you can start at step 2.
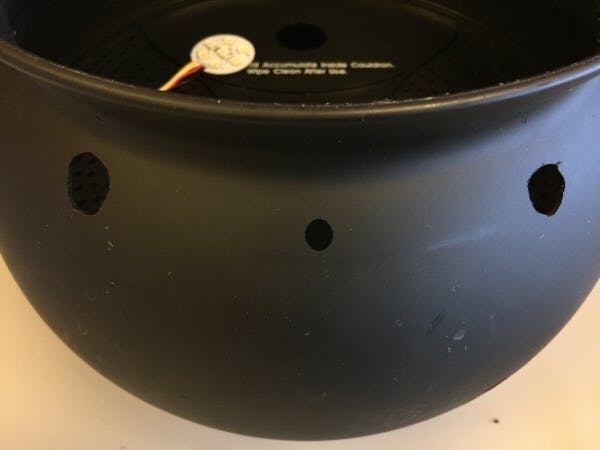
Step 2 - Drill Some Holes
We need to drill three holes at the back of the cauldron - two to accommodate the power cords for the two ultrasonic foggers that will be inside, and a small hole for the LED cable.
The holes need to be positioned above the water level. To determine the water level, put one of the foggers inside the cauldron, plug it in, and add water until you start seeing some fog. Add a little bit more water, then measure up from the inside bottom of the cauldron to see how high the holes should be placed. Space the holes evenly around the back of the cauldron.
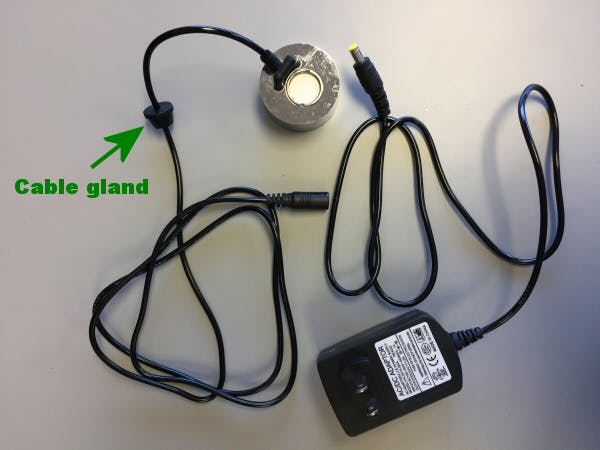
The holes for the fogger cords should be just a bit larger than the cable itself, such that the cable gland can be squeezed into the hole to make a waterproof seal. The hole for the LED cable should be about 1/4" in diameter.

Tip: I've found that Brad Point Drill Bits, like the ones shown in the above gallery, make the cleanest holes when drilling through plastic.
Step 3 - Make Some Noise
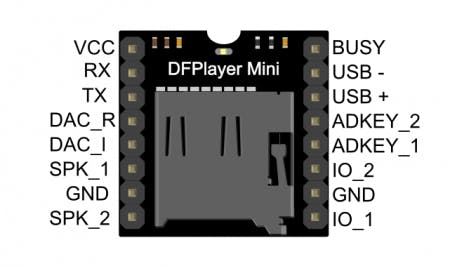
Next, let's put together our sound effects circuit. We're using a nifty little sound module from DF Robot. (Click here for documentation.)
The photos in the gallery below show a schematic view of the required connections, and how they are implemented for this project using a perma-proto board.
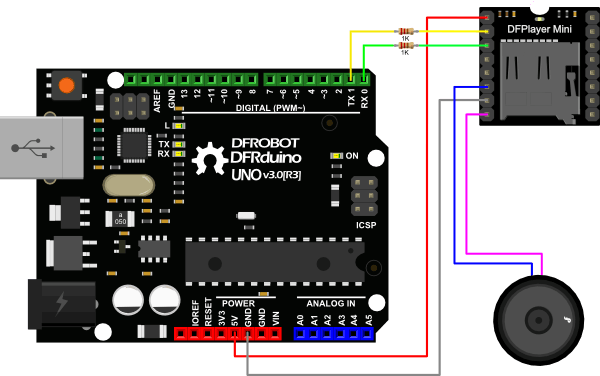
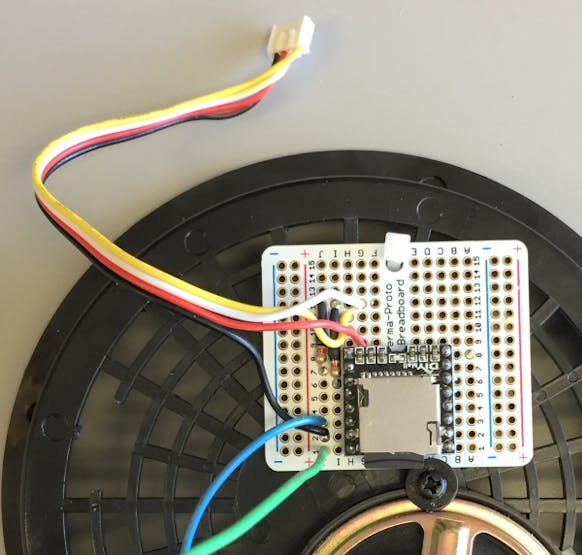

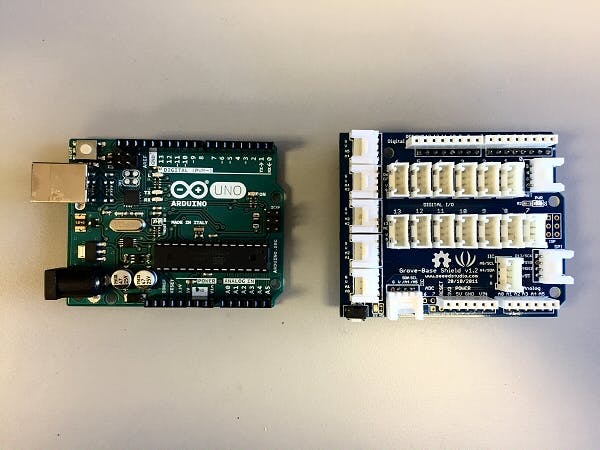
Did you notice the cable coming from the proto board? It's called a Grove cable, and will be plugged into a Grove shield that sits atop our Uno.
Tip: The Grove system, from Seeed Studio, consists of shields, cables, and components, and is a fantastic way to create quick prototypes with secure connections.
Step 4 - Light it Up
To light up the fog inside the cauldron we'll be using a seven-element RGB led disc. (You can use other RGB lights that you may already have on hand.)
Clip the connector off one end of a Grove cable, thread the cable through the center hole in the back of the cauldron (such that the end that still has the connector is on the outside of the cauldron) and then solder the wires to the LED disc as follows:
Yellow wire to "G" hole (for green control)White wire to "R" hole (for red control)Red wire to "B" hole (for blue control)Black wire to "GND" (for ground)
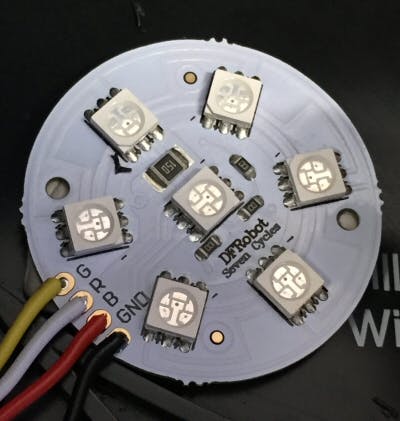
Cable Wires Soldered to LED Disc
On the other end of the cable, cut the red wire and attach it to the yellow wire of another Grove connector. When you're done the cable will have two connectors and will look like this:
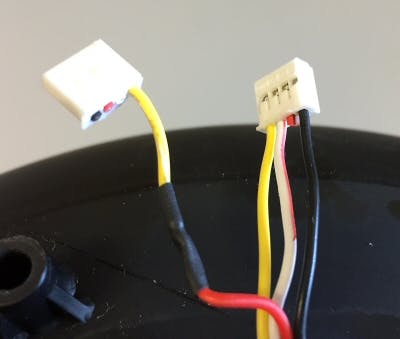
Cable from LED Disc with Two Connectors
Wait, why couldn't we just use a single connector, since it already has four wires?
The four wires in a Grove cable are always comprised of power, ground, and two other lines (for digital or analog signals), but we need three digital signal lines - one for each of the red, green, and blue colors of the LED.
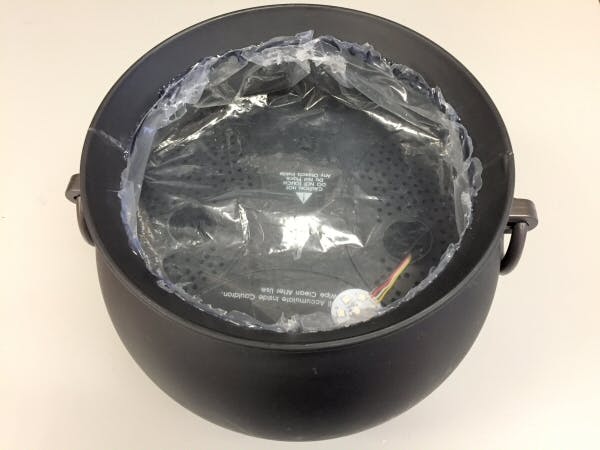
Now that the LED is wired up and ready to go, attach it to the inside bottom of the cauldron using a little bit of removable mounting putty or other suitable method.
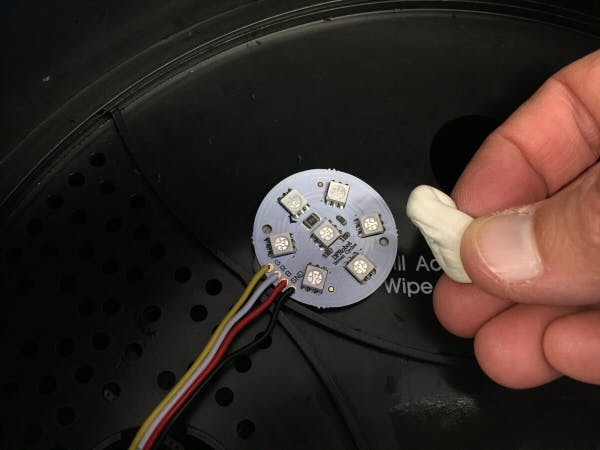
LED Disc At Inside Bottom of Cauldron
Step 5 - Hold Your Water
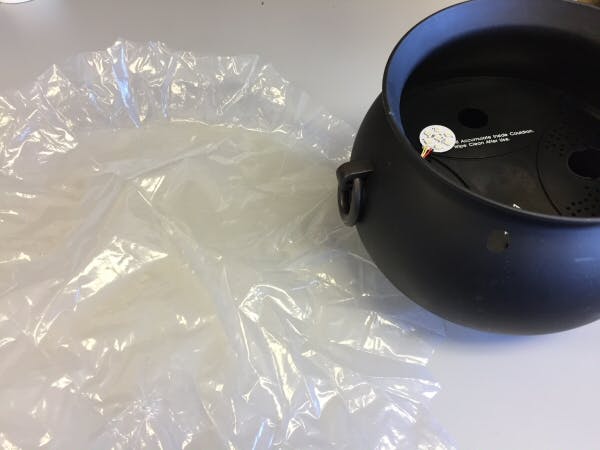
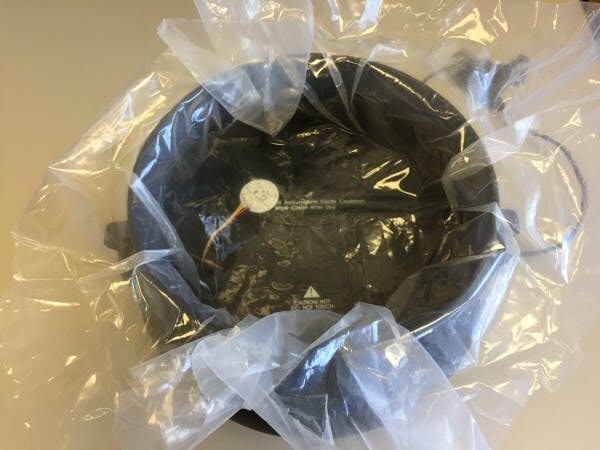
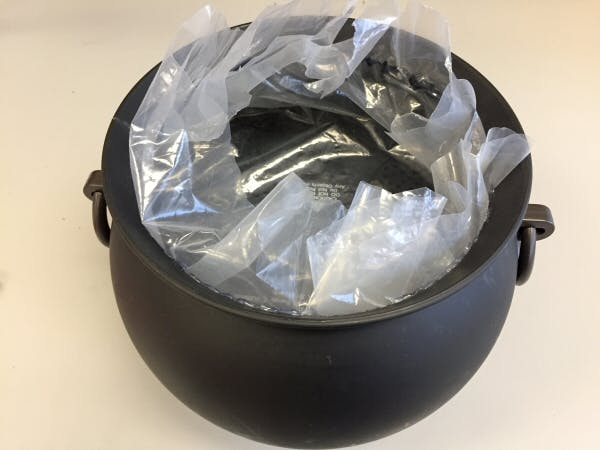
We can't expose the LED disc to water, so we'll place a piece of clear plastic sheeting inside the cauldron, secure it with hot glue, and then trim the excess.
Once the plastic is secured, find the location of the holes that you drilled in the back (for the three cords) and make a slit in the plastic for each hole.
Step 6 - Get Sensitive
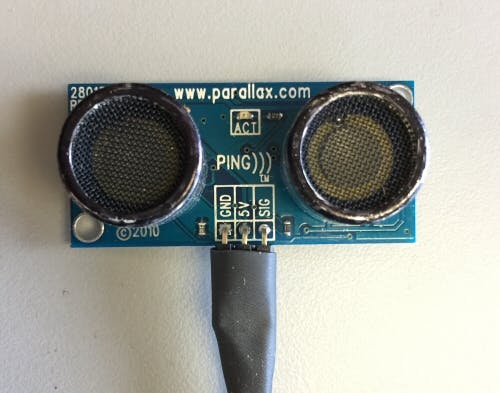
Since the goal of this project is to increase the drama as curious trick-or-treaters approach the cauldron, we need a distance sensor. I happened to have a very accurate Ping Ultrasonic Distance Sensor on hand from another project, but I'm sure that a less expensive sensor would work well enough for our purposes.
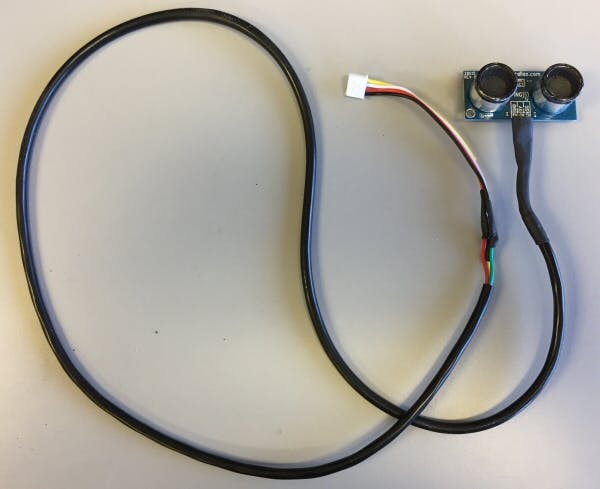
The Ping cable needs to be long enough to go from the front of the cauldron (where the sensor will be placed) to the Uno (which in my case will be inside the base of the cauldron).
One end of the cable will have a Grove connector, and the other will have three wires soldered to the Ping. Here are the connections to make:
Ping "GND" (ground) to the black wire on the Grove connectorPing "5V" (power) to the red wire on the Grove connectorPing "SIG" (signal) to the white wire on the Grove connector
Step 7 - Sound it Out
The cauldron software supports three "moods", corresponding to the distance detected by the Ping sensor, with each mode having a different lighting pattern and sound effect audio file.
To get the required audio files into your sound module:
Download a zip file containing the three audio files. Insert your MicroSD card into an SD adapter, and insert the adapter into an SD card reader connected to your computer. Copy the the three folders that you extracted from the downloaded zip file (named "01", "02", and "03") into the root folder of the MicroSD card. Eject the SD adapter from your computer, take out the MicroSD card, and insert it into the sound module's MicroSD holder.
Step 8 - Connect it Together
By now I'm sure you can almost smell the sweet stench of the bubbling witch's brew!
Line up the pins of the Grove Shield with the headers on your Arduino Uno, and press it all the way down.
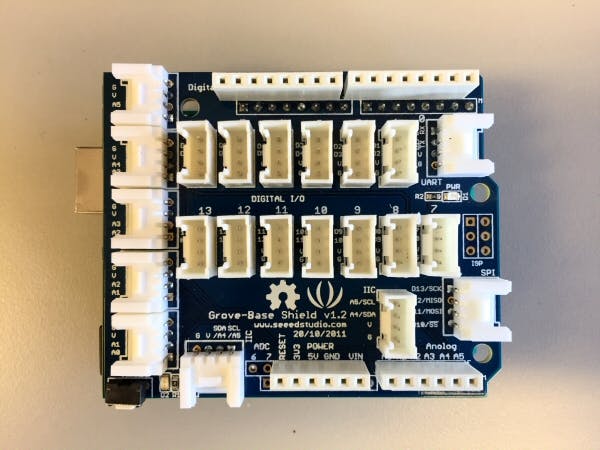
Now make these connections to the Uno and Grove shield:
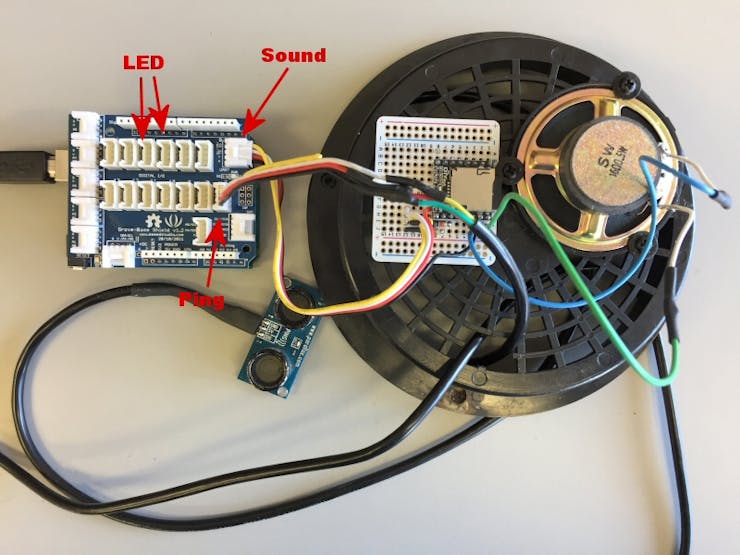
Plug the four-wire cable from the sound module into the "UART" socket (also labeled TX/RX) on the Grove shield.Plug the single-wire cable from the LED disc into socket 3 on the Grove shield.Plug the three-wire cable from the LED disc into socket 4 on the Grove shield.Plug the cable from the Ping distance sensor into socket 7 on the Grove shield.Plug a USB "Standard B" cable into the Uno.
My cauldron, having been gutted of its prior electronics, had a handy spot in the base to house the Uno, sound module, and speaker.
Your new cauldron will most likely not have space inside, so you'll want to conceal the Uno and sound module behind the cauldron (perhaps beneath some black cloth) and position the speaker so that it faces out towards your visitors.
Turn the cauldron over so that it's right-side-up, place the two foggers inside, and thread their power cords through the two holes that you drilled in the back.
Be sure to squeeze the cable glands into the holes, to make watertight seals.
Finally, tape the Ping distance sensor to the front base of the cauldron and conceal it the best you can with some black fabric or other material. However, don't obstruct the part of the sensor that send or receives the ultrasonic waves or you won't get accurate distance readings.
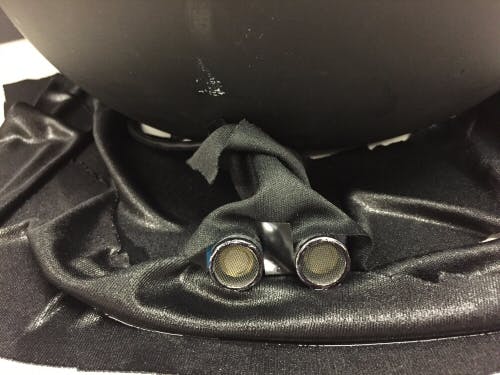
Ping Sensor in Front of Cauldron
Step 9 - Code it!
Of course all this cool hardware won't do anything without software to control it.
Follow these steps to get the Creepy Cauldron program running on your Arduino Uno:
Download and install the Arduino IDE program, if you haven't done so already. Download the zip file containing the Creepy Cauldron code, unzip the file to extract the "Cauldron" folder, and copy that folder to your Arduino documents folder. The program uses a library called SoftPWM to handle pulse width modulation for some of the LED control lines. Download the library, extract its contents, and copy the SoftPWM folder to your Arduino "libraries" folder. The program also uses a library called NewPing to take distance readings using the Ping sensor. Download the library, extract its contents, and copy the NewPing folder to your Arduino "libraries" folder. To avoid a compile error you must find the definition for "TIMER_ENABLED" in "NewPing.h" and change it to "false". Connect the Uno to your computer. Launch the Arduino IDE, open the Cauldron sketch and upload it to the Uno.
Note: You may need to temporarily unplug the sound module cable from the Grove Shield's serial UART (TX/TX) connector while uploading the code. That's because the sound module uses the Uno's hardware serial capability, as does the Arduino IDE when uploading code.
Code Design
The software supports three "moods" that correspond to the detection of a human or zombie (or, actually, anything) at these distances:
Mood 1: 1cm to 25cmMood 2: 26cm to 70cmMood 3: 71cm or further
The current mood is determined in the main loop every second, based on distance readings from the Ping sensor. A change in mood triggers a corresponding change in lighting pattern and effects audio file.
Step 10 - Fire it Up!
Now for the moment you've been waiting for...drum roll, please!
Plug the USB cable (from the Arduino Uno) into a wall adapter. Plug the two power cords from the foggers into their own AC adapters. Add water to the cauldron until you start to see some fog, then add a bit more.
Sit back and enjoy the fun as neighborhood ghosts and goblins creep closer and closer to your creepy cauldron, only to shriek in horror as they look inside!
Take it Further
There's plenty of room to take this first version to the next level. Here are some of my ideas:
Edit the audio to include a witch's voice urging those who are too far away to, "come closer!" When the user comes up to the edge of cauldron, play audio that directs them to place their hand on a capacitive touch control, then deliver a custom "fortune" with associated lighting and sound effects. Include a small hidden camera that can take an image of the user's face, and a pico projector than can project it into the fog, to accompany their custom fortune. (Too hard you say? You're a maker, right?)
If you like this project and want to show me some love, please click the "Respect" button at the top of the page.
Thank you!
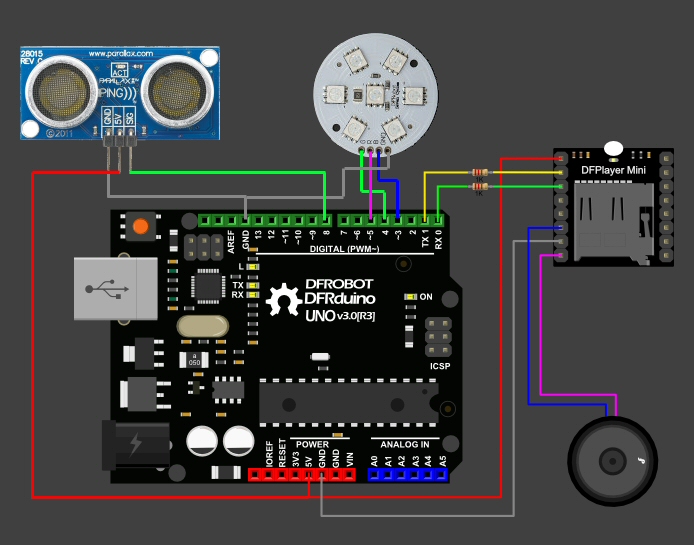
Schematics
Creepy Cauldron Wiring Diagram
Wiring diagram for the Creepy Cauldron
Code
Creepy Cauldron Code
Arduino
This code for Arduino Uno is part of the Creepy Cauldron project, which was entered into the Make/Hackster.io Halloween contest in 2016.
The article was first published in hackster, November 17, 2016
cr: https://www.hackster.io/barton-listick/you-can-t-creep-up-on-this-creepy-cauldron-7e6755
author: Barton Listick


