
The continuation of an older project. This time using a PIR sensor and an ESP32 to send an email every time that movement is detected.
Software apps and online services
Hand tools and fabrication machines
- Soldering iron (generic)
- 3D Printer (generic)
Story
After completing my GSM Home Alarm V1.0 and some time of using, I decided to make some modifications.
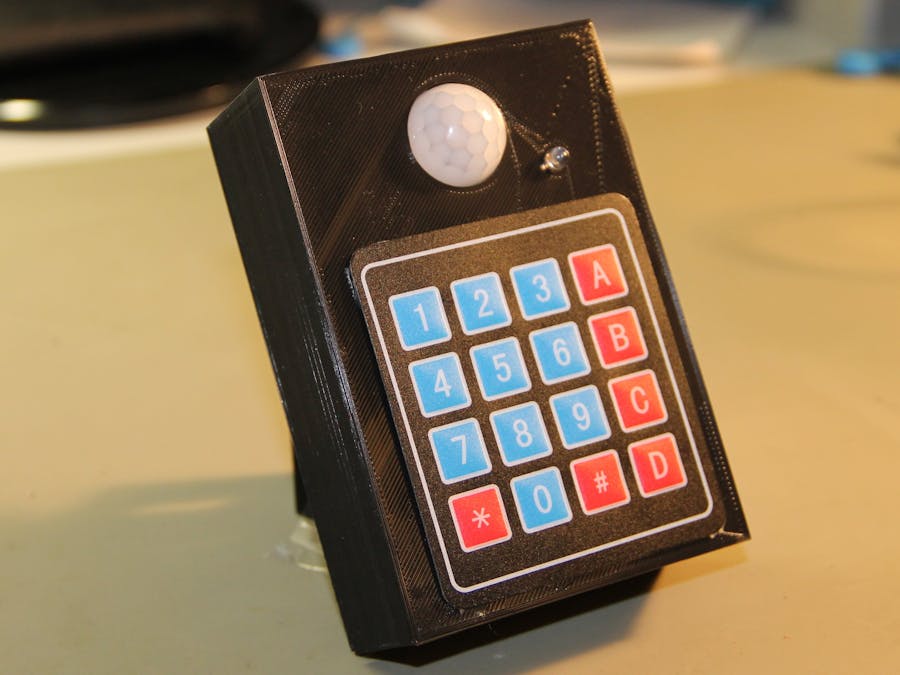
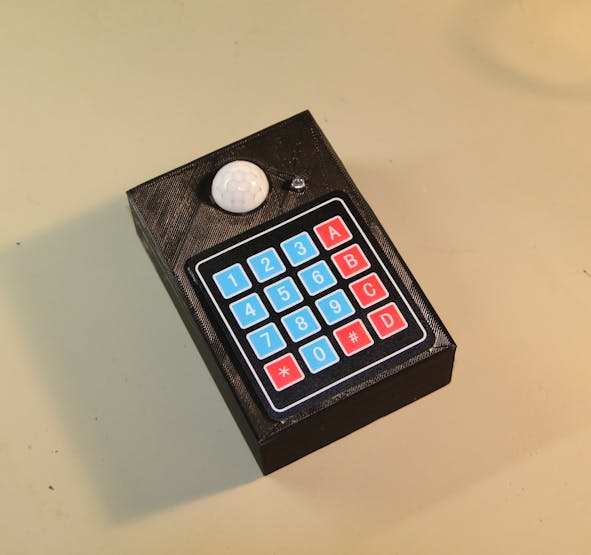
In the hardware the main changes are the replacement of the ultrasonic sensor and the introduction of a keypad.
On the software, I change the SMS notification by e-mail.
Also I decided to scale down the circuit and design and 3D print a box for the circuit.
Components

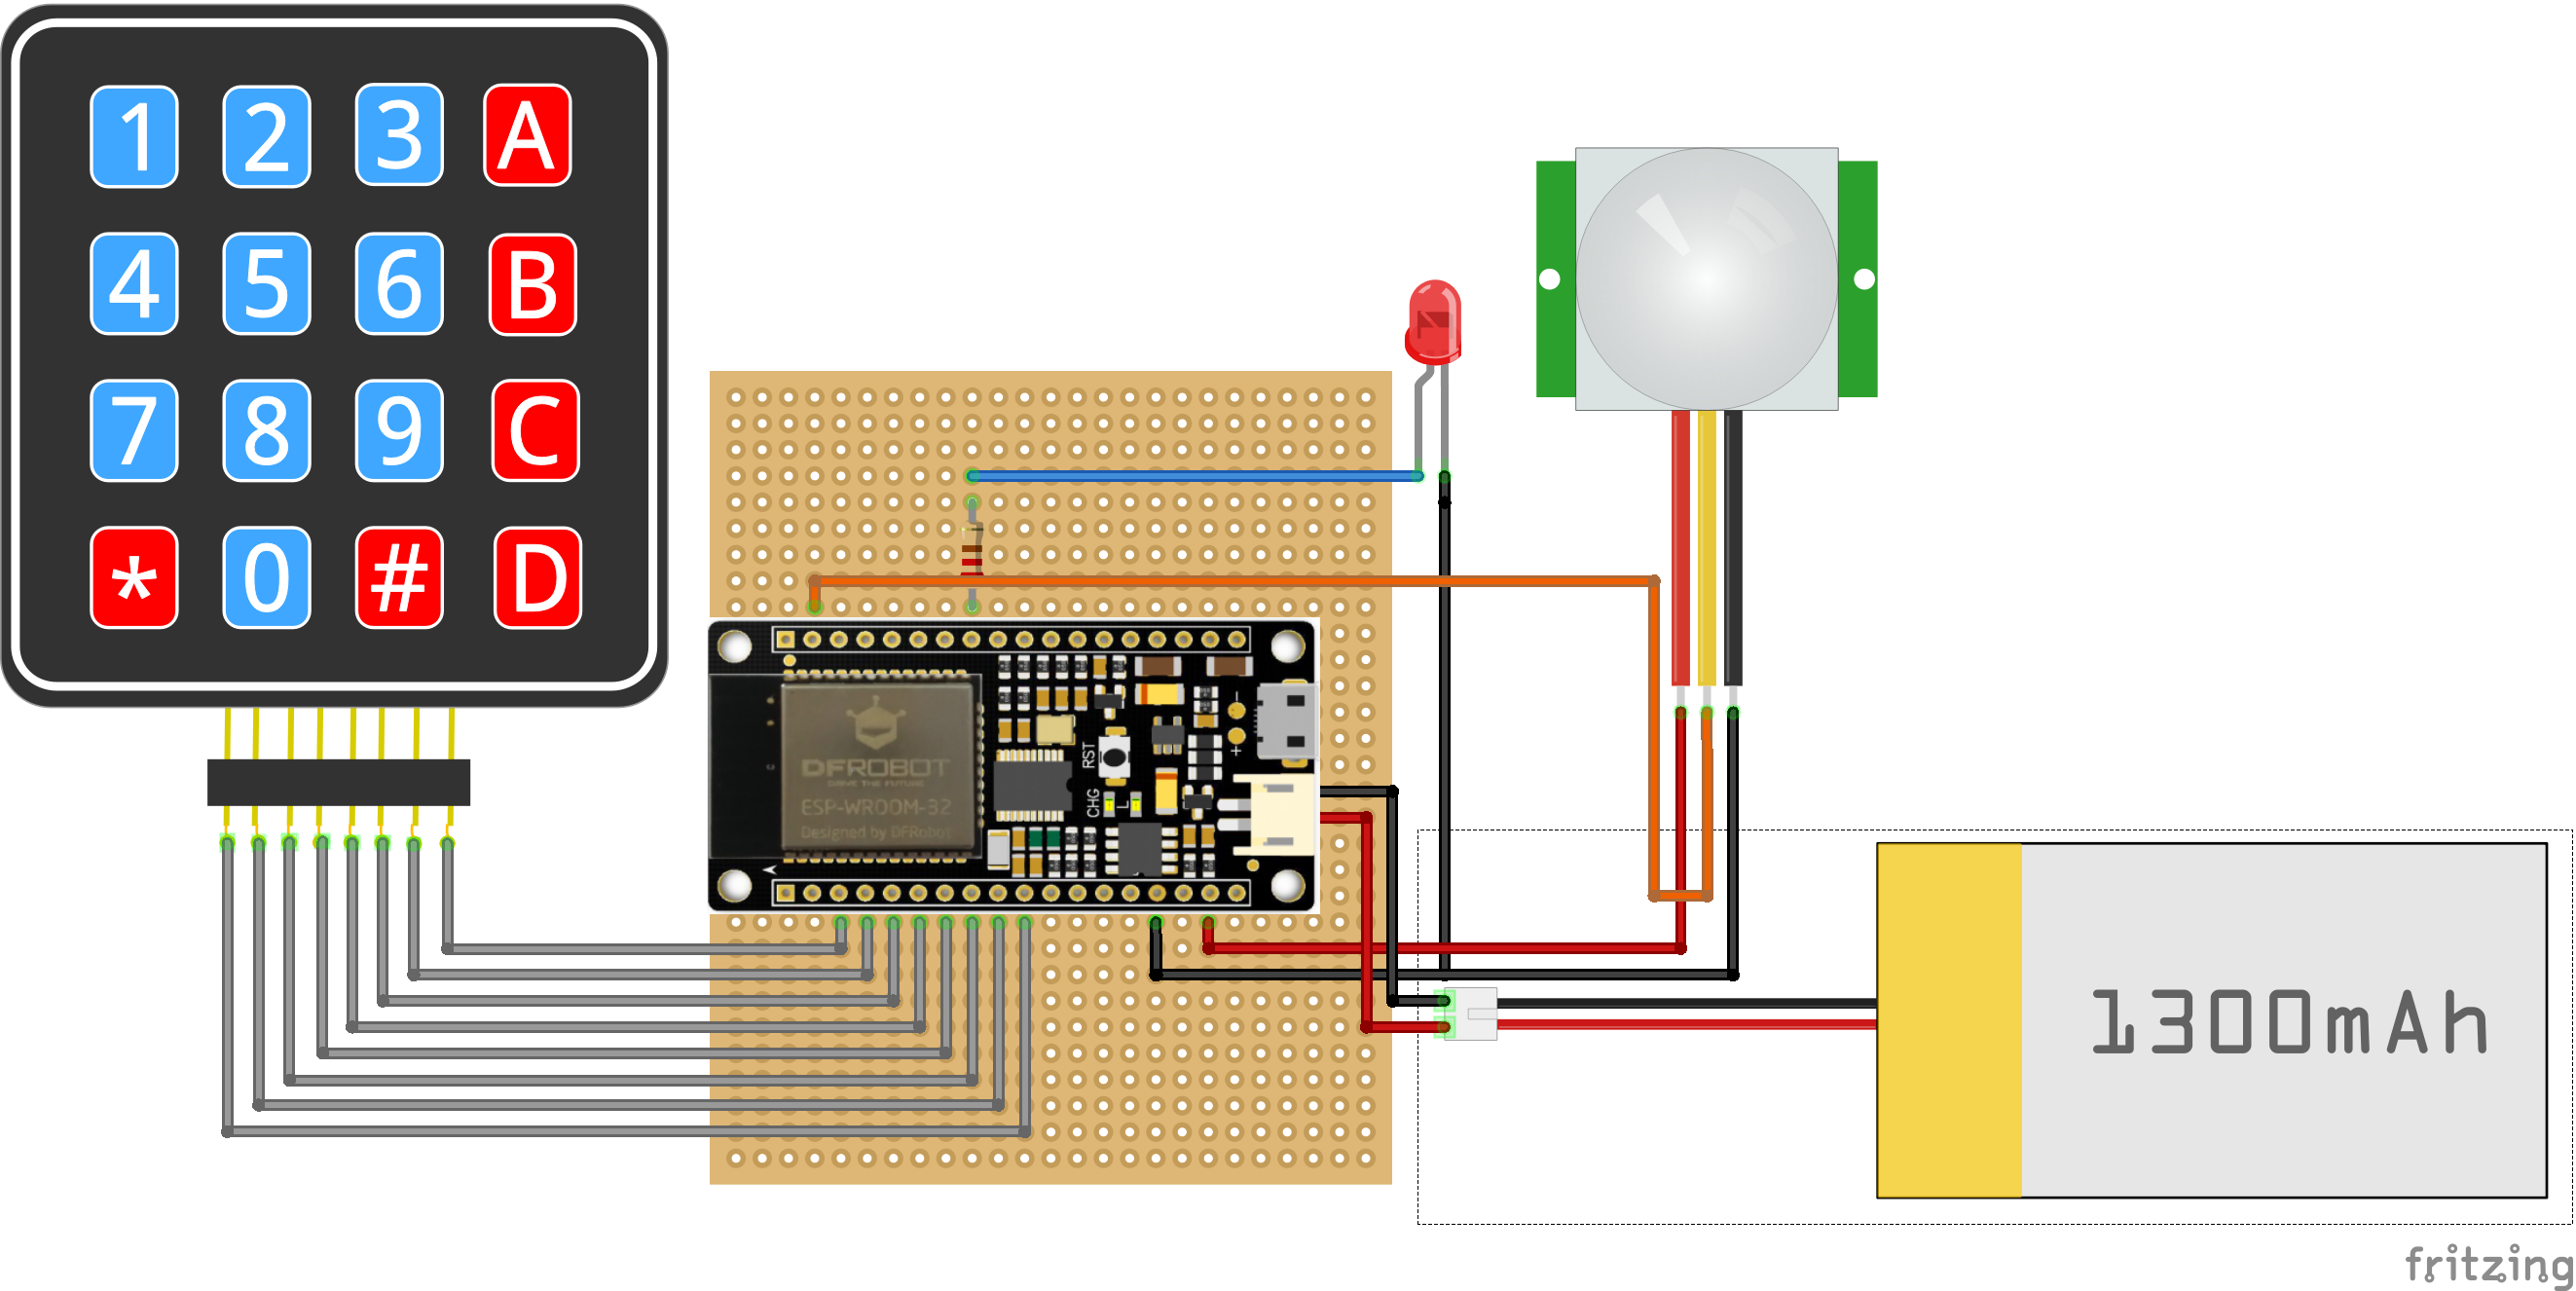
Connect the Components

The FireBeetle ESP32 IOT Microcontroller will be the brain of this project. The big advantage is that you can get WIFI and Battery management in one very small footprint. It is powered directly from the USB port (+5V) but I also added a battery as backup power (this last one is opcional).
The keypad is connected from pin D2 to pin D8.
The led is connected to pin MOSI/IO19.
The PIR Sensor signal pin is connected in pin A1/IO39.
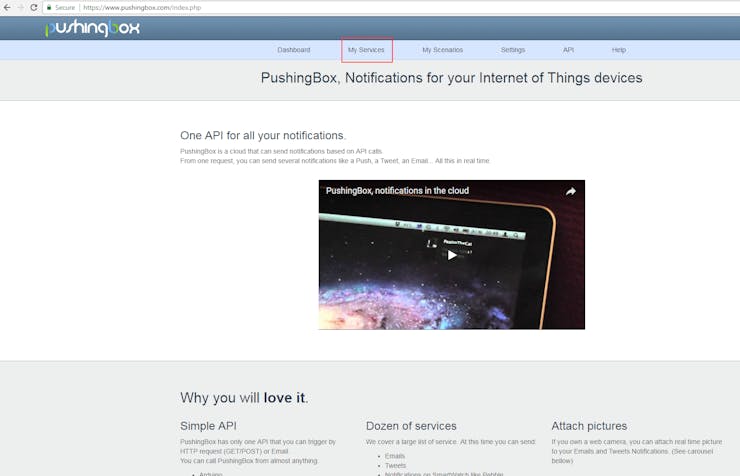
Pushing Box
During this project I discovered this IOT service that allows you to setup several notifications.
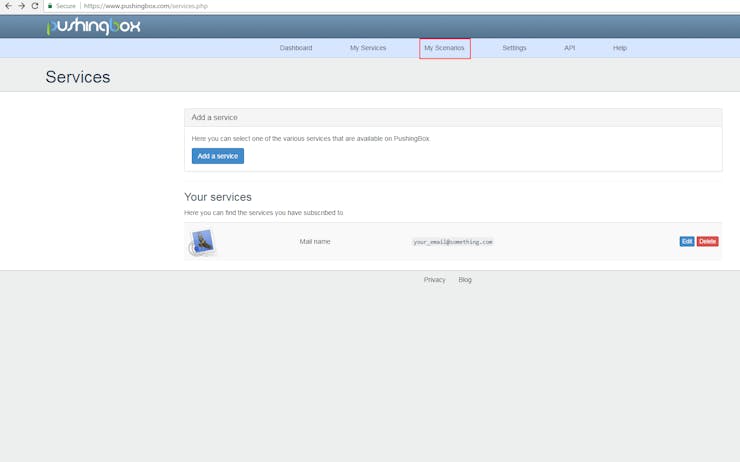
1 - Go to https://www.pushingbox.com and create an account.
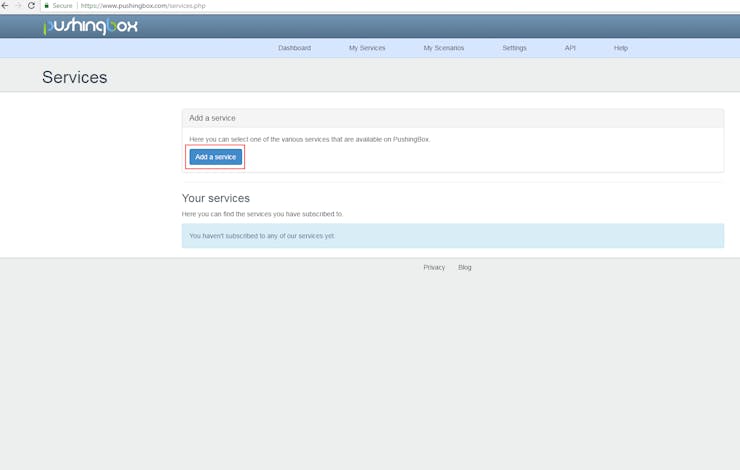
2 - Go to "My Services"
3 - "Add a service"
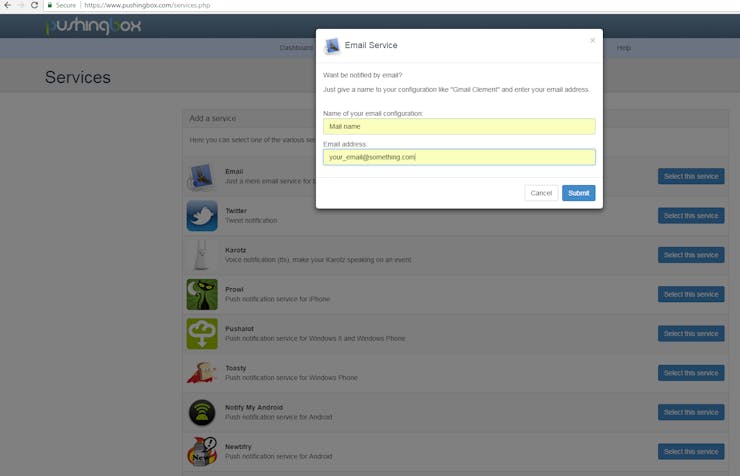
4 - In "Email" line, press "Select this service".

5- Configure the email that will receive the notification.
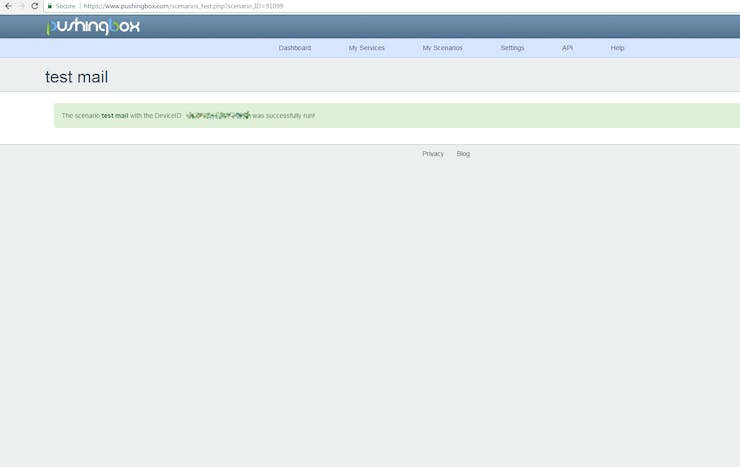
6 - Go to "My Scenarios"
7 - Press "Test".

8 - If everything is ok, you should get an email in you inbox.
Code
For you to use my code, some changes are necessary.
- Define your WIFI network name and password. - Copy the DEVID from "My Scenarios" on Pushingbox and paste it in the code.
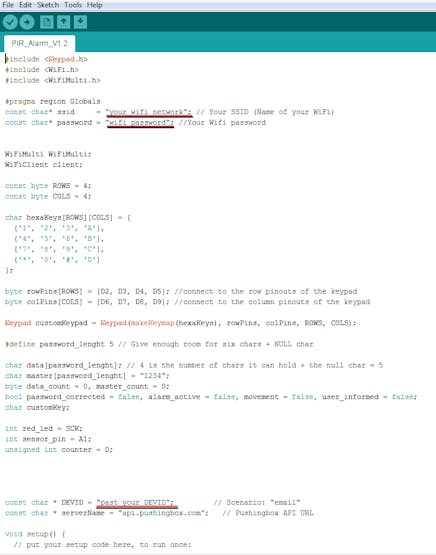
Upload and open a Serial Monitor window to check if everything is working.
For activating the system just press "1234", my default password, and the alarm will be armed in 8s (this can be also changed in the code).
Conclusion
Comparing with my previous project, the upgrade to the PIR sensor is a big improvement. I'm getting almost none of "false, positive" alarm.
Almost in the end phase, I remember, "Why did I not used an RFID???!!!", or better, the Bluetooth module available in the ESP32, instead of the keypad.
Also the code is very basic, with a lot of opportunity's of improvement, so I do not think that this will be my last alarm system.
Feel free to comment or send me a message if you found any mistakes, or if you have any suggestions/improvements or questions.
Like it. Subscribe. Make it.
#include <Keypad.h>
#include <WiFi.h>
#include <WiFiMulti.h>

#pragma region Globals
const char* ssid     = "your_wifi_network"; // Your SSID (Name of your WiFi)
const char* password = "wifi_password"; //Your Wifi password


WiFiMulti WiFiMulti;
WiFiClient client;

const byte ROWS = 4;
const byte COLS = 4;

char hexaKeys[ROWS][COLS] = {
  {'1', '2', '3', 'A'},
  {'4', '5', '6', 'B'},
  {'7', '8', '9', 'C'},
  {'*', '0', '#', 'D'}
};

byte rowPins[ROWS] = {D2, D3, D4, D5}; //connect to the row pinouts of the keypad
byte colPins[COLS] = {D6, D7, D8, D9}; //connect to the column pinouts of the keypad

Keypad customKeypad = Keypad(makeKeymap(hexaKeys), rowPins, colPins, ROWS, COLS);

#define password_lenght 5 // Give enough room for six chars + NULL char

char data[password_lenght]; // 4 is the number of chars it can hold + the null char = 5
char master[password_lenght] = "1234";
byte data_count = 0, master_count = 0;
bool password_corrected = false, alarm_active = false, movement = false, user_informed = false;
char customKey;

int red_led = SCK;
int sensor_pin = A1;
unsigned int counter = 0;


const char * DEVID = "past_your_DEVID";         // Scenario: "email"
const char * serverName = "api.pushingbox.com";   // Pushingbox API URL

void setup() {
  // put your setup code here, to run once:

  Serial.begin(115200);
  delay(10);

  pinMode(sensor_pin, INPUT);
  pinMode(red_led, OUTPUT);


  Connect_to_Wifi();


}

void loop() {

  Check_Keypad();

  if (alarm_active == true) {
    Check_Movement();
  }

  if (alarm_active == true && movement == true && user_informed == false)
  {
    Serial.println("Send Mail");

    // Send_mail();
    sendToPushingBox(DEVID);


  }

}


bool Check_Movement()
{

  if (digitalRead(sensor_pin) == LOW)
  {
    counter++;
    delay(5);
    if (counter >= 200)
    {
      movement = true;
      Serial.println("Movement");
      counter = 0;
    }
  } else movement = false;
}


void Connect_to_Wifi()
{

  // We start by connecting to a WiFi network
  WiFiMulti.addAP(ssid, password);

  Serial.println();
  Serial.println();
  Serial.print("Wait for WiFi... ");

  while (WiFiMulti.run() != WL_CONNECTED) {
    Serial.print(".");
    delay(500);
  }

  Serial.println("");
  Serial.println("WiFi connected");
  Serial.println("IP address: ");
  Serial.println(WiFi.localIP());

}

void sendToPushingBox(const char * devid)
{


  client.stop();
  if (client.connect(serverName, 80)) {
    client.print("GET /pushingbox?devid=");
    client.print(devid);
    client.println(" HTTP/1.1");
    client.print("Host: ");
    client.println(serverName);
    client.println("User-Agent: test mail");
    client.println();
    client.flush();

        user_informed = true;

  }
  else {
    Serial.println("connection failed");
  }
}


void Check_Keypad()
{
  char customKey = customKeypad.getKey();

  if (customKey) // makes sure a key is actually pressed, equal to (customKey != NO_KEY)
  {

    delay(50);
    digitalWrite(red_led, HIGH);
    delay(50);
    digitalWrite(red_led, LOW);

    data[data_count] = customKey; // store char into data array
    data_count++; // increment data array by 1 to store new char, also keep track of the number of chars entered
  }

  if (data_count == password_lenght - 1) // if the array index is equal to the number of expected chars, compare data to master
  {

    if (!strcmp(data, master)) // equal to (strcmp(Data, Master) == 0)
    {
      //Right password
      Serial.println("Password Correct");

      for (int i = 0; i < 10; i++) {
        delay(50);
        digitalWrite(red_led, HIGH);
        delay(50);
        digitalWrite(red_led, LOW);
      }

      if (alarm_active == true ) {
        // reset alarm
        alarm_active = false;
        Serial.println("Alarm DESACTIVE");

      }
      else
      {
        alarm_active = true;
        user_informed = false;

        int counter = 0;
        while (counter < 5)
        {
          digitalWrite(red_led, HIGH);
          delay(1000);
          digitalWrite(red_led, LOW);
          delay(1000);
          counter++;
        }

        digitalWrite(red_led, LOW);
        Serial.println("Alarm ACTIVE");

      }


    } else {
      Serial.println("Password Wrong");
      digitalWrite(red_led, HIGH);
      delay(1000);
      digitalWrite(red_led, LOW);
    }

    //Clear data
    while (data_count != 0)
    { // This can be used for any array size,
      data[data_count--] = 0; //clear array for new data
    }

  }
}
The article was first published in Hackster, March 8, 2018
cr: https://www.hackster.io/Tiobel/mail-alarm-bfe496
author: Hugo Gomes


