
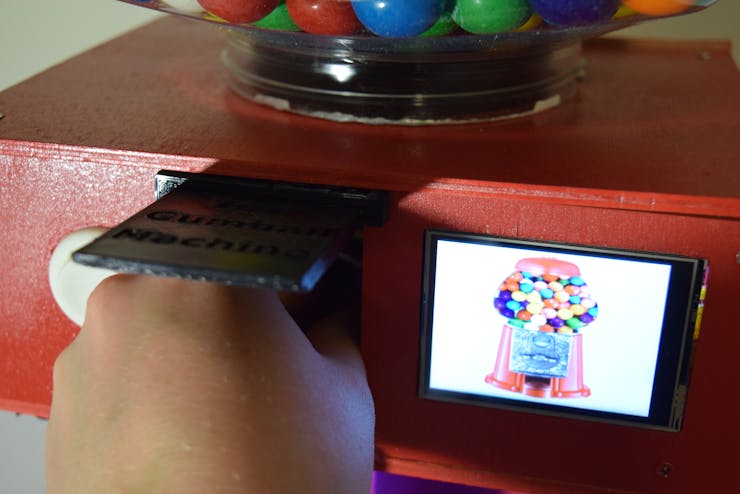
LEDs, WiFi, automatic dispensing, an LCD screen — it's got it all. This gumball machine lets users interact with it via a webpage.

Things used in this project
Hardware components
Software apps and online services
Node.js
Autodesk Fusion 360: https://www.hackster.io/autodesk/products/fusion-360?ref=project-17d49c
Hand tools and fabrication machines
3D Printer (generic)
Soldering iron (generic)
CNC router
jigsaw
Story
What is ultimate? Infinite RGB? How about a cool LCD touchscreen? Maybe even some completely unnecessary WiFi capabilities? How about all of them-in a gumball machine.
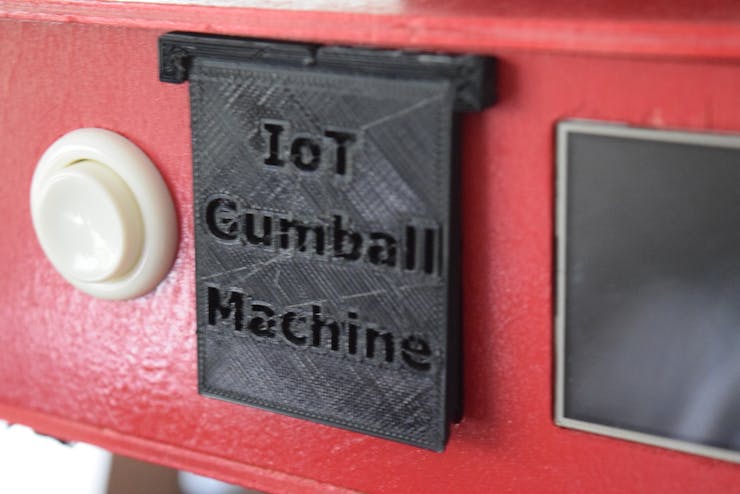
DFRobot reached out to me to create a project that uses their 2.8" TFT screen, so I made the most amazing gumball machine ever (of course).
Design
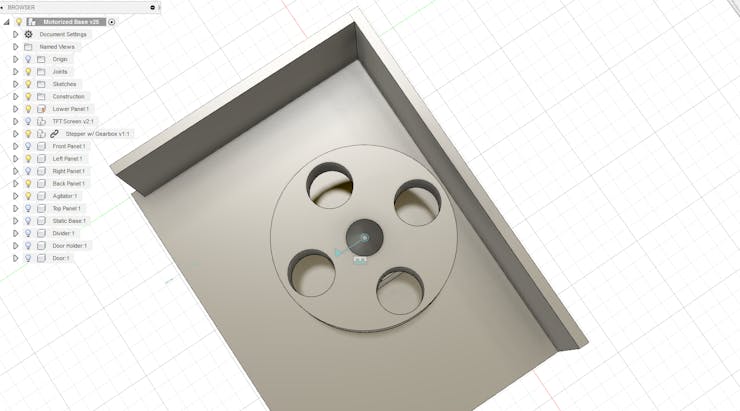
As usual, almost everything that's more complex than making a few simple connections and a basic box needed a design in Fusion 360. I started out by sketching what I wanted the machine to look like. It needed to be tall, have enough room for all of the electronics, and also be able to support the weight of 12lbs of gumballs.
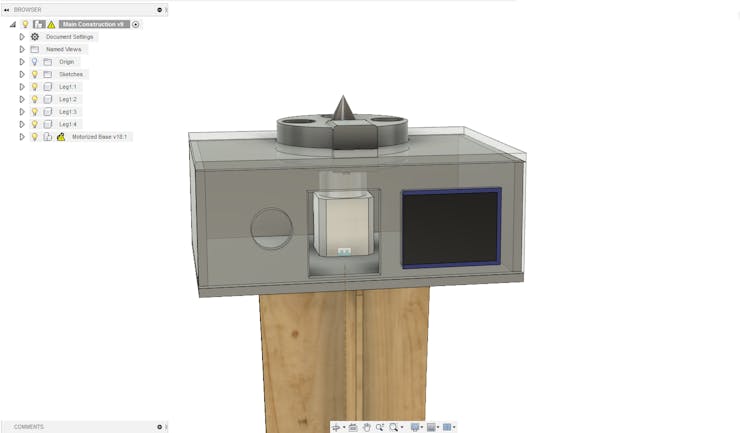
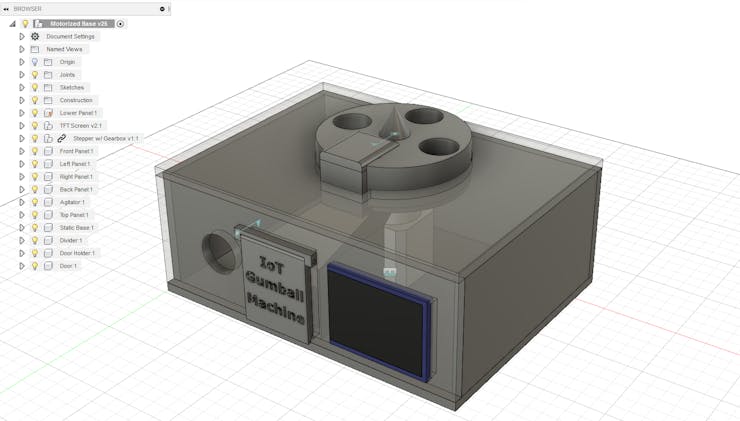
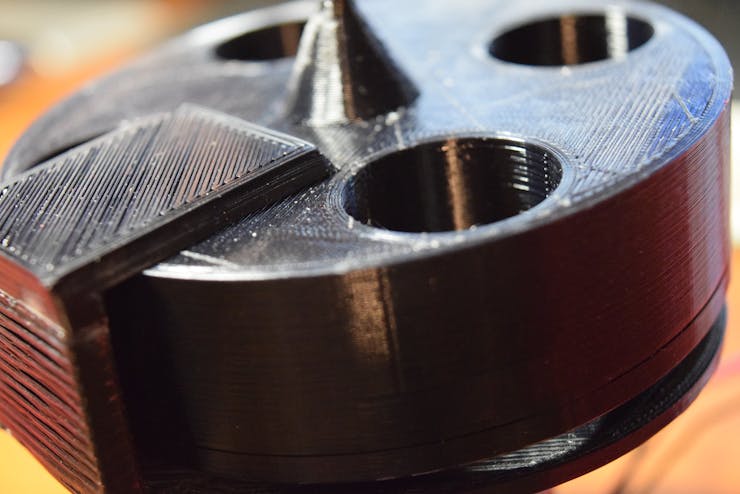
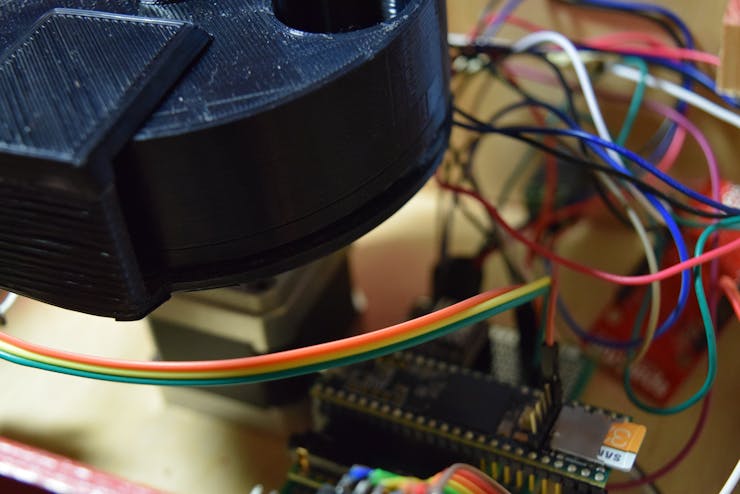
So then I tried to make a simple and elegant dispensing mechanism. It had to only dispense one gumball at a time, not get jammed, and not let more than one gumball fall through what it turns. I came to the realization that all I needed was a simple wheel with 4 holes, and that the dispensing hole would have a cover on the top of it to stop excess gumballs from falling through.
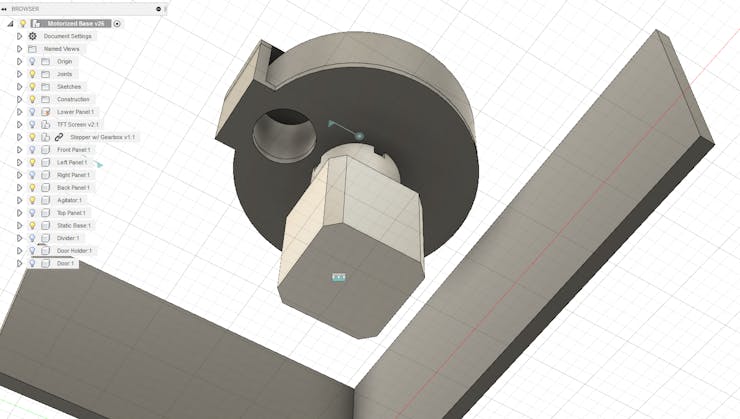
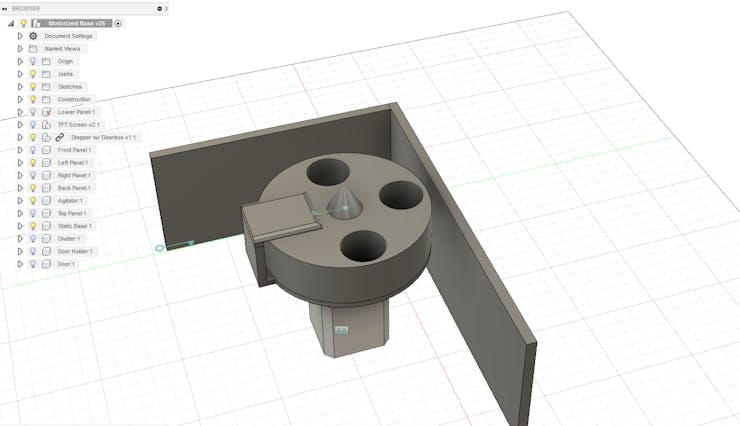
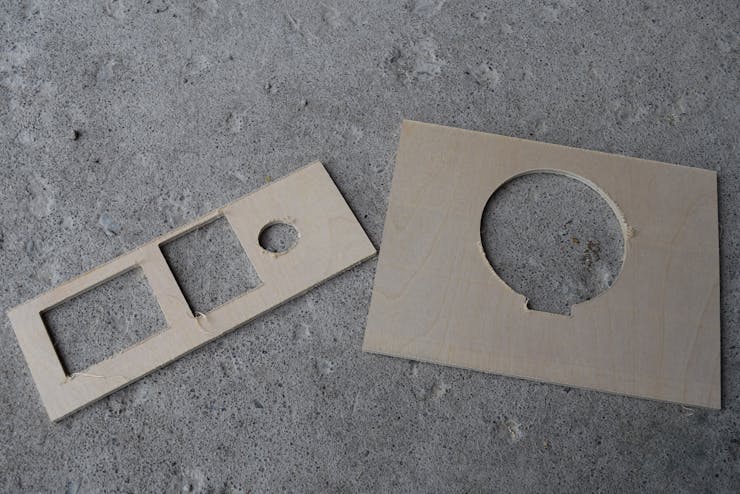
After my design was finished I exported all of the 3d-printable parts and generated toolpaths for CNC routing the housing.
Housing and Fabrication
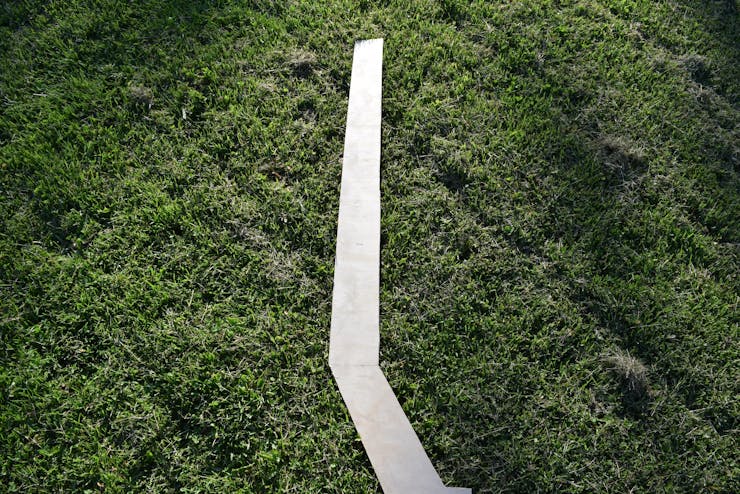
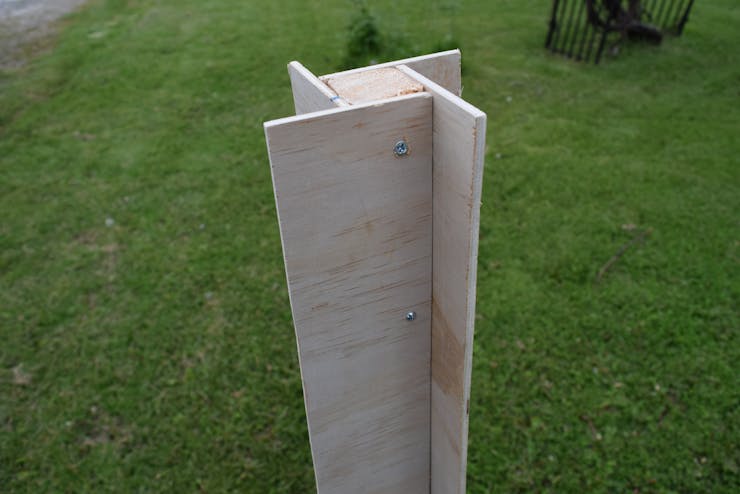
I started by gathering the dimensions for the gumball machine's legs and then sketching them out on a huge sheet of plywood. Then I took a jigsaw and cut the four legs out. I also cut out the main housing from plywood with my CNC router.
Then I drilled holes into everything and painted it red.

The LED strip got glued onto the bottom plate so it could cast a nice glow onto the machine's stand below.
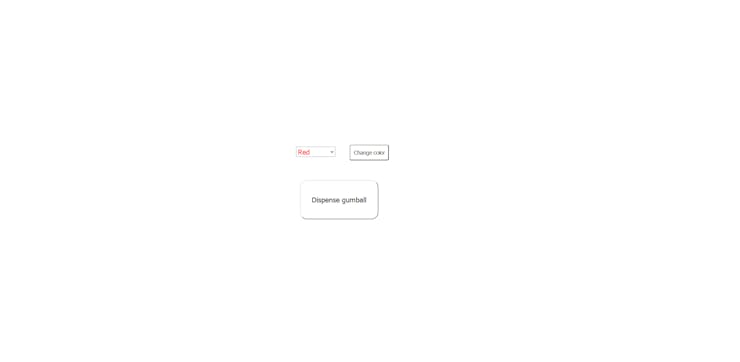
Webpage
In order for users to interact with the gumball machine there needs to be an easy interface. I chose to create a simple webpage that lets users dispense gumballs and change the LEDs' color. After an action happens the webpage POSTs data to a custom Node.js webserver via AJAX.
Webserver
I needed a webserver to act as an intermediary between users on the webpage and the gumball machine. Therefore, I decided to use Node.js to both send and receive data. Users send a POST request to control LED color and dispense. Then the ESP8266 sends a GET request to get the status of the machine. And what happens if someone keeps clicking "dispense"? The server keeps track of all the IPs that have clicked the dispense button and blocks them from dispensing twice.
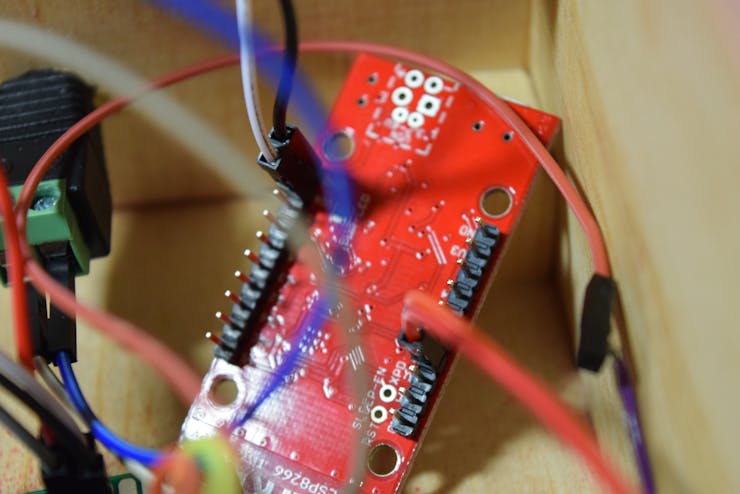
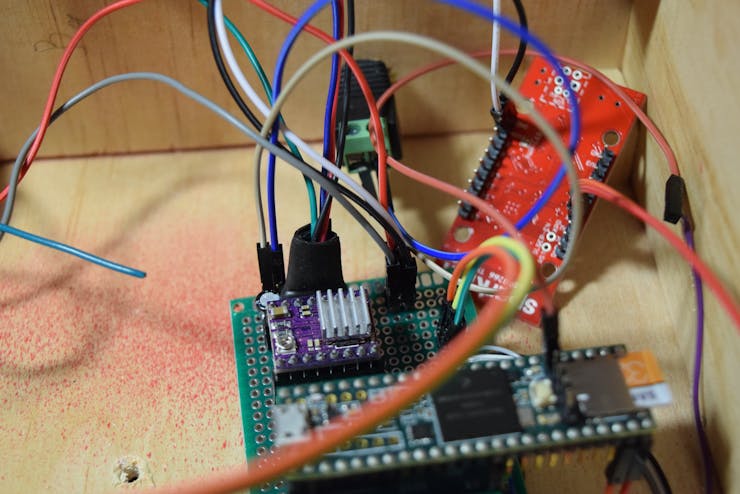
Electronics
A TFT screen takes a lot of processing power to drive, so I had to choose a fast and powerful board, leading me to use the Teensy 3.5. But now you might be thinking to yourself: "How does a Teensy use WiFi?" That was a very hard problem for me to solve. I needed to get the Teensy to listen to a local server for changes made by users. Then it dawned on me to just use an ESP8266 to check the server and then "talk" to the Teensy via Serial, which made it a lot easier.
Software
The Teensy runs a simple script that first loads the image from the SD card and displays it onscreen. Then it checks serial data to see if it needs to change the color of the LEDs or dispense.
Usage
Using the gumball machine is pretty simple: just go to the webpage and click the "dispense" button. Or, better yet, just go up and push the button. Then just reach in and grab your rightful prize.
Custom parts and enclosures
Parts to 3D Print
https://www.thingiverse.com/thing:2980515
Code
Teensy Code
C/C++
#define TFT_CS 2
#define TFT_DC 5
#define SD_CS   BUILTIN_SDCARD
#define DIR_PIN 16
#define STEP_PIN 17
#define LED_PIN 20
#define BUTTON_PIN 30
#define NUMPIXELS 20
#define RPM 60
#define MOTOR_STEPS 200
#define MICROSTEPS 1
//#define rxPin 36
//#define txPin 37

#include <SPI.h>
#include <SD.h>
#include <Adafruit_ILI9341.h>
#include <Adafruit_GFX.h>
#include <Adafruit_NeoPixel.h>
#include <Arduino.h>
#include "BasicStepperDriver.h"
//#include <SoftwareSerial.h>

Adafruit_NeoPixel pixels = Adafruit_NeoPixel(NUMPIXELS, LED_PIN, NEO_GRB + NEO_KHZ800);
int LEDColors[] = {pixels.Color(255,0,0),pixels.Color(0,255,0),pixels.Color(0,0,255),pixels.Color(200,0,200),pixels.Color(0,0,0)};

BasicStepperDriver stepper(MOTOR_STEPS, DIR_PIN, STEP_PIN);

//SoftwareSerial Serial4 = SoftwareSerial(rxPin, txPin);

bool button_pressed = false;

Adafruit_ILI9341 tft = Adafruit_ILI9341(TFT_CS, TFT_DC);

void setup(){
    //pinMode(rxPin, INPUT);
    //pinMode(txPin, OUTPUT);
    Serial.begin(9600);
    Serial4.begin(9600);
    delay(500);
    SPI.setMOSI(7);
    SPI.setSCK(14);
    if(SD.begin(SD_CS)){
      Serial.println("Success");
      File entry = SD.open("MAINPAGE.BMP");
      if(entry != NULL){
      Serial.println(entry.name());
      }
      entry.close();
  }
  stepper.begin(RPM, MICROSTEPS);
  tft.begin();
  pixels.begin();
  tft.setRotation(1);
  pixels.setBrightness(75);
  pinMode(BUTTON_PIN,INPUT_PULLUP);
  attachInterrupt(BUTTON_PIN,set_button,FALLING);
  tft.setTextColor(0x0000);
  tft.fillScreen(0xFFFF);
  tft.setCursor(0,0);
  tft.print("HI");
  setAllPixels(0);
  //displayDispensing();
  delay(3000);
  loadMainPage();
}

elapsedMillis timer1;

void loop(){
    if(button_pressed){
        button_pressed = false;
        dispense();
    }
    if(Serial4.available()){
        String cmd = Serial4.readStringUntil(',');
        Serial.print(cmd);
        Serial.print(',');
        if(cmd=="LED"){
            String color = Serial4.readStringUntil('\n');
            Serial.println(color);
            if(color=="RED\r"){
                setAllPixels(0);
            }
            else if(color=="GREEN\r"){
                setAllPixels(1);
            }
            else if(color=="BLUE\r"){
                setAllPixels(2);
            }
            else if(color=="PURPLE\r"){
                setAllPixels(3);
            }
            else if(color=="BLACK\r"){
                setAllPixels(4);
            }
        }
        else if(cmd=="DISPENSE"){
            String cmd2 = Serial4.readStringUntil('\n');
            Serial.println(cmd2);
            if(cmd2=="true\r"){
                if(timer1>5000){
                //displayDispensing();
                dispense();
                }
            }
        }
    }

}

void loadMainPage(){
    tft.fillScreen(0xFFFF);
    bmpDraw("MAINPAGE.BMP",0,0);
}

void displayDispensing(){
    tft.fillScreen(0xFFFF);
    tft.setTextSize(3);
    tft.setCursor(90,30);
    tft.print("Dispensing \n");
    tft.setCursor(100,80);
    tft.print("gumball!");
    delay(3000);
    loadMainPage();
}

void dispense(){
    Serial.println("Dispensing");
    displayDispensing();
    stepper.move(259);
    delay(3000);
    loadMainPage();
}

void set_button(){
    button_pressed = true;
    delay(200);
}

void setAllPixels(int colorNum){
    Serial.print("Setting pixels to ");Serial.println(colorNum);
    for(int i=0;i<NUMPIXELS;i++){
        pixels.setPixelColor(i, LEDColors[colorNum]);
    }
    pixels.show();
}

#define BUFFPIXEL 20

void bmpDraw(char *filename, int16_t x, int16_t y) {

  File     bmpFile;
  int      bmpWidth, bmpHeight;   // W+H in pixels
  uint8_t  bmpDepth;              // Bit depth (currently must be 24)
  uint32_t bmpImageoffset;        // Start of image data in file
  uint32_t rowSize;               // Not always = bmpWidth; may have padding
  uint8_t  sdbuffer[3*BUFFPIXEL]; // pixel buffer (R+G+B per pixel)
  uint8_t  buffidx = sizeof(sdbuffer); // Current position in sdbuffer
  boolean  goodBmp = false;       // Set to true on valid header parse
  boolean  flip    = true;        // BMP is stored bottom-to-top
  int      w, h, row, col, x2, y2, bx1, by1;
  uint8_t  r, g, b;
  uint32_t pos = 0, startTime = millis();

  if((x >= tft.width()) || (y >= tft.height())) return;

  Serial.println();
  Serial.print(F("Loading image '"));
  Serial.print(filename);
  Serial.println('\'');

  // Open requested file on SD card
  bmpFile = SD.open(filename);
  /*if ((bmpFile = SD.open(filename)) == NULL) {
    Serial.print(F("File not found"));
    return;
  }*/

  // Parse BMP header
  if(read16(bmpFile) == 0x4D42) { // BMP signature
    Serial.print(F("File size: ")); Serial.println(read32(bmpFile));
    (void)read32(bmpFile); // Read & ignore creator bytes
    bmpImageoffset = read32(bmpFile); // Start of image data
    Serial.print(F("Image Offset: ")); Serial.println(bmpImageoffset, DEC);
    // Read DIB header
    Serial.print(F("Header size: ")); Serial.println(read32(bmpFile));
    bmpWidth  = read32(bmpFile);
    bmpHeight = read32(bmpFile);
    if(read16(bmpFile) == 1) { // # planes -- must be '1'
      bmpDepth = read16(bmpFile); // bits per pixel
      Serial.print(F("Bit Depth: ")); Serial.println(bmpDepth);
      if((bmpDepth == 24) && (read32(bmpFile) == 0)) { // 0 = uncompressed

        goodBmp = true; // Supported BMP format -- proceed!
        Serial.print(F("Image size: "));
        Serial.print(bmpWidth);
        Serial.print('x');
        Serial.println(bmpHeight);

        // BMP rows are padded (if needed) to 4-byte boundary
        rowSize = (bmpWidth * 3 + 3) & ~3;

        // If bmpHeight is negative, image is in top-down order.
        // This is not canon but has been observed in the wild.
        if(bmpHeight < 0) {
          bmpHeight = -bmpHeight;
          flip      = false;
        }

        // Crop area to be loaded
        x2 = x + bmpWidth  - 1; // Lower-right corner
        y2 = y + bmpHeight - 1;
        if((x2 >= 0) && (y2 >= 0)) { // On screen?
          w = bmpWidth; // Width/height of section to load/display
          h = bmpHeight;
          bx1 = by1 = 0; // UL coordinate in BMP file
          if(x < 0) { // Clip left
            bx1 = -x;
            x   = 0;
            w   = x2 + 1;
          }
          if(y < 0) { // Clip top
            by1 = -y;
            y   = 0;
            h   = y2 + 1;
          }
          if(x2 >= tft.width())  w = tft.width()  - x; // Clip right
          if(y2 >= tft.height()) h = tft.height() - y; // Clip bottom

          // Set TFT address window to clipped image bounds
          tft.startWrite(); // Requires start/end transaction now
          tft.setAddrWindow(x, y, w, h);

          for (row=0; row<h; row++) { // For each scanline...

            // Seek to start of scan line.  It might seem labor-
            // intensive to be doing this on every line, but this
            // method covers a lot of gritty details like cropping
            // and scanline padding.  Also, the seek only takes
            // place if the file position actually needs to change
            // (avoids a lot of cluster math in SD library).
            if(flip) // Bitmap is stored bottom-to-top order (normal BMP)
              pos = bmpImageoffset + (bmpHeight - 1 - (row + by1)) * rowSize;
            else     // Bitmap is stored top-to-bottom
              pos = bmpImageoffset + (row + by1) * rowSize;
            pos += bx1 * 3; // Factor in starting column (bx1)
            if(bmpFile.position() != pos) { // Need seek?
              tft.endWrite(); // End TFT transaction
              bmpFile.seek(pos);
              buffidx = sizeof(sdbuffer); // Force buffer reload
              tft.startWrite(); // Start new TFT transaction
            }
            for (col=0; col<w; col++) { // For each pixel...
              // Time to read more pixel data?
              if (buffidx >= sizeof(sdbuffer)) { // Indeed
                tft.endWrite(); // End TFT transaction
                bmpFile.read(sdbuffer, sizeof(sdbuffer));
                buffidx = 0; // Set index to beginning
                tft.startWrite(); // Start new TFT transaction
              }
              // Convert pixel from BMP to TFT format, push to display
              b = sdbuffer[buffidx++];
              g = sdbuffer[buffidx++];
              r = sdbuffer[buffidx++];
              tft.writePixel(tft.color565(r,g,b));
            } // end pixel
          } // end scanline
          tft.endWrite(); // End last TFT transaction
        } // end onscreen
        Serial.print(F("Loaded in "));
        Serial.print(millis() - startTime);
        Serial.println(" ms");
      } // end goodBmp
    }
  }

  bmpFile.close();
  if(!goodBmp) Serial.println(F("BMP format not recognized."));
}

uint16_t read16(File &f) {
  uint16_t result;
  ((uint8_t *)&result)[0] = f.read(); // LSB
  ((uint8_t *)&result)[1] = f.read(); // MSB
  return result;
}

uint32_t read32(File &f) {
  uint32_t result;
  ((uint8_t *)&result)[0] = f.read(); // LSB
  ((uint8_t *)&result)[1] = f.read();
  ((uint8_t *)&result)[2] = f.read();
  ((uint8_t *)&result)[3] = f.read(); // MSB
  return result;
}
ESP8266 Code
C/C++
#include <Arduino.h>

#include <ESP8266WiFi.h>
#include <ESP8266WiFiMulti.h>
#include <ESP8266HTTPClient.h>

ESP8266WiFiMulti WiFiMulti;

void setup(){
    Serial.begin(9600);
    WiFiMulti.addAP("SSID", "PSK");
}

void loop(){
    if((WiFiMulti.run() == WL_CONNECTED)){
        HTTPClient http;

        http.begin("http://local_ip (change these values):3010/status/led");
        int httpCode = http.GET();

        String payload = http.getString();
        if(payload){
            Serial.print("LED,");
            Serial.println(payload);
        }
        http.end();

        http.begin("http://local_ip:3010/status/dispense");
        httpCode = http.GET();

        payload = http.getString();
        if(payload){
            Serial.print("DISPENSE,");
            Serial.println(payload);
            if(payload=="true"){
                delay(4000);
            }
        }
        http.end();
        delay(1000);
    }
}
Node JS Server Code
JavaScript
var express = require('express');
var myParser = require('body-parser');
var app = express();
const cors = require('cors');

var latestColor = "RED";
var dispense_active = false;
var usedIPs = [];

const whitelist = ['::ffff:local_ip']

app.use(myParser.json({extended: true}));
app.use(cors());
app.options('*',cors());
app.post("/gumball", function(request, response){
    console.log(request.body);
    response.send("OK, 200");
    if(typeof request.body.LED !=='undefined'){
        latestColor = request.body.LED;
    }
     if(typeof request.body.DISPENSE !=='undefined'){
        dispense_active = request.body.DISPENSE;
        if(dispense_active = true){
            if(usedIPs.indexOf(request.ip)==-1){
            usedIPs.push(request.ip);
            console.log(usedIPs);
            }
            else if(whitelist.indexOf(request.ip)>-1){
                dispense_active = true;
            }
            else{
                dispense_active = false;
            }
        }
    }
});

app.get('/status/dispense',function(req,res){
    res.send(dispense_active);
    dispense_active = false;
});

app.get('/status/led',function(req,res){
    res.send(latestColor);
});

app.listen(3010);
Webpage main
HTML
<html>
	<head>
	<title>IoT Gumball Machine</title>
	<script src="https://ajax.googleapis.com/ajax/libs/jquery/3.3.1/jquery.min.js">
	</script>
	<link rel="stylesheet" type="text/css" href="style.css">
	</head>
<body>
	<script>
		function changeLED(color){
			console.log(color.toUpperCase());
			var colorName = color.toUpperCase();
			var obj = {"LED": colorName};
			$.ajax('http://local_ip:3010/gumball',{
				data: JSON.stringify(obj),
				contentType: 'application/json',
				type: 'POST'
			});
		}
		function dispense(){
			console.log("Dispensing");
			var obj = {"DISPENSE": true};
			$.ajax('http://local_ip (change these values):3010/gumball',{
				data: JSON.stringify(obj),
				contentType: 'application/json',
				type: 'POST'
			});
		}
		function changeColor(color){ document.getElementById("color_list").style.color = color;
			console.log(color);
		}


	</script>
	<div class="centered">
	<form id="LED_change" onsubmit="changeLED(this.color_list.value); return false" onchange="changeColor(this.color_list.value); return false">
		<select id="color_list" name="color_list">
		<option class="sRed" value="red">Red</option>
		<option class="sGreen" value="green">Green</option>
		<option class="sBlue" value="blue">Blue</option>
		<option class="sPurple" value="purple">Purple</option>
		<option class="sOff" value="black">Off</option>
		</select>
		<input type=submit value="Change color">
	</form>
	<button id="dButton" onclick="dispense(); return false">Dispense gumball</button>
	</div>

</body>


</html>
Webpage CSS
CSS
#dButton{
	width: 200px;
	height: 100px;
	font-size: 18px;
	color: black;
	background-color: white;
	border-color: lightgray;
	border-radius: 18px;
	margin:30px 10px;
}

#dButton:hover{
	cursor: pointer;
}

select{
	width: 100px;
	font-size: 18px;
}

#LED_change>input[type=submit]{
	width: 100px;
	height: 40px;
	background-color: white;
	border-color: black;
	border-radius: 4px;
	margin-left: 30px;
}

#LED_change>input[type=submit]:hover{
	cursor: pointer;
}

.centered{
	position: fixed;
	top: 40%;
	left: 40%;
}

.sRed{
	color: red;
}

.sGreen{
	color: green;
}

.sBlue{
	color: blue;
}

.sPurple{
	color: purple;
}

.sOff{
	color: black;
}

body{
	font-family: Verdana;
	font-size: 20px;
}
The article was first published in hackster, June 29, 2018
cr: https://www.hackster.io/gatoninja236/the-ultimate-gumball-machine-17d49c
author: Arduino “having11” Guy


