

Build an Open-Source AI Buddy: A DIY AI Companion for Kids Using DFRobot UNIHIKER K10


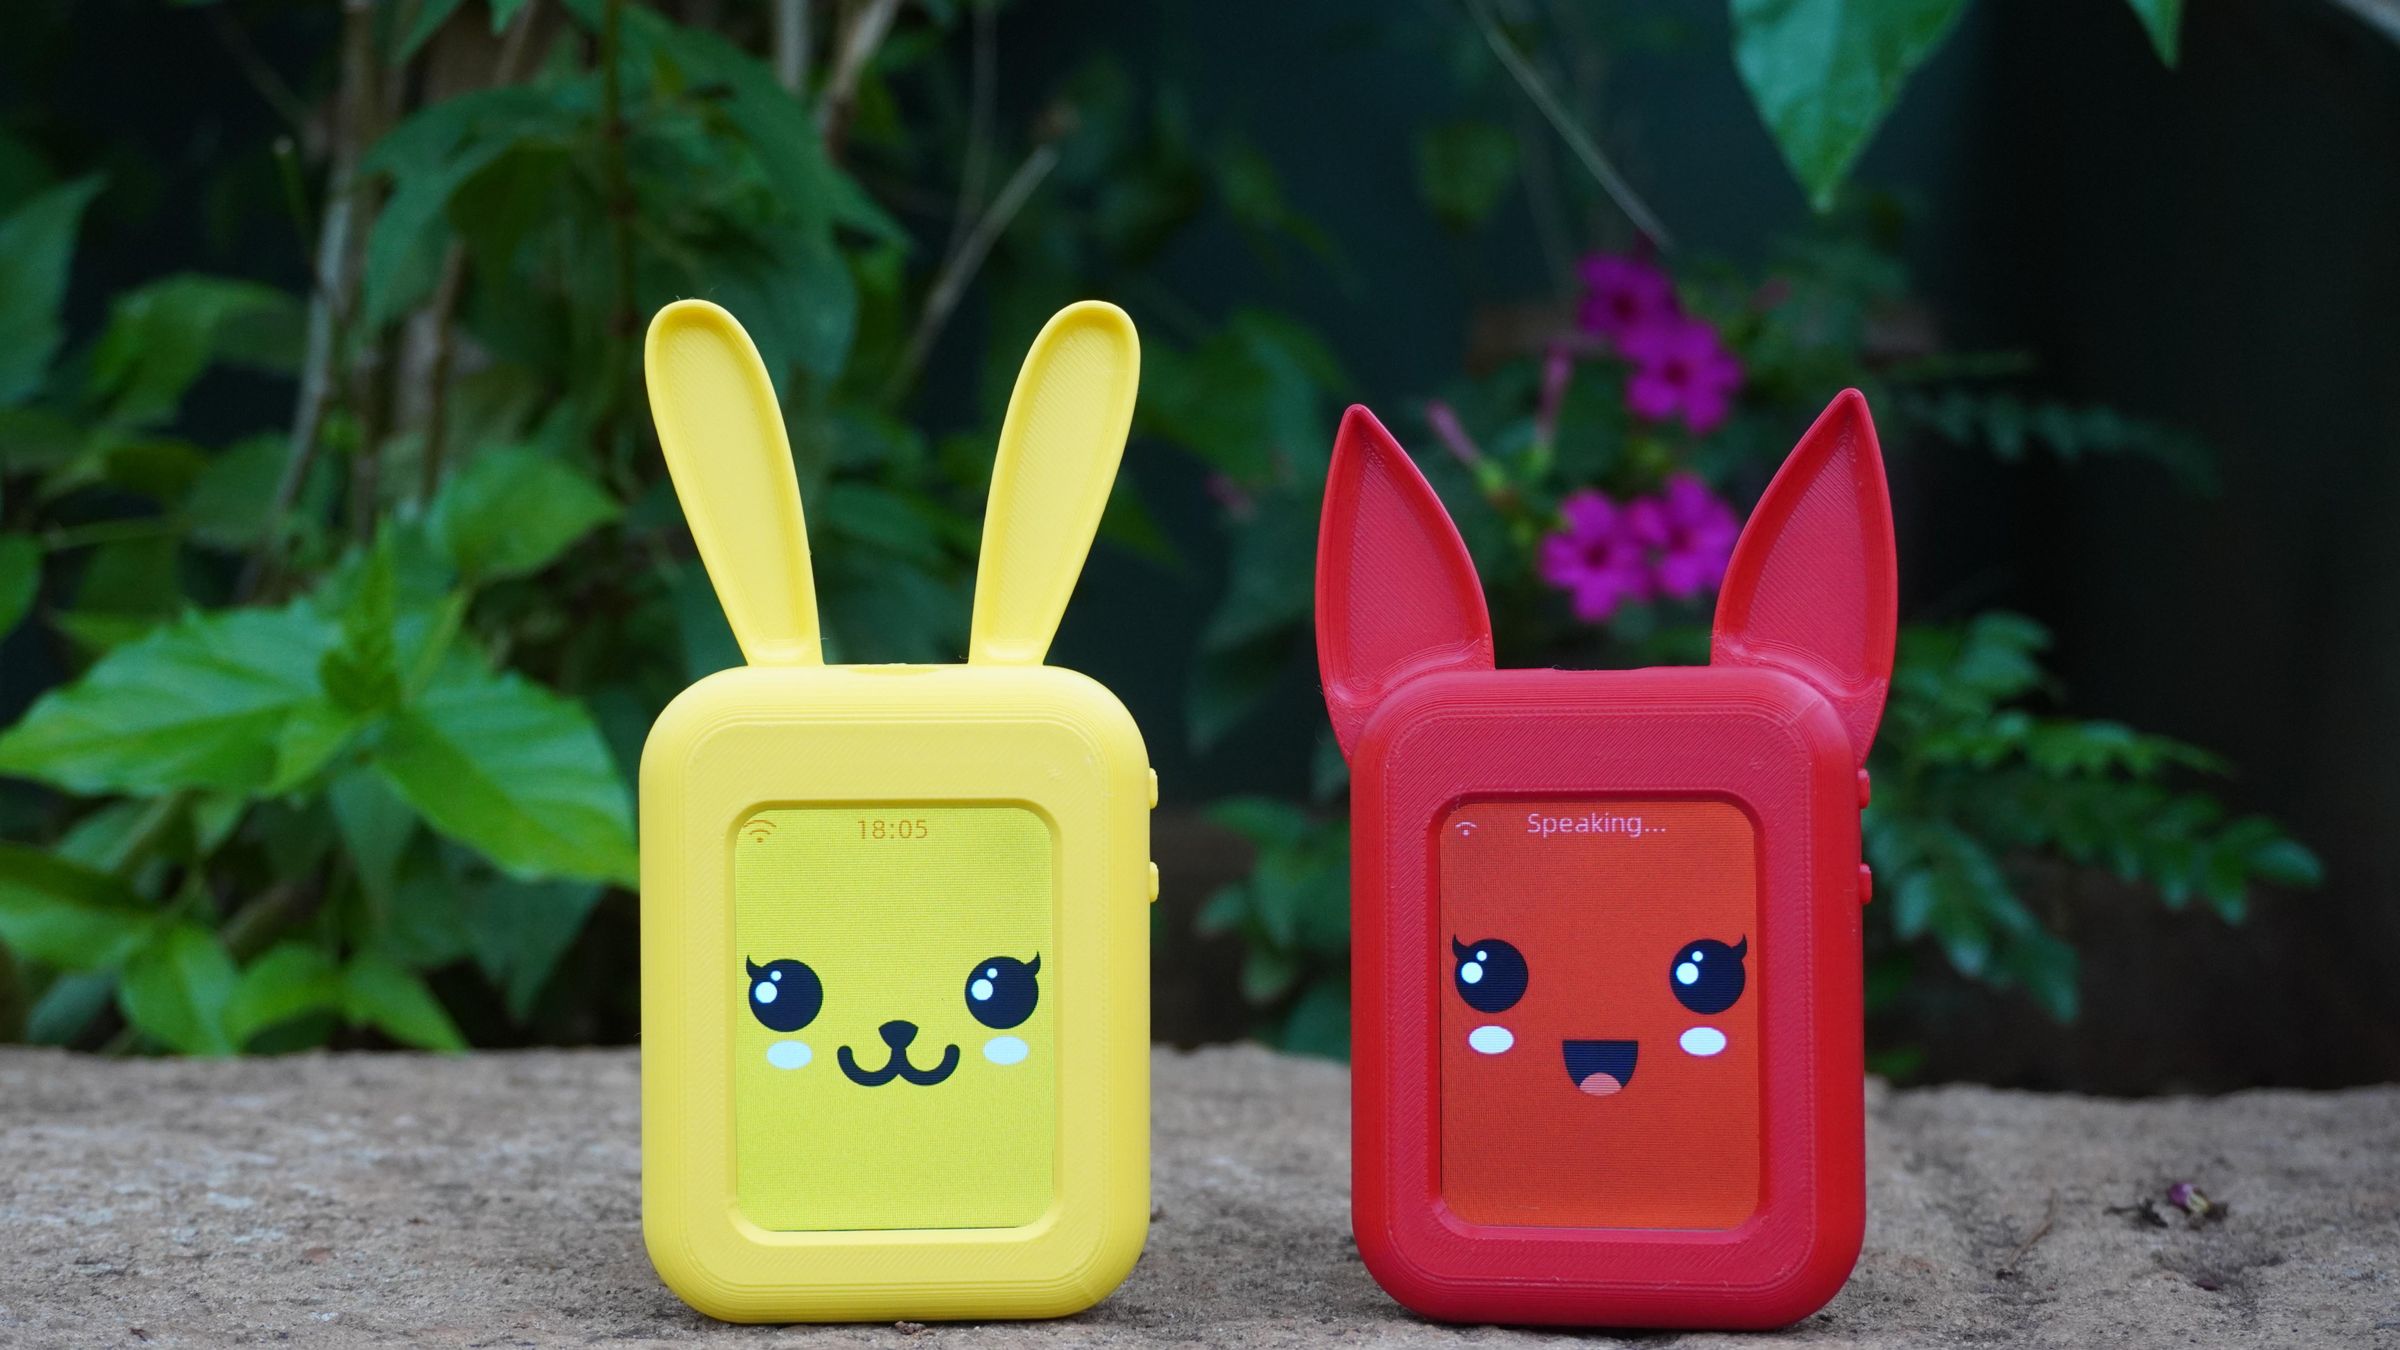 What if your child had a friendly AI companion they could talk to, learn with, and customize themselves?
Meet AI Buddy, an open-source AI chatbot built around the DFRobot UNIHIKER K10 and the Xiaozhi Framework. It combines conversational AI with adorable, pocket-sized animal designs to create a fun and interactive learning companion for kids.
Unlike commercial AI toys, AI Buddy is completely DIY and customizable. From the enclosure to the software, everything is designed to be modified, expanded, and personalized. Whether you want a bunny, cat, giraffe, or your own custom character, you can simply swap the enclosure while using the same electronics inside.
For this improved version, I redesigned almost every part of the project:
- 🐰 Brand-new interchangeable animal enclosures designed in Fusion 360
- 🔋 Custom Battery Management System (BMS) for safe charging and longer battery life
- 🤖 Powered by the DFRobot UNIHIKER K10
- 💬 Runs the Xiaozhi AI Framework for natural voice conversations
- 🎨 Cute animated facial expressions displayed on the built-in screen
- 🔊 Built-in microphone and speaker for hands-free interaction
- 🛠️ Fully open-source hardware and software
- 🌈 Multiple character designs with the same core electronics
Whether you're a maker, parent, educator, or simply someone who enjoys building interactive gadgets, AI Buddy is a rewarding project that combines 3D printing, electronics, embedded programming, PCB design, and AI into a single build.
In this Instructable, I'll guide you through designing the enclosure, assembling the electronics, building the custom battery management system, programming the UNIHIKER K10, and bringing your own AI Buddy to life.
Let's get started! 🚀
Supplies
Tools
- 3D Printer
- Precision Screwdriver Kit
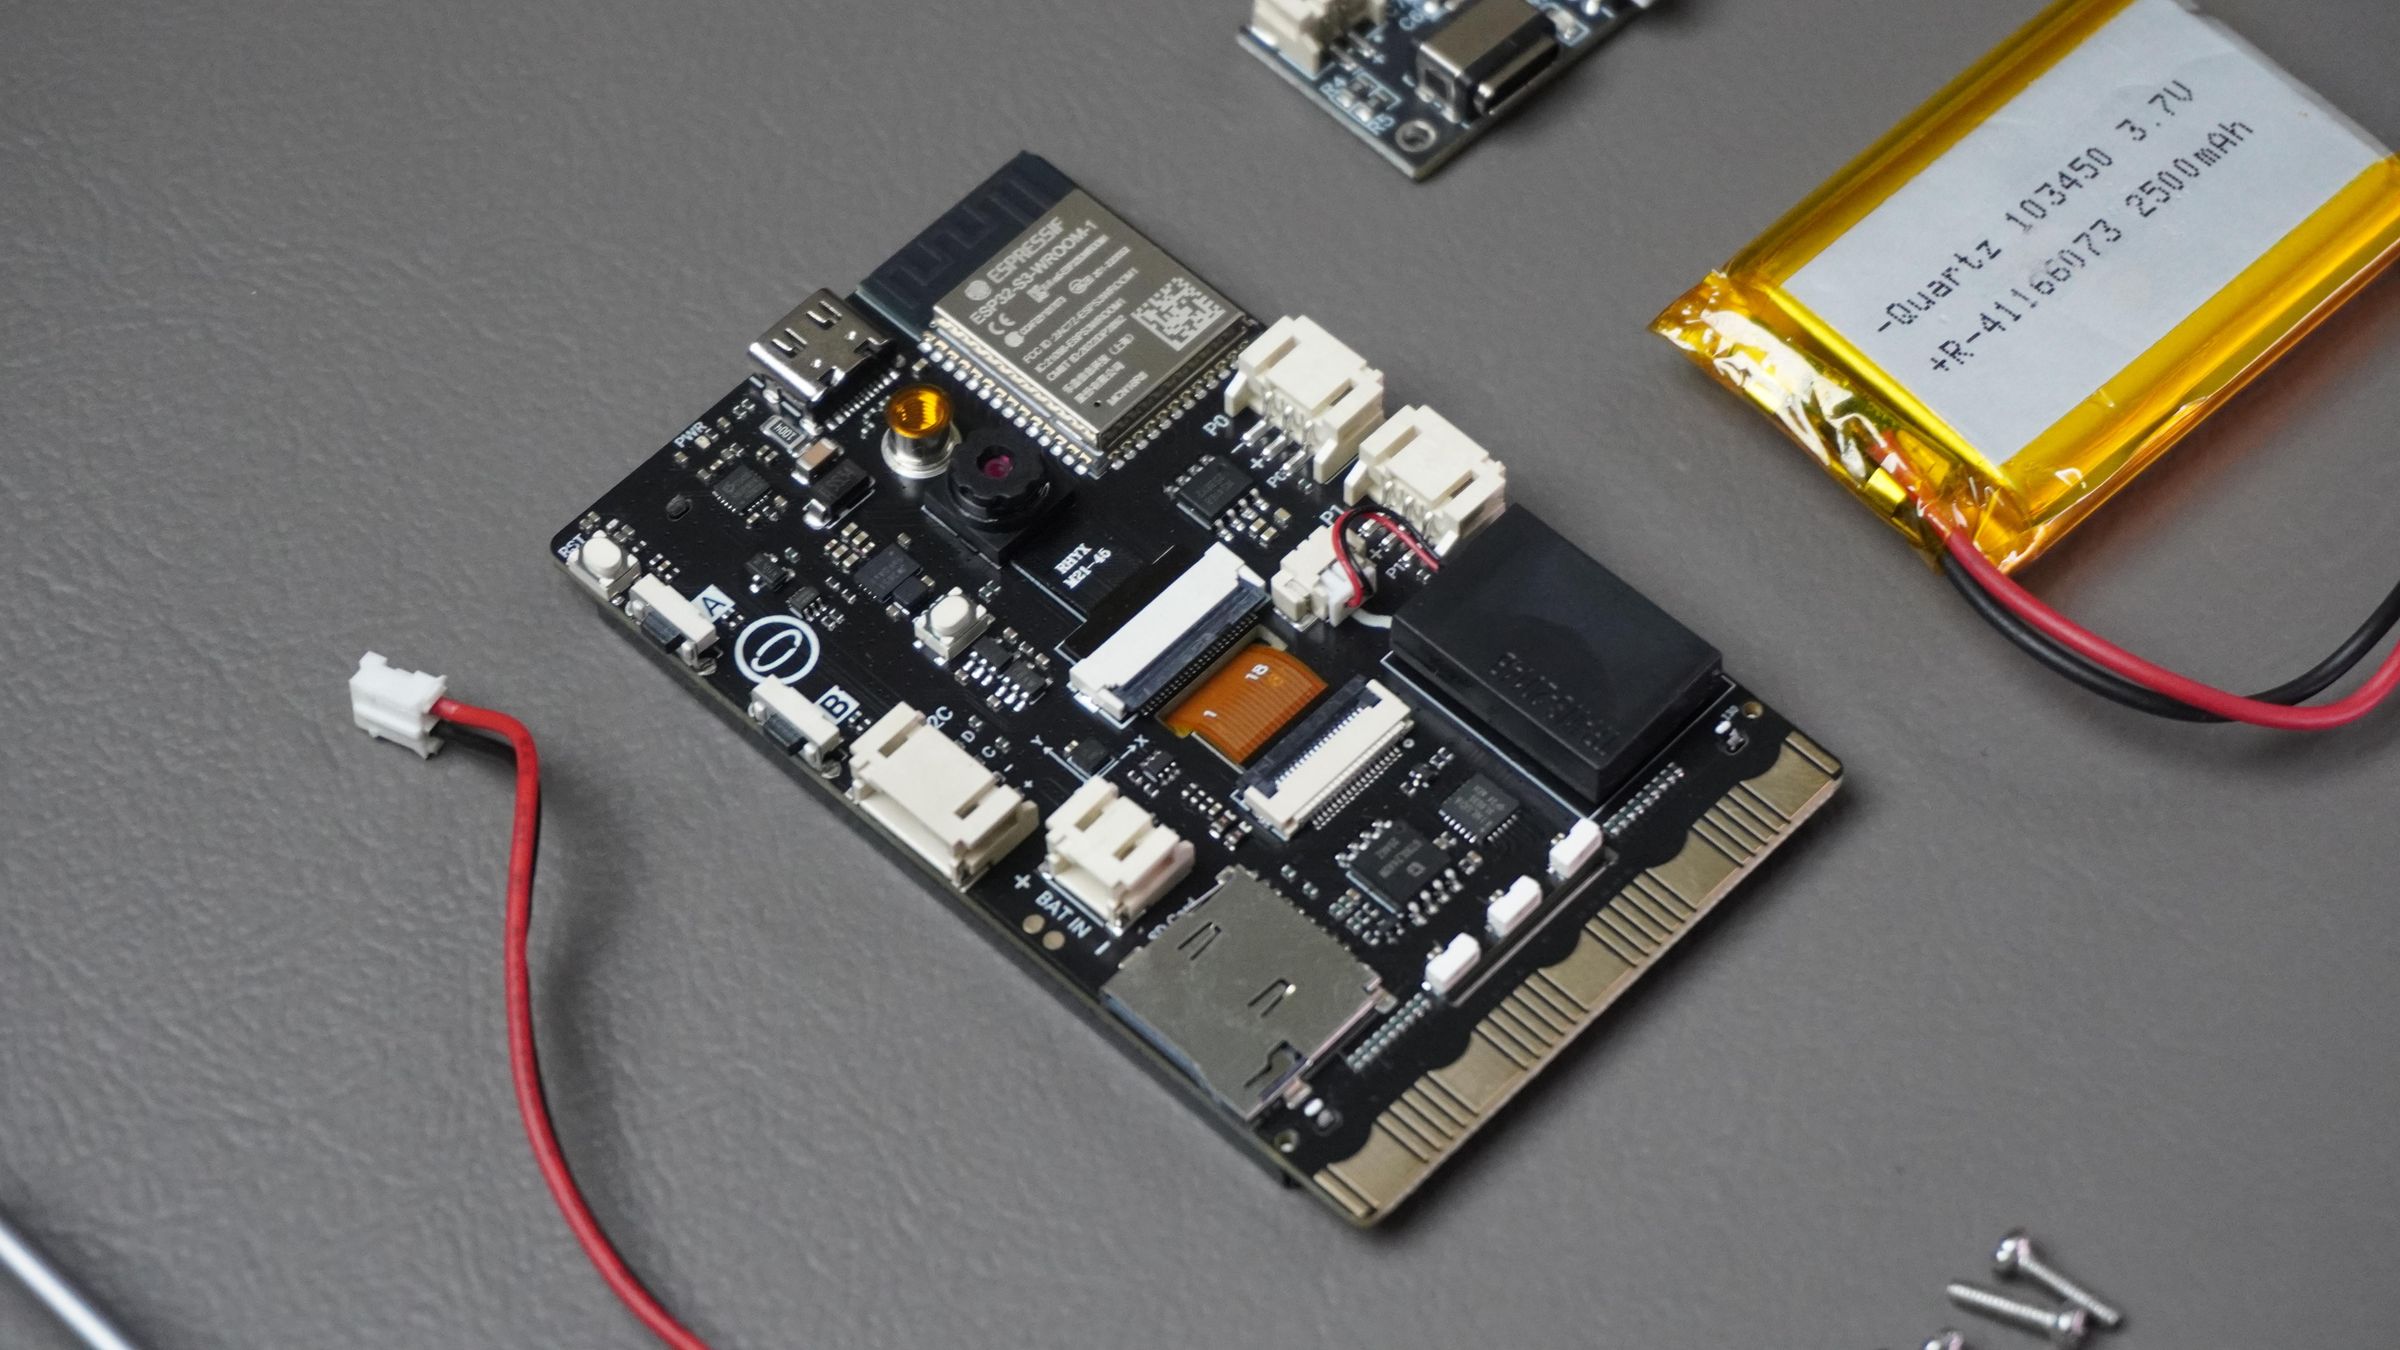
Meet the DFRobot UNIHIKER K10
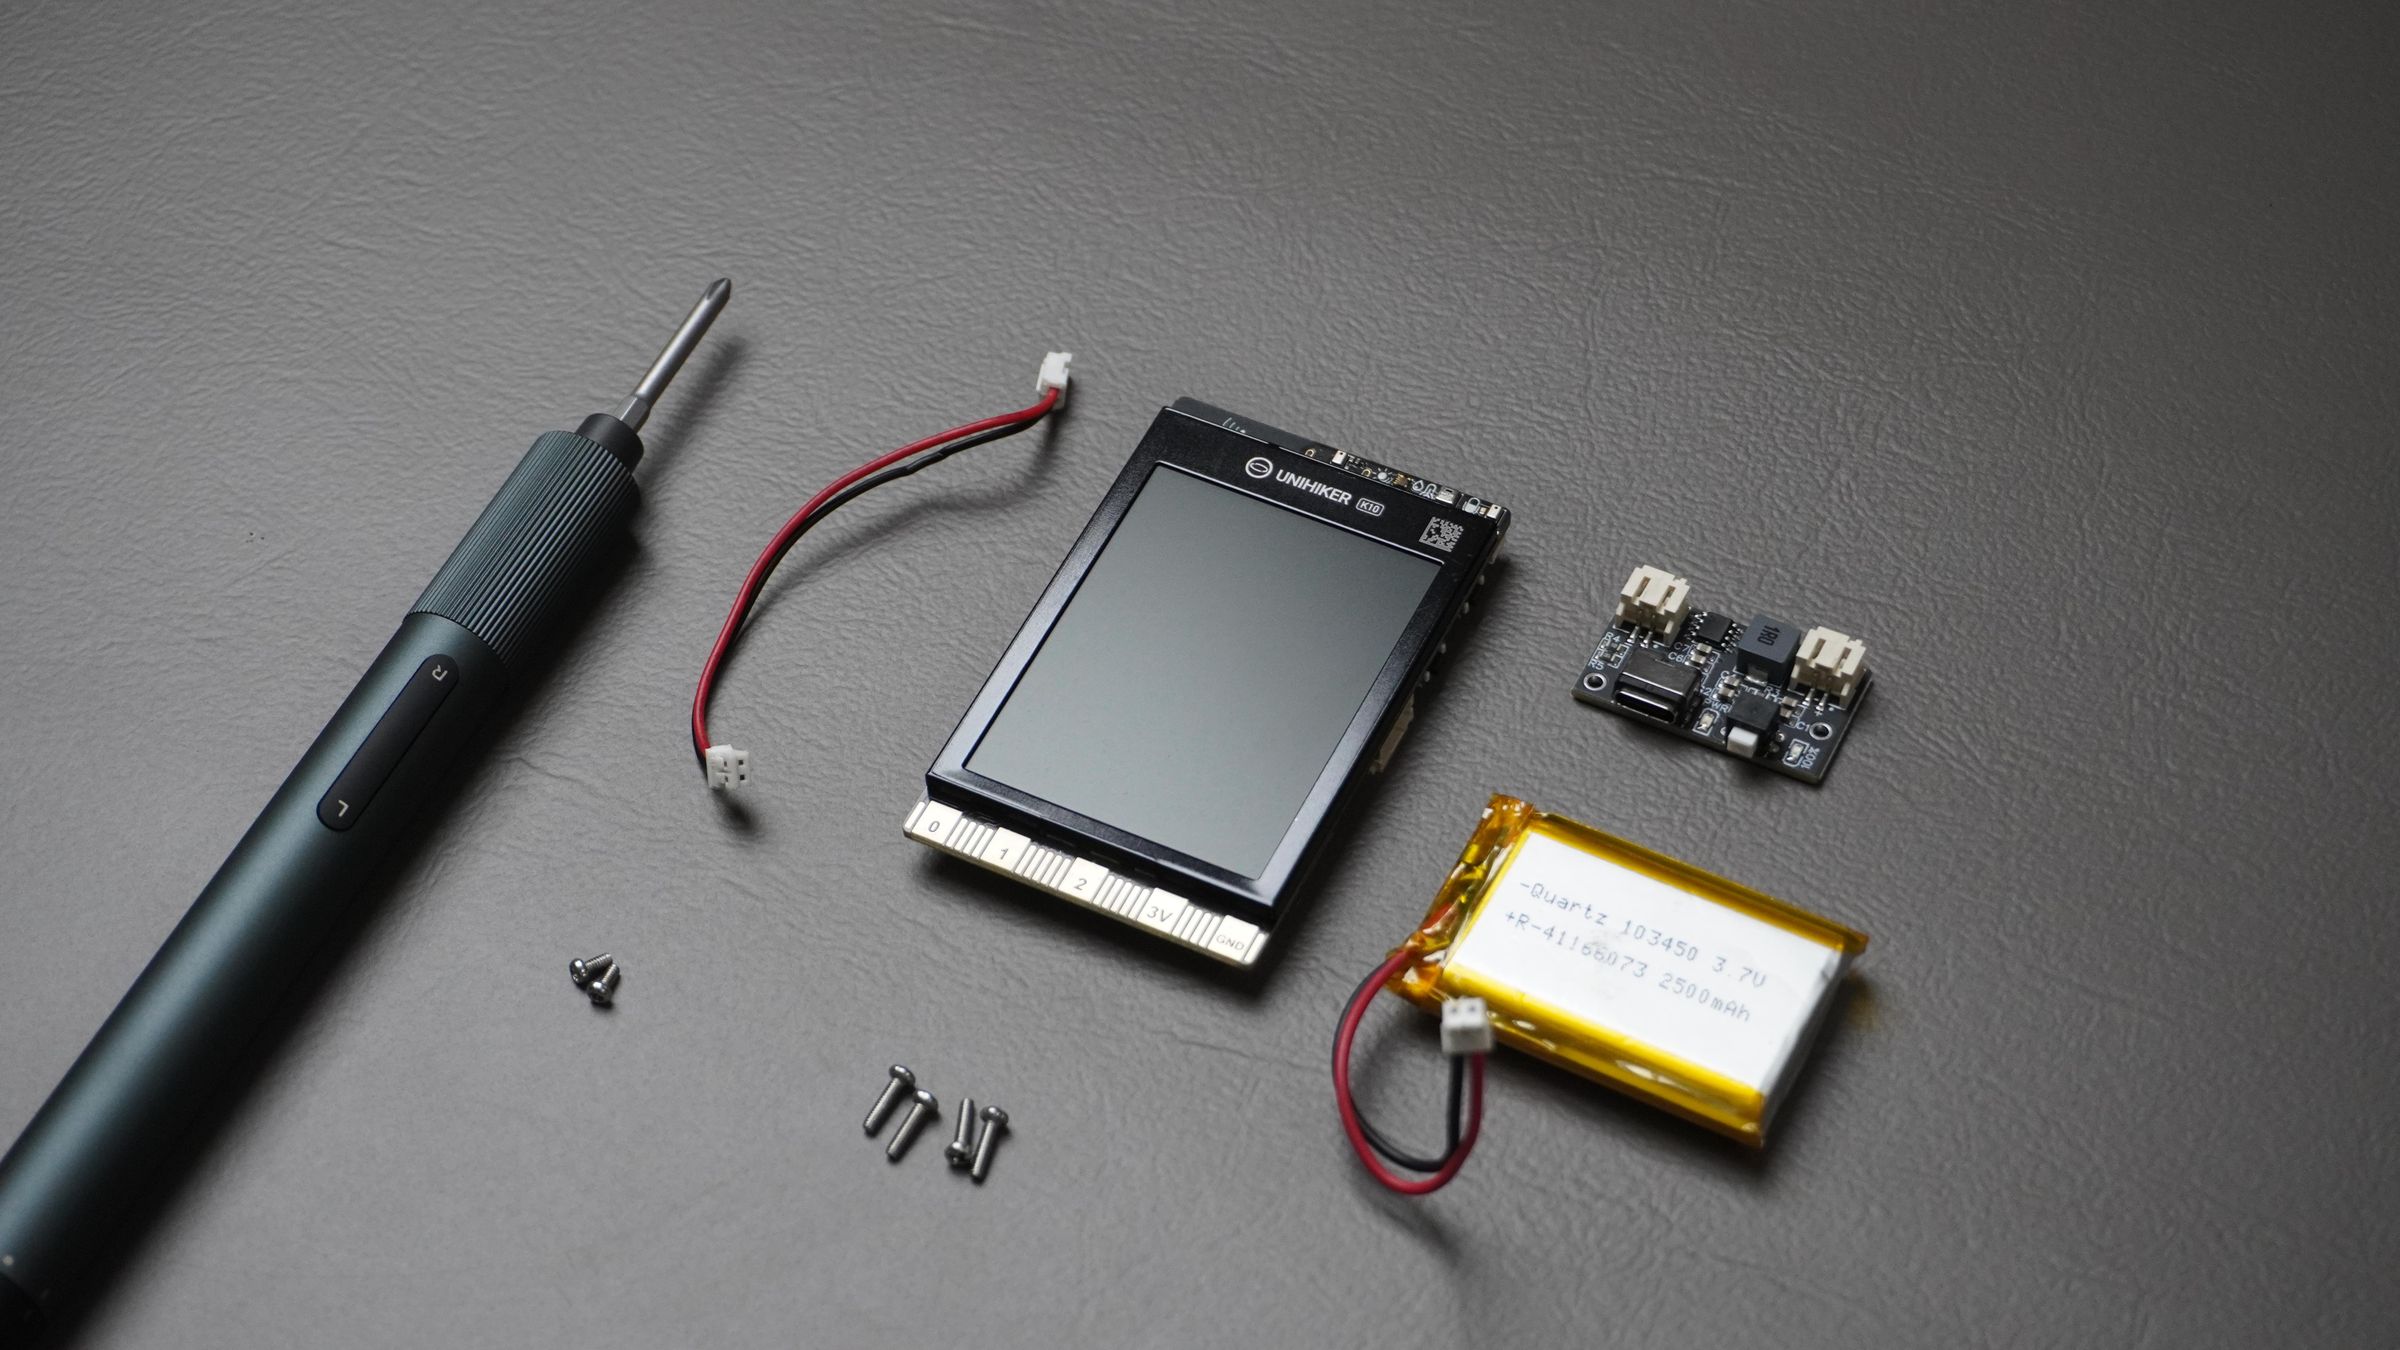
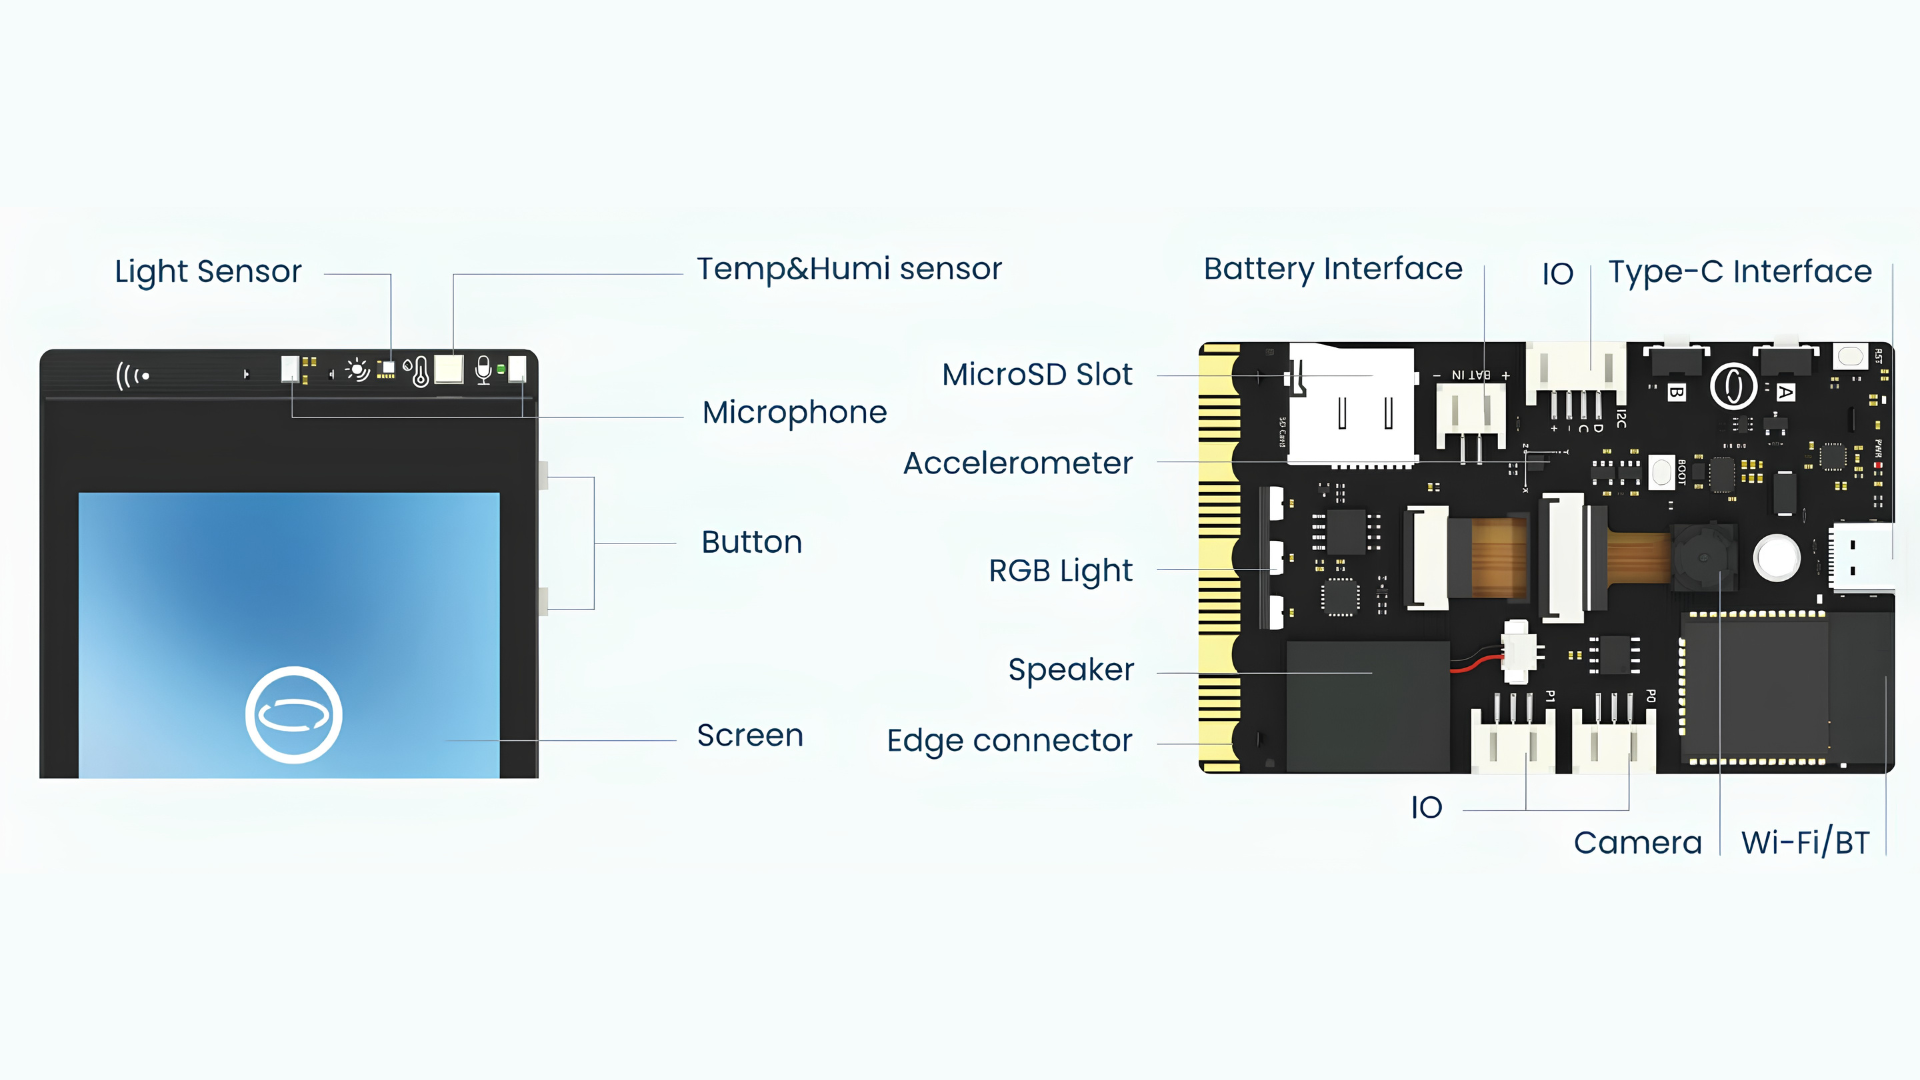
At the heart of AI Buddy is the DFRobot UNIHIKER K10, an ESP32-S3-powered development board packed with everything needed to build an interactive AI companion.
Unlike traditional ESP32 boards, the UNIHIKER K10 already includes a display, camera, microphone, speaker, sensors, buttons, RGB LEDs, and battery connector—all integrated into a compact form factor. This significantly reduces wiring and makes it an ideal platform for portable AI projects.
Key Features
- ESP32-S3 (Dual-Core Xtensa LX7 @ 240 MHz)
- 16 MB Flash
- 8 MB PSRAM
- 2.8" 240 × 320 Color LCD
- 2 MP Camera
- Dual MEMS Microphones
- 2W Speaker
- Wi-Fi (2.4 GHz)
- Bluetooth 5.0
- Temperature & Humidity Sensor
- Ambient Light Sensor
- 3-Axis Accelerometer
- 3× WS2812 RGB LEDs
- MicroSD Card Slot
- USB Type-C Programming Interface
- Dedicated Li-Po Battery Connector (3.0–6.0 V)
All these features make the UNIHIKER K10 a perfect choice for an AI chatbot capable of voice interaction, expressive animations, and future expansion.
Why I Chose the UNIHIKER K10
For AI Buddy, I wanted a board that could handle voice conversations while remaining compact and beginner-friendly. The UNIHIKER K10 already provides:
- 🎤 Dual microphones for voice input
- 🔊 Built-in speaker for AI responses
- 🖥️ Color display for animated expressions
- 📷 Camera for future AI vision features
- 📶 Wi-Fi for connecting to AI services
- 🔋 Battery connector for portable operation
This allowed me to focus on designing the enclosure and user experience instead of building complex hardware from scratch.
One Limitation
The UNIHIKER K10 includes a 2-pin Li-Po battery connector, making it easy to power the board from a rechargeable battery.
However, it does not include an onboard battery charging or battery protection circuit. This means the battery cannot be safely charged through the board itself, nor does it provide overcharge, over-discharge, or short-circuit protection.
Designing the Custom BMS PCB
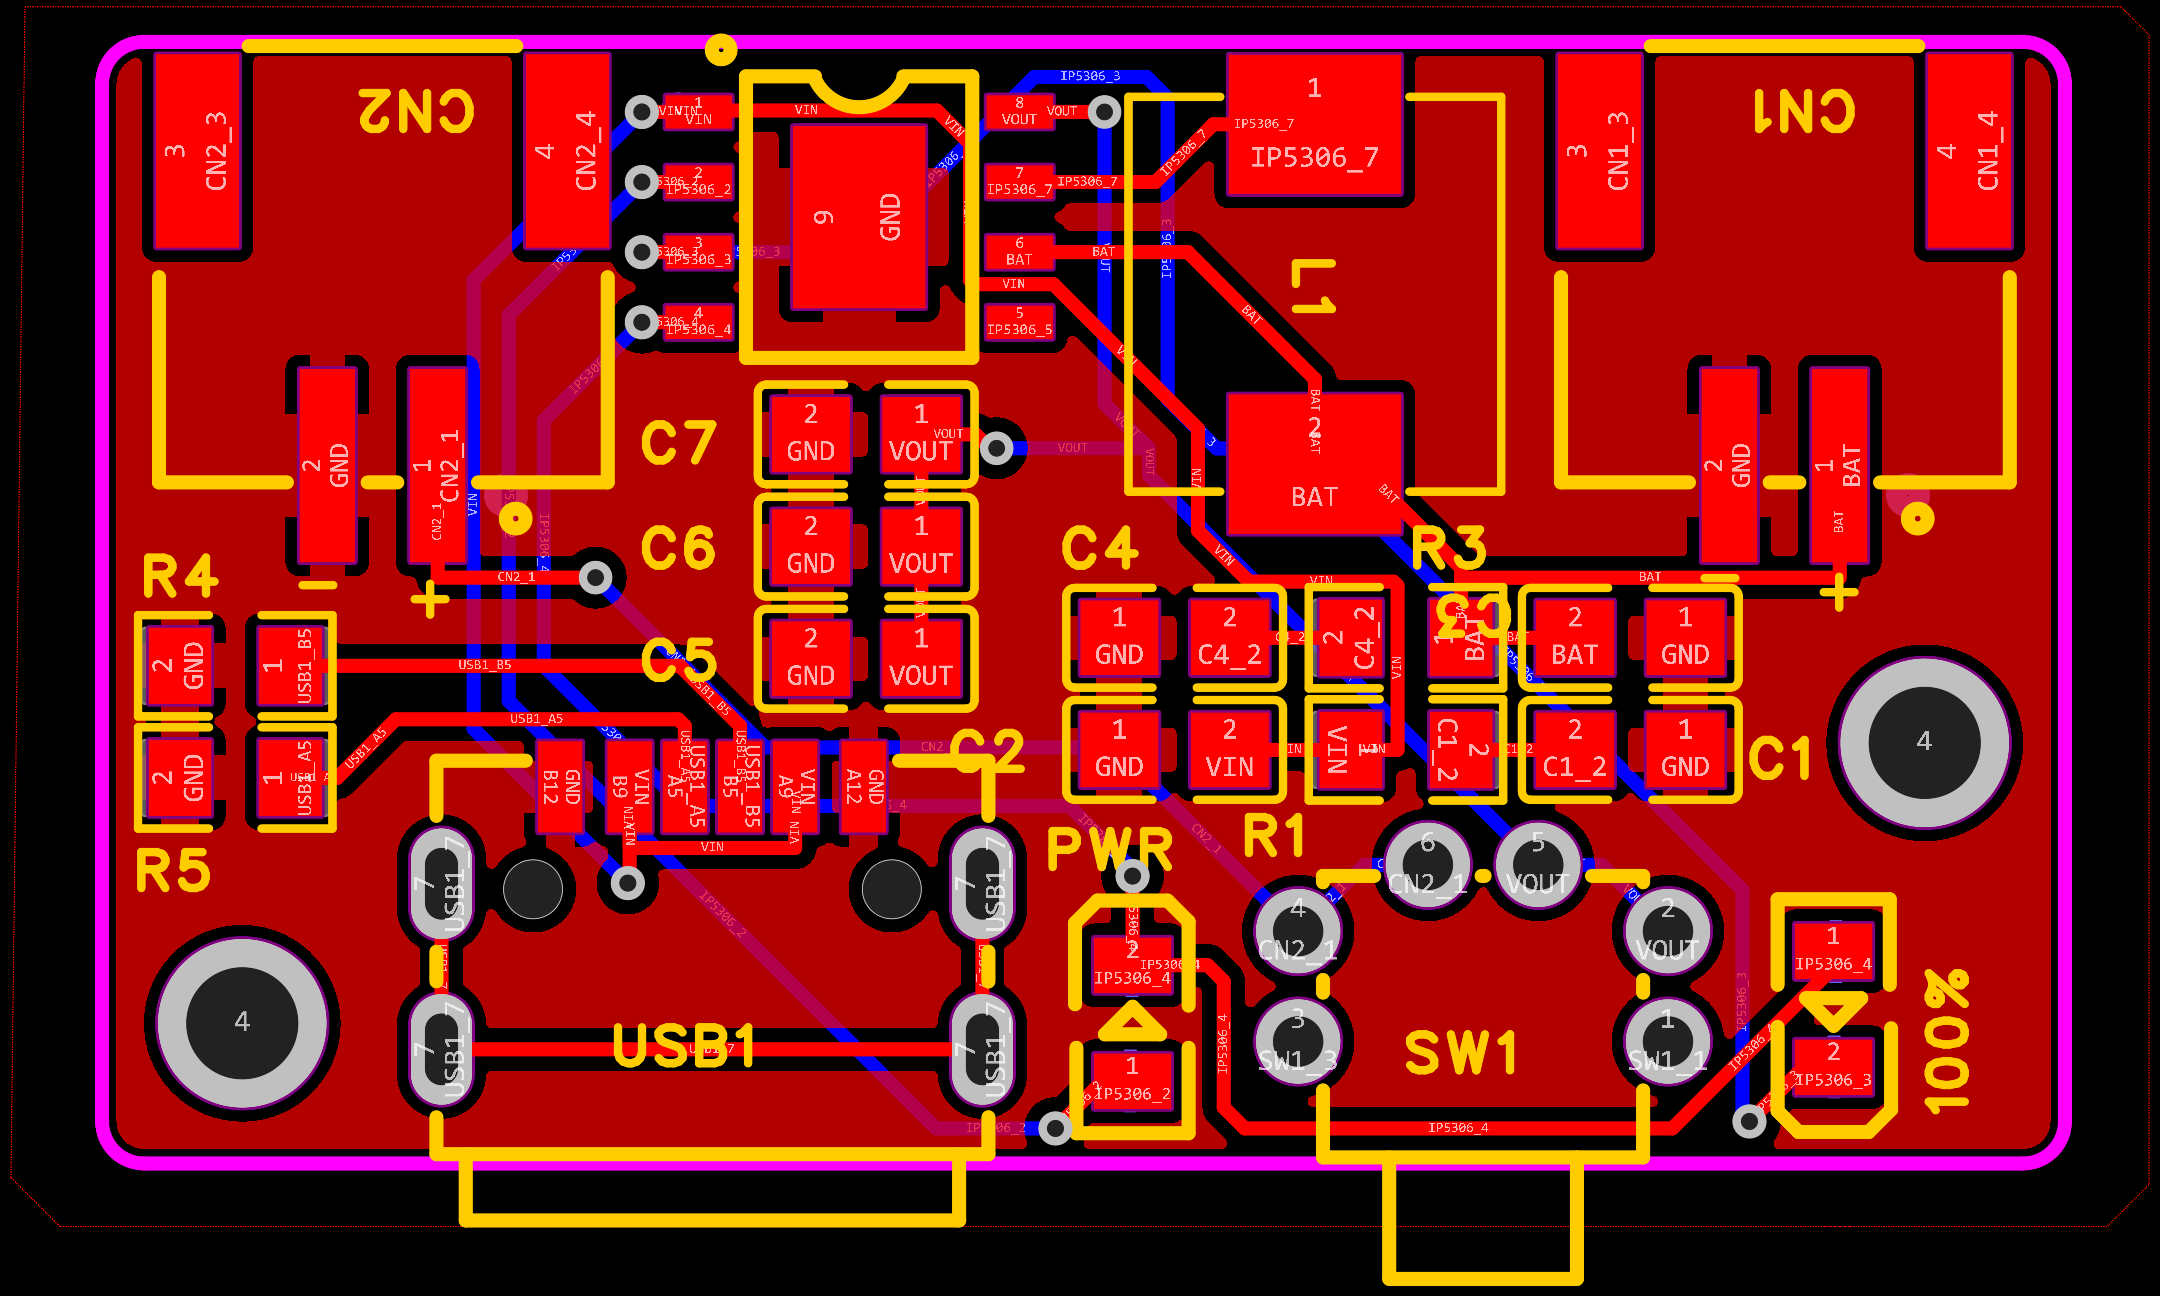
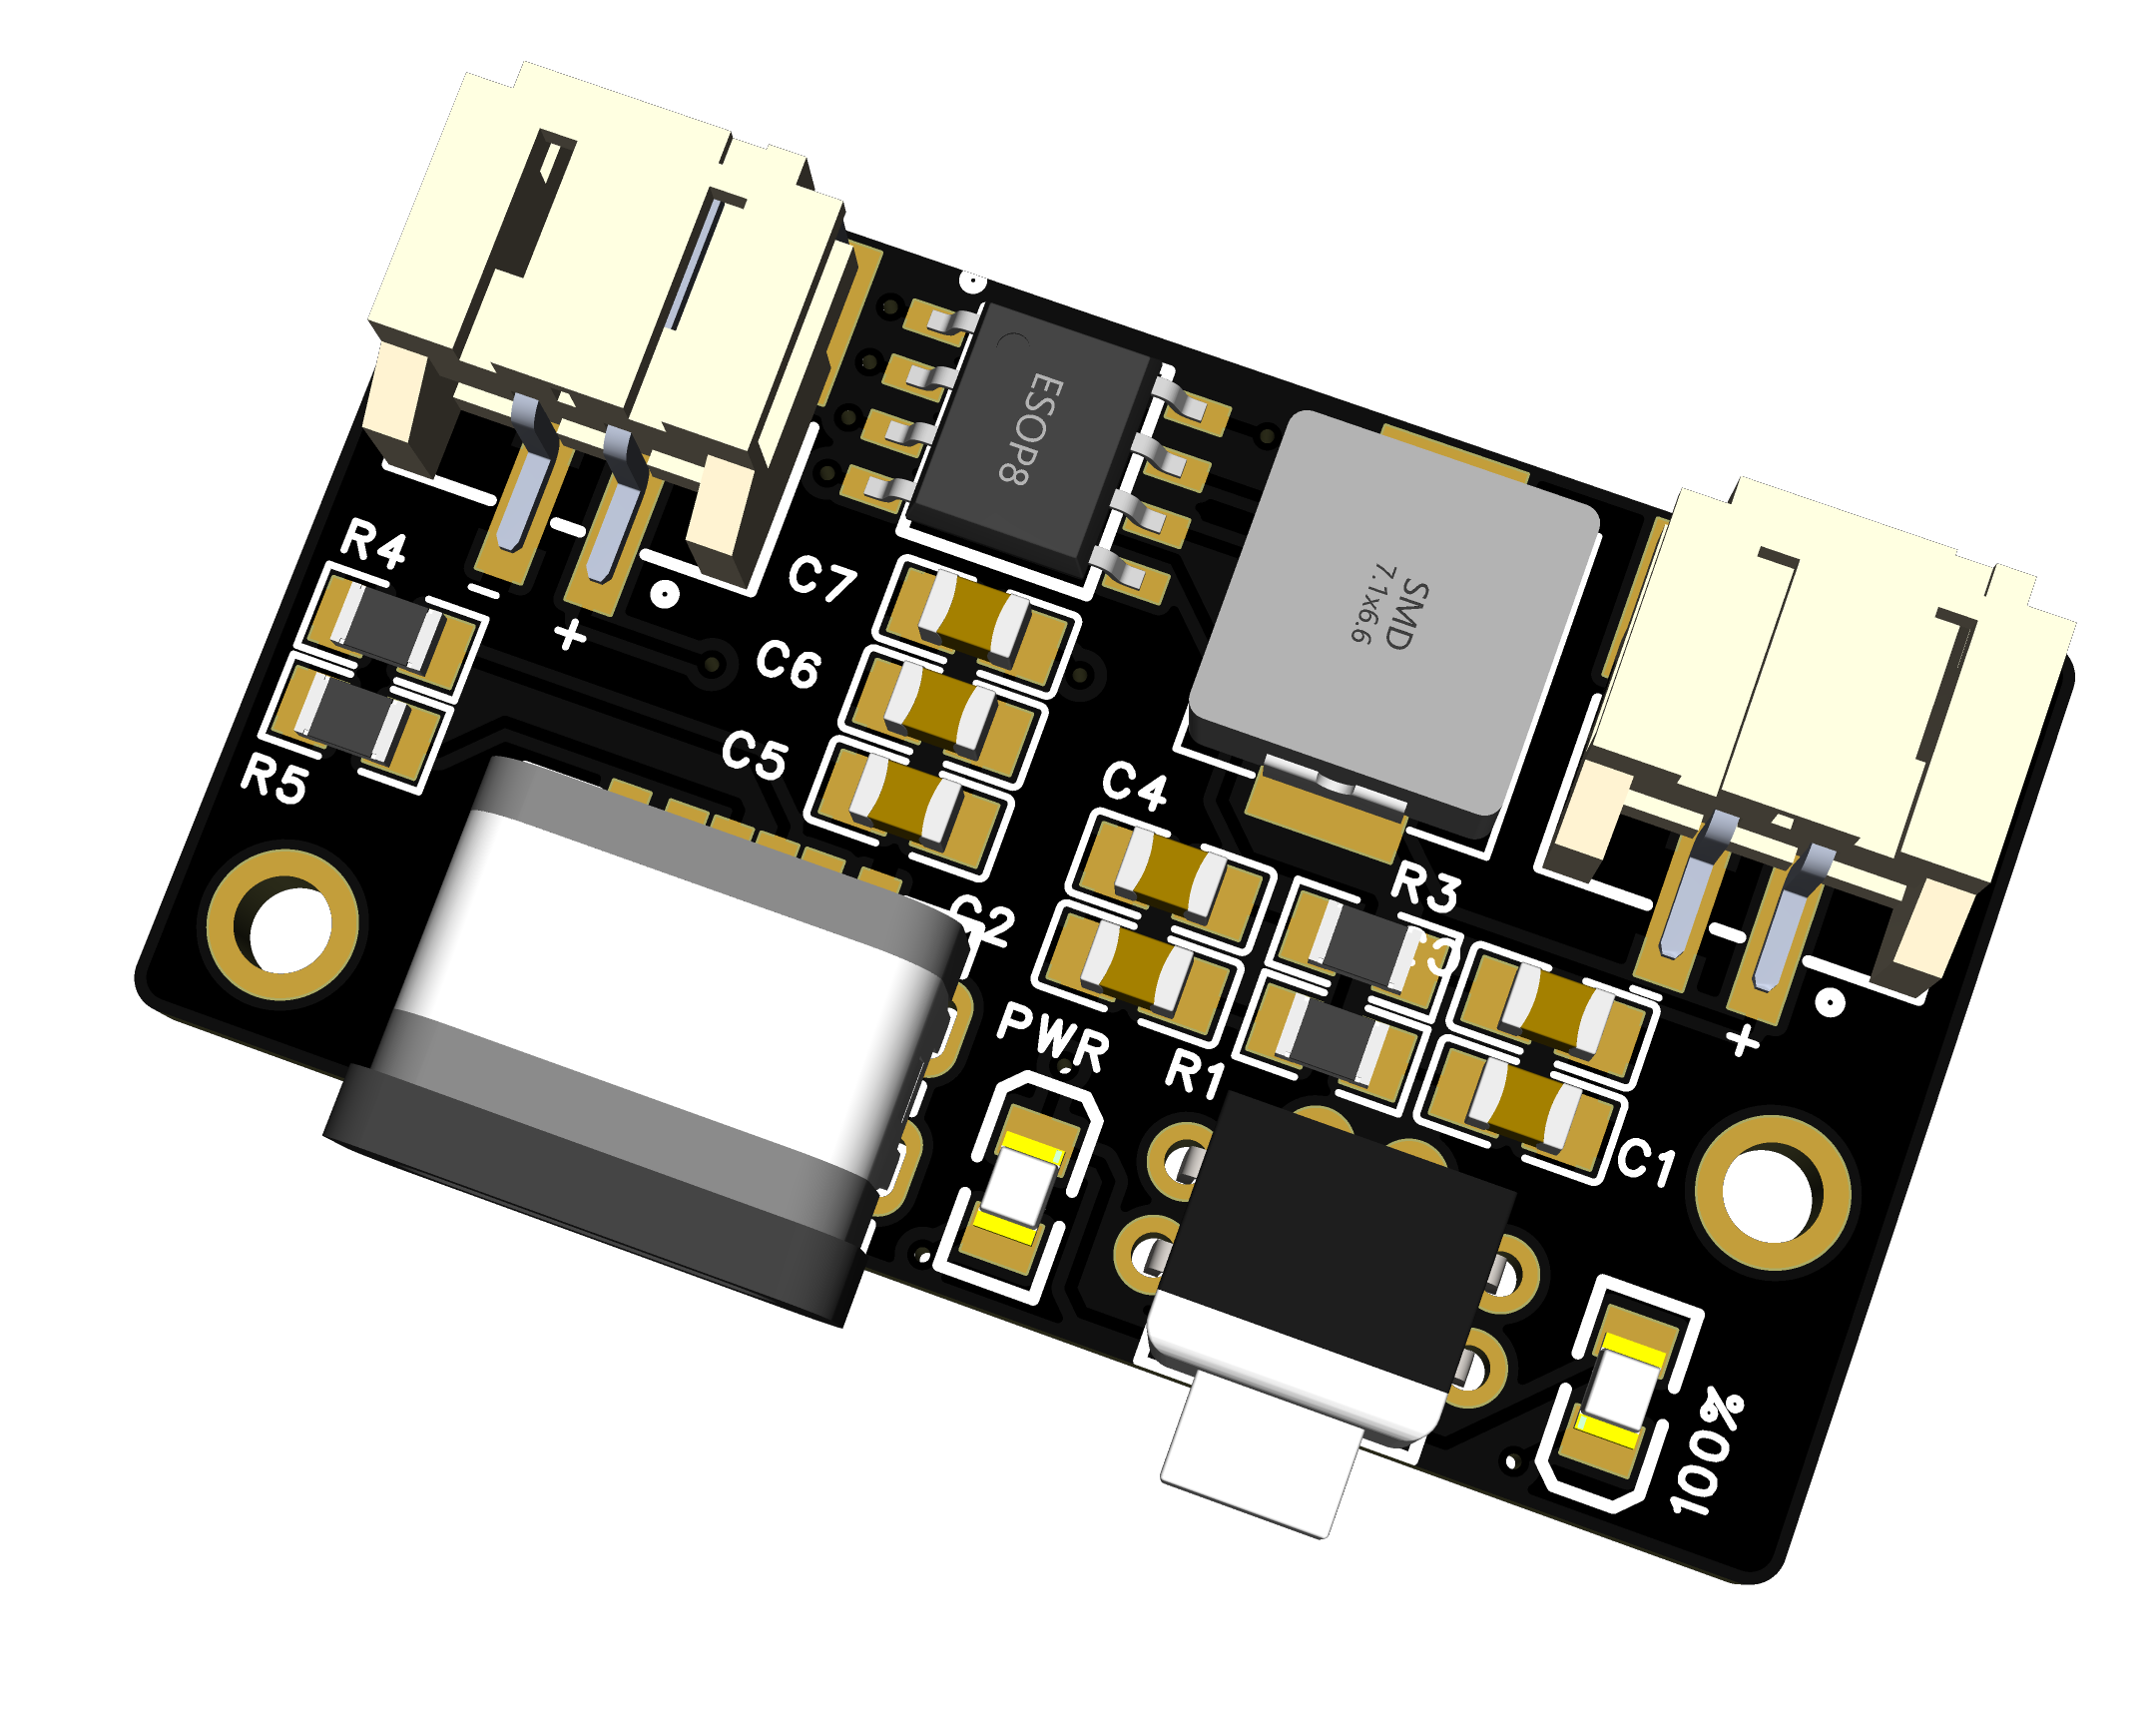
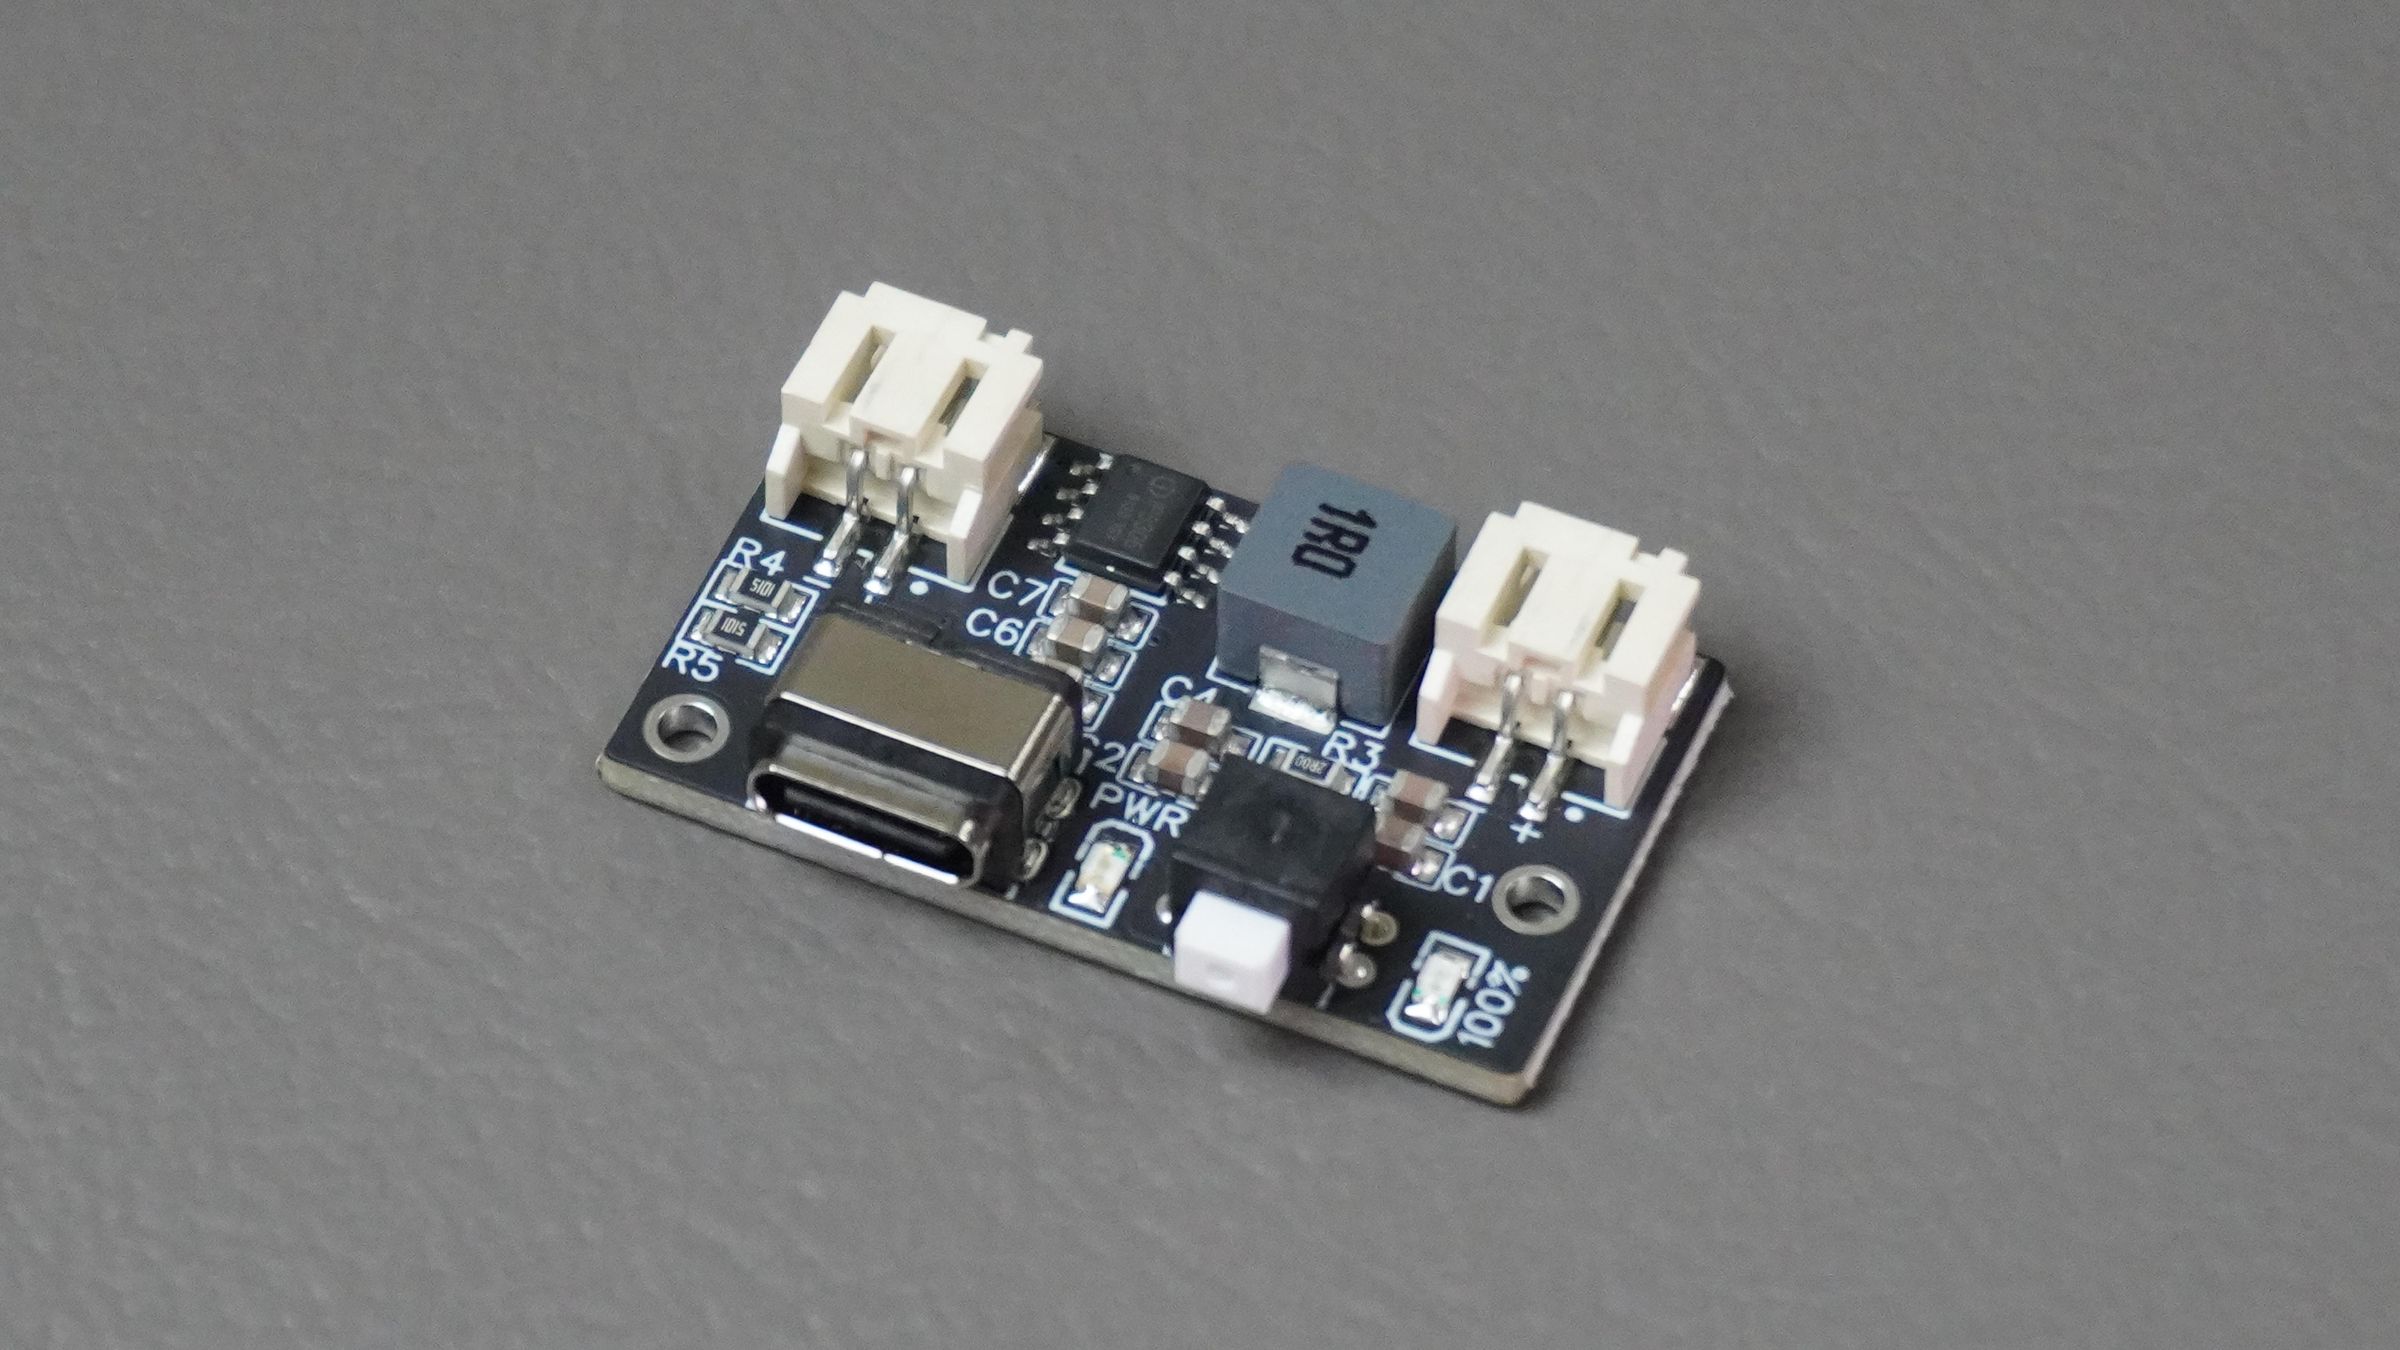
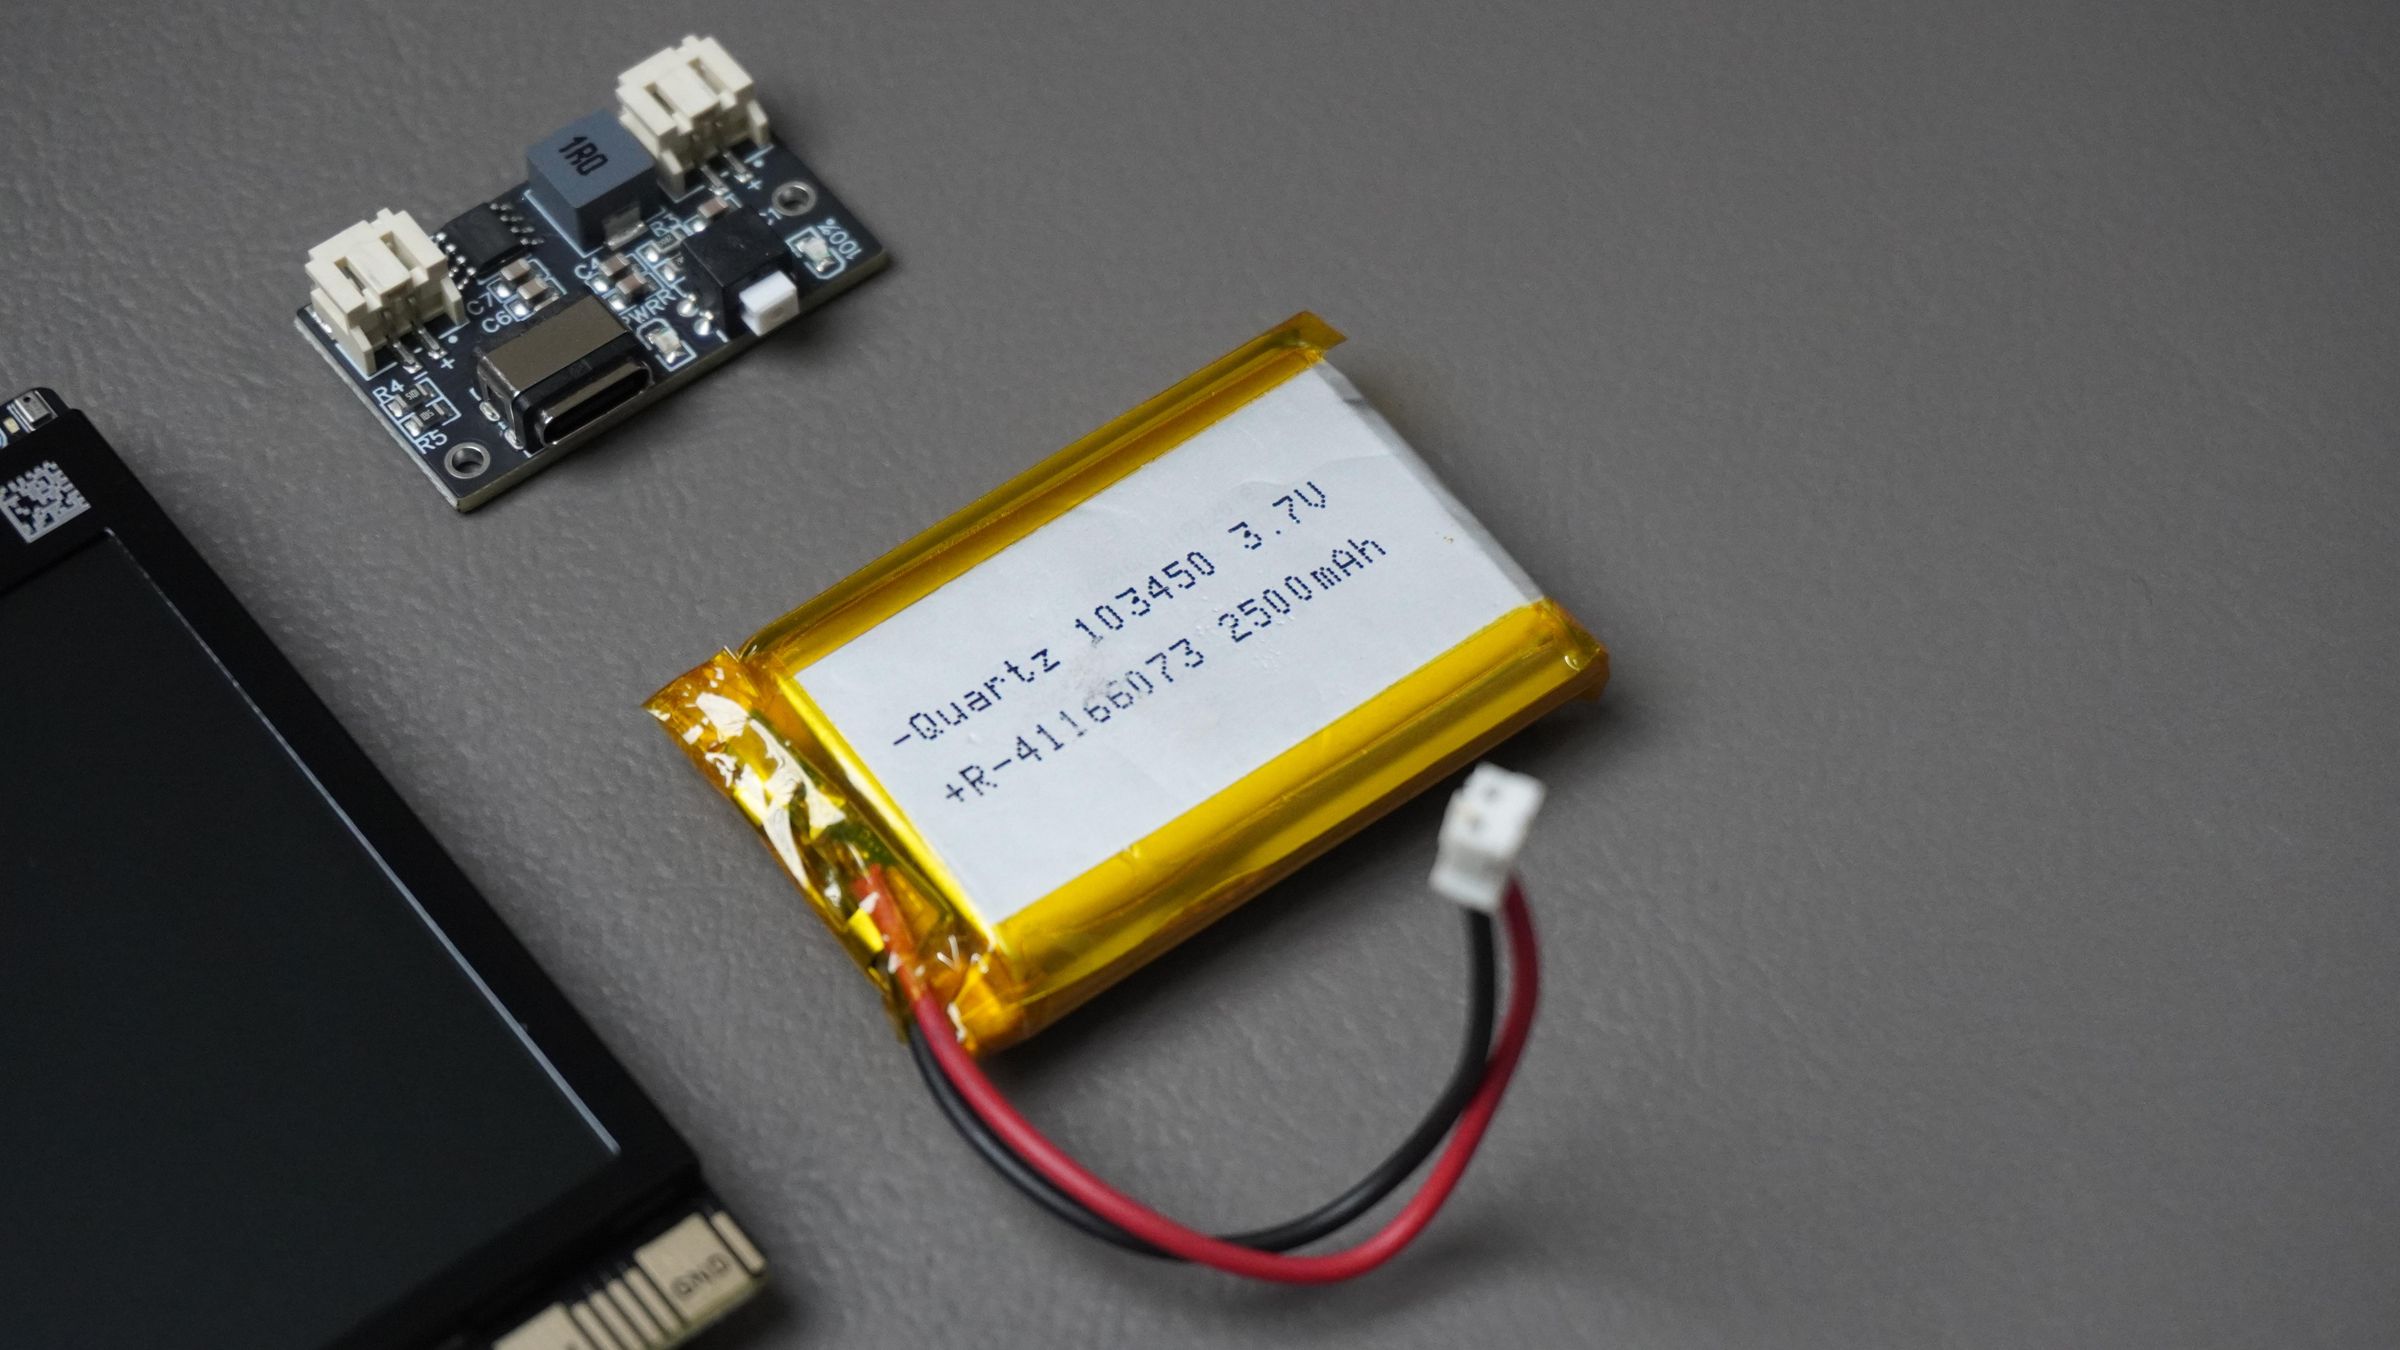
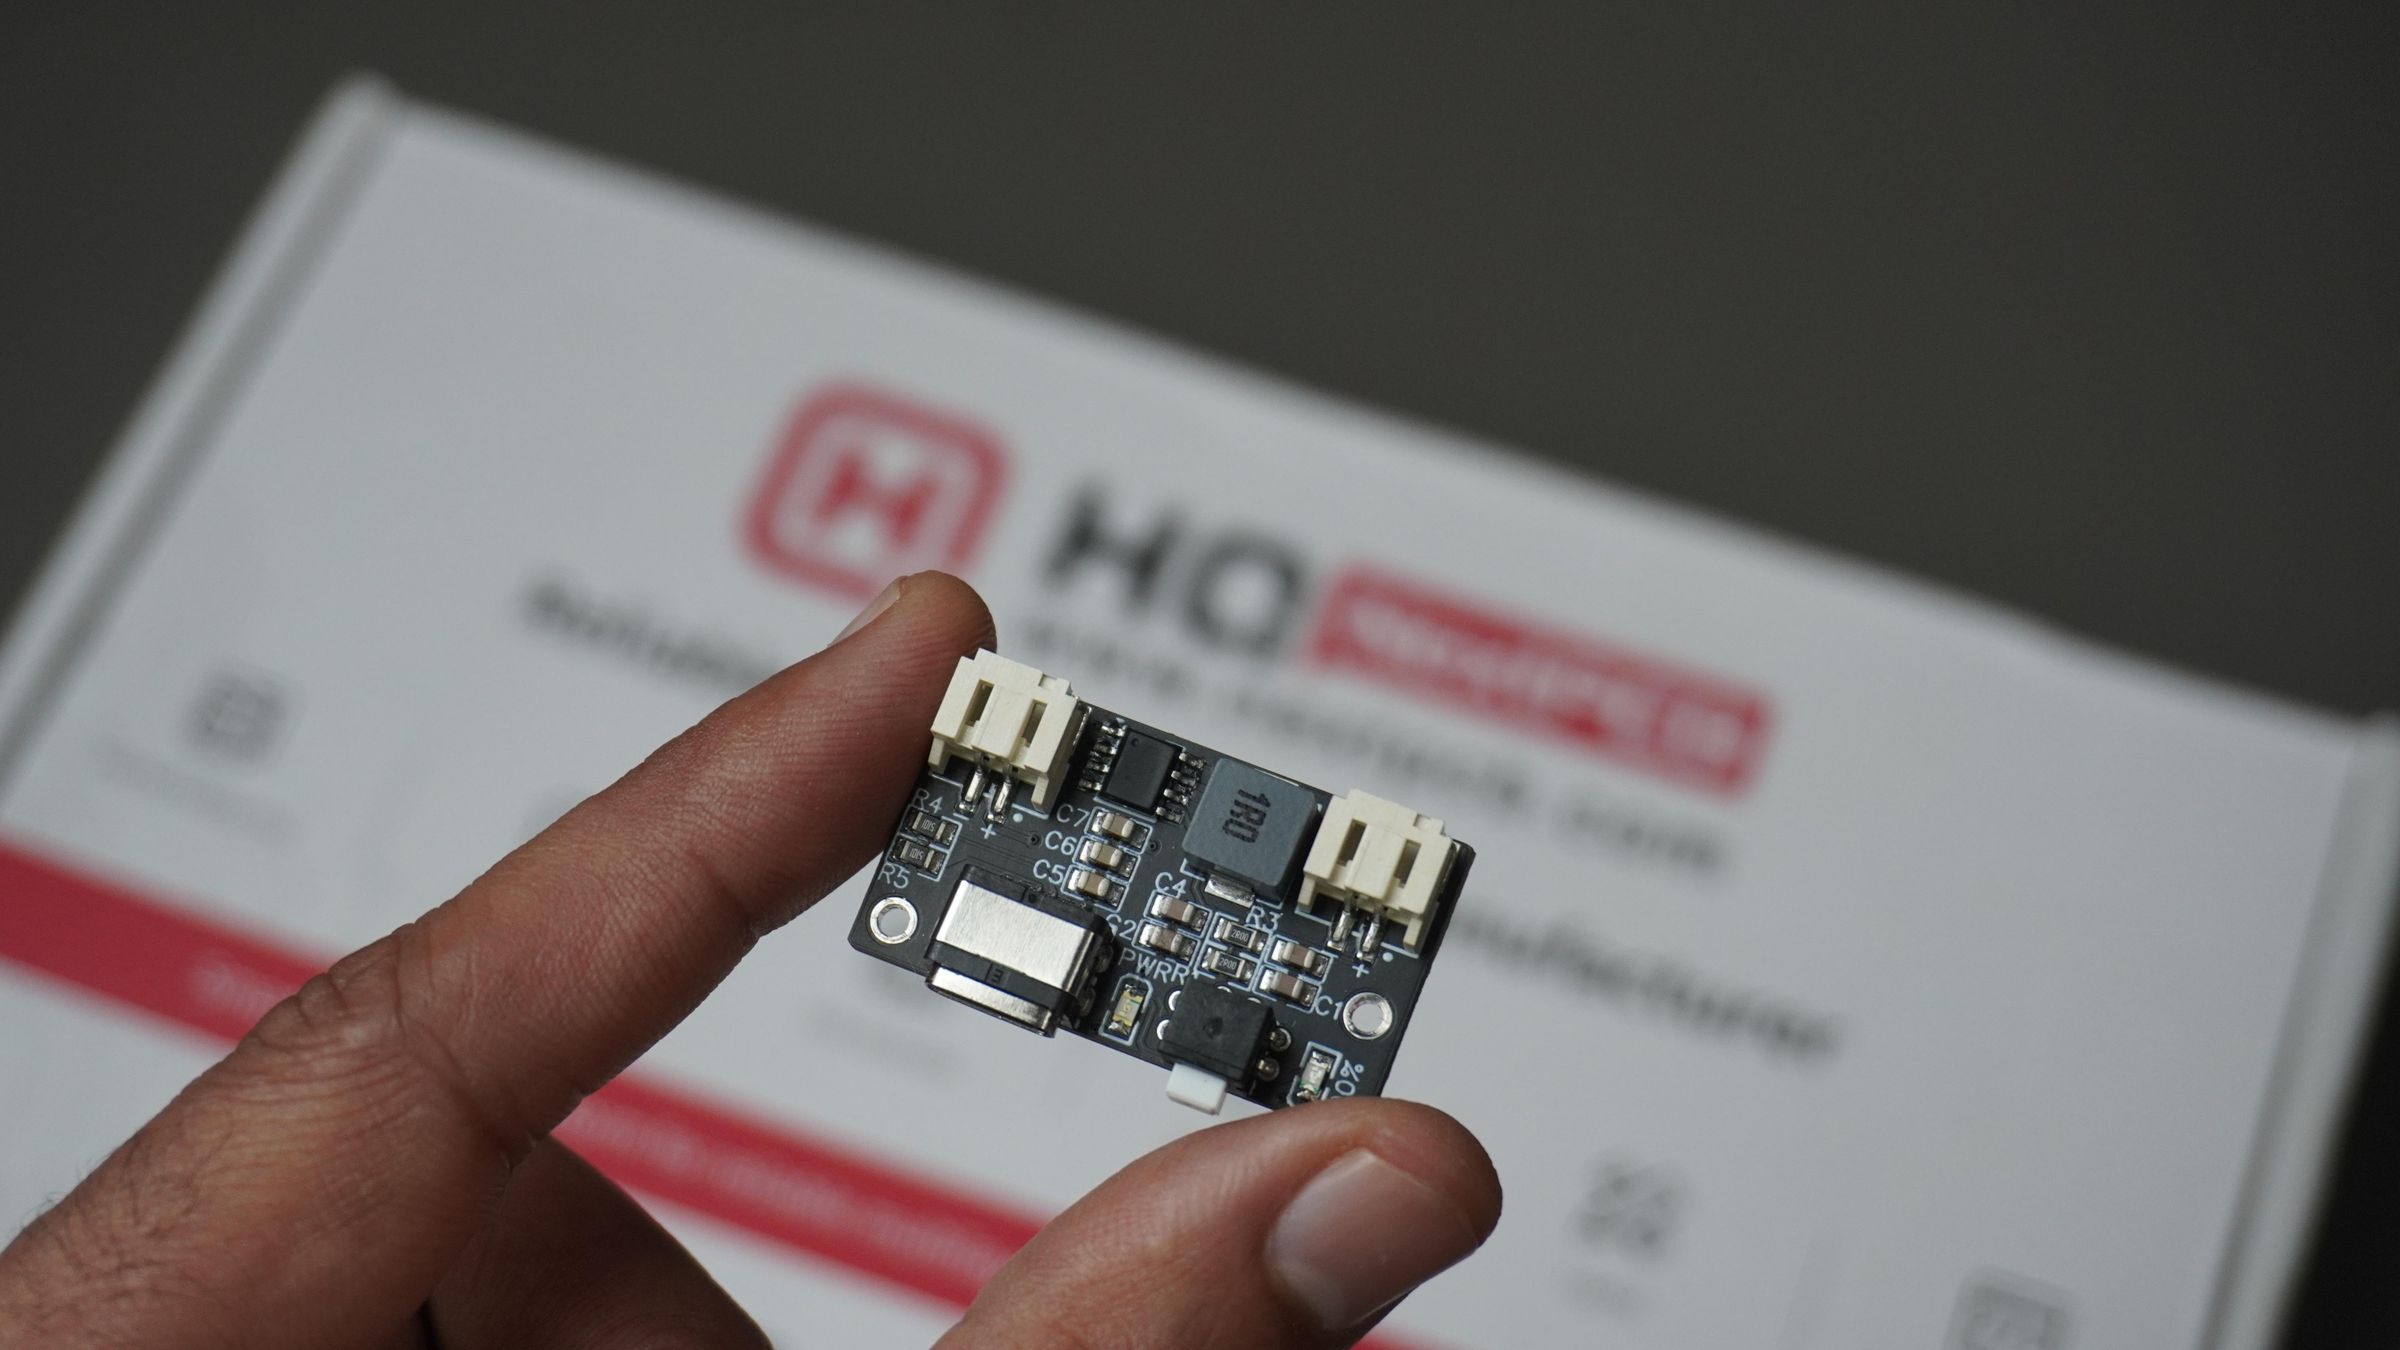
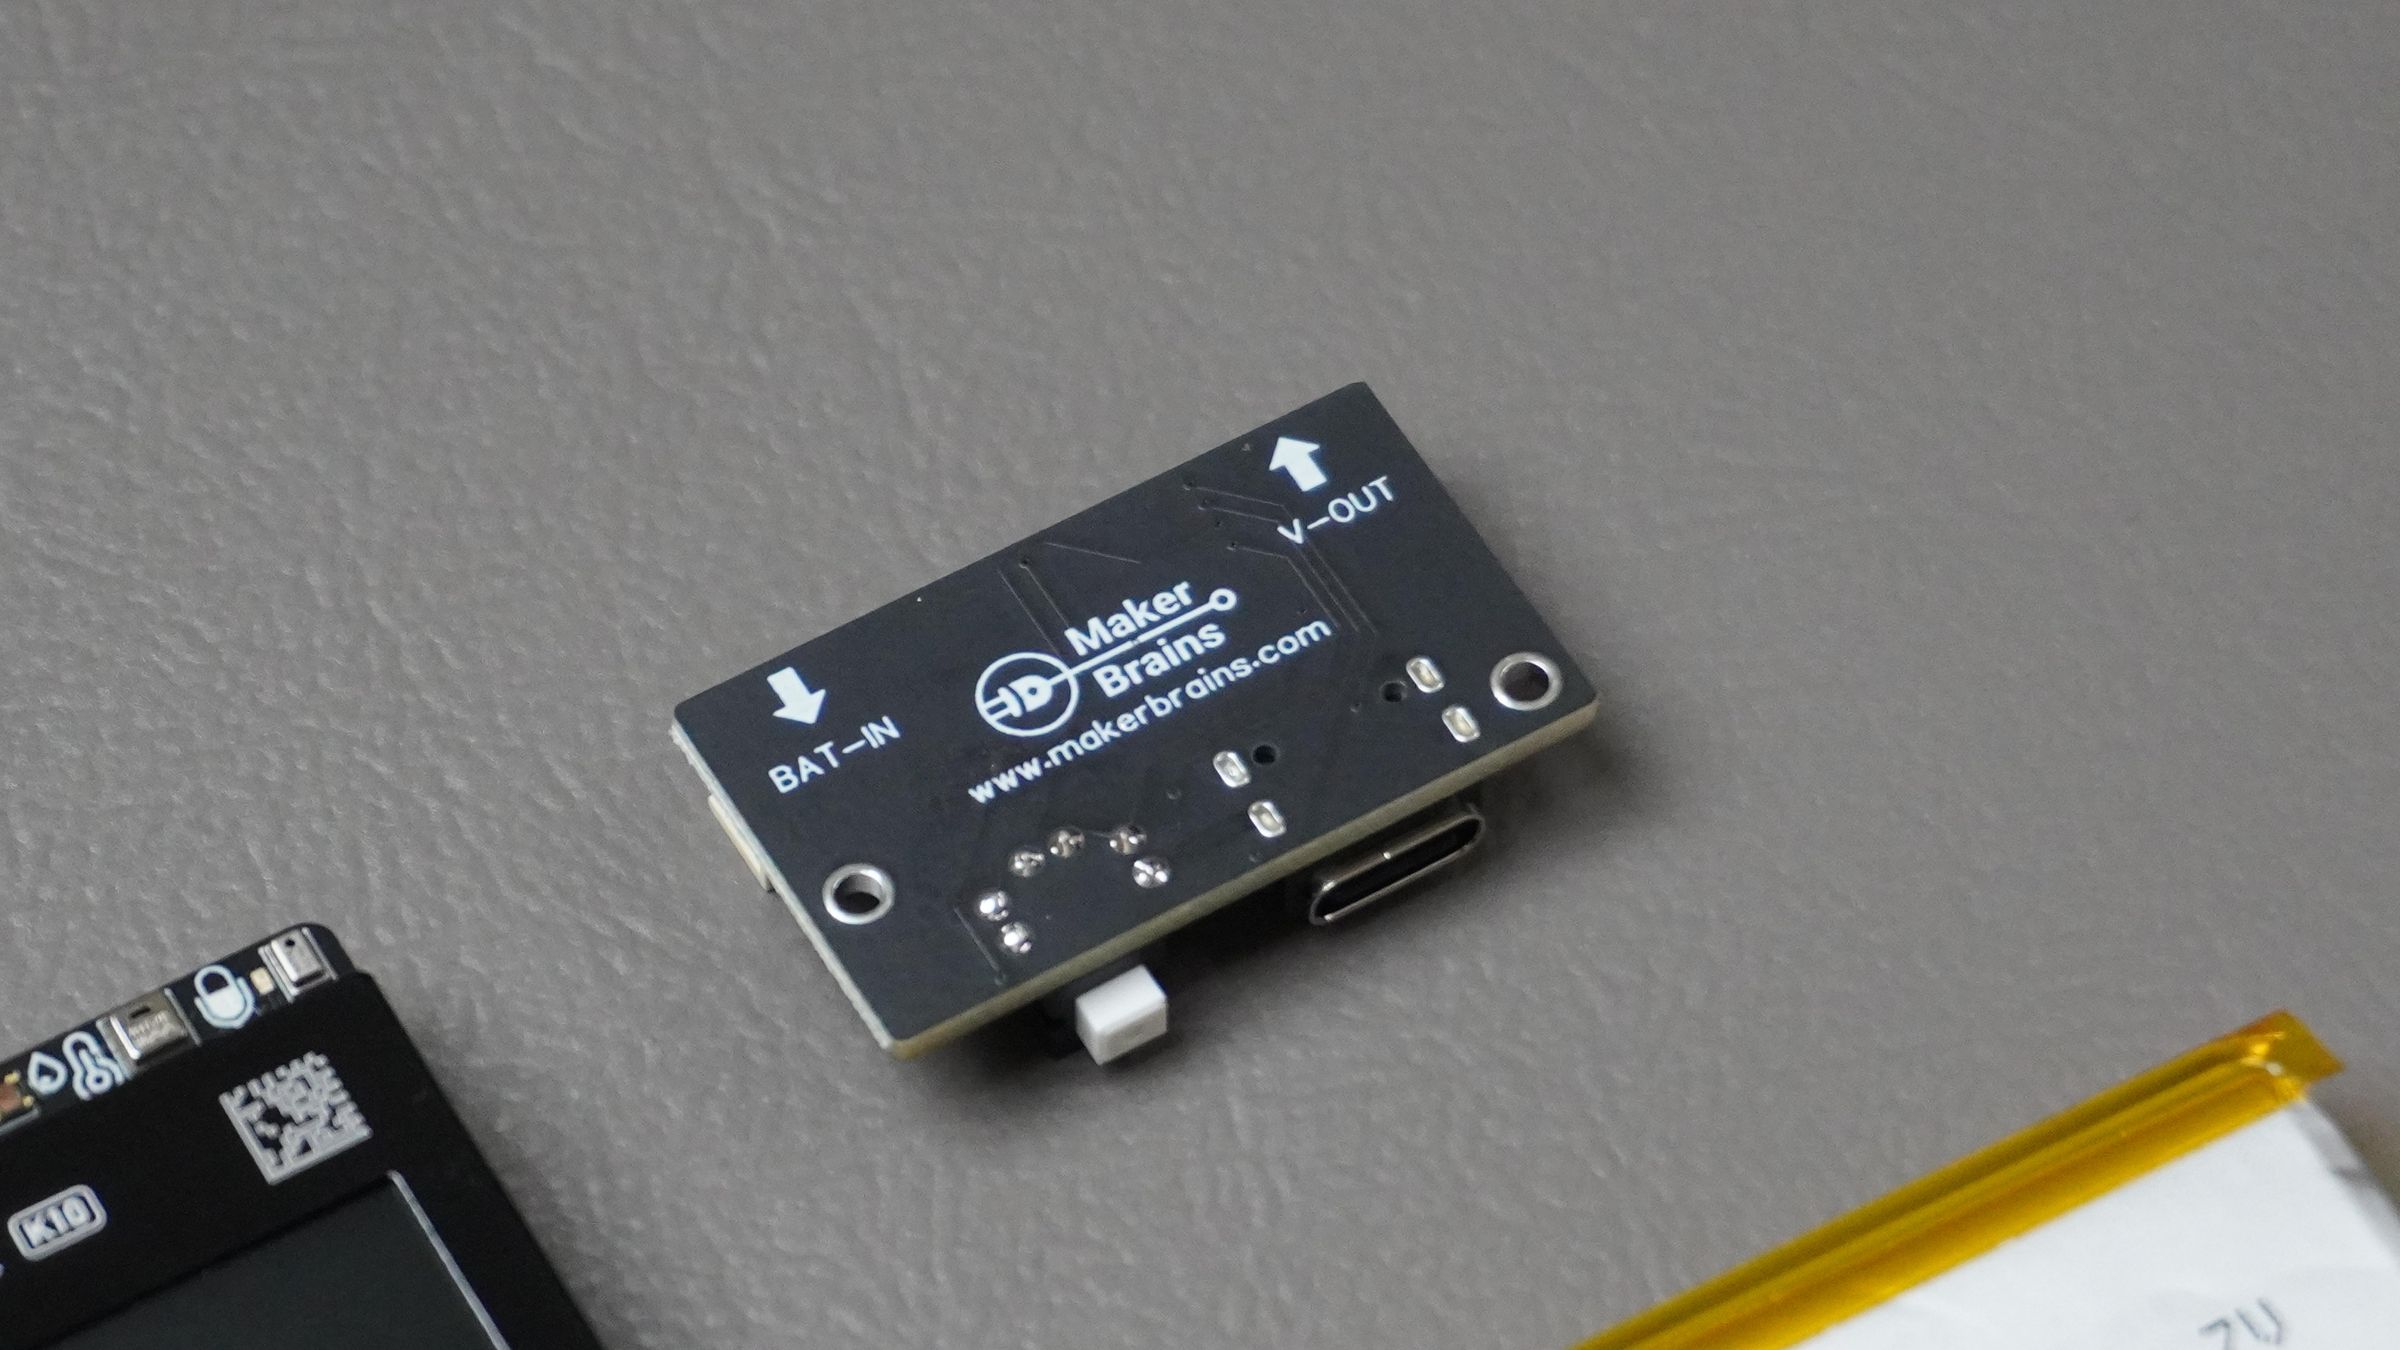
Although the DFRobot UNIHIKER K10 includes a dedicated Li-Po battery connector, it does not provide onboard battery charging or battery protection. To make AI Buddy truly portable and easy to recharge, I designed a compact Battery Management System (BMS) that fits neatly inside the enclosure.
The PCB is based on the IP5306 Power Management IC, which provides safe battery charging and power management for single-cell Li-Po batteries.
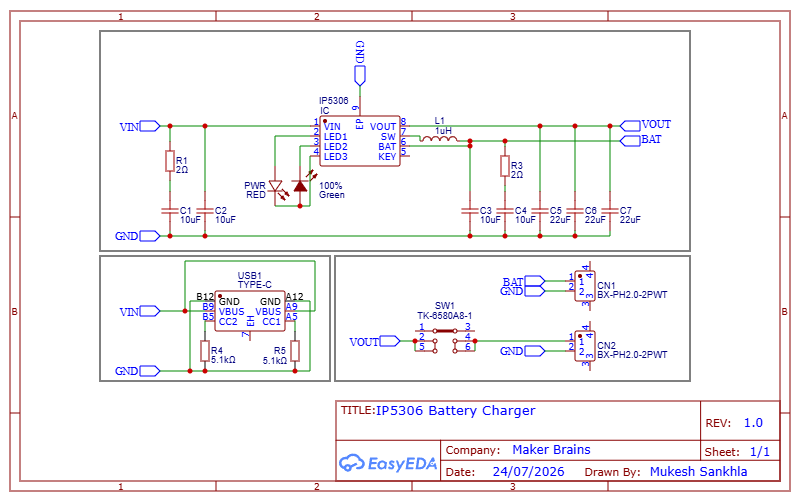
Features
- 🔋 USB Type-C Li-Po Battery Charging
- ⚡ IP5306 Power Management IC
- 🛡️ Battery Charging & Protection
- 🔘 On-board Power Button
- 🔌 2 × JST-PH 2-Pin Connectors
- Battery Input
- Power Output to UNIHIKER K10
- 📏 Compact PCB designed specifically for the AI Buddy enclosure
The dual JST connectors make the wiring extremely simple. Just connect the battery to the Battery IN connector and the UNIHIKER K10 to the Battery OUT connector—no additional wiring or soldering is required during final assembly.
PCB Design & Manufacturing
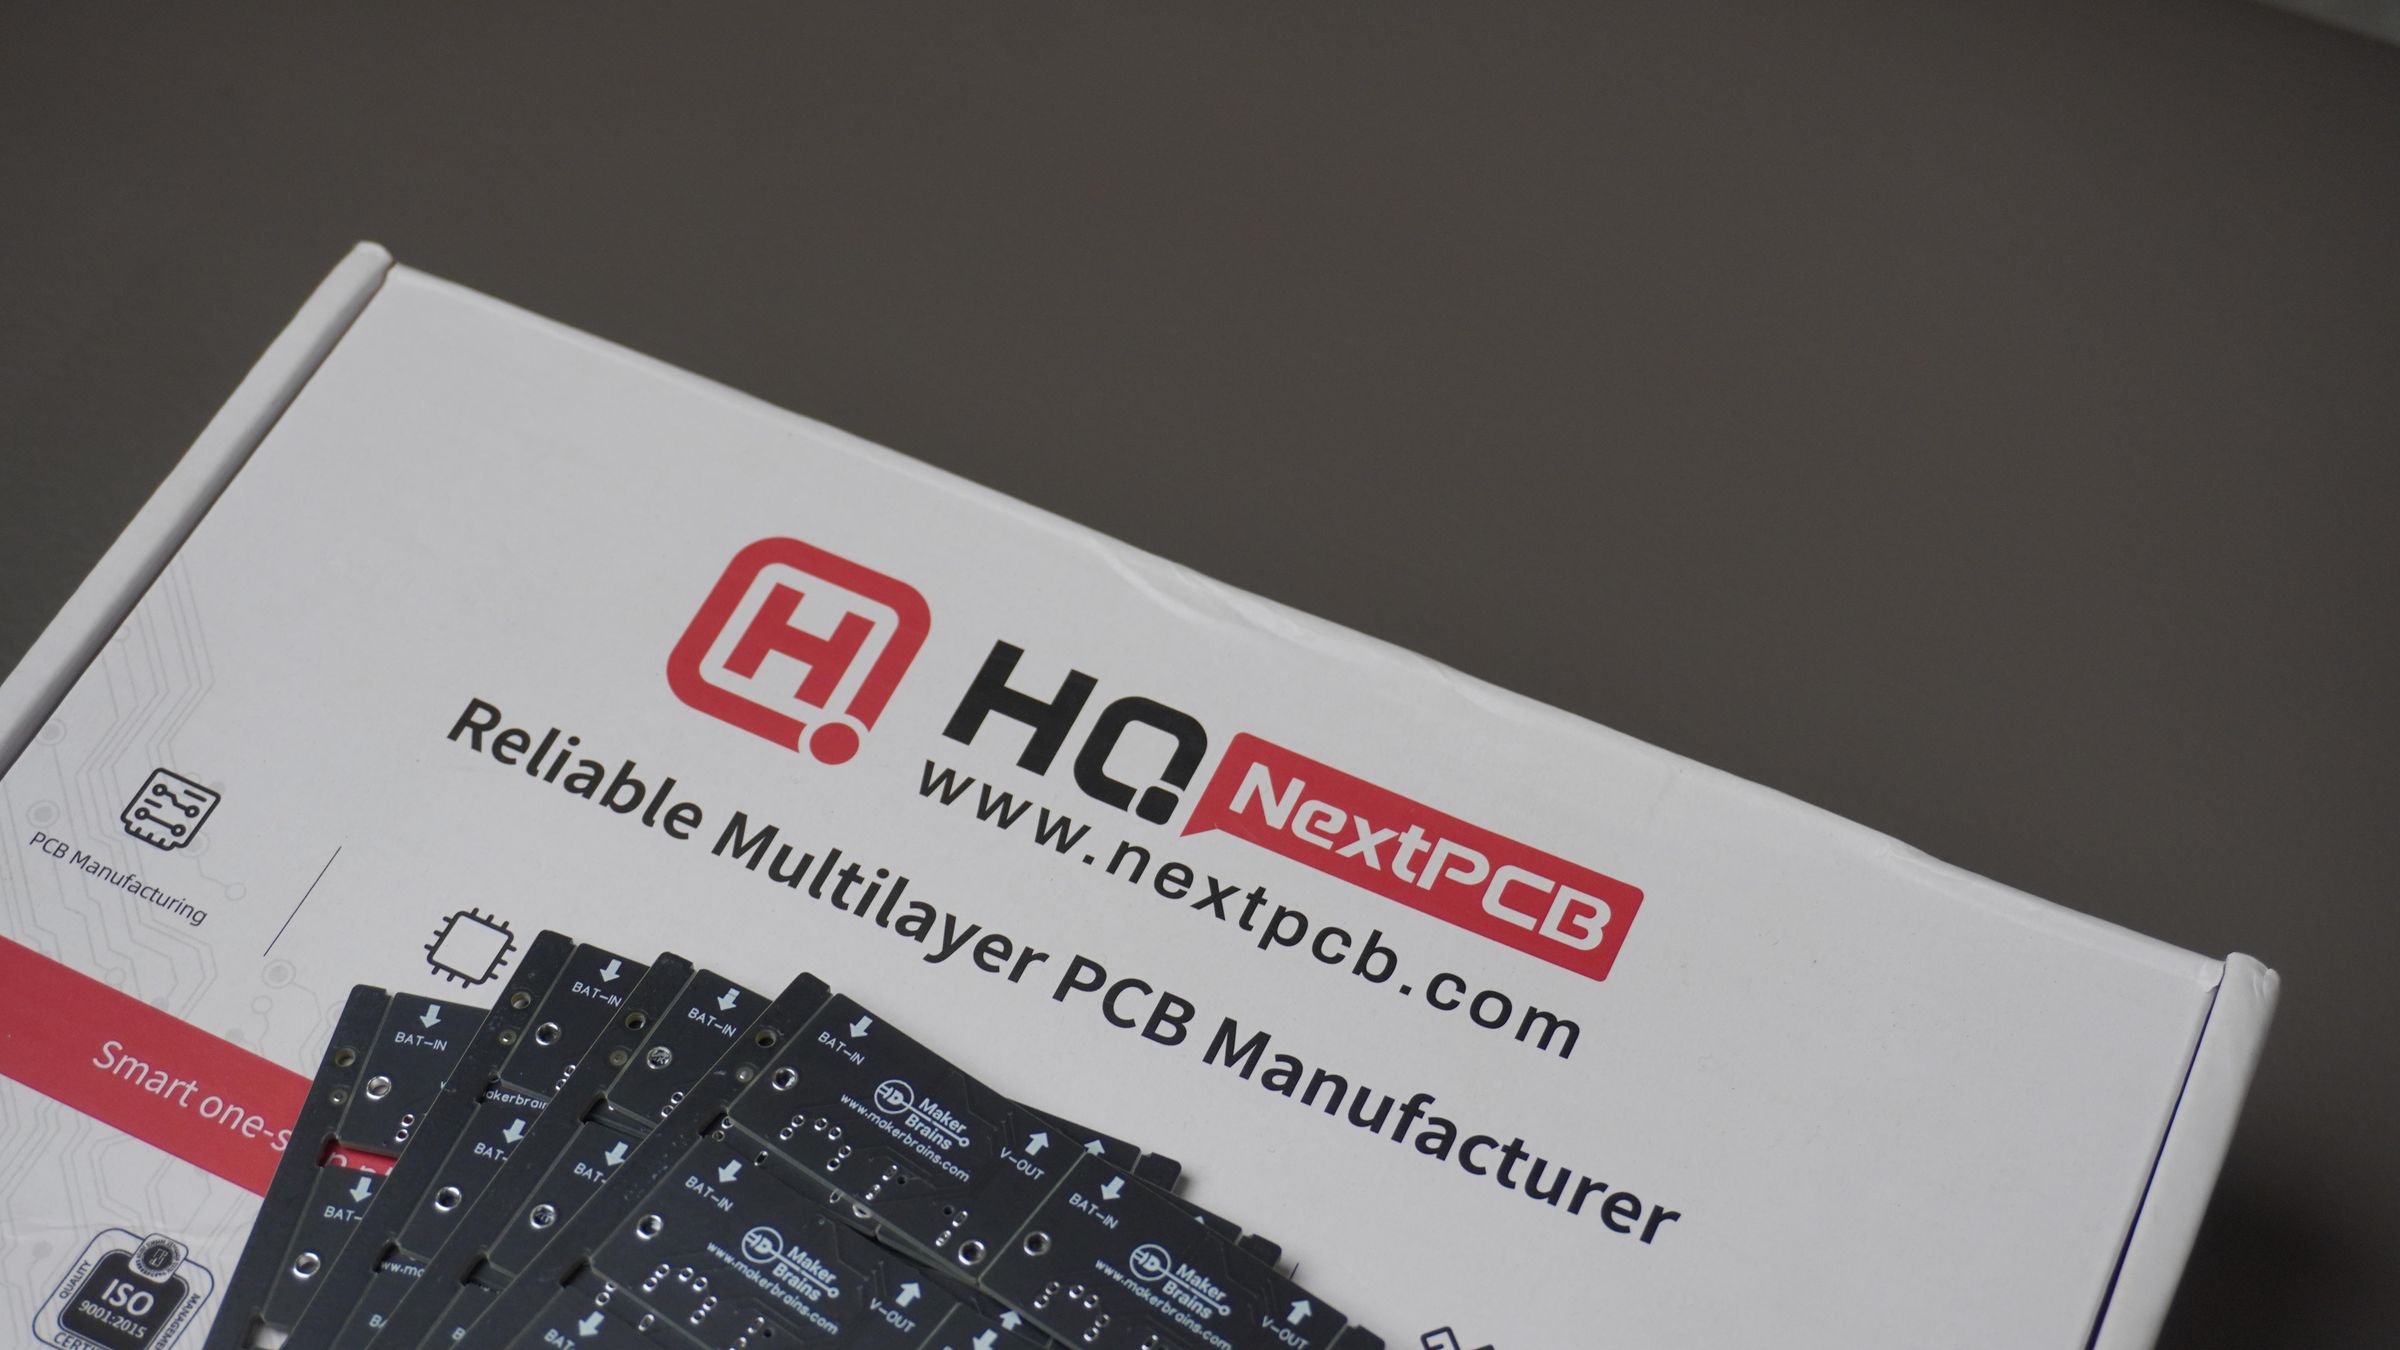
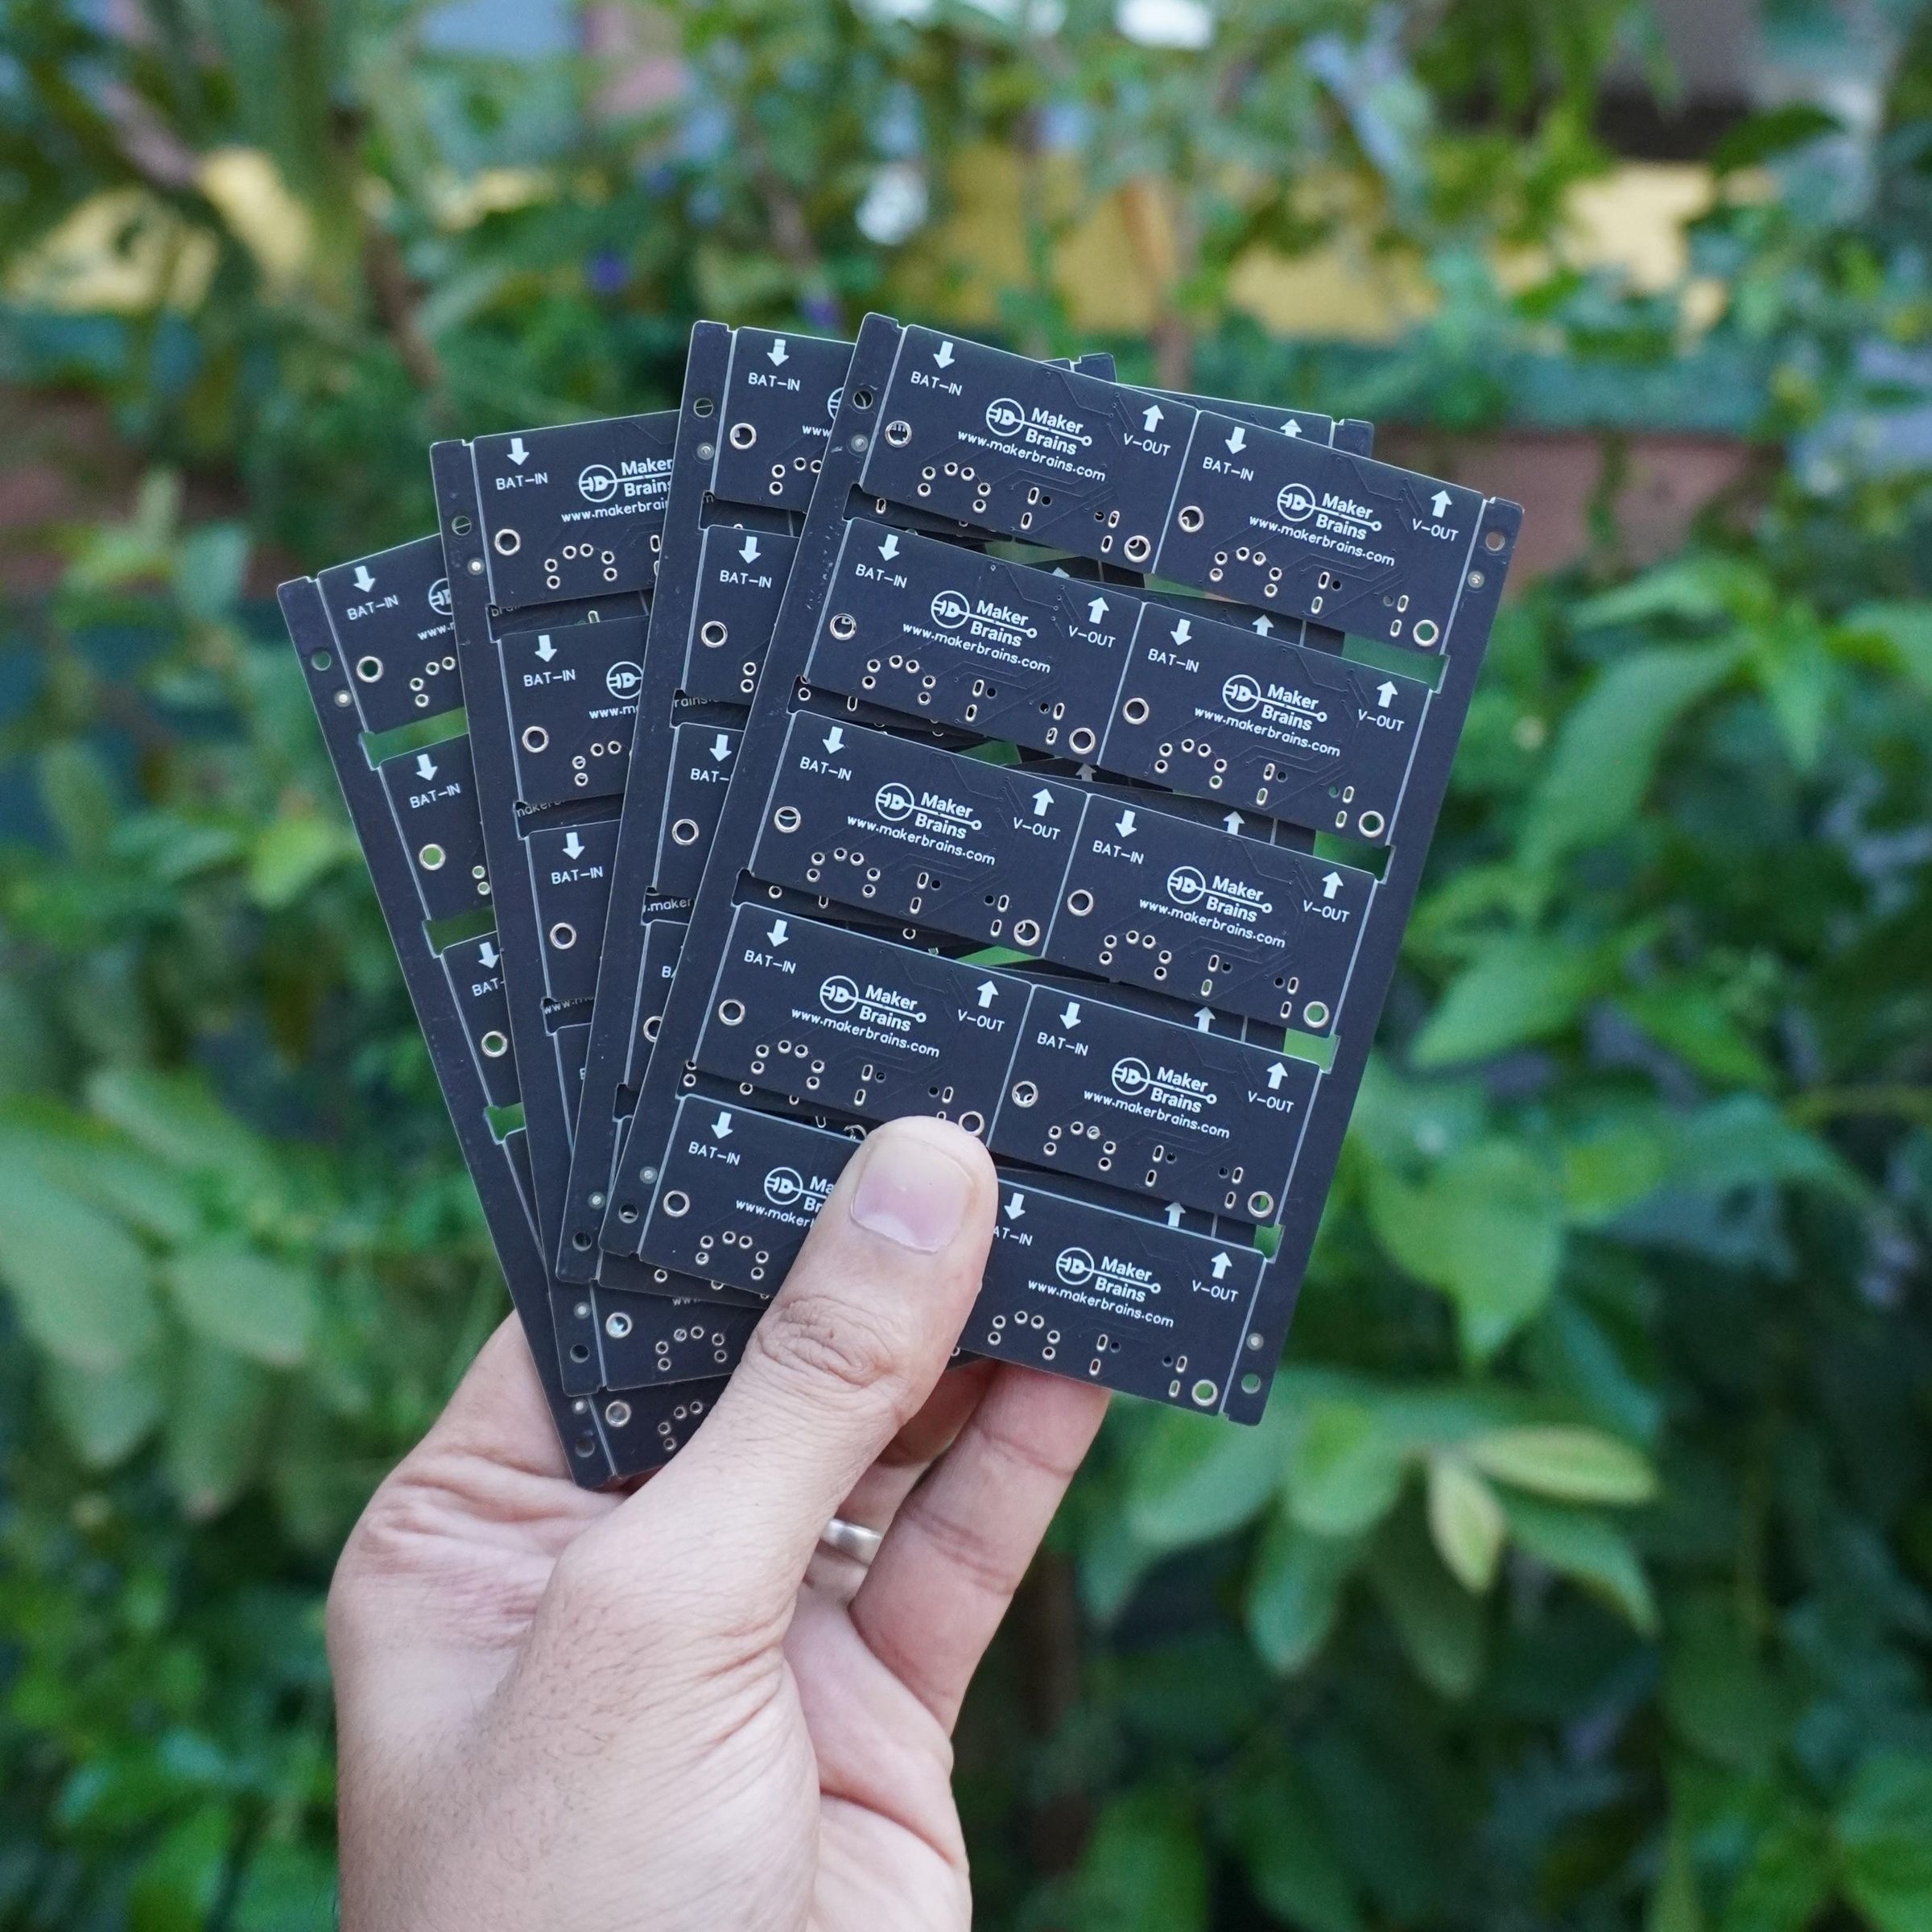
The PCB was designed in KiCad and later manufactured and assembled by NextPCB.
After submitting the Gerber files, the NextPCB engineering team carefully reviewed the design and identified a few manufacturability issues that could have affected production. They worked directly with me to resolve these before fabrication, ensuring the boards worked perfectly on the very first revision.
Having an engineering review before manufacturing is incredibly valuable, especially for custom electronics projects, and it helped save both time and cost.
Why I Recommend NextPCB
If you're designing your own PCBs, I highly recommend checking out NextPCB. In addition to PCB fabrication and assembly services, they provide a Free Online Gerber Viewer and DFM Checker that lets you inspect your board before placing an order.
It supports:
- Gerber RS-274X
- Gerber X2
- Excellon Drill Files
- ODB++
- Native KiCad PCB Files (.kicad_pcb)
The online viewer is especially useful for verifying:
- Silkscreen alignment
- Drill hole placement
- Board outline
- Copper layers
- Manufacturing errors
- Design for Manufacturability (DFM) checks
It's a quick way to catch mistakes before your PCB goes into production.
Useful Links
- NextPCB – PCB Manufacturing & Assembly
- https://www.nextpcb.com/
- HQ Components – Electronic Components
- https://www.hqonline.com/
- NextPCB Free Online Gerber Viewer & DFM Checker
- https://www.nextpcb.com/free-online-gerber-viewer.html
Design Files
If you'd like to build your own AI Buddy, I've included all the required PCB files:
- Gerber Files
- Bill of Materials (BOM)
- Pick-and-Place (PnP) Files
These files can be uploaded directly to NextPCB for fabrication and assembly, making it easy to reproduce the custom BMS for your own build.
Designing the Enclosure in Fusion 360
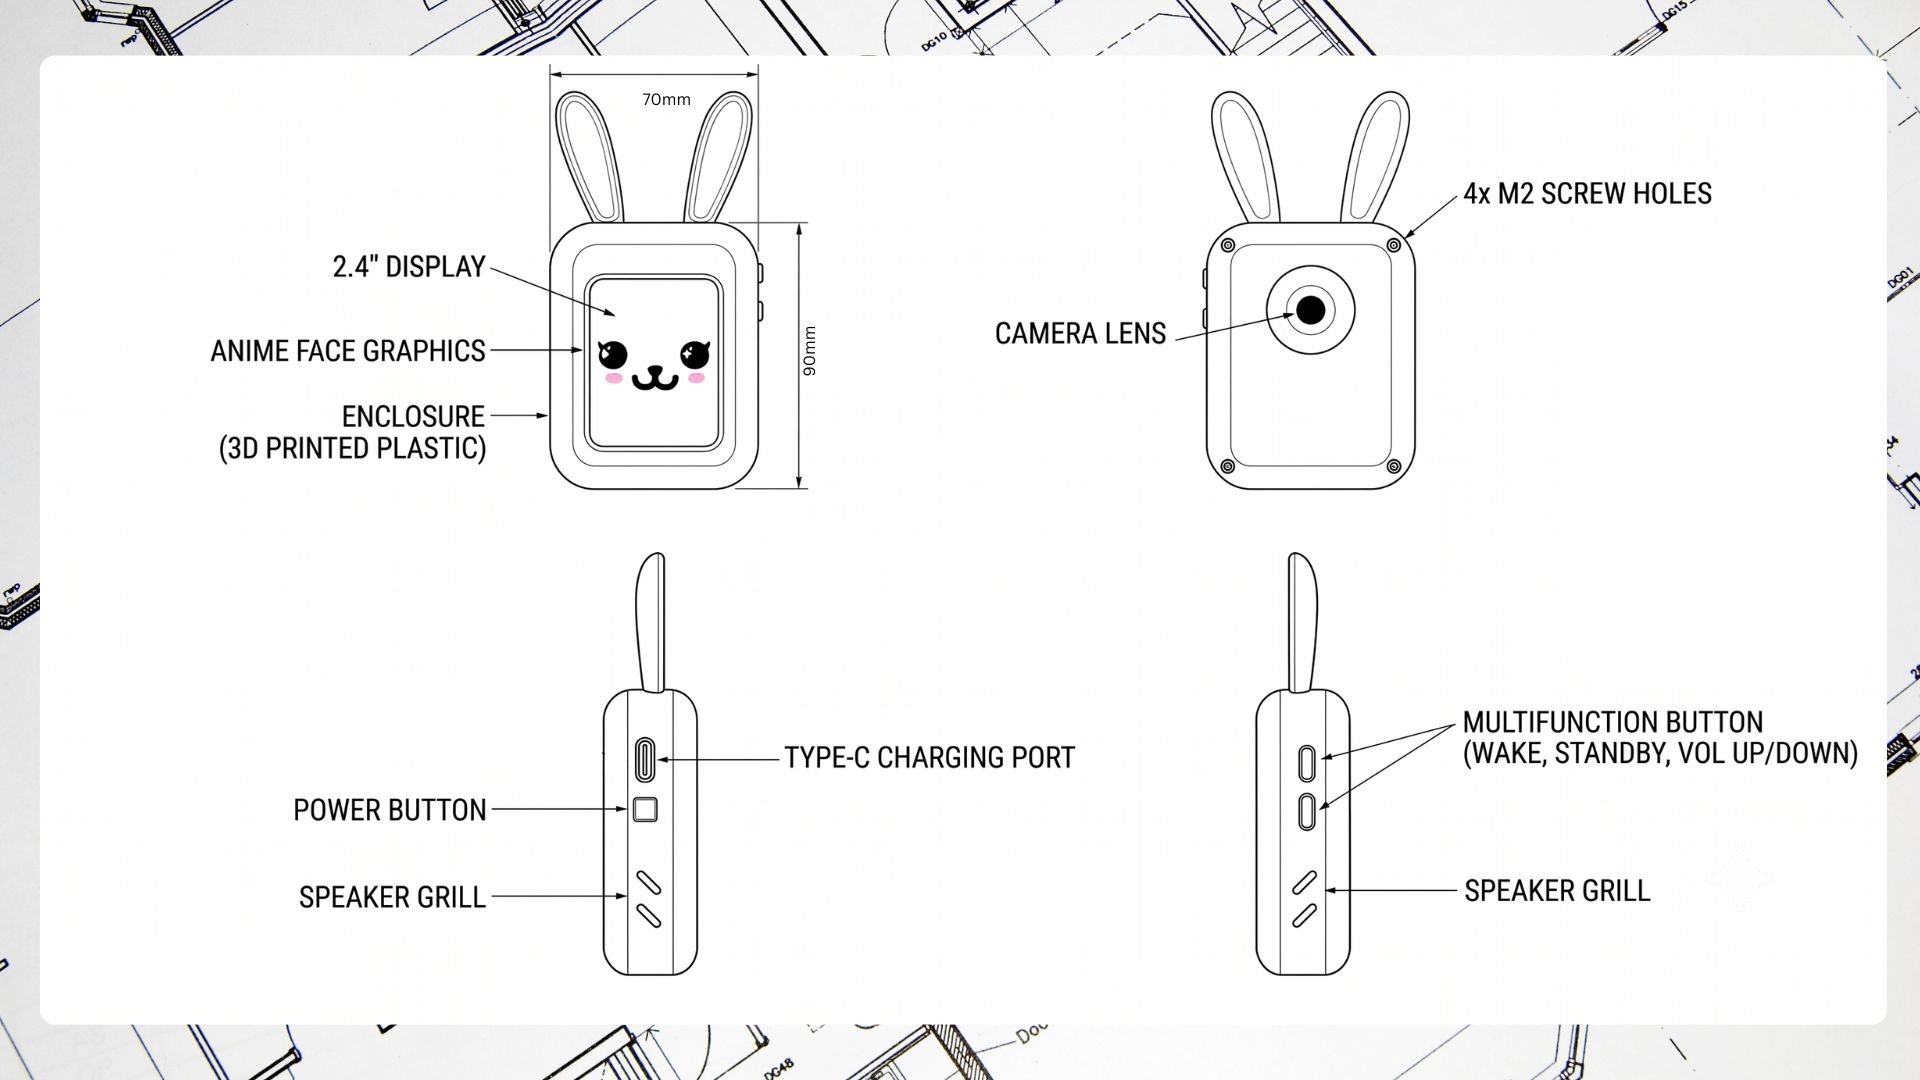
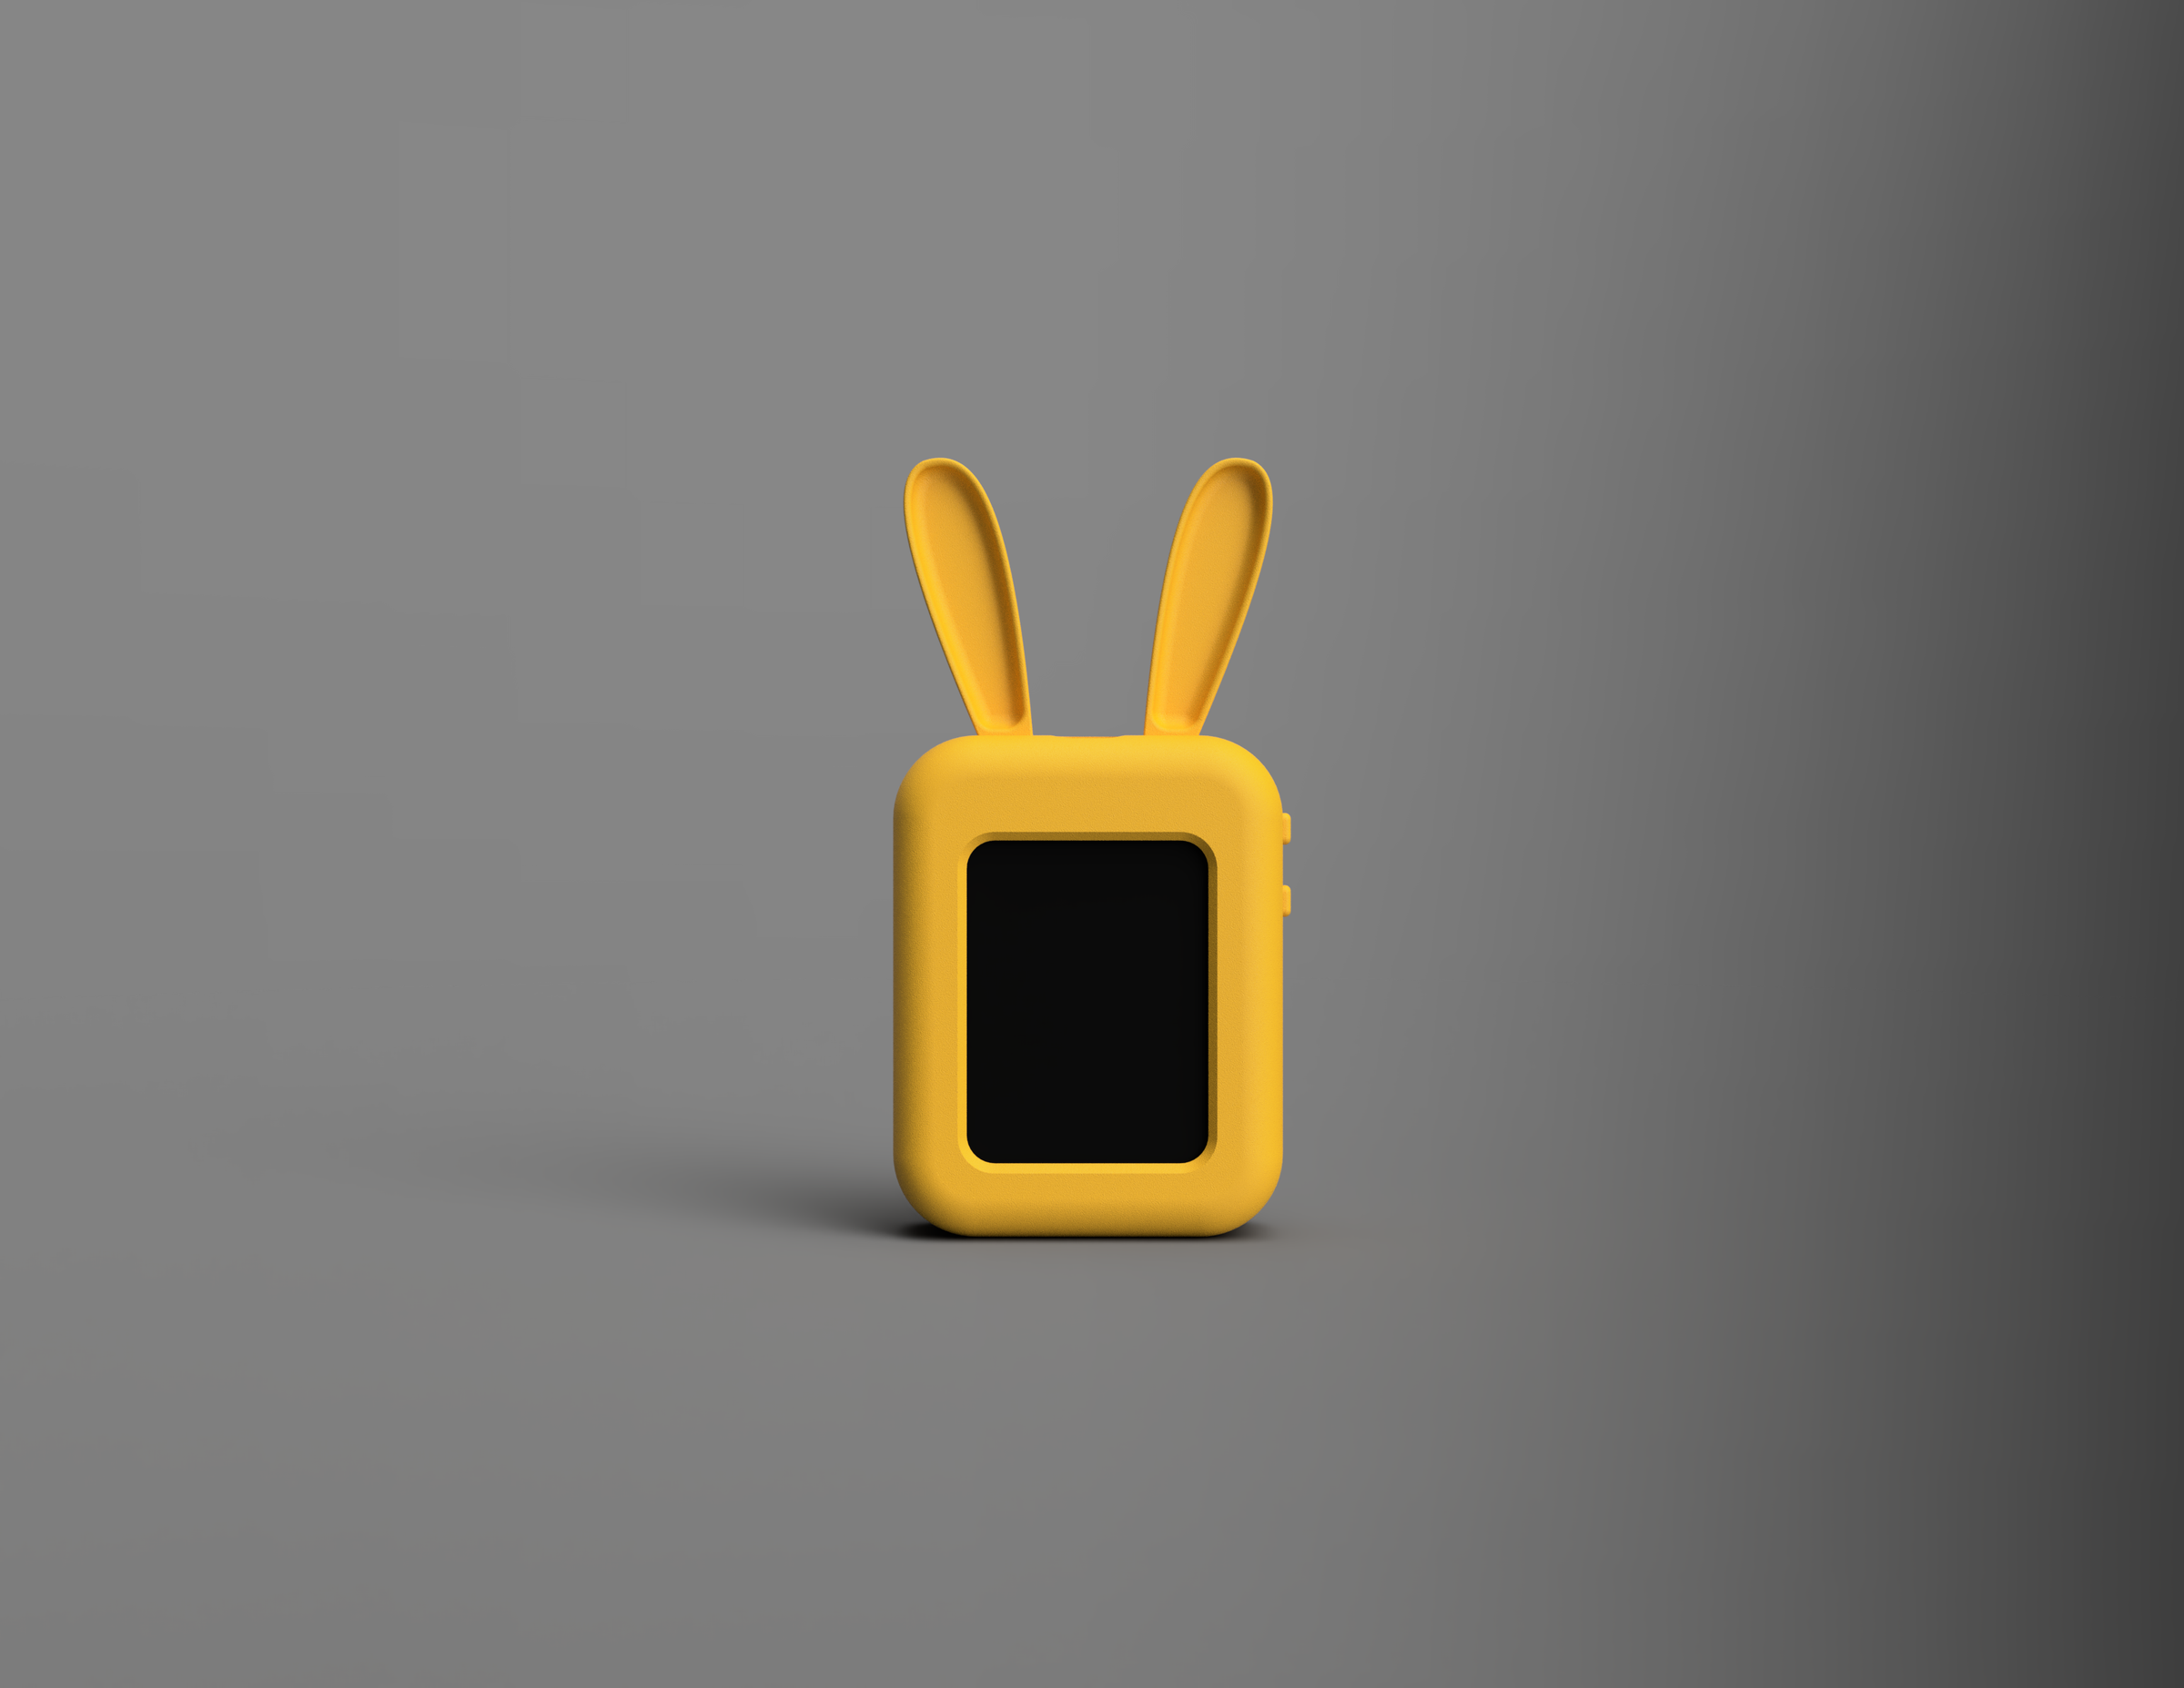
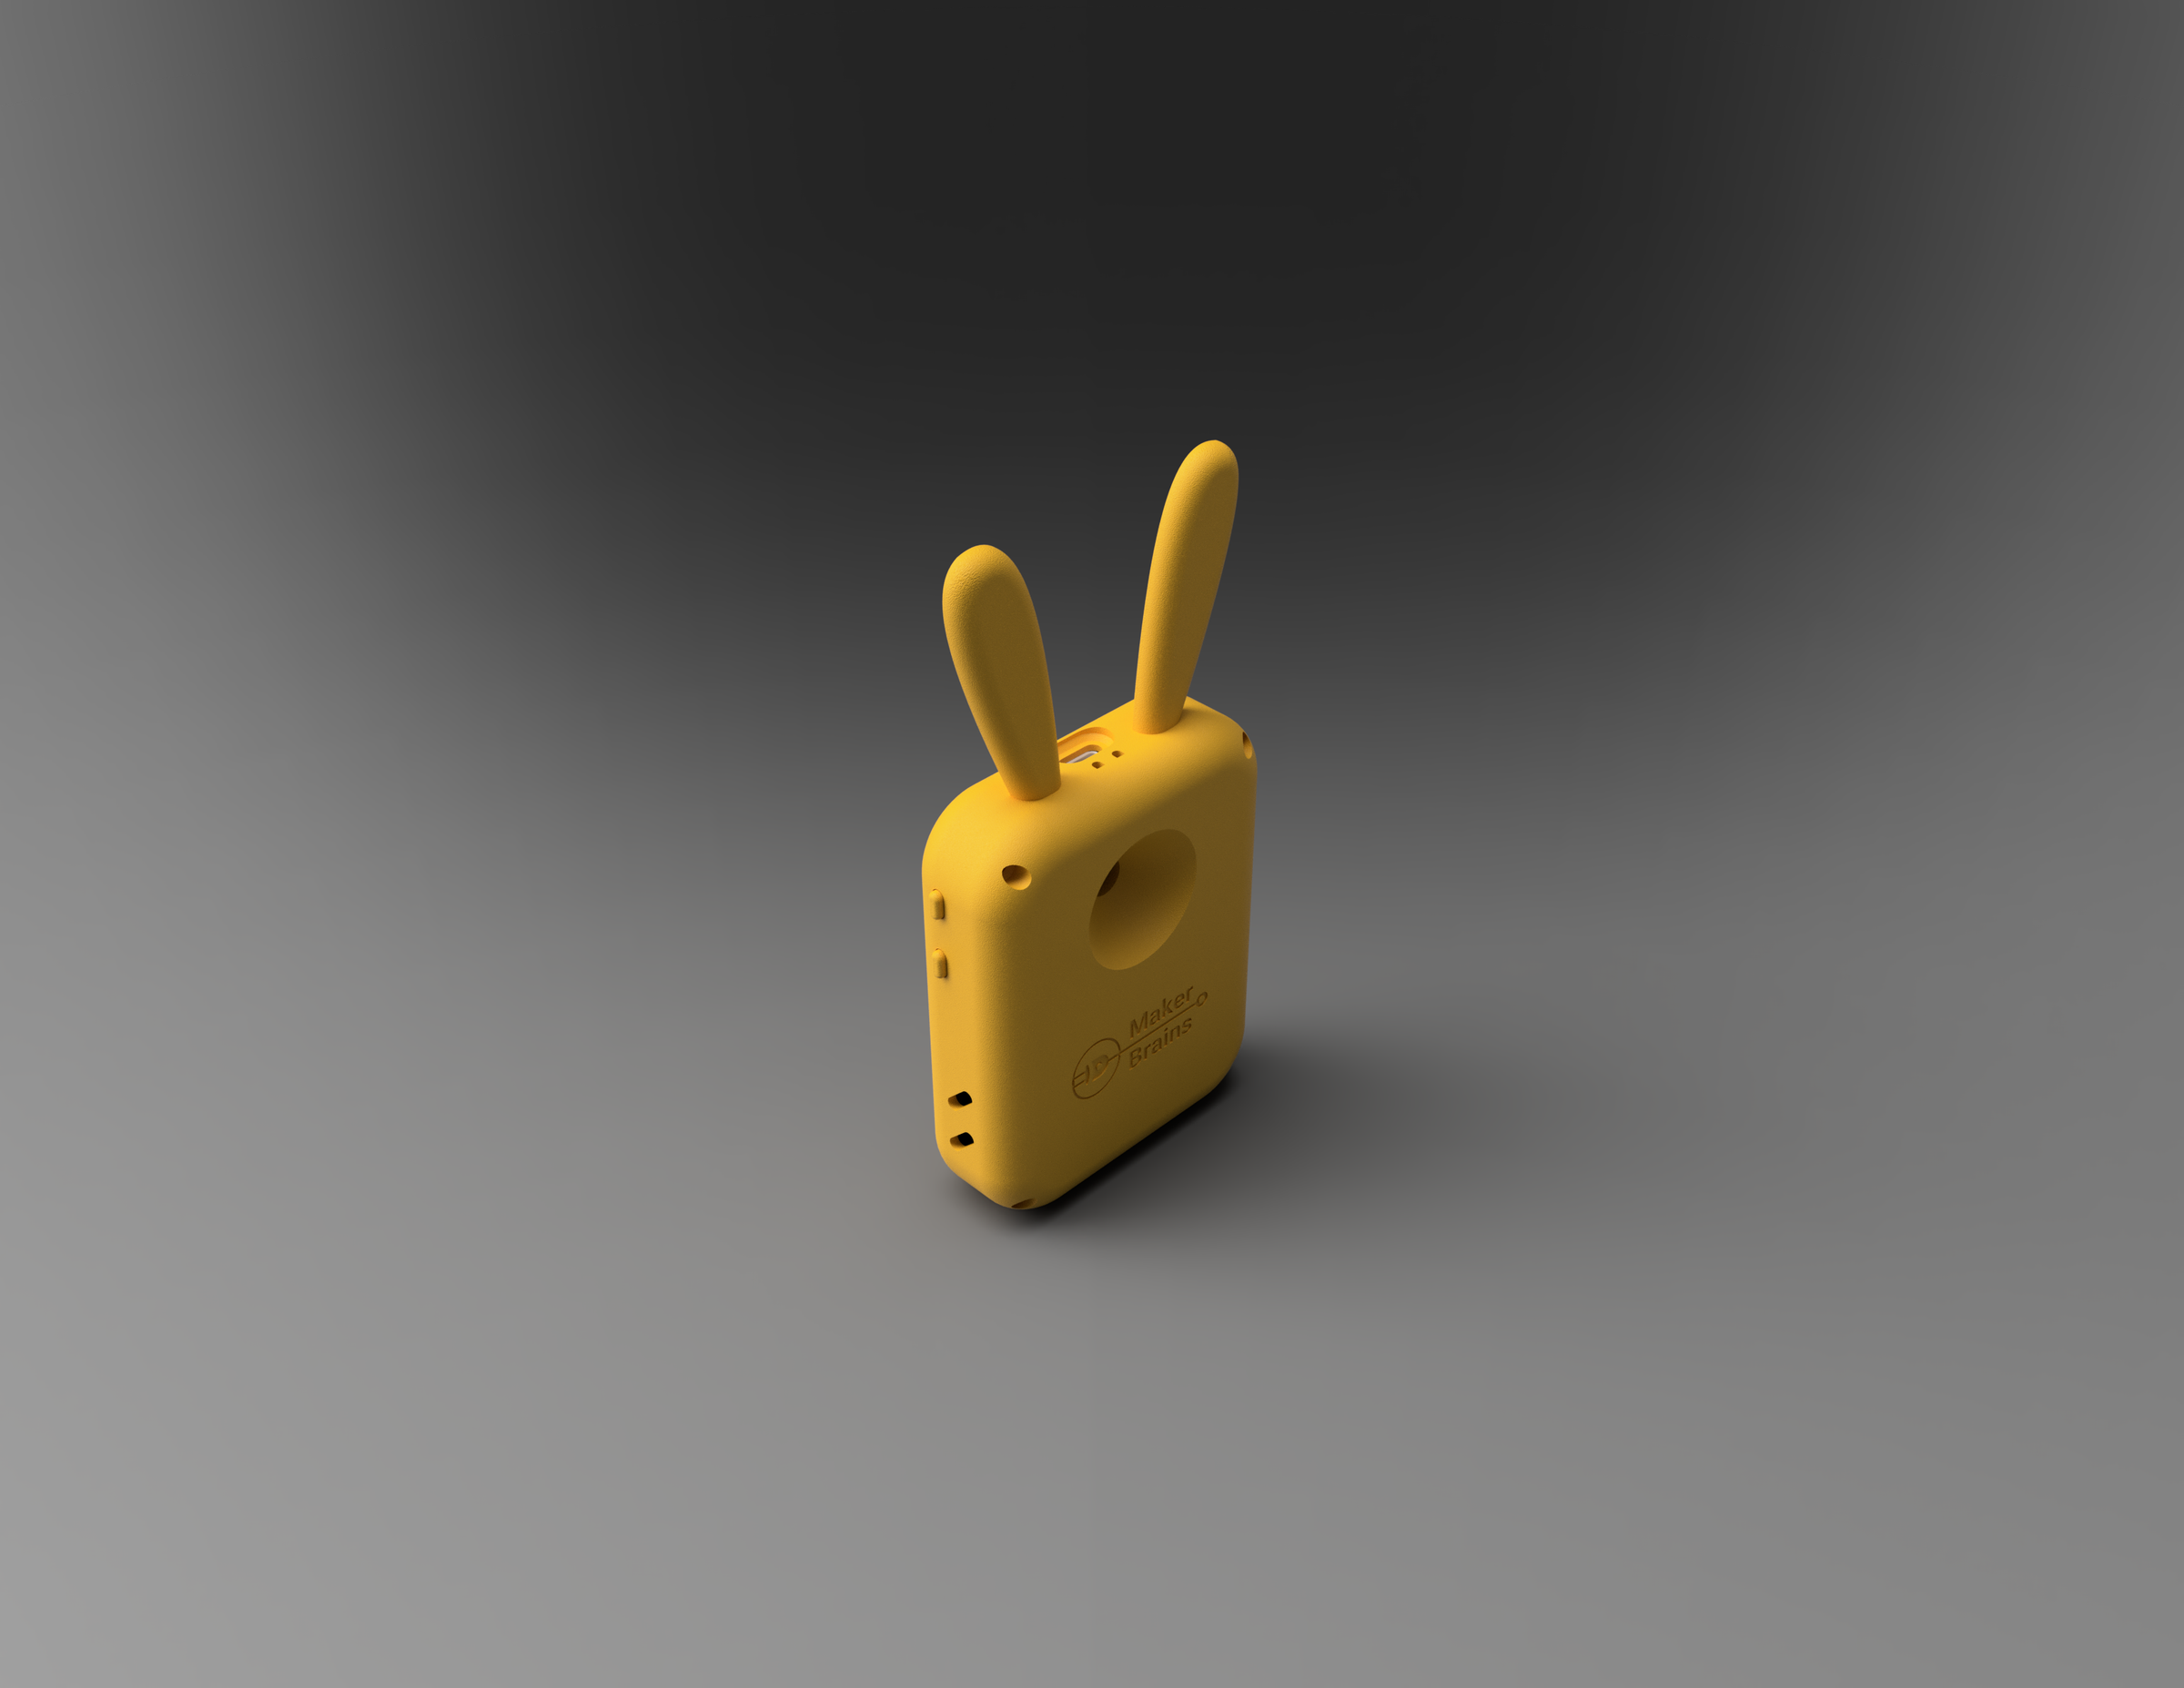
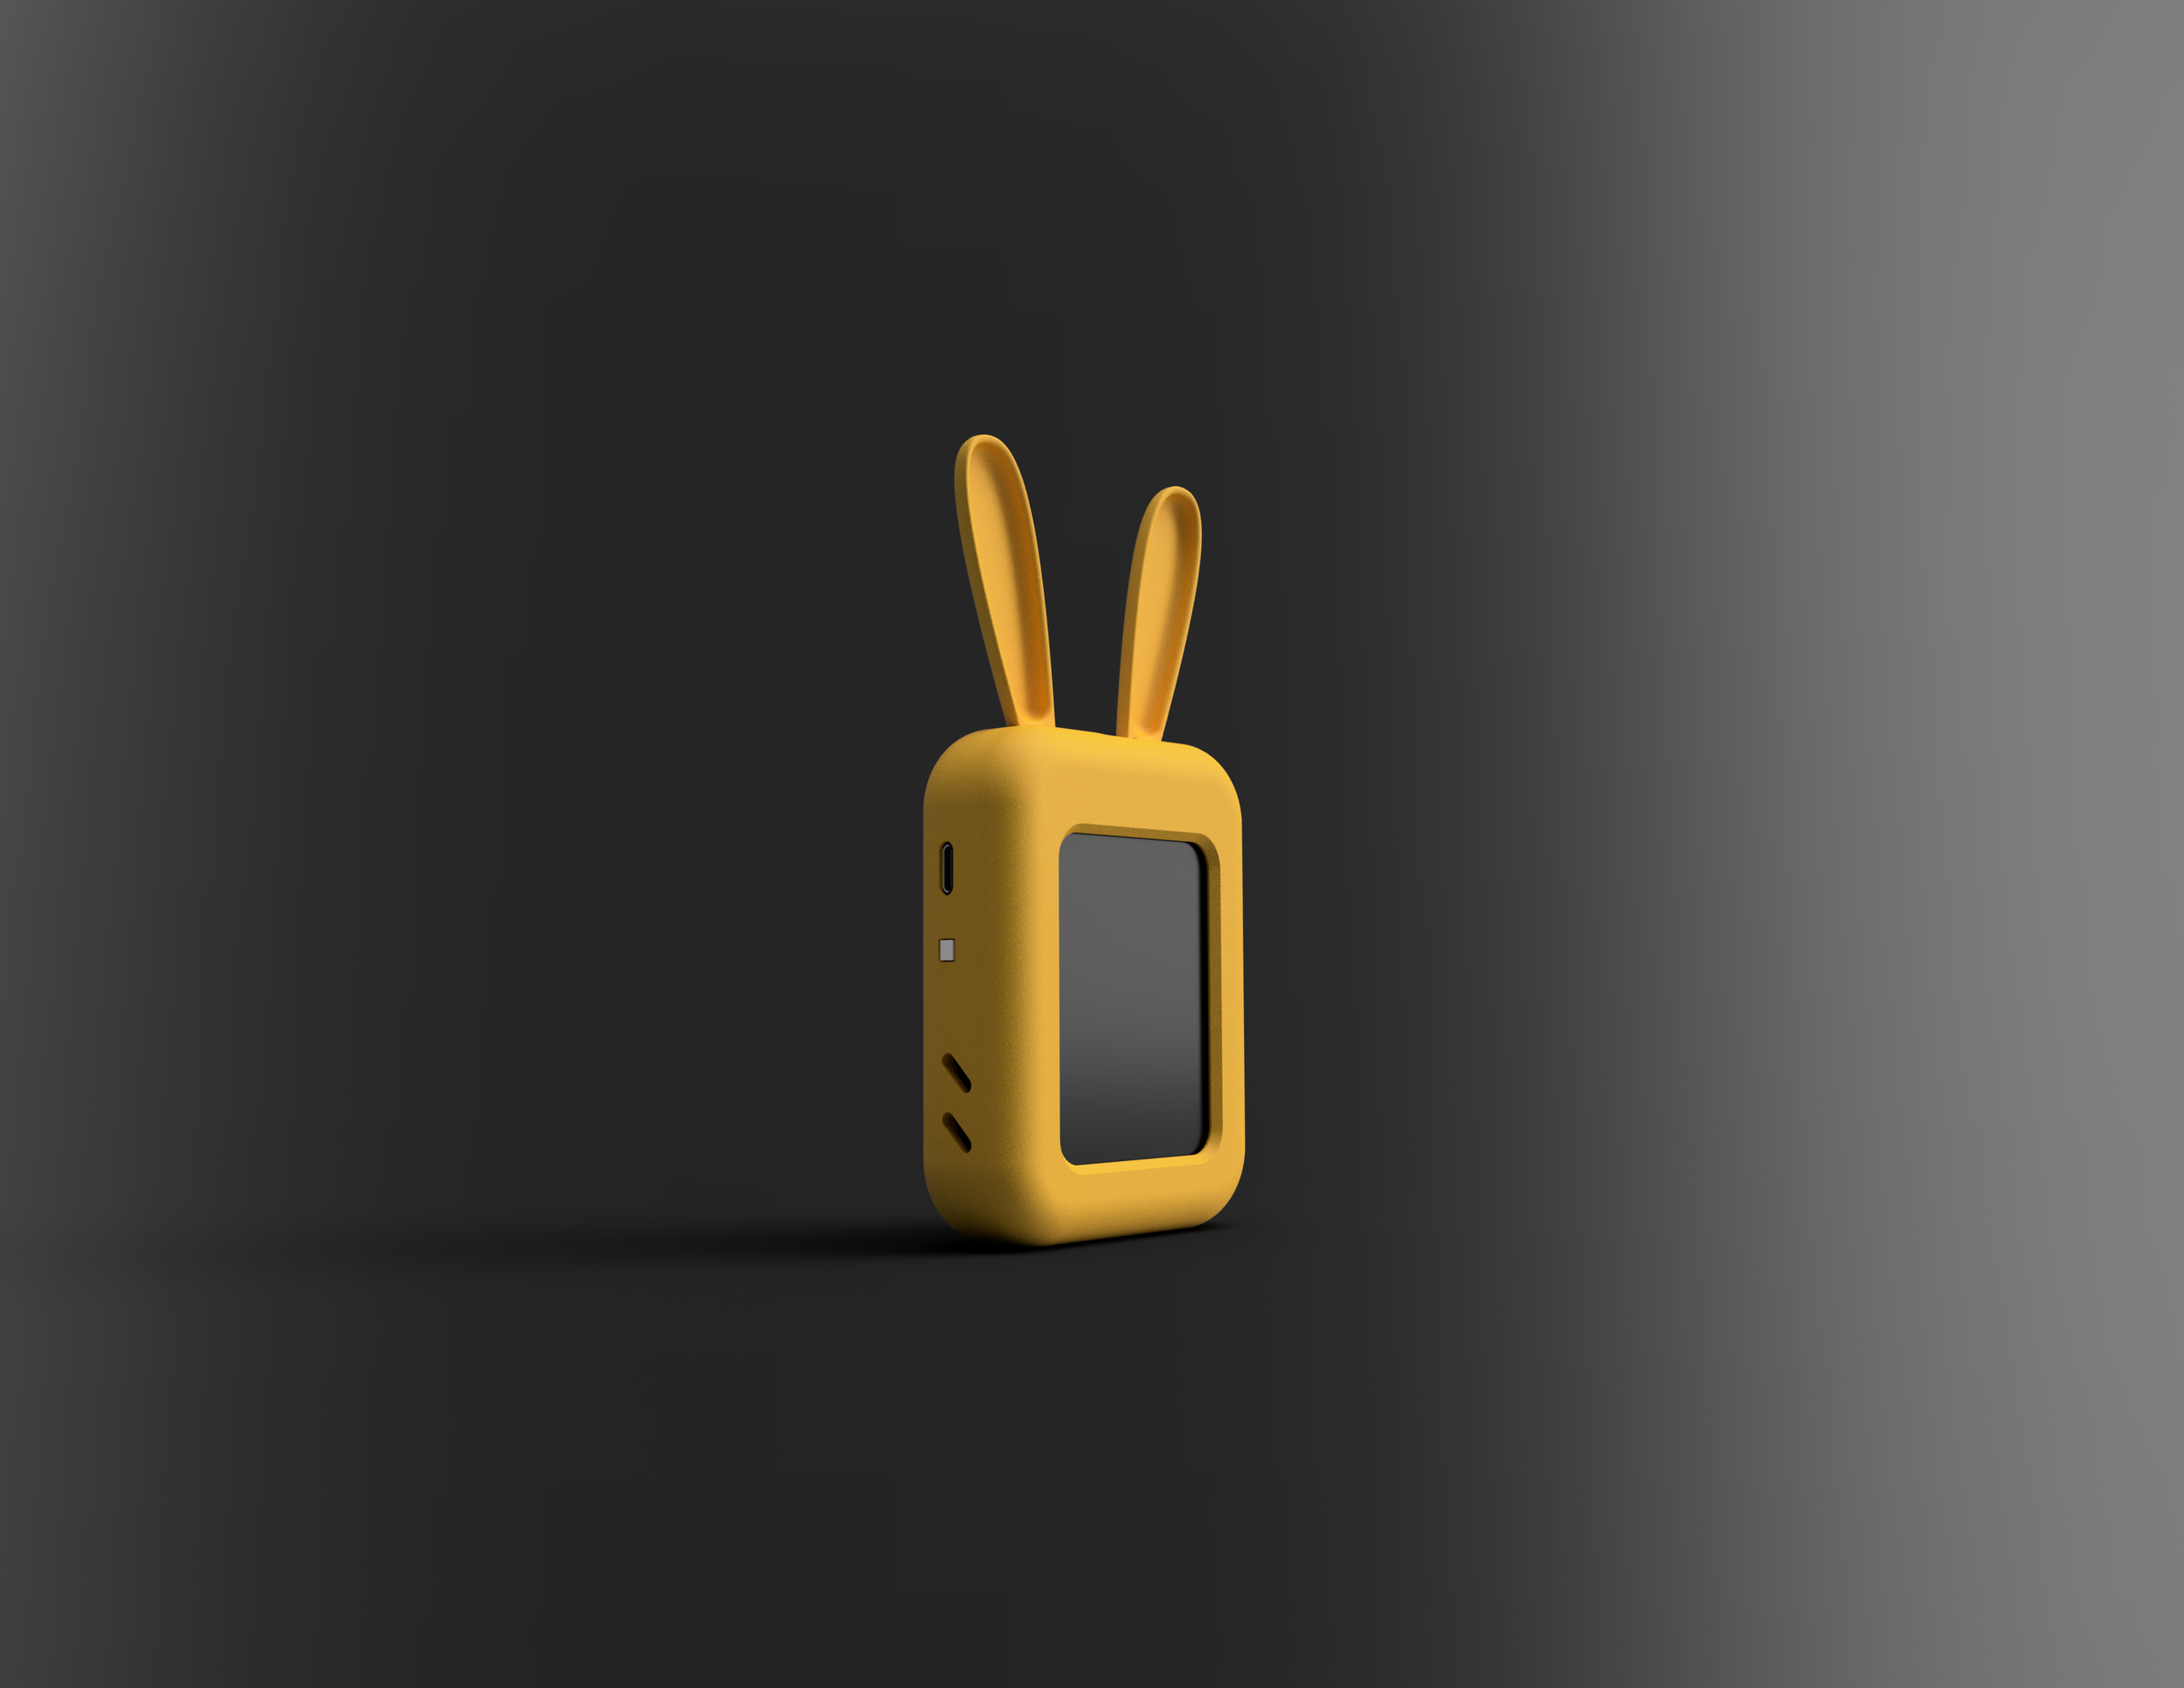
To give AI Buddy its friendly personality while keeping the electronics compact and easy to assemble, I designed the entire enclosure in Fusion 360. The design focuses on simplicity, modularity, and easy customization, allowing anyone to create their own unique AI Buddy character.
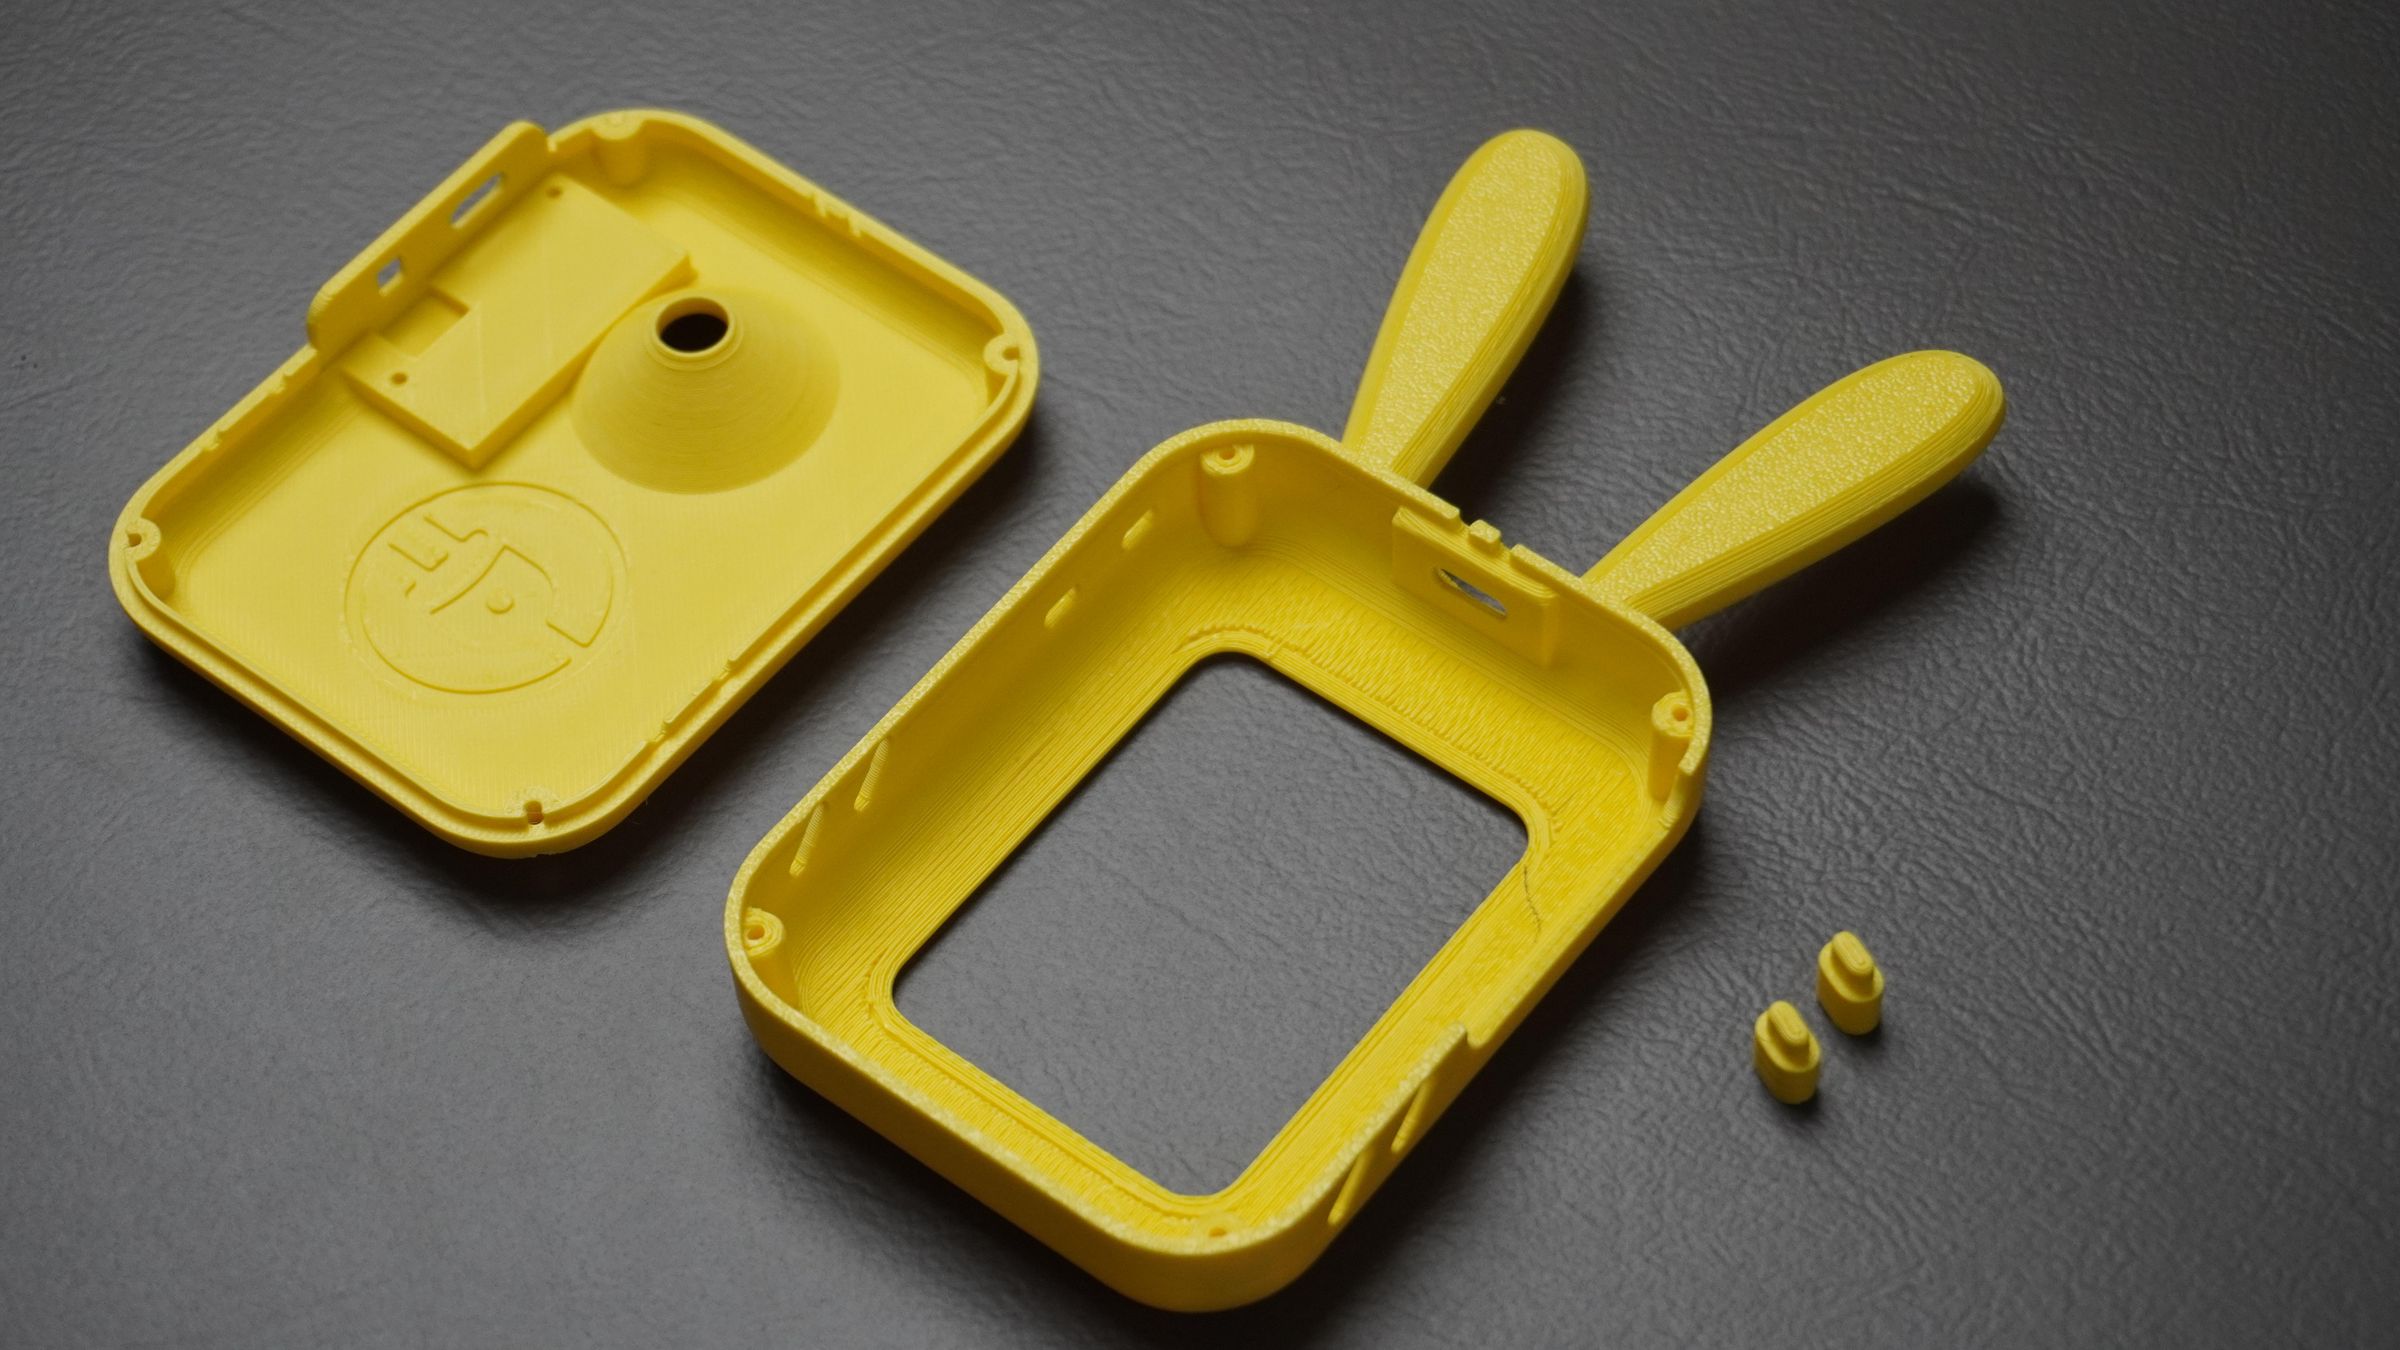
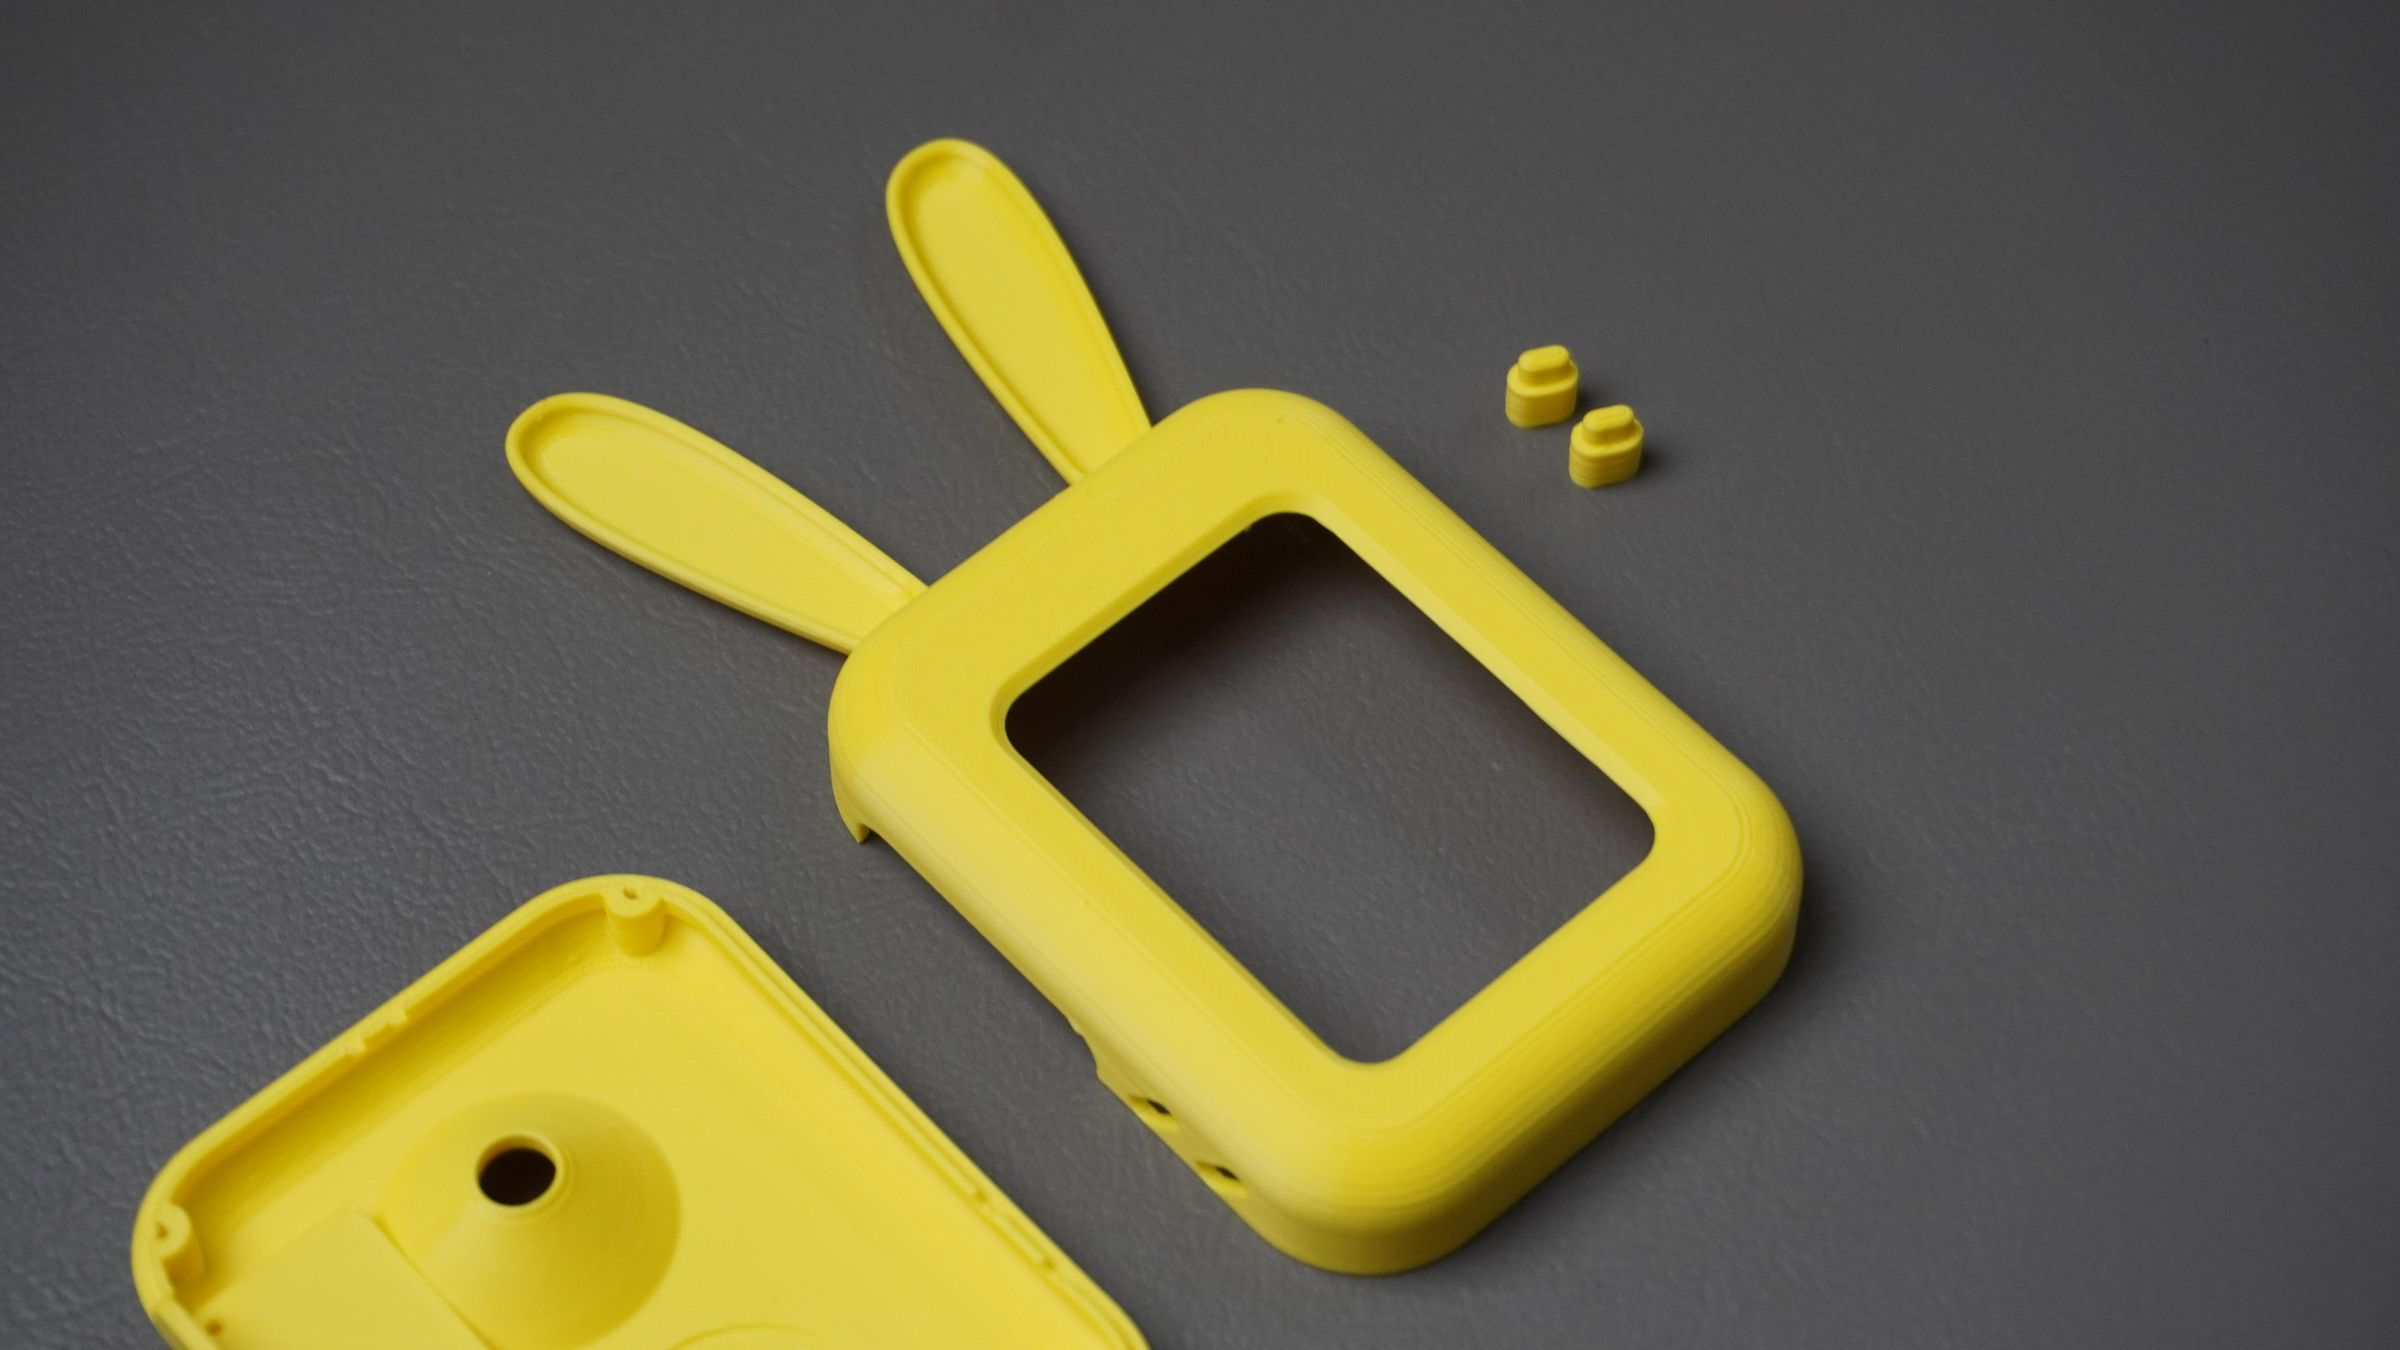
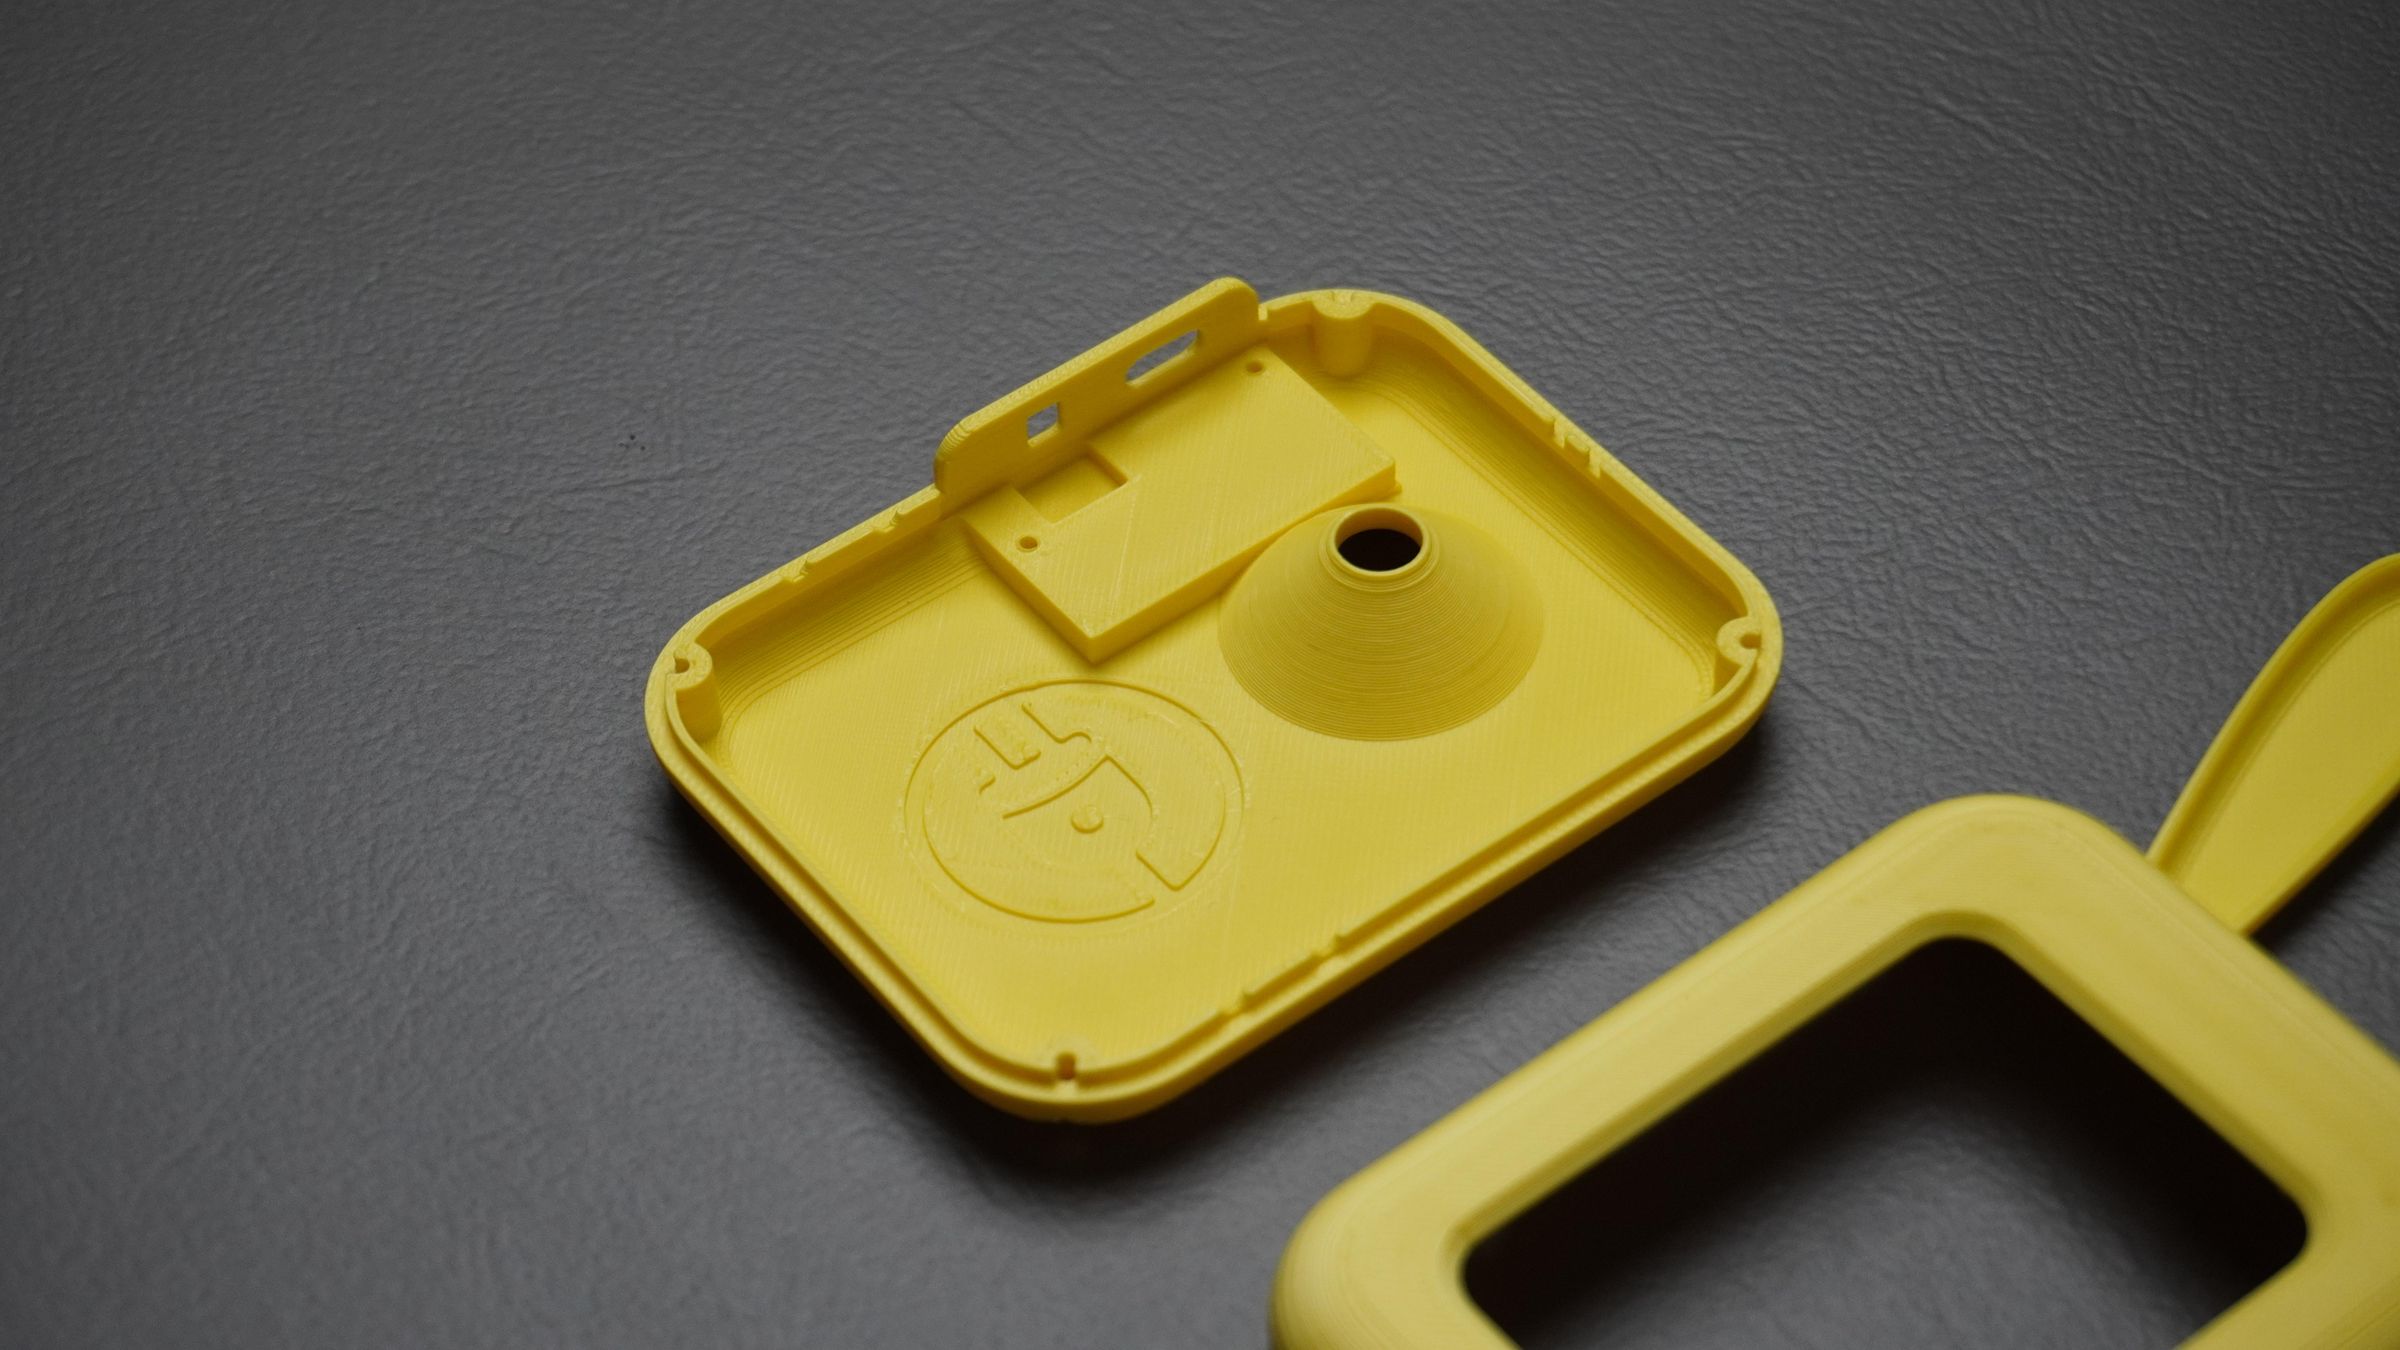
The enclosure consists of four printed parts:
- 1× Front Housing
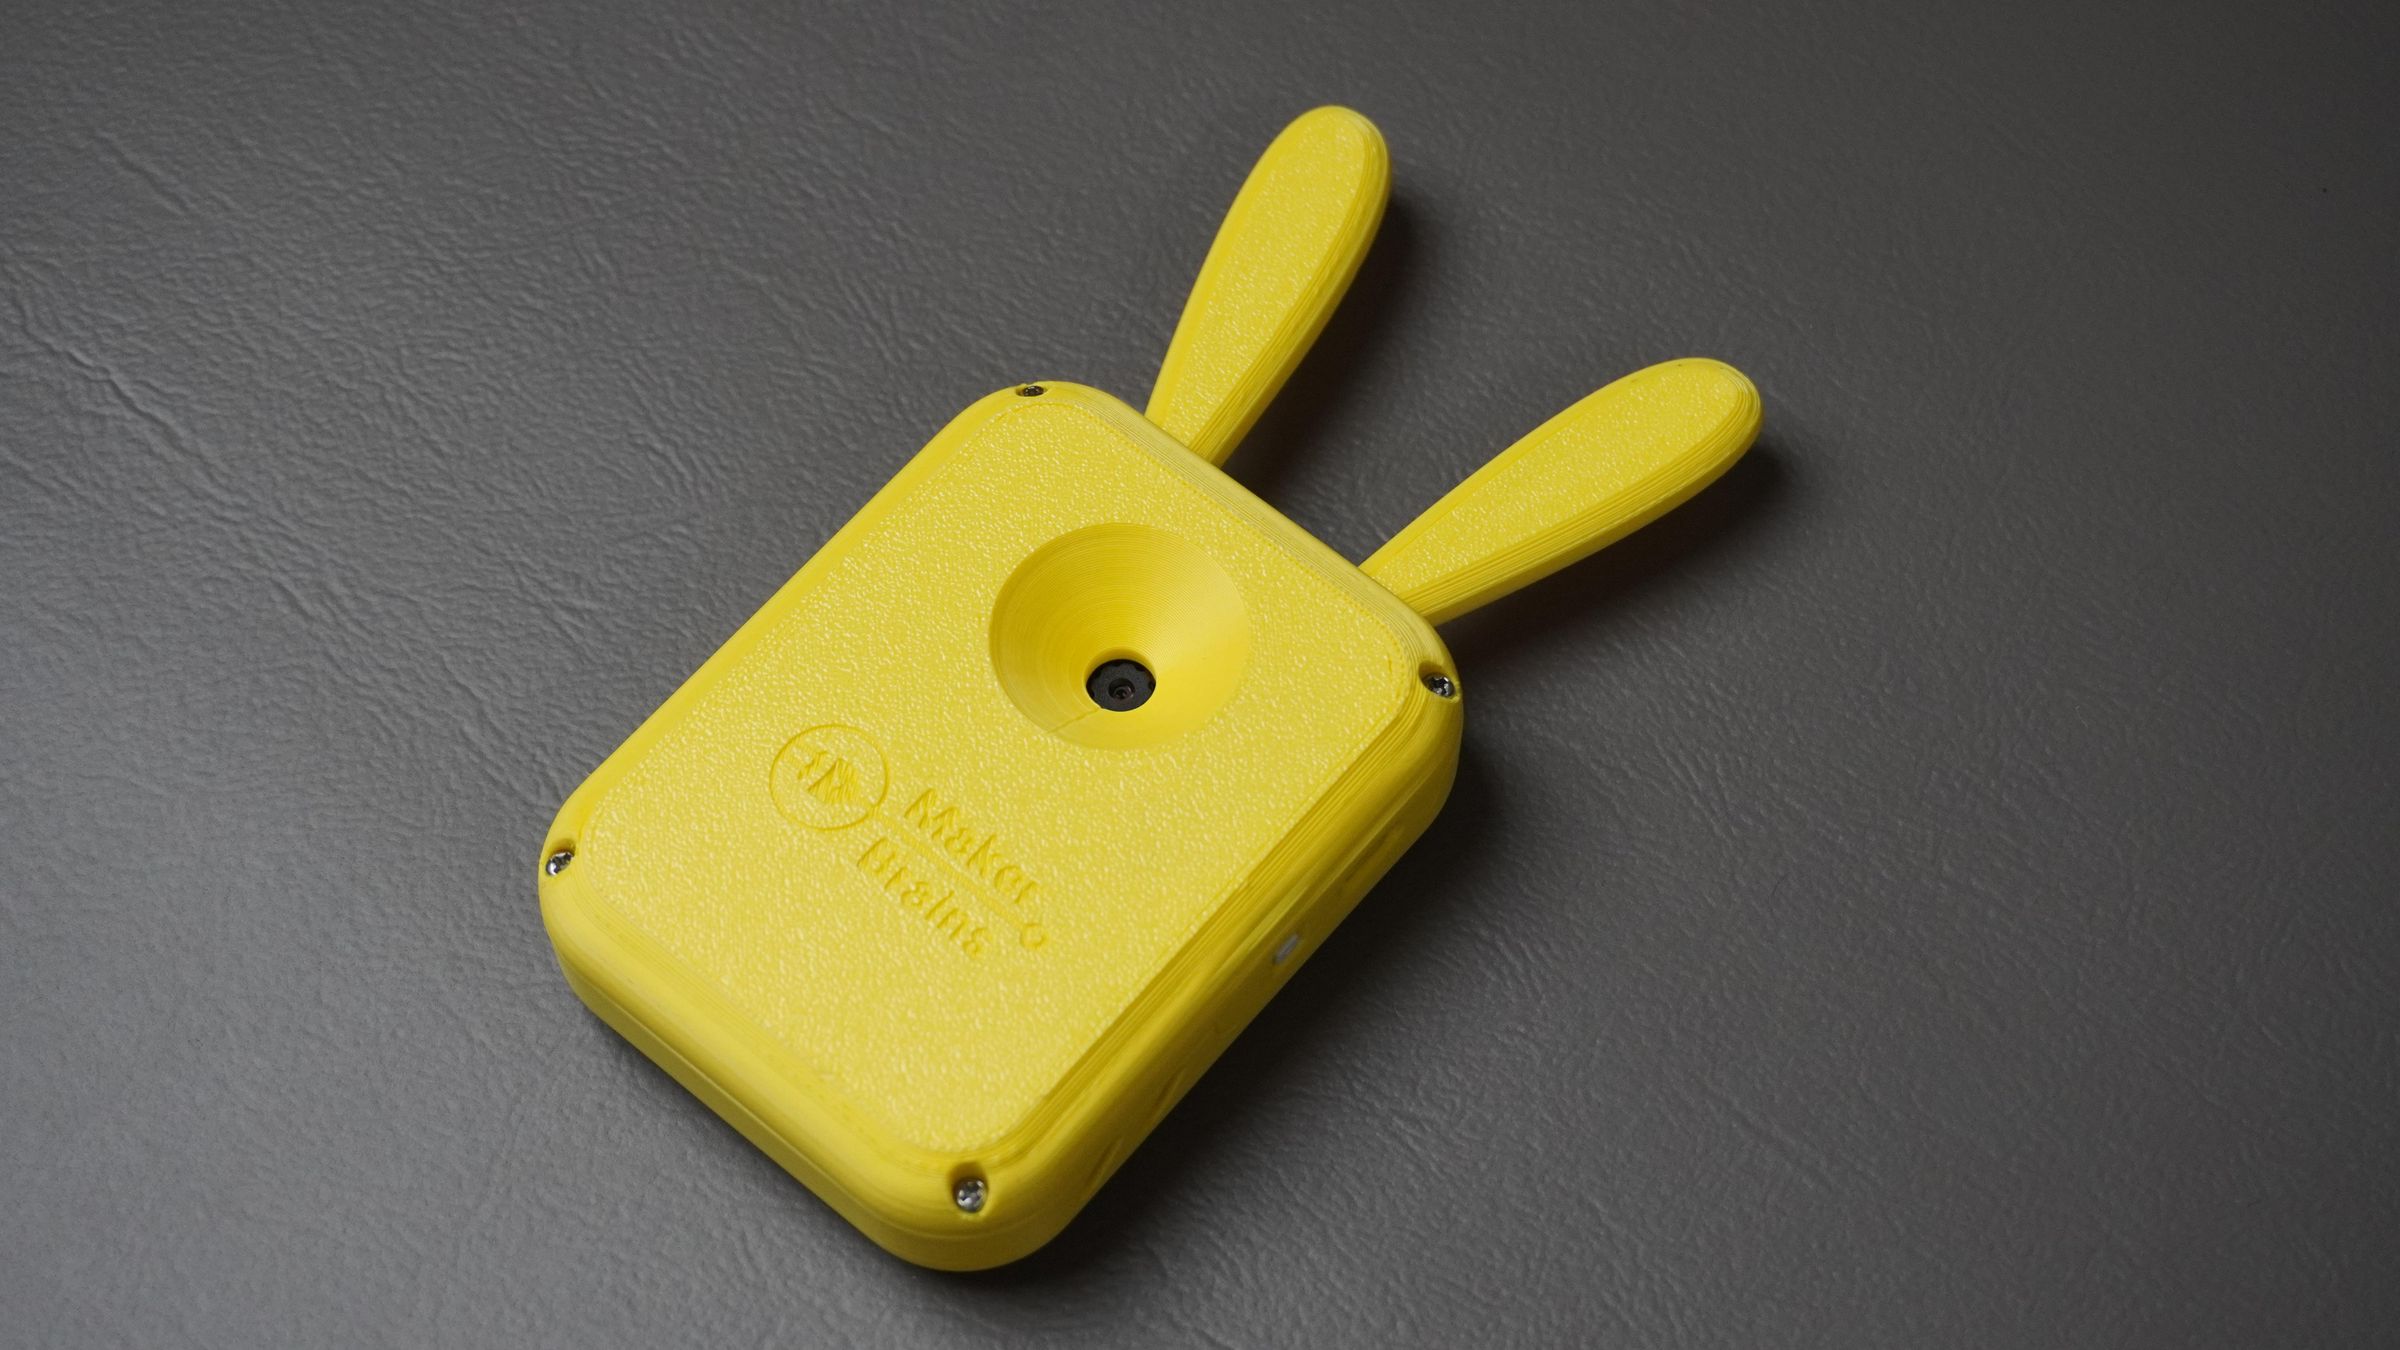
- 1× Rear Cover
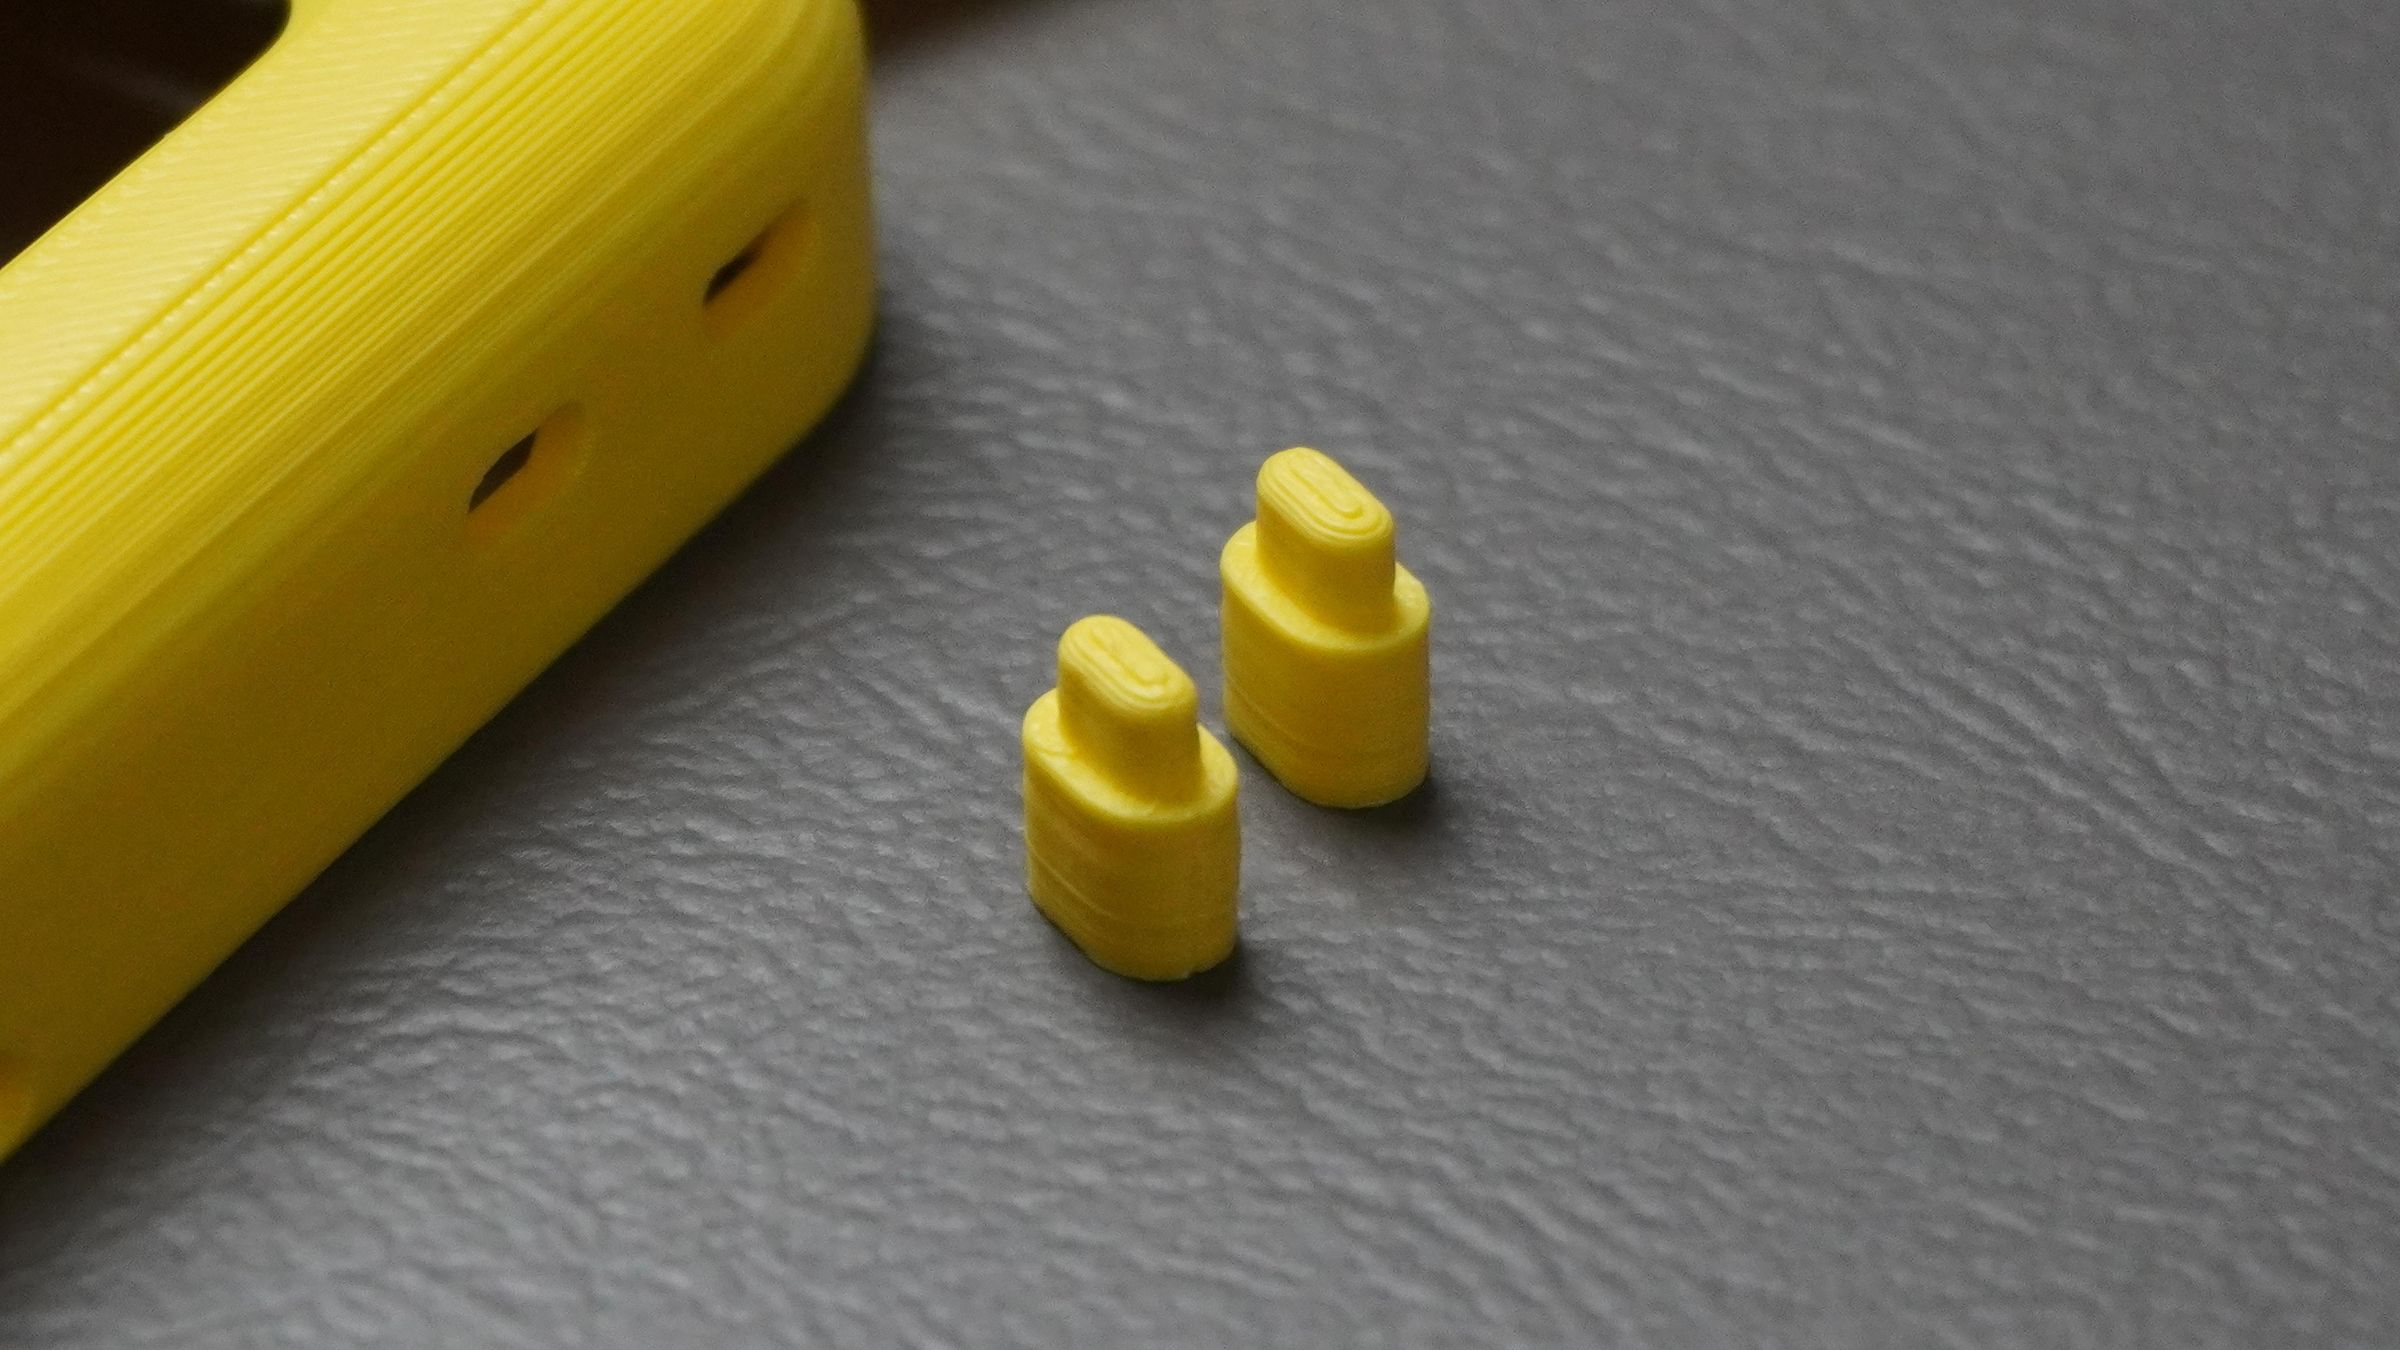
- 2× Button Extensions
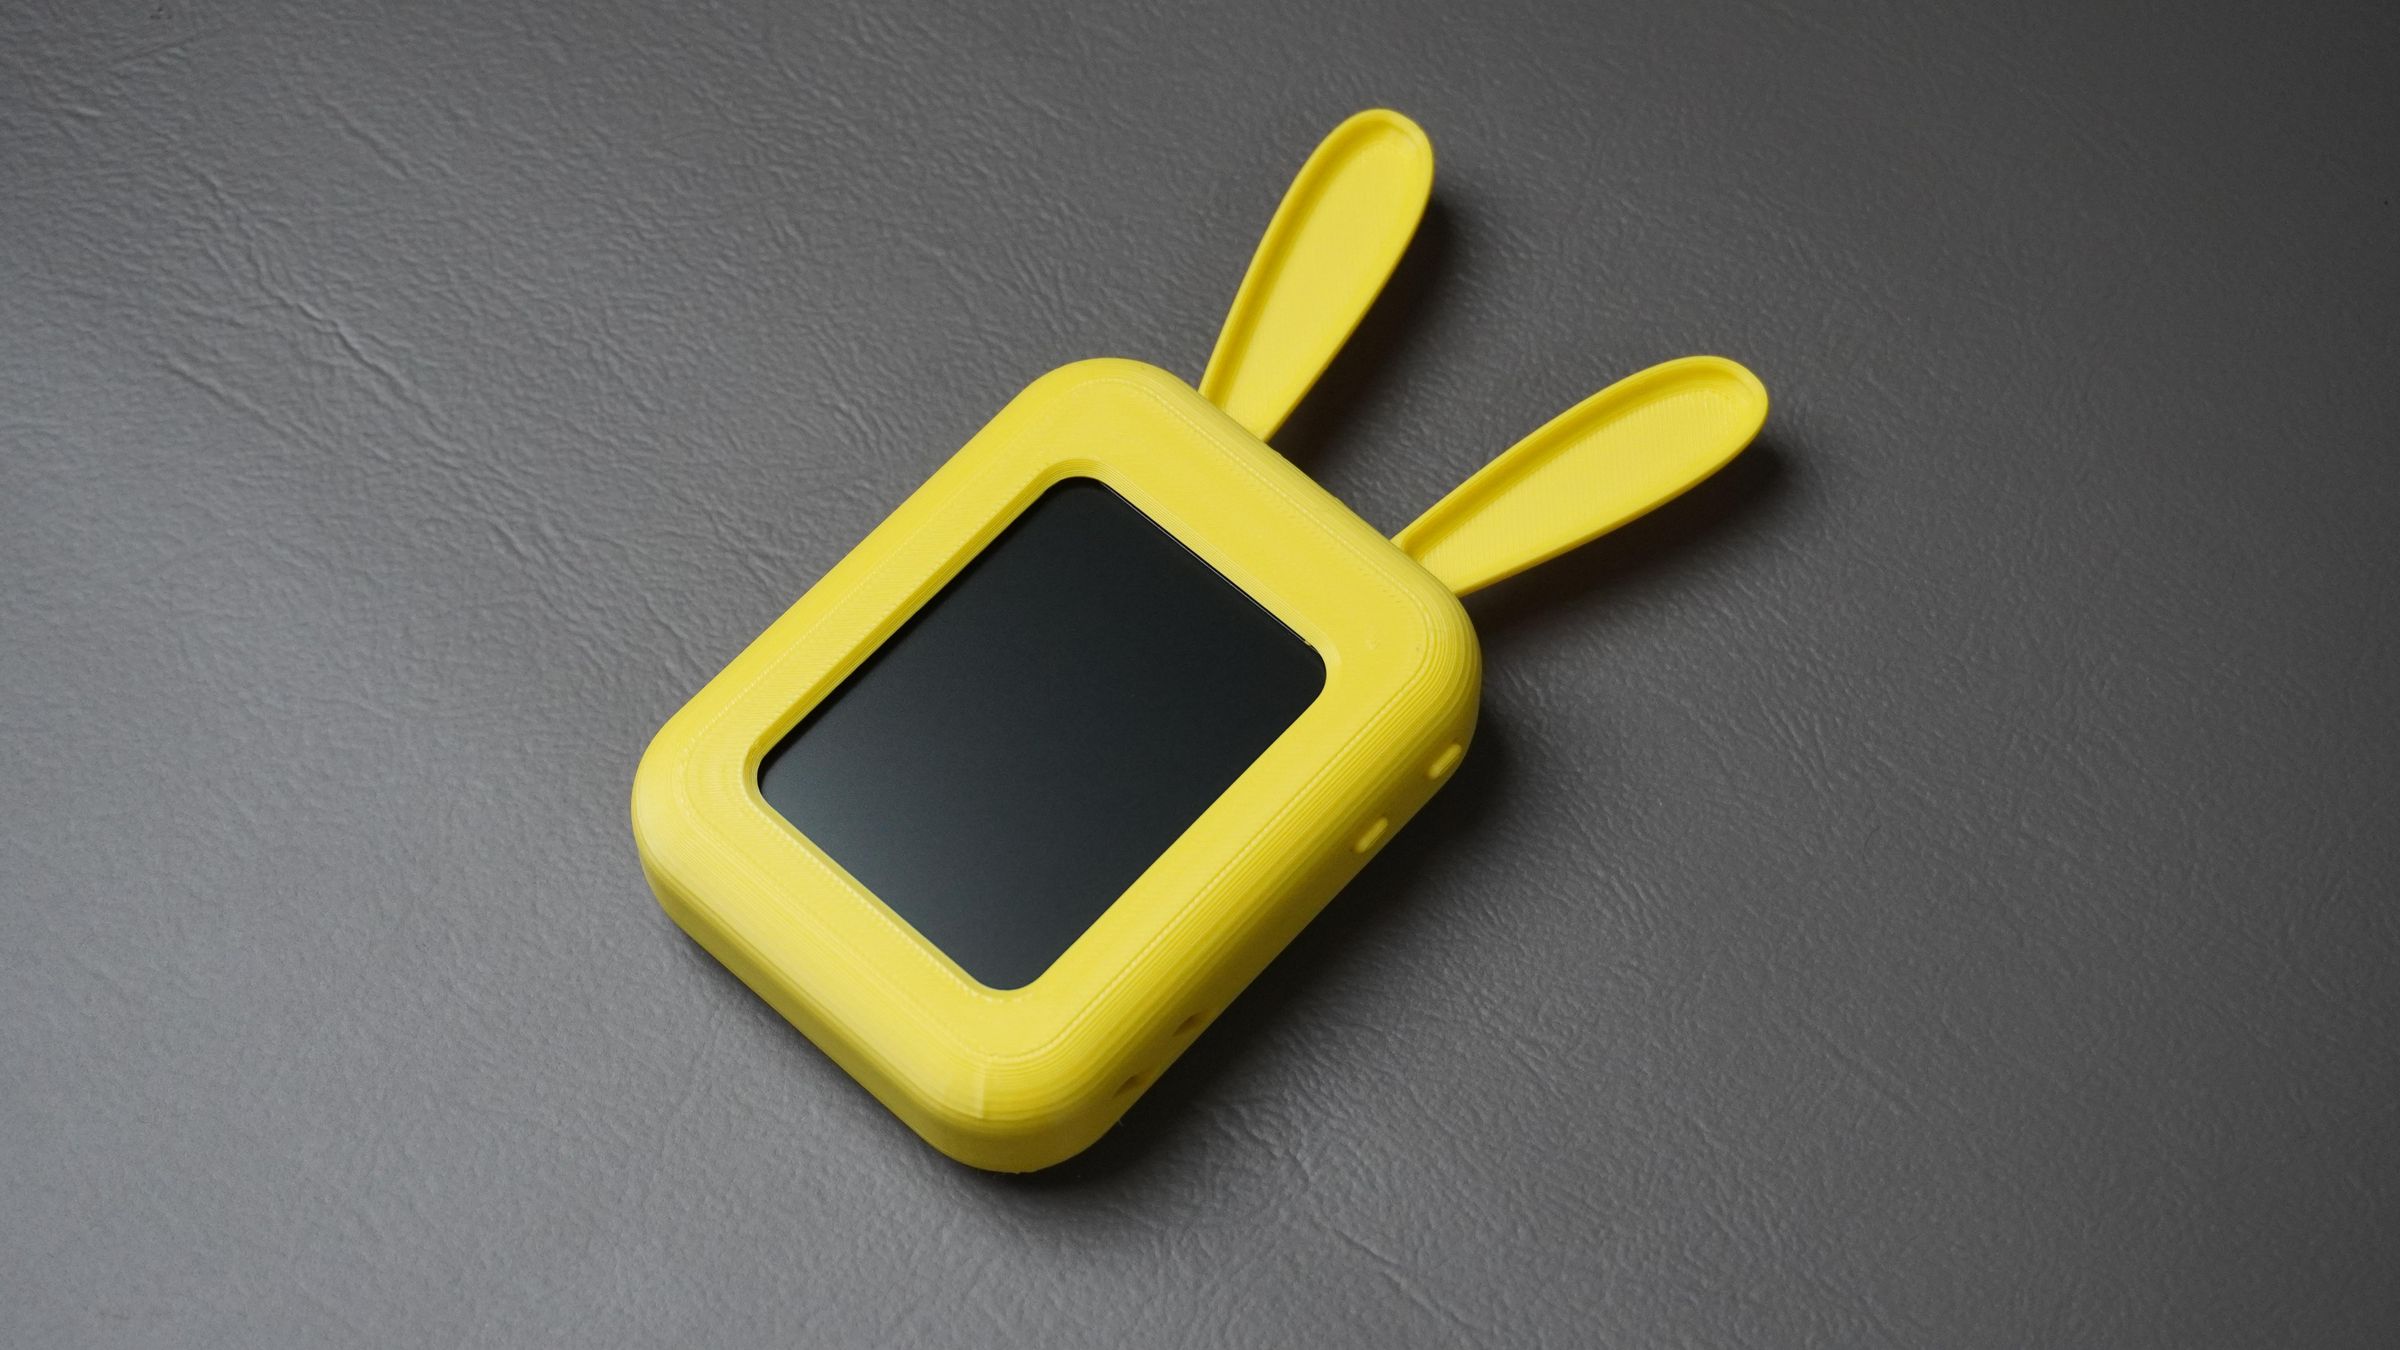
Front Housing
The front housing forms the face of AI Buddy and holds the DFRobot UNIHIKER K10 securely in place.
It includes:
- Display opening for the LCD
- USB Type-C opening for programming the UNIHIKER
- Openings for the UNIHIKER onboard buttons using external button extensions
- Smooth rounded edges for a toy-like appearance
This is the only part that changes between different character designs.
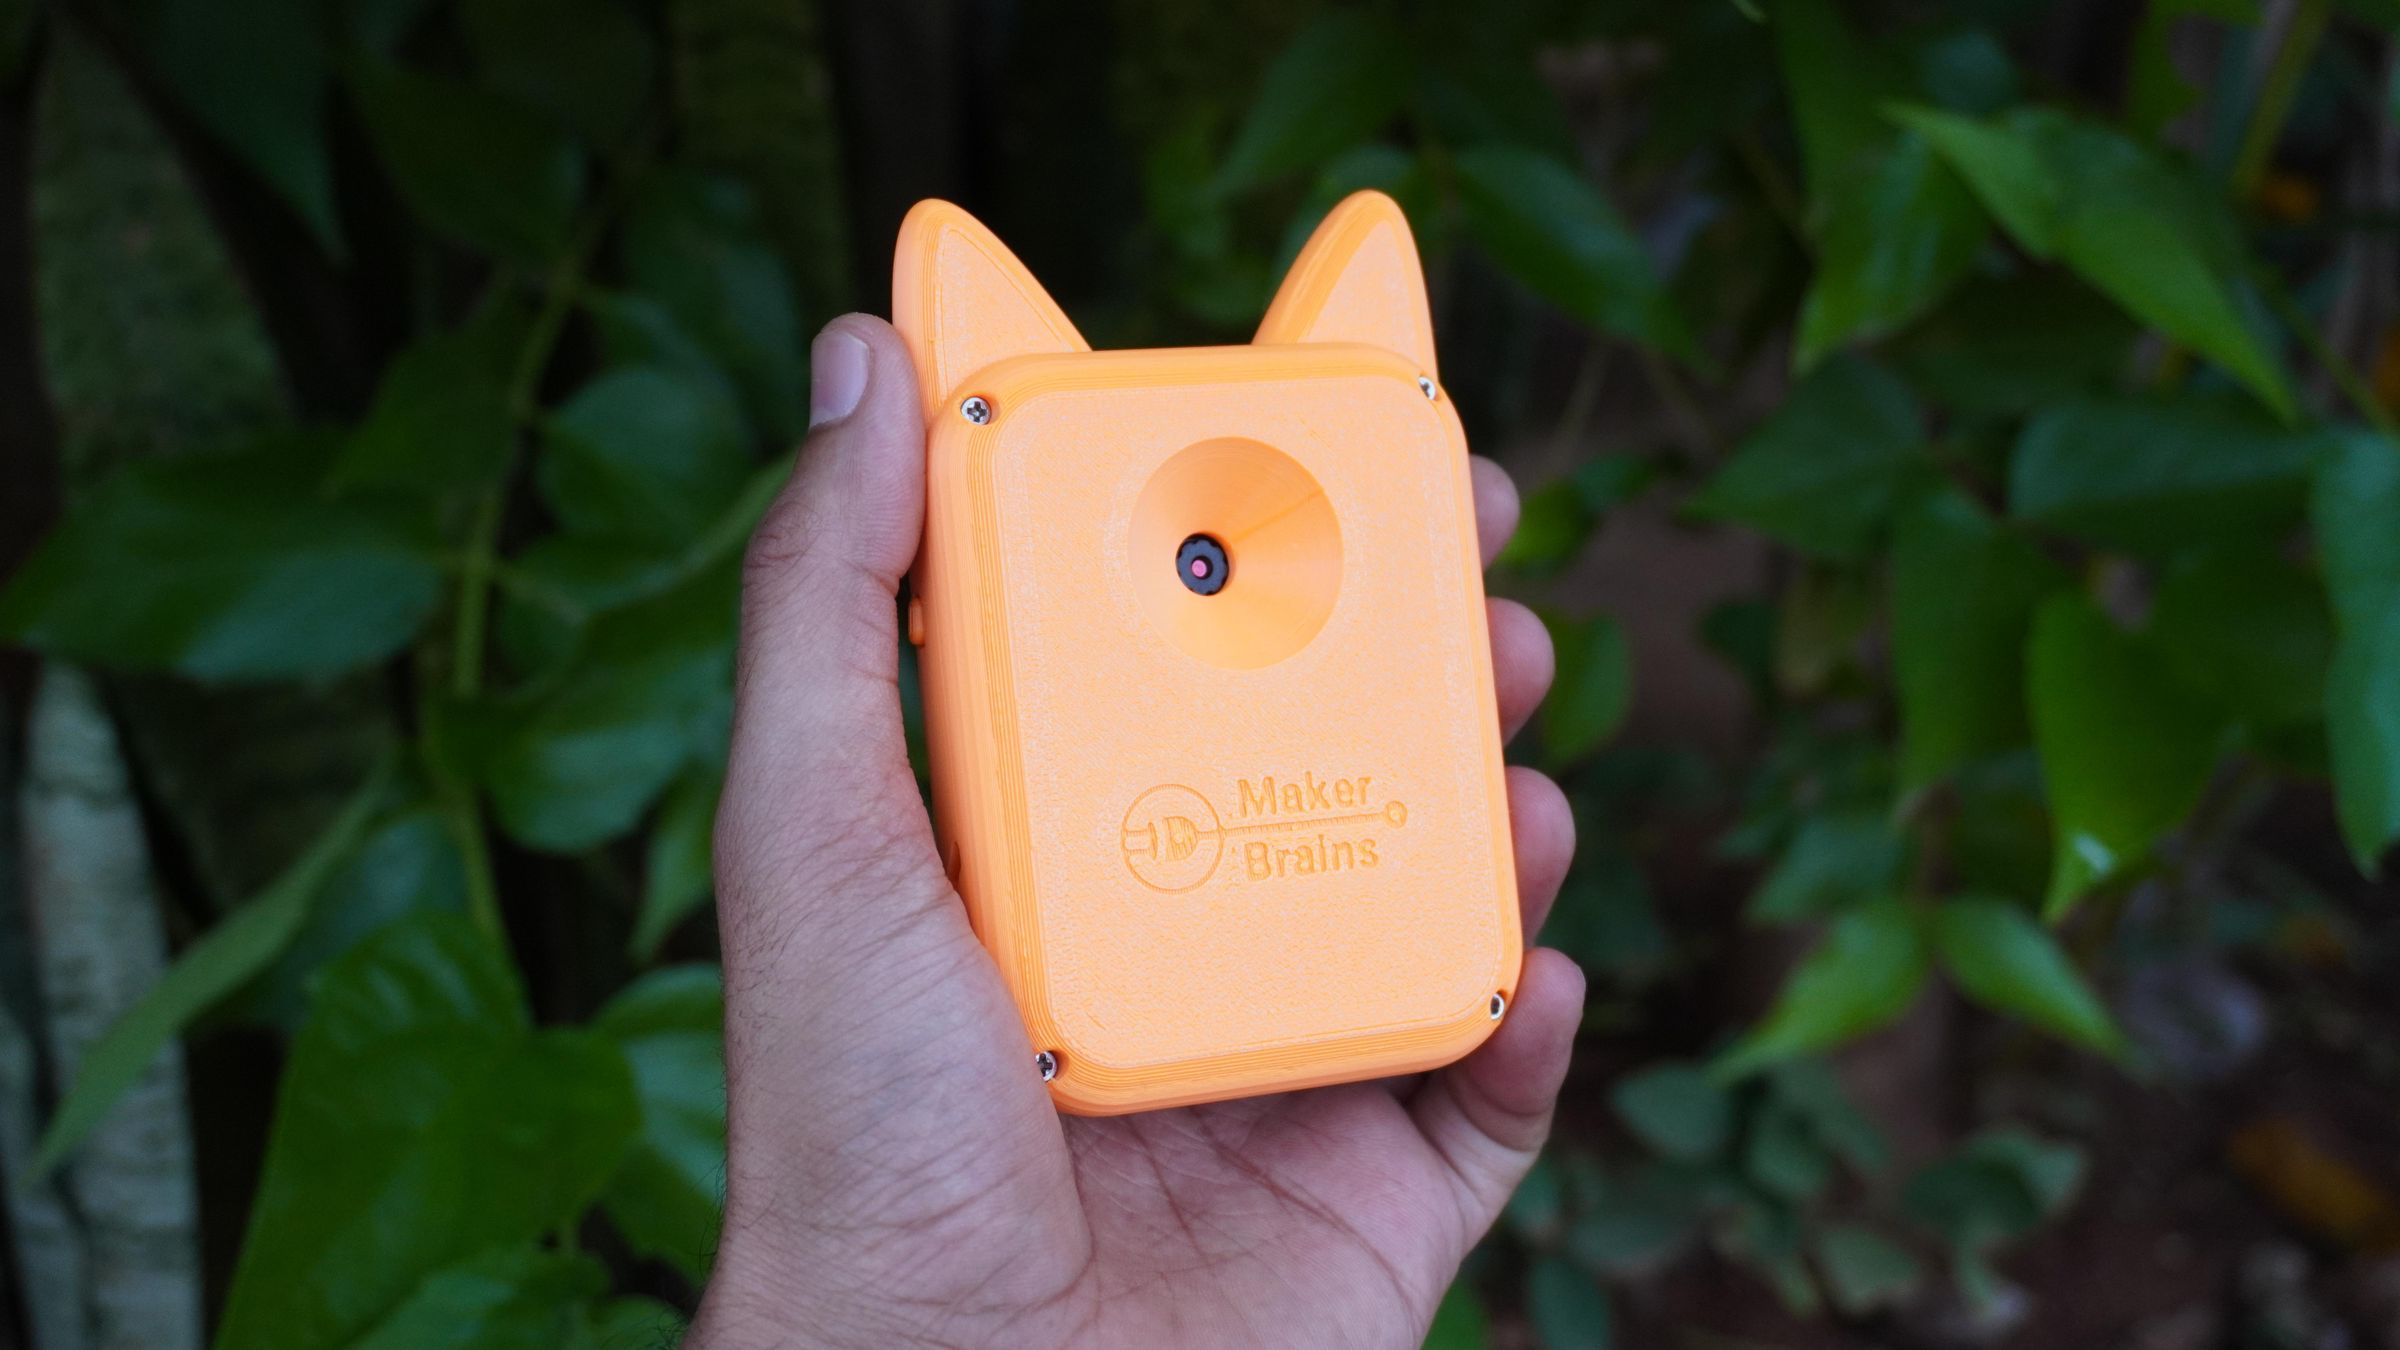
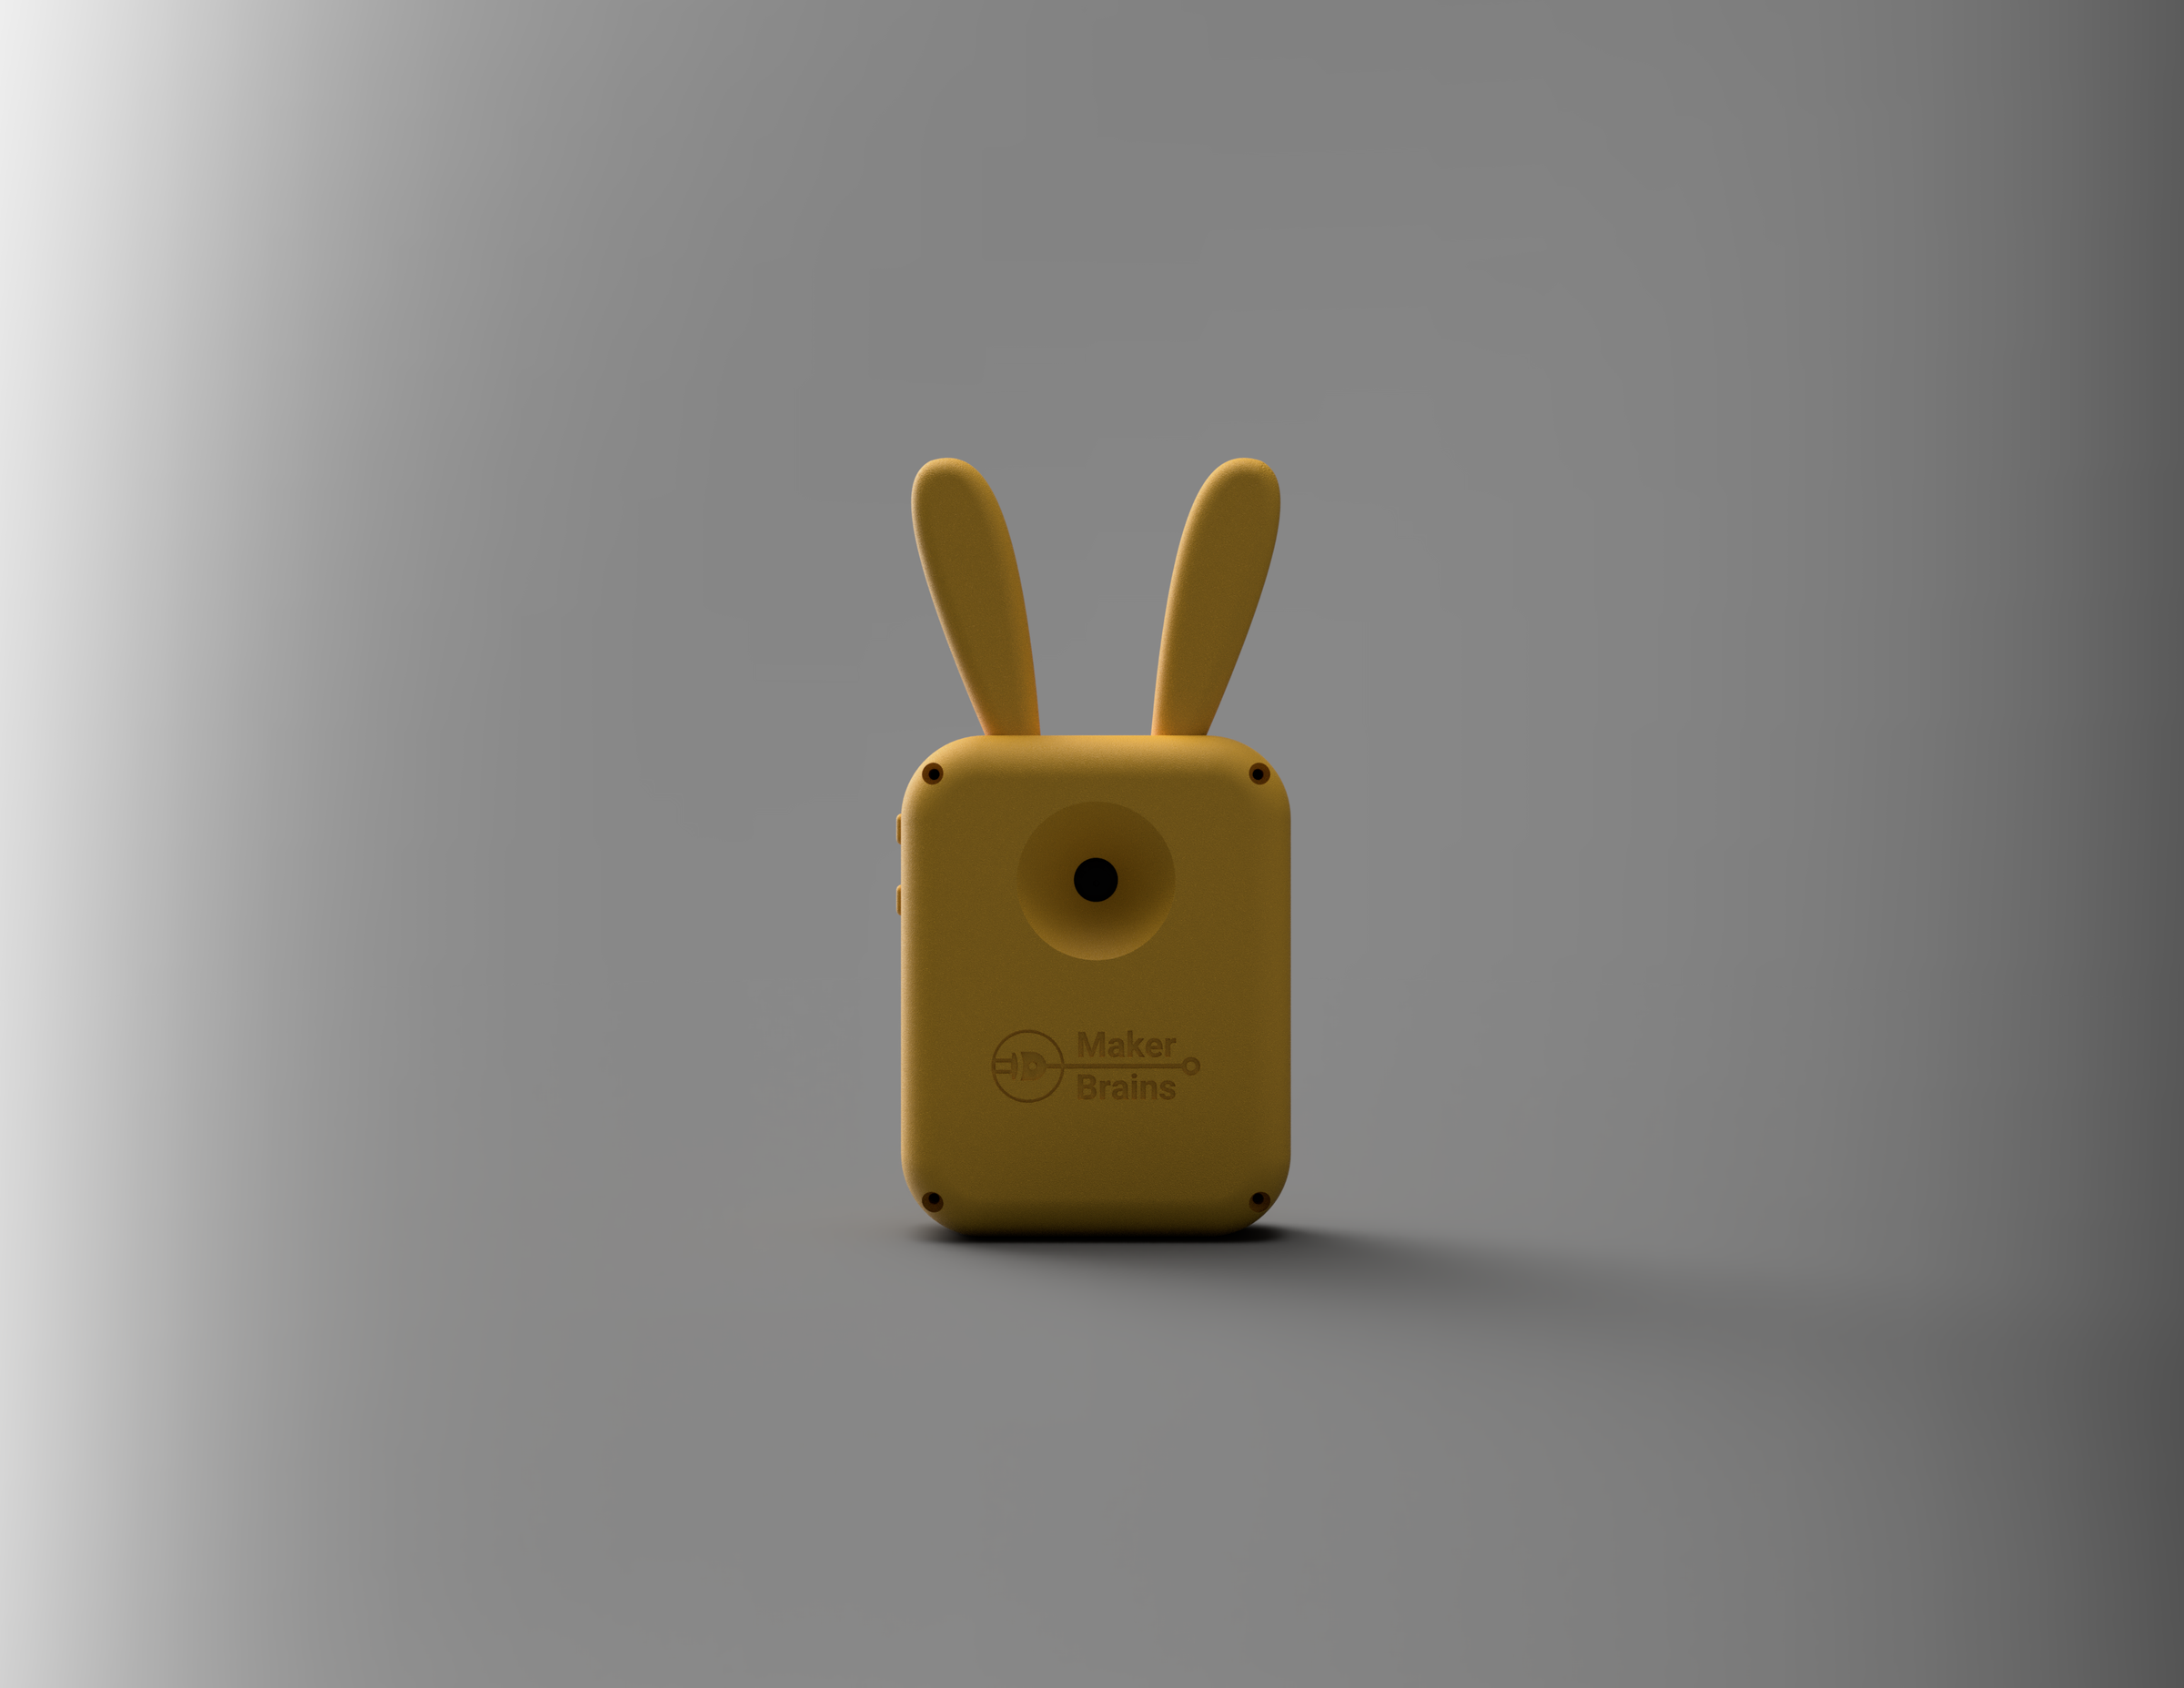
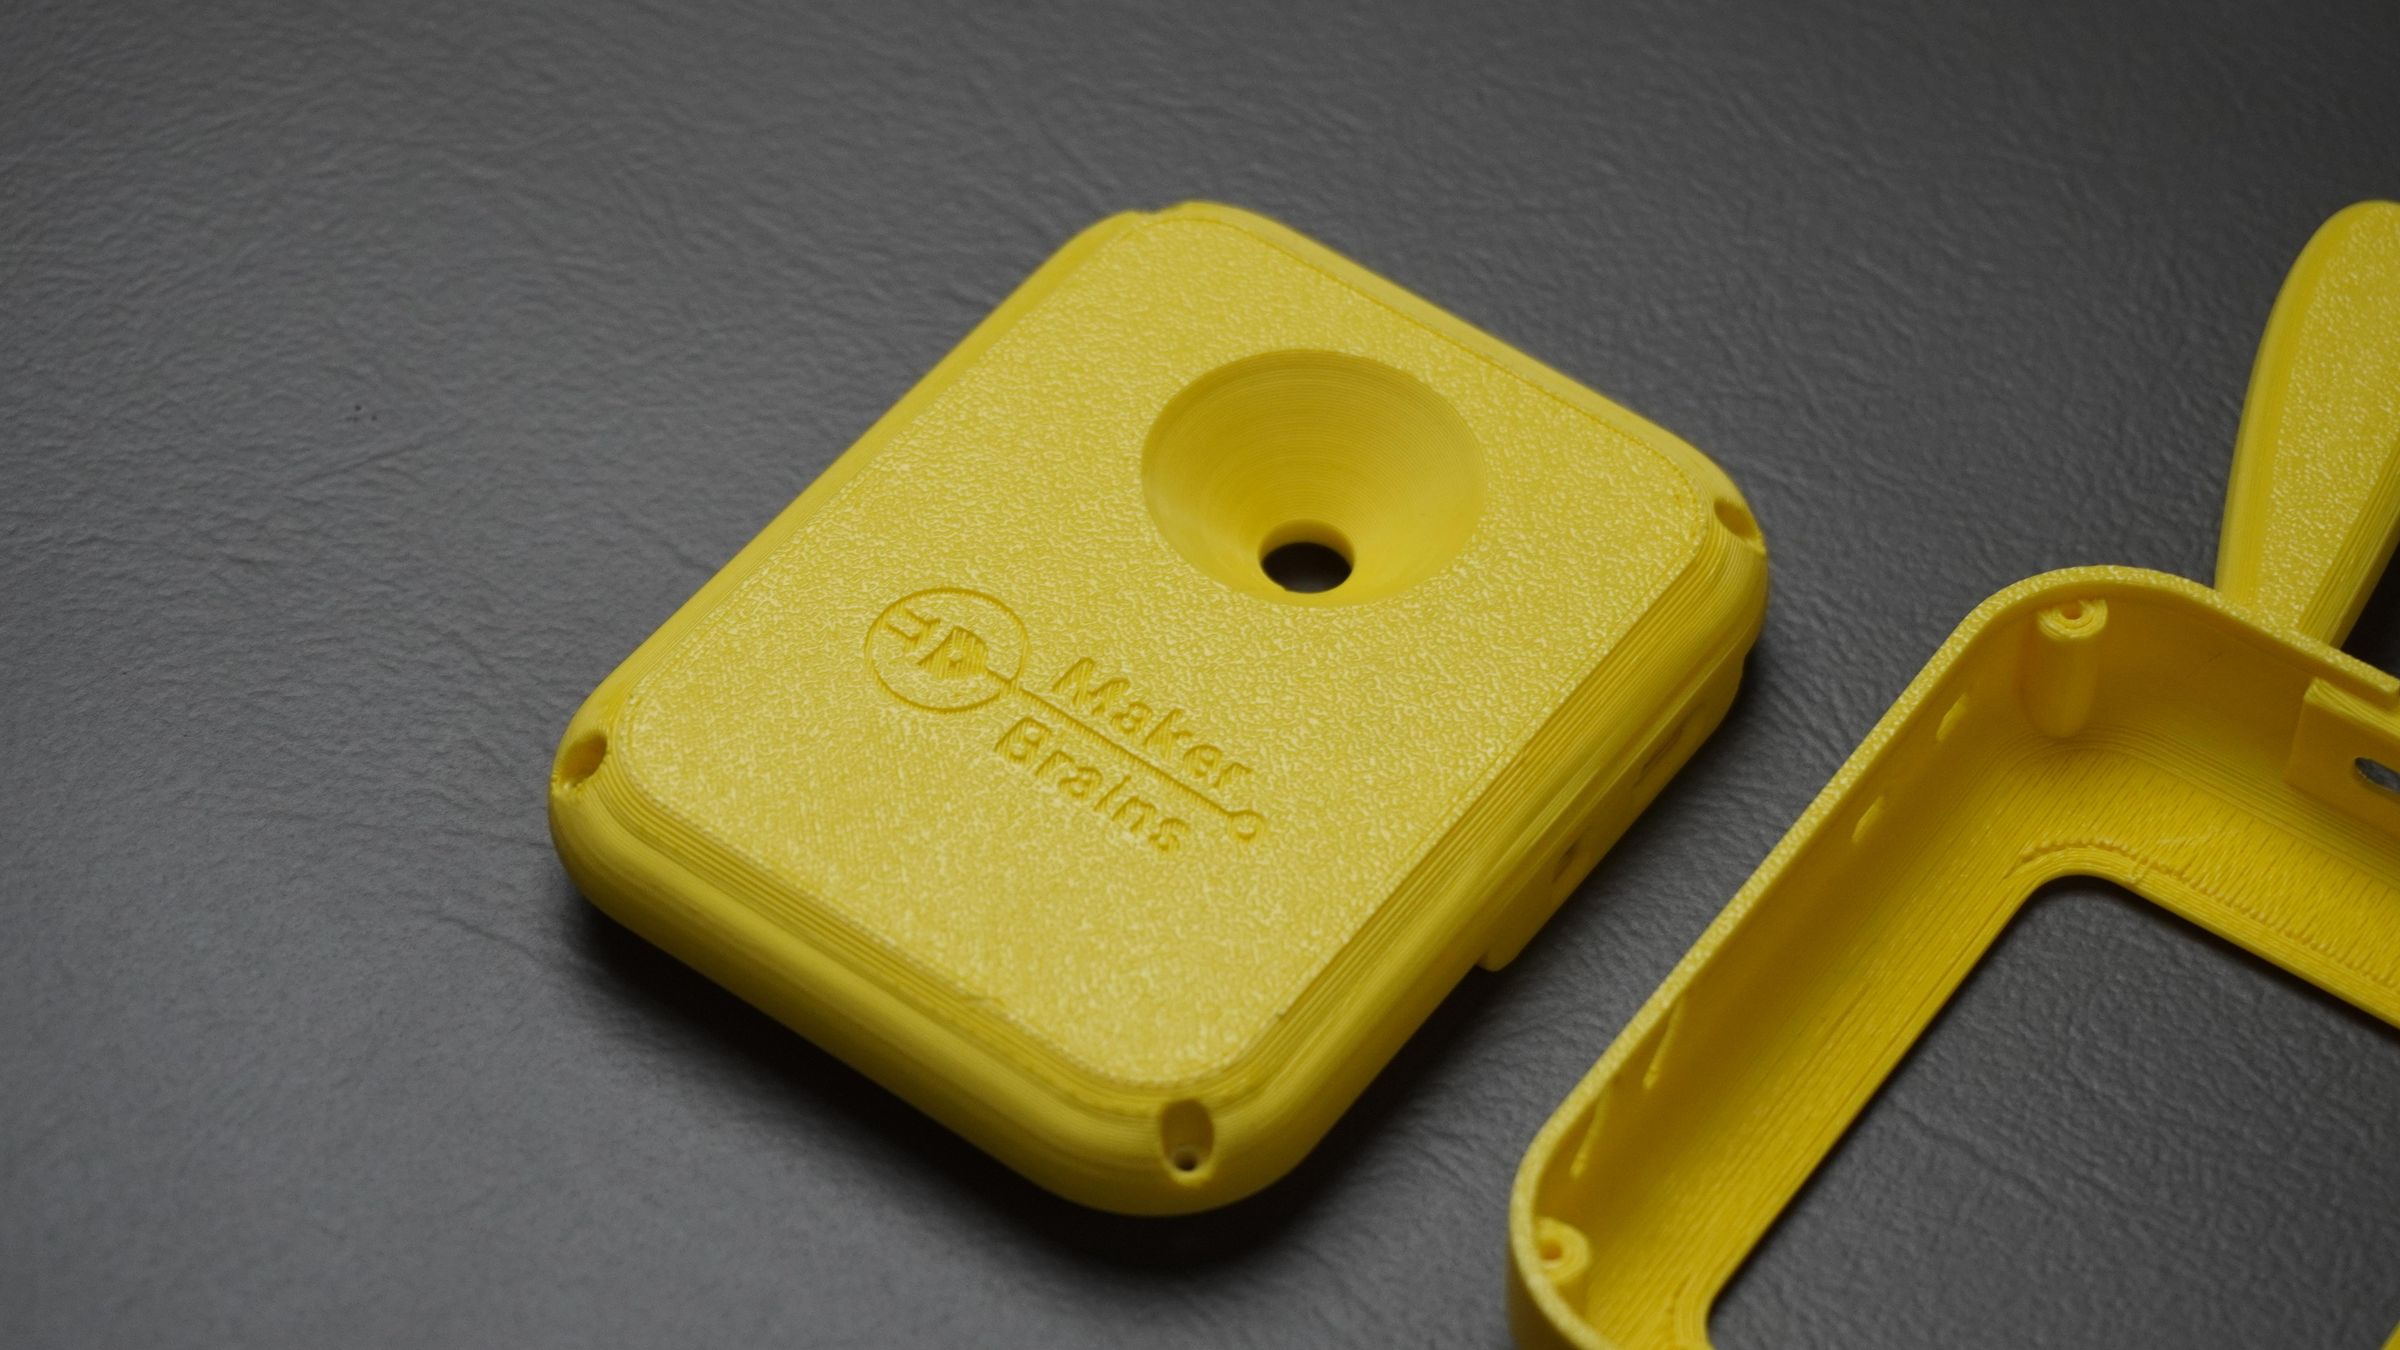
Rear Cover
The rear cover was designed to do much more than simply close the enclosure.
It features:
- Dedicated mounting points for the custom BMS PCB
- USB Type-C opening for charging through the BMS
- Opening for the BMS power button
- Camera opening aligned with the UNIHIKER camera
- Four screw mounting points for assembly
The rear cover remains identical for every AI Buddy character, making it reusable across all enclosure designs.
Button Extensions
The UNIHIKER K10 has onboard push buttons located inside the enclosure. To make them accessible from the outside, I designed two small button extension pieces that transfer the button press to the onboard switches.
These buttons are used for:
- Wake/Sleep
- Volume Up
- Volume Down
- Other functions supported by the firmware
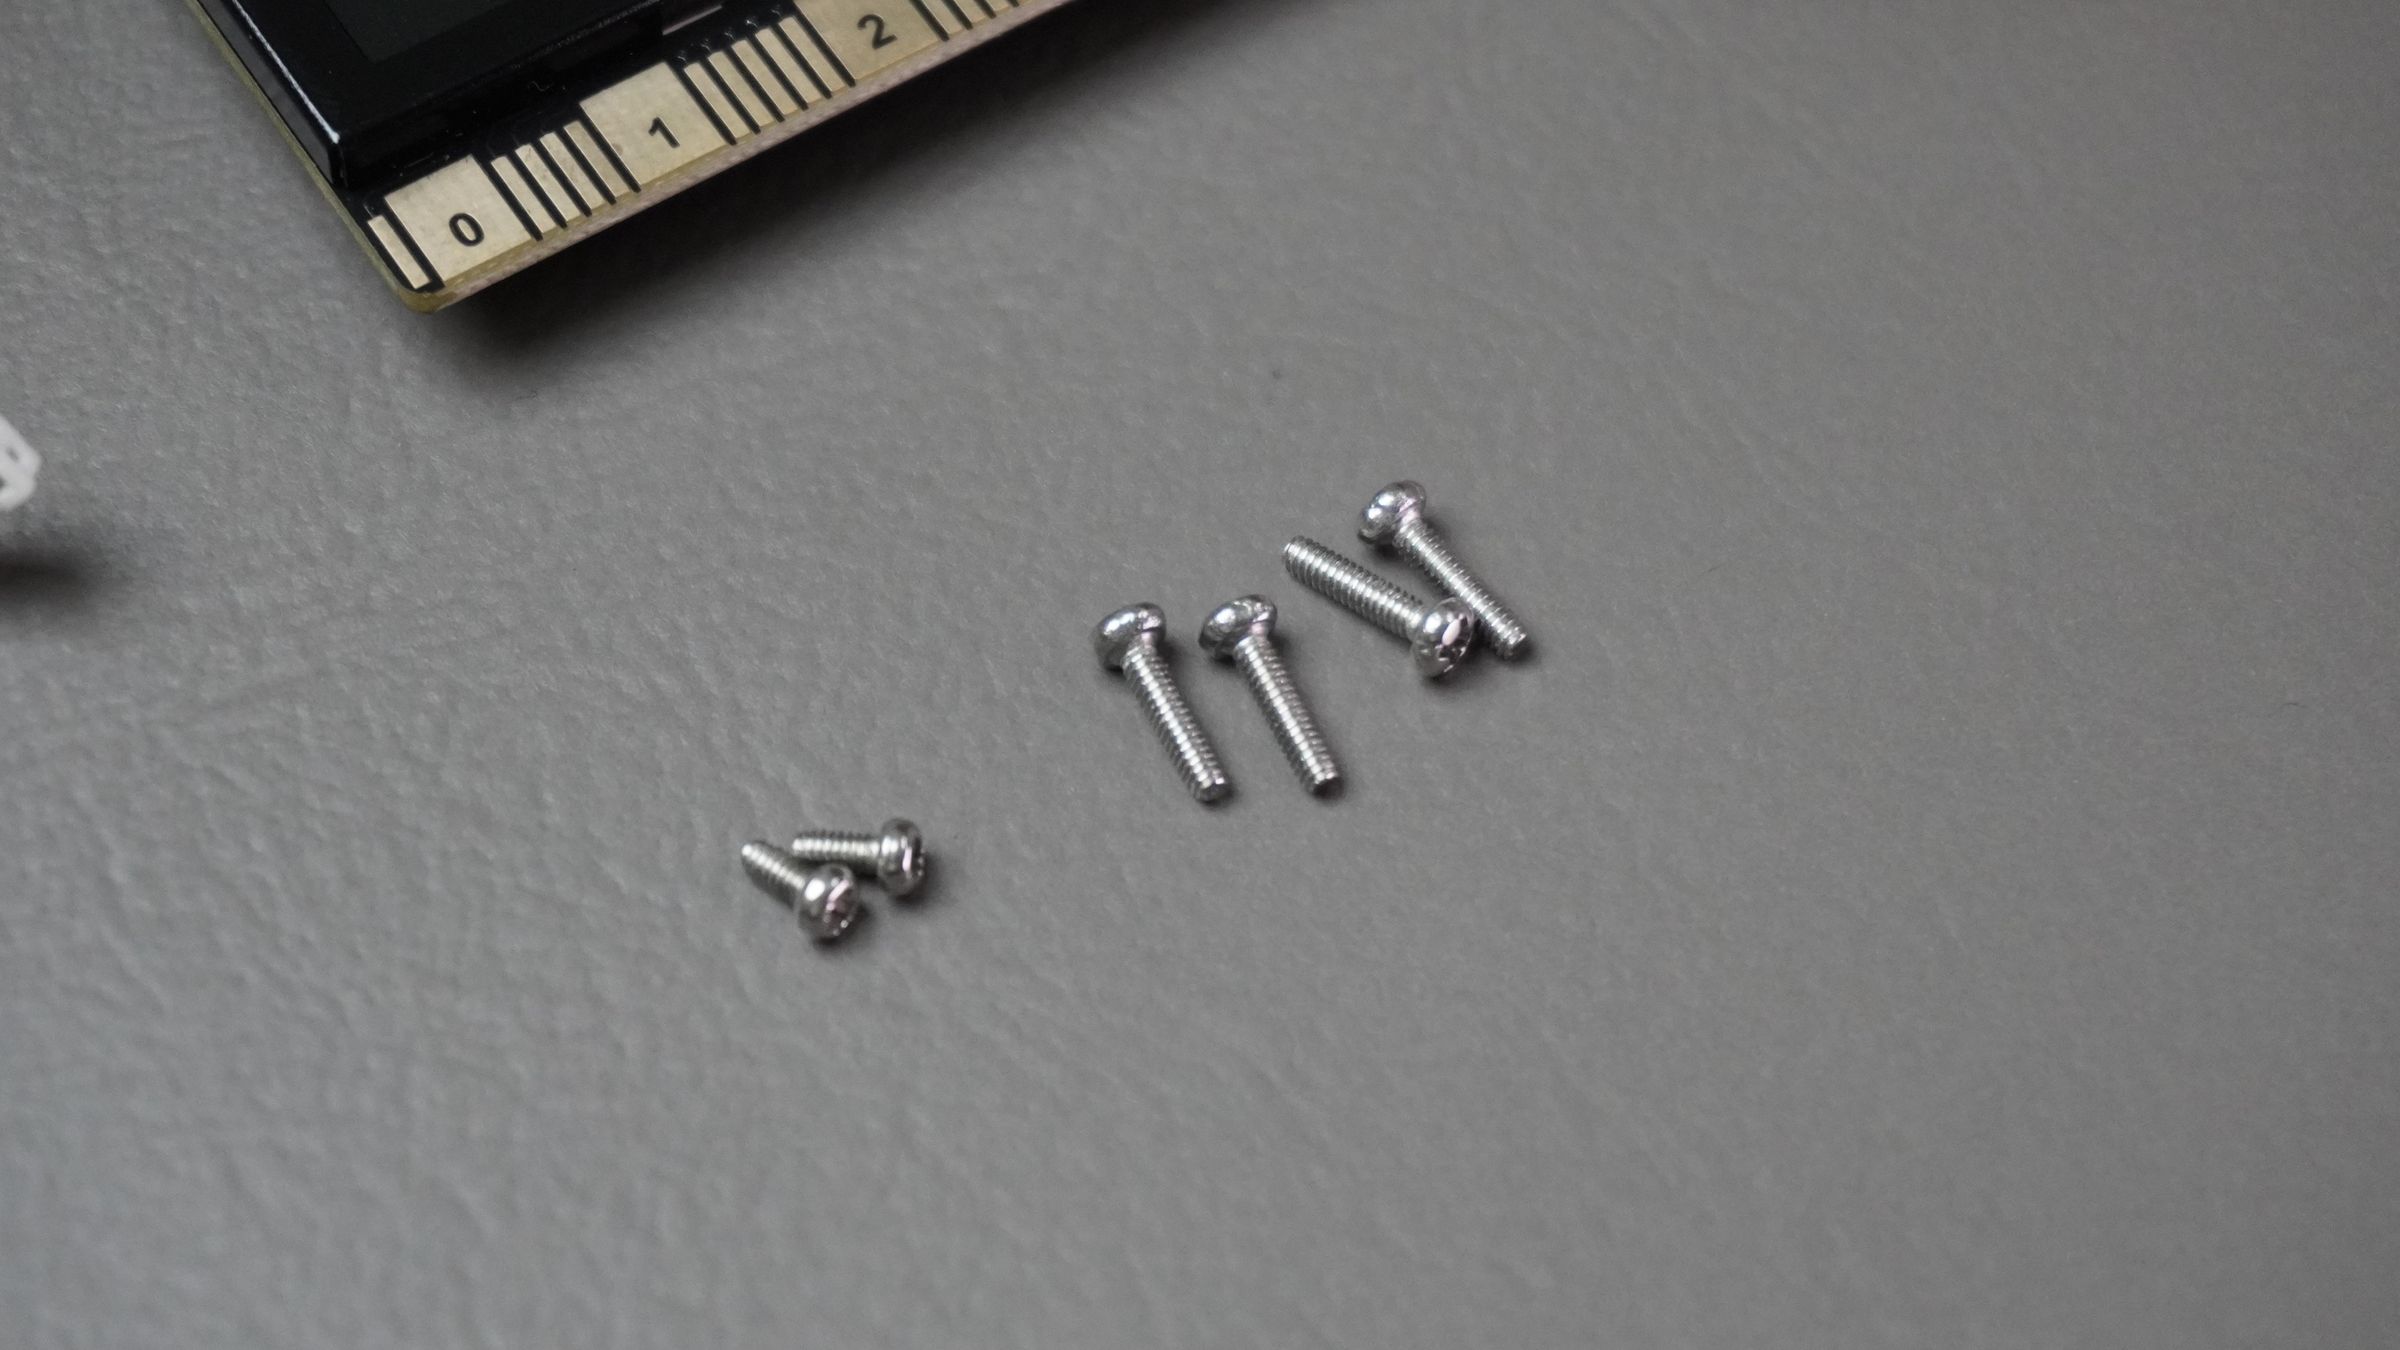
The complete enclosure is assembled using four M2 screws that fasten the rear cover to the front housing.
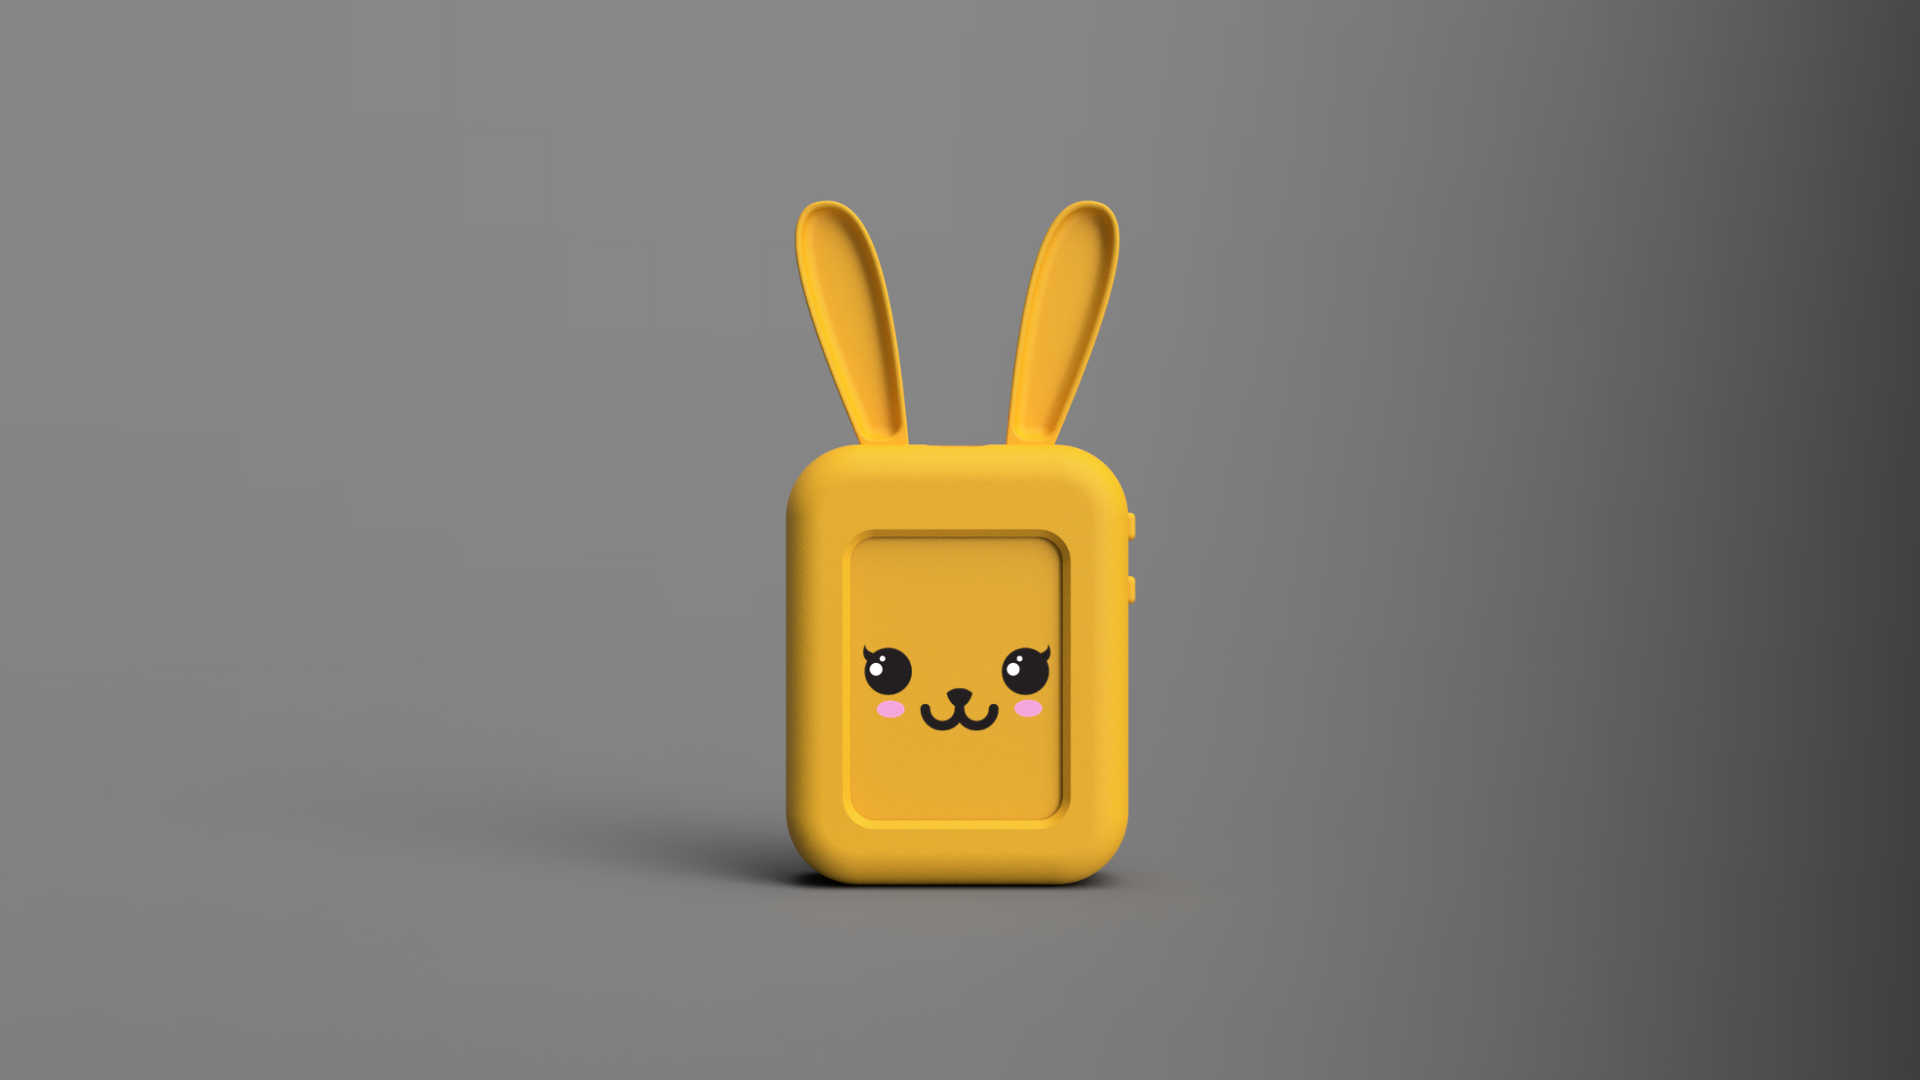
Multiple Character Designs
One of the goals of AI Buddy was to make it easy to personalize.
Instead of redesigning the entire enclosure every time, I made only the front housing interchangeable. The rear cover, button extensions, and internal hardware remain exactly the same.
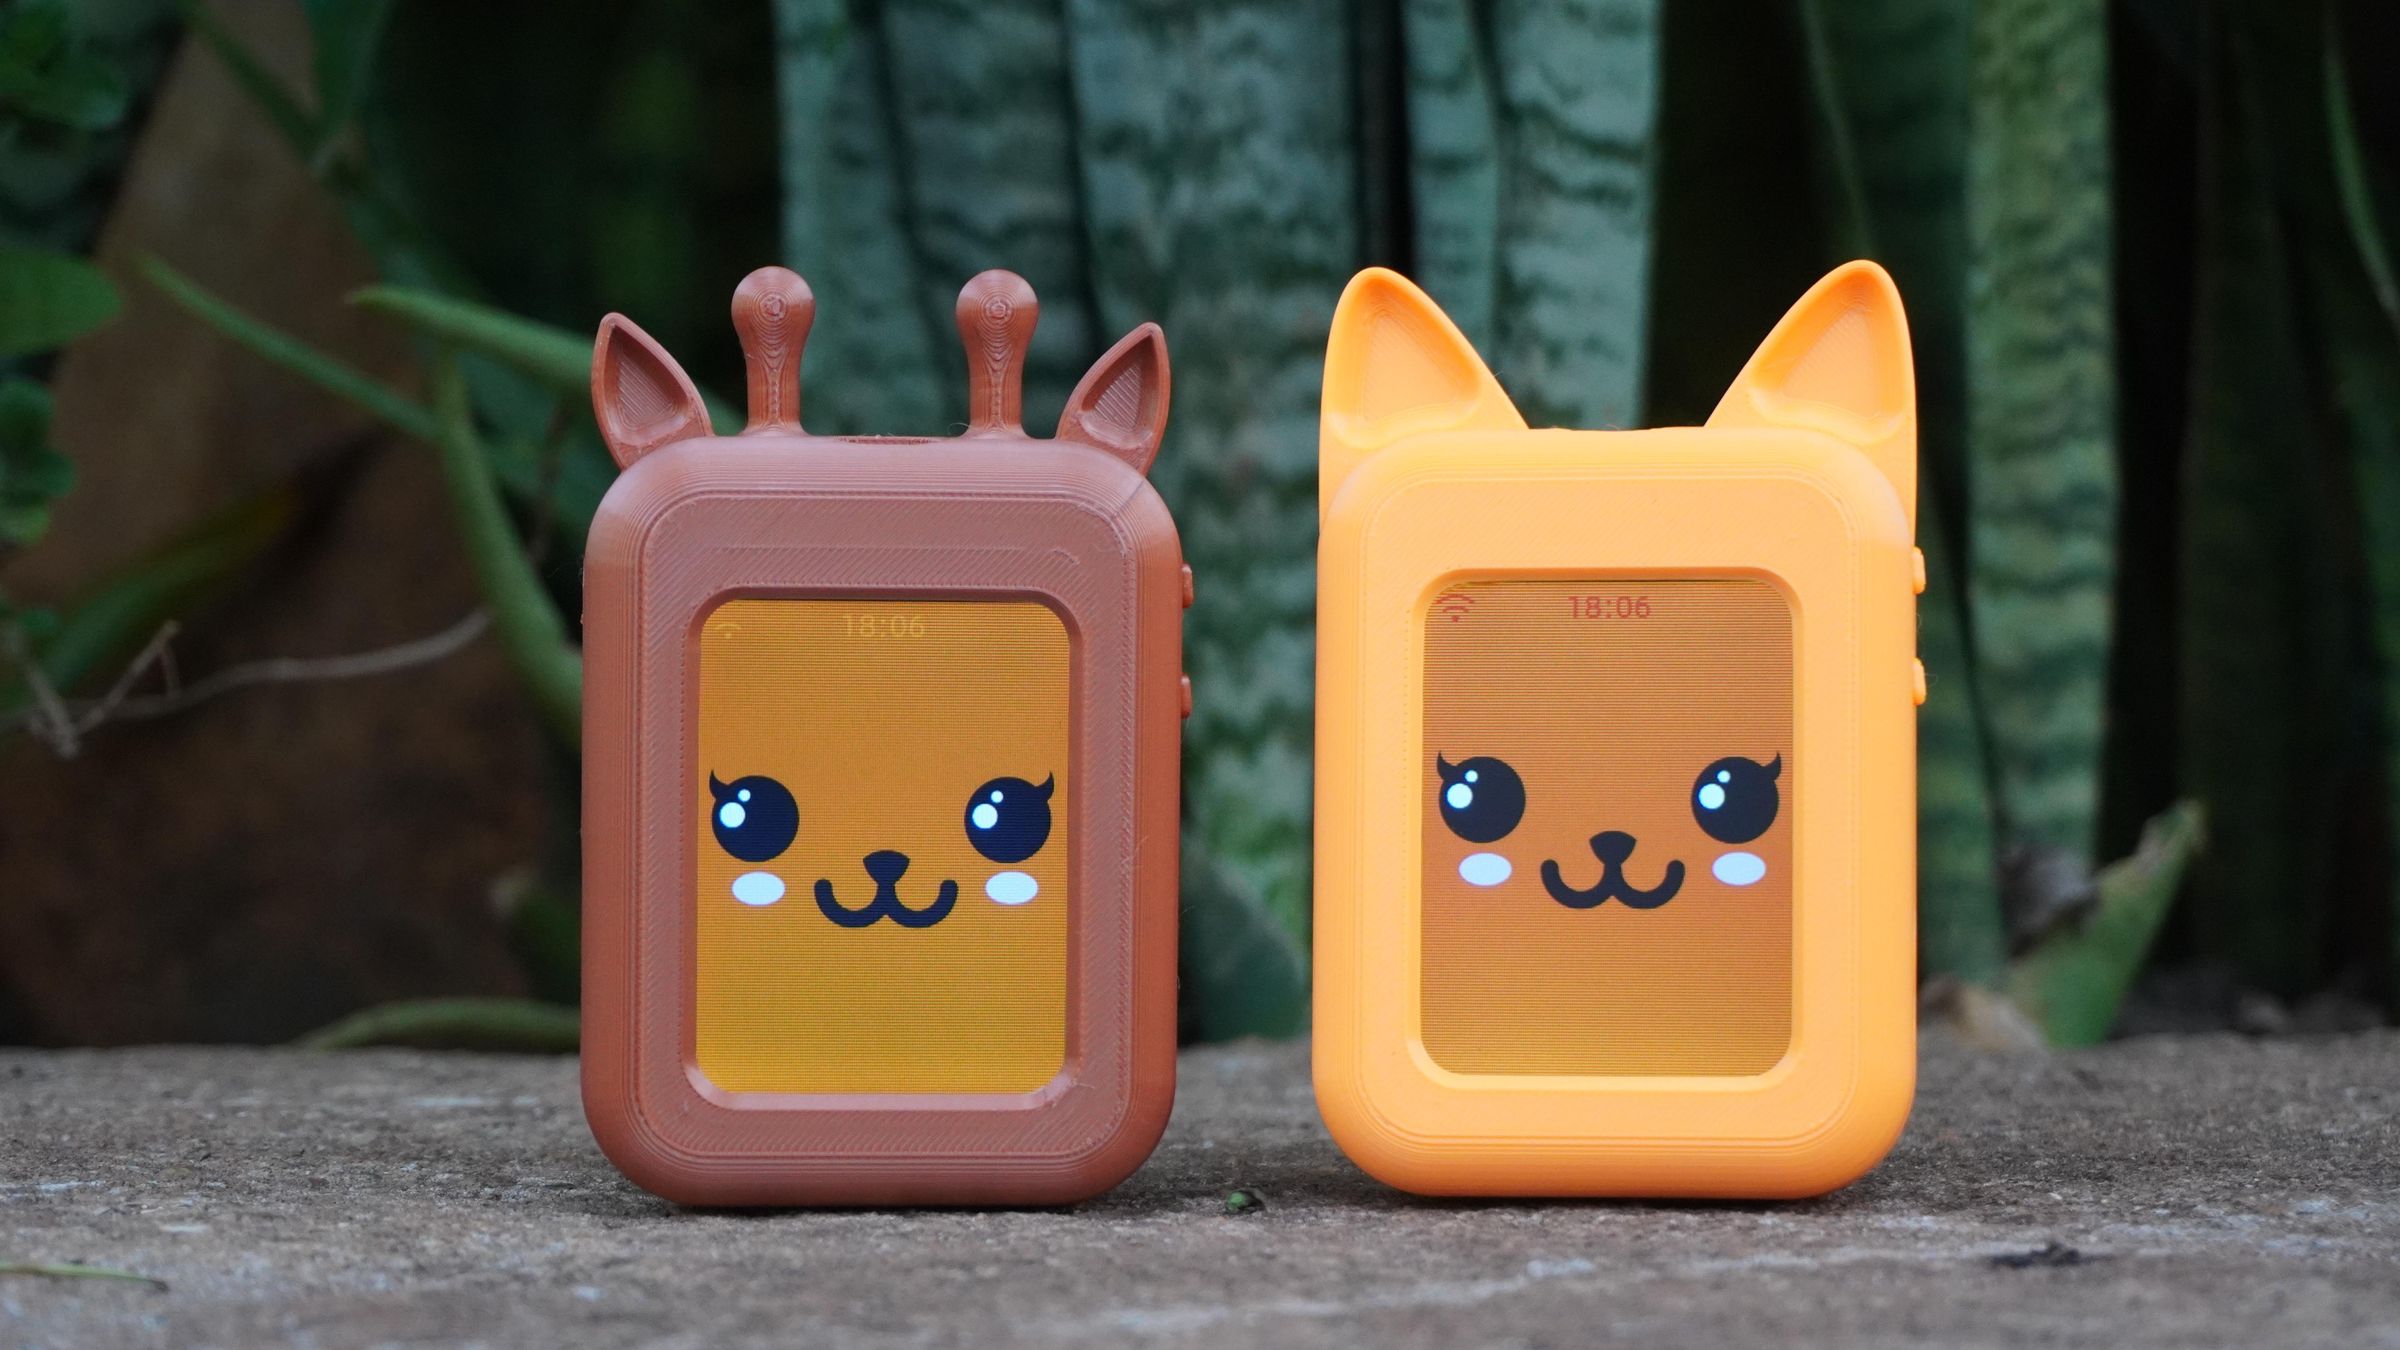
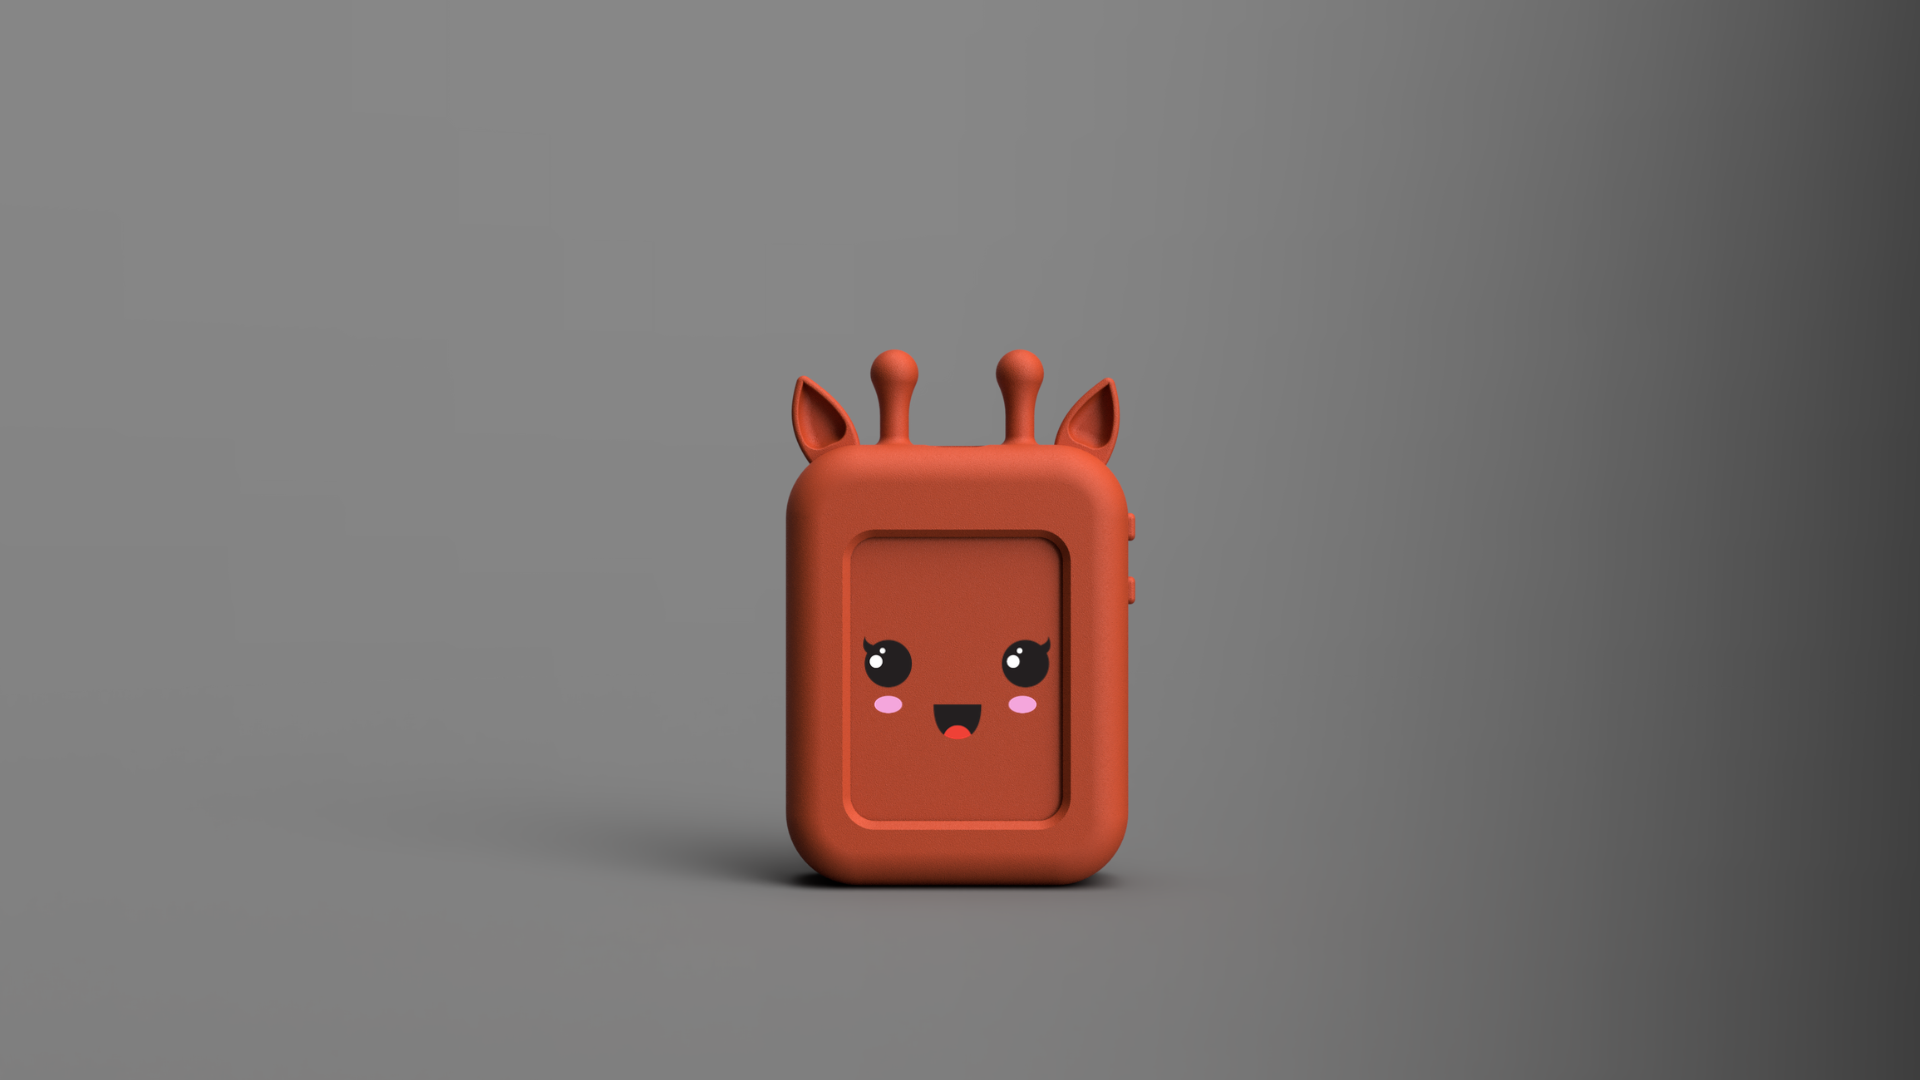
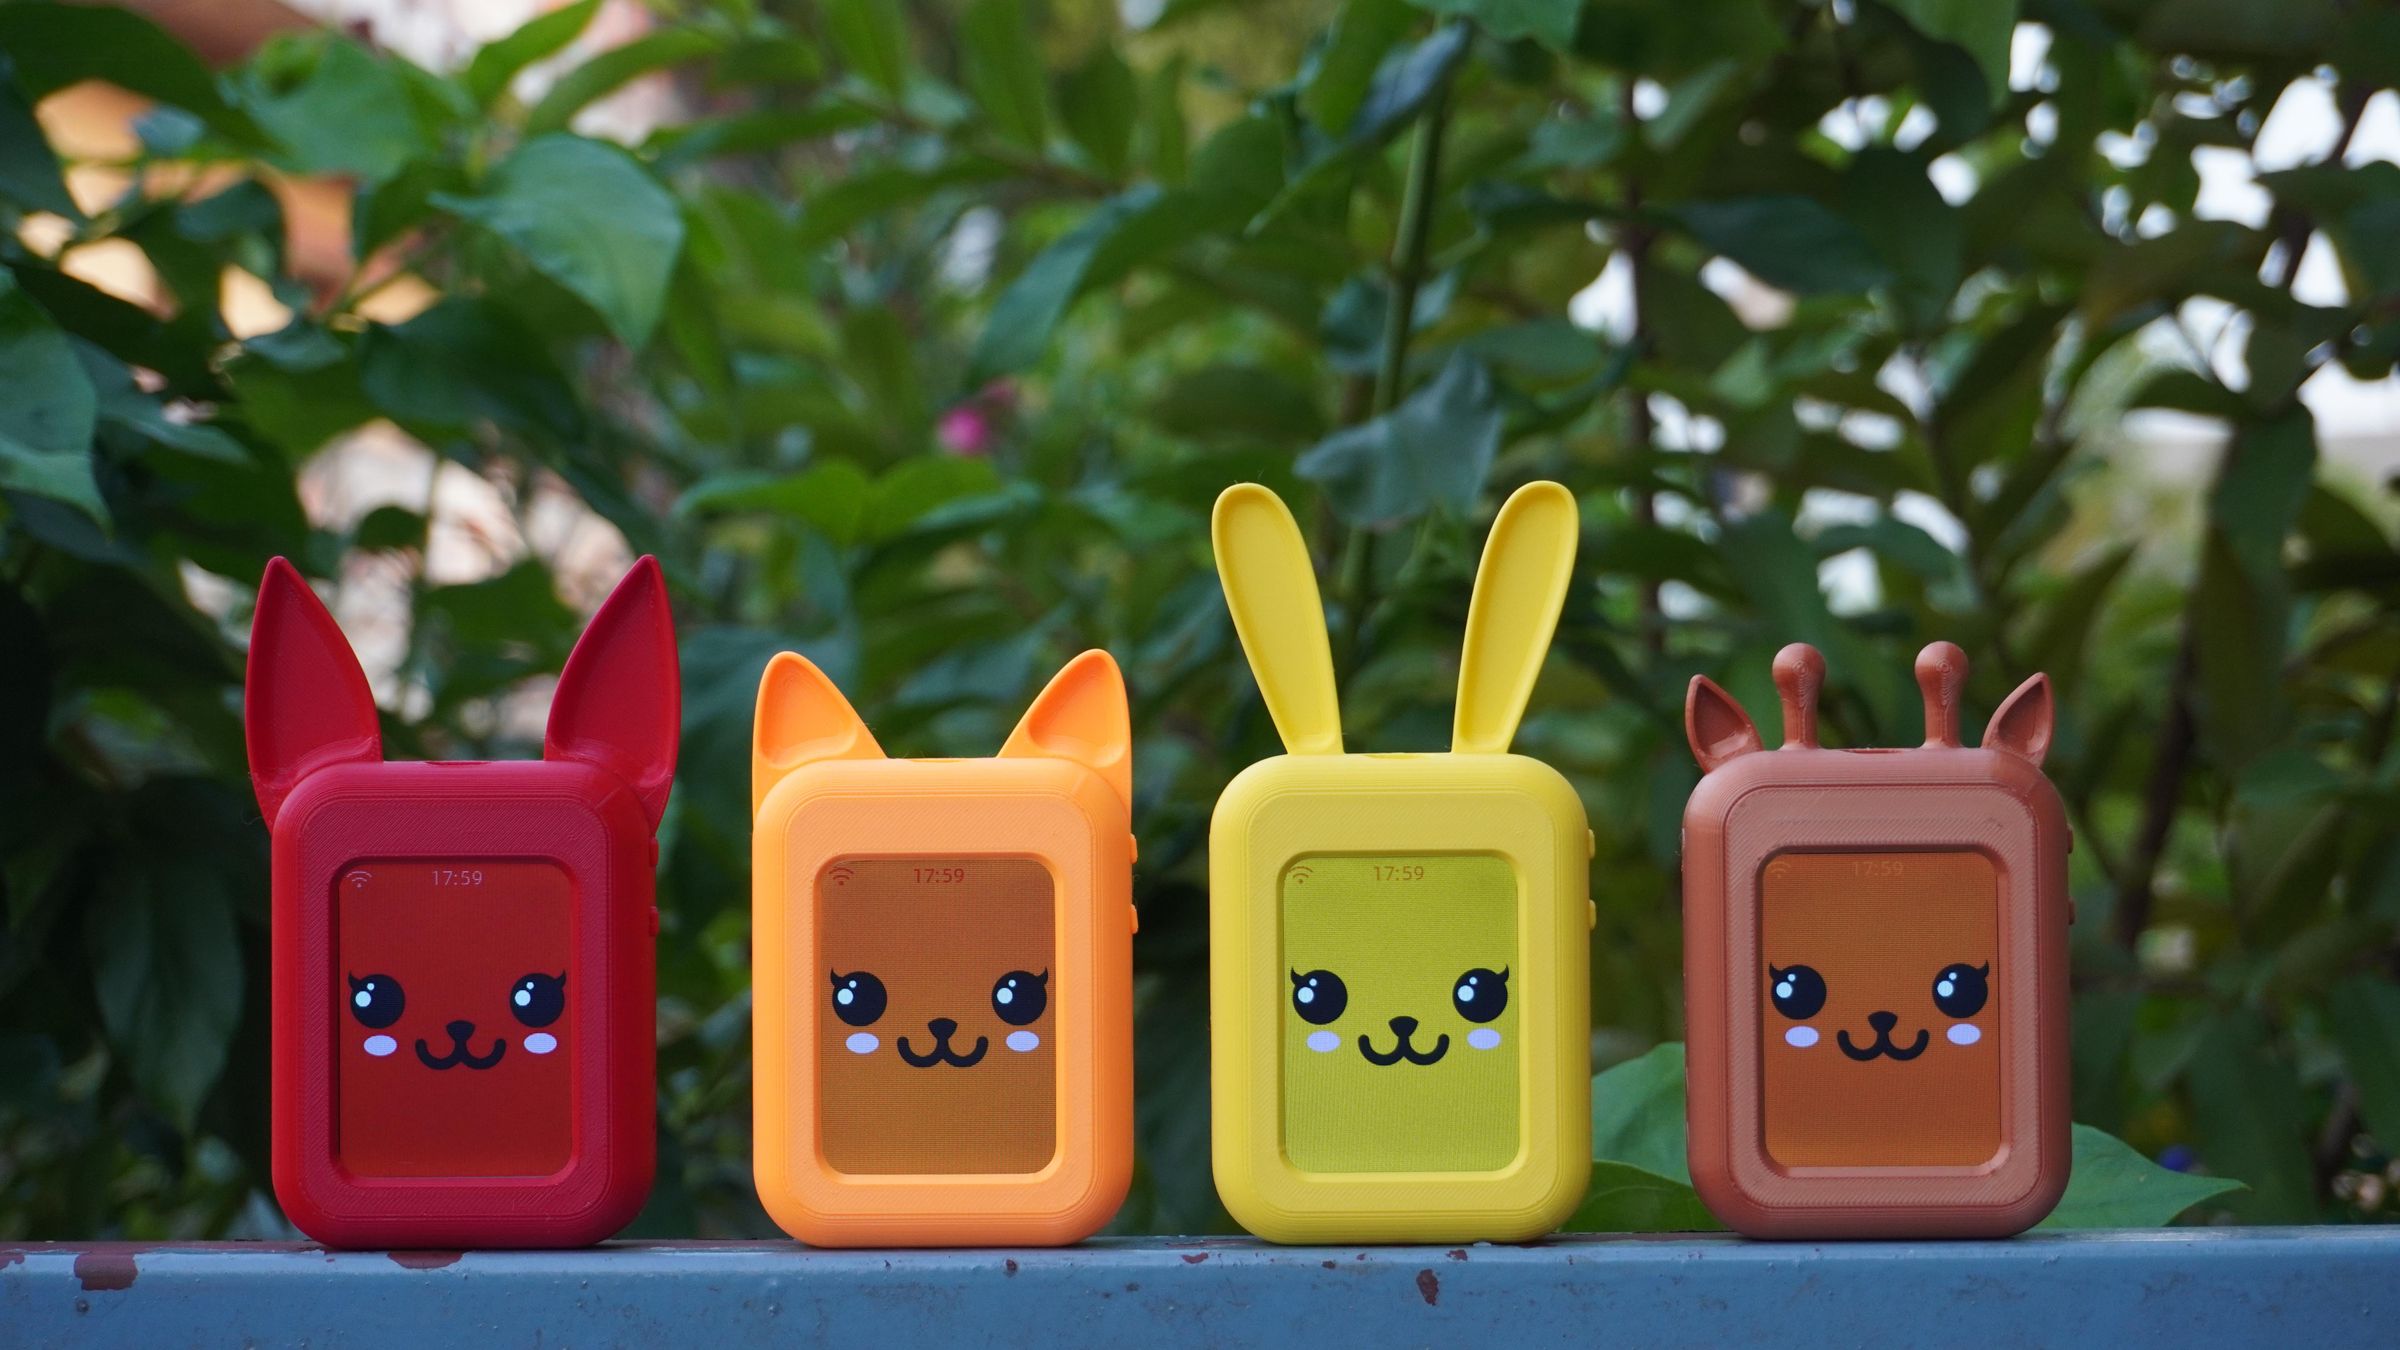
So far, I've designed several characters, including:
- 🐰 Bunny
- 🦊 Fox
- 🐱 Cat
- 🦒 Giraffe
Since the internal dimensions are identical, you can even create your own custom character in Fusion 360 while reusing all the existing electronics and rear components.
This modular approach makes AI Buddy easy to customize, print, and expand into an entire collection of AI companions.
Step 1: 3D Printing the Parts
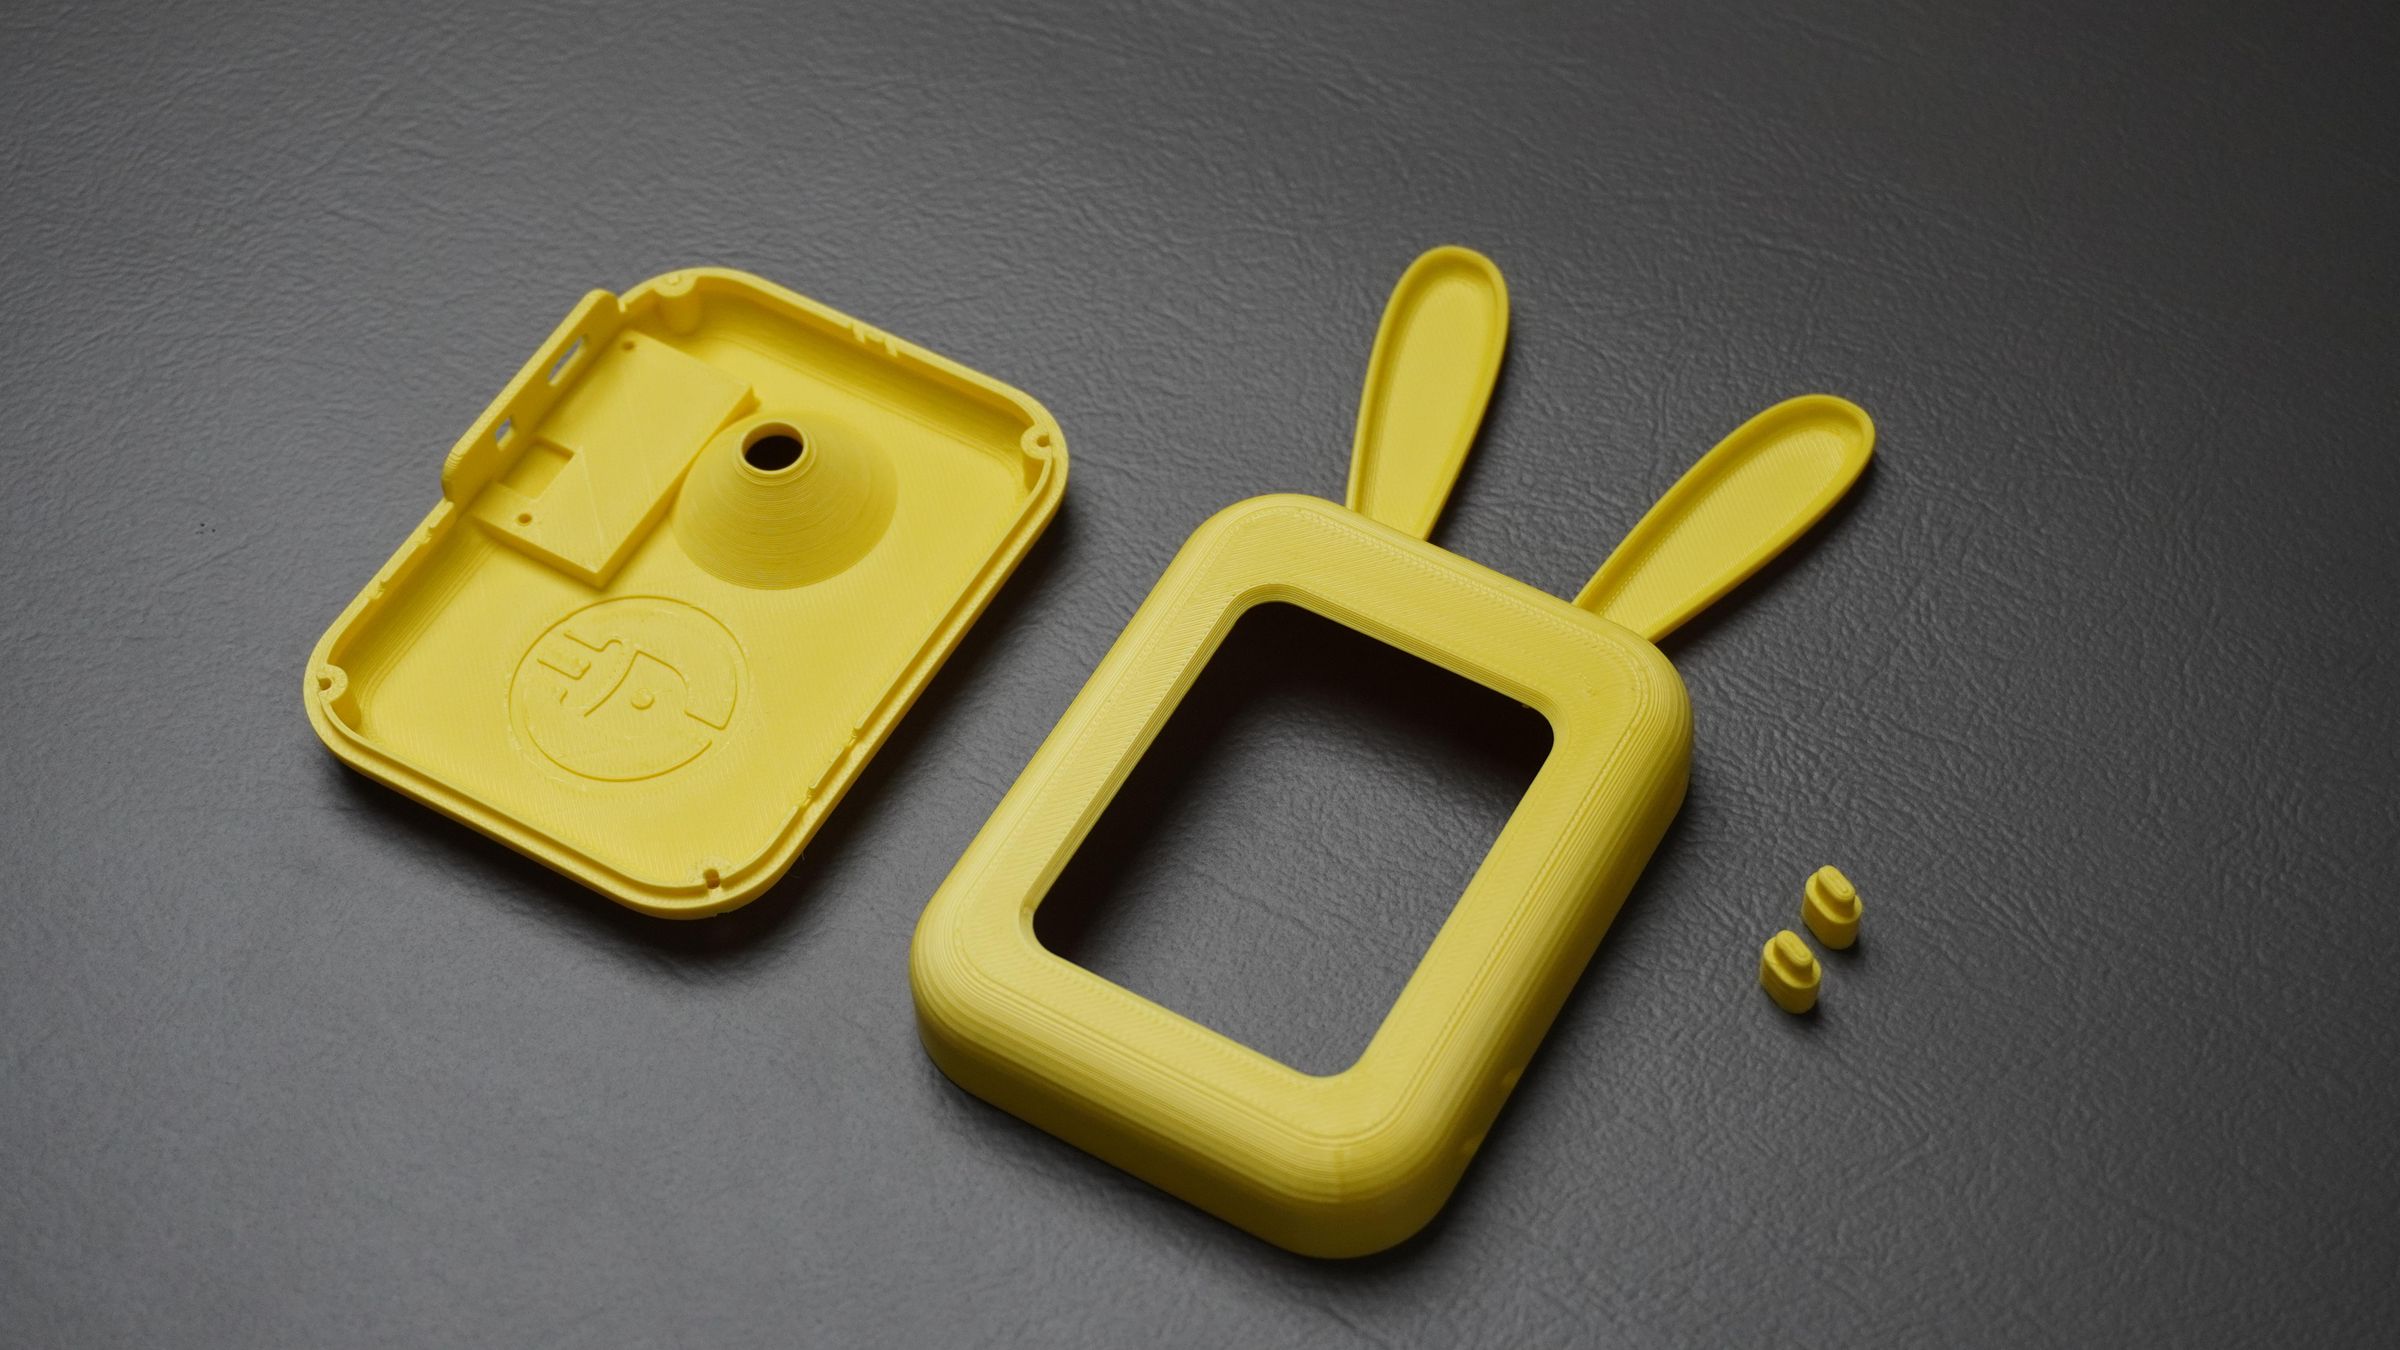
With the enclosure design complete, it's time to bring AI Buddy to life using a 3D printer.
For this build, I printed all the parts on my Bambu Lab P1S using standard PLA print settings:
- PLA Filament
- 0.4 mm Nozzle
- 0.2 mm Layer Height
Bunny Version
For the main build featured in this Instructable, I printed the Bunny enclosure using Yellow PLA, giving it a bright and cheerful appearance that's perfect for an AI companion.
Other Character Variants
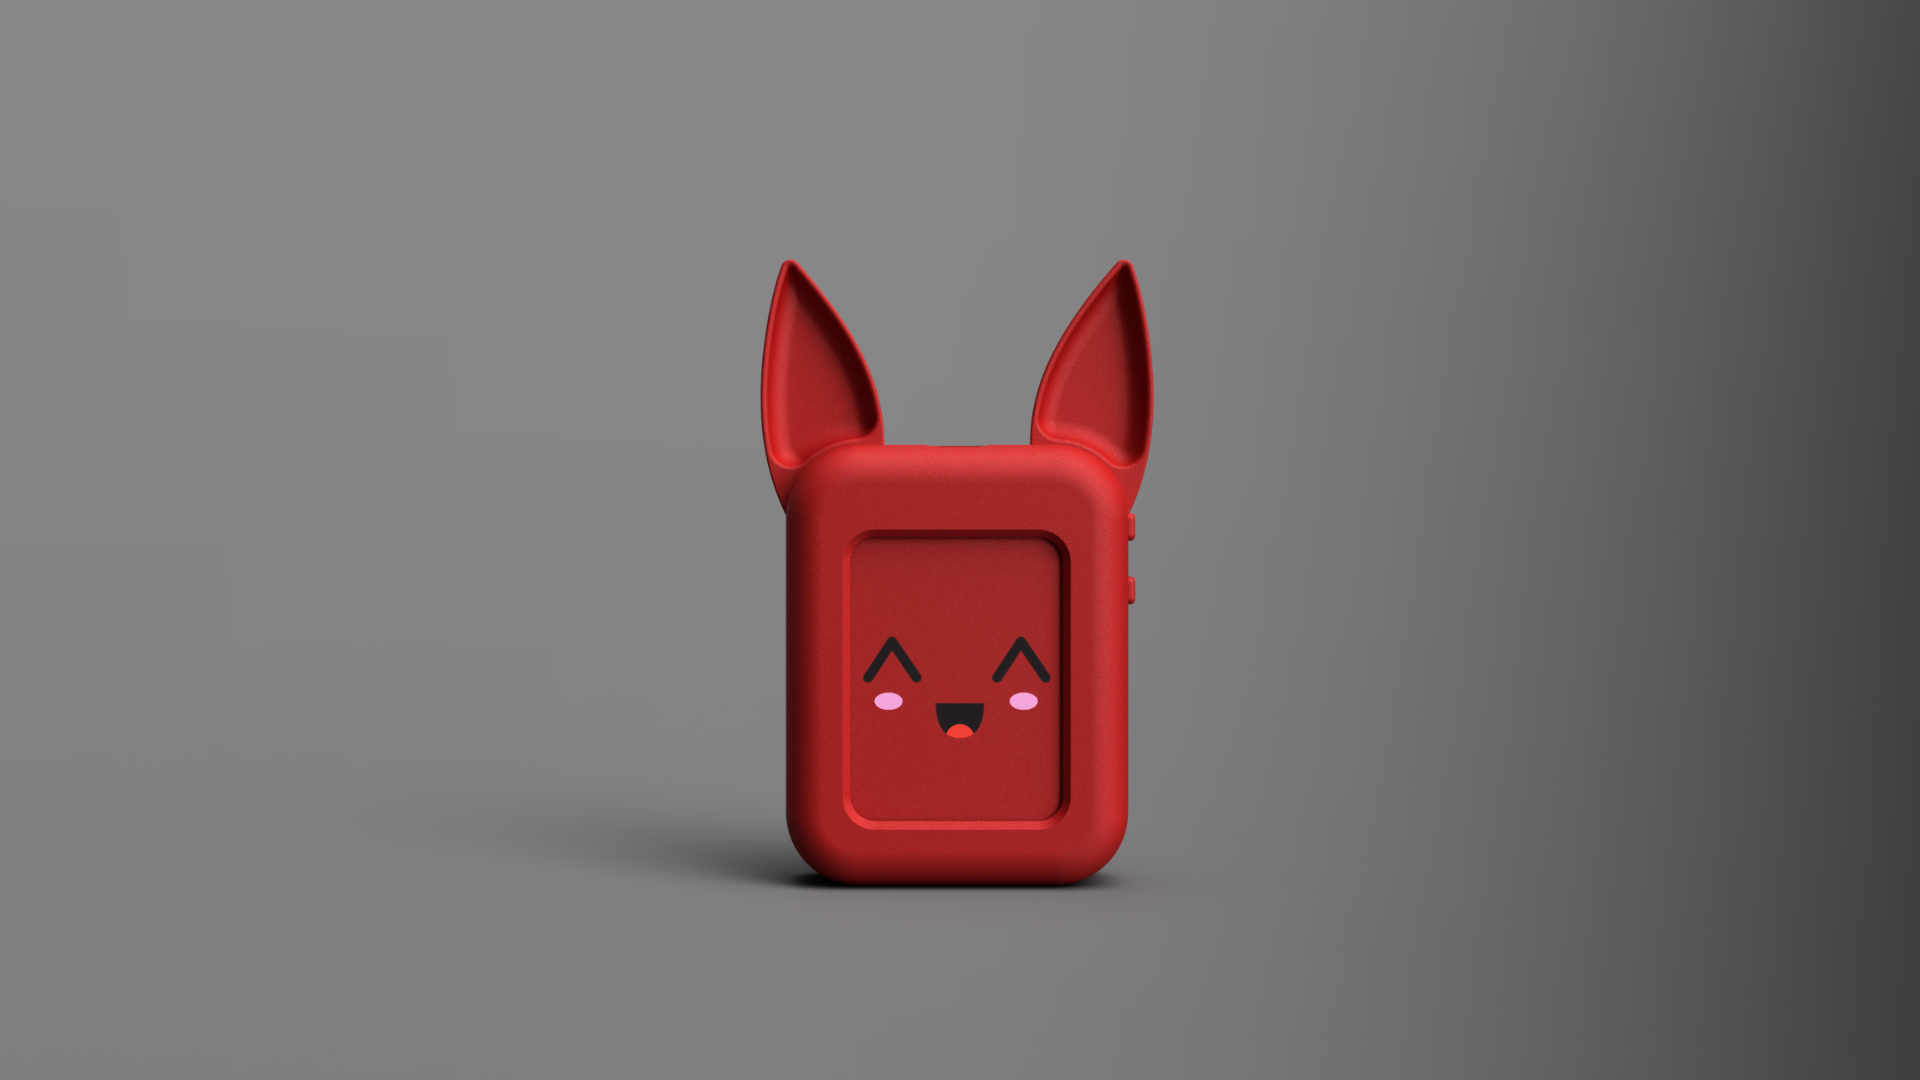
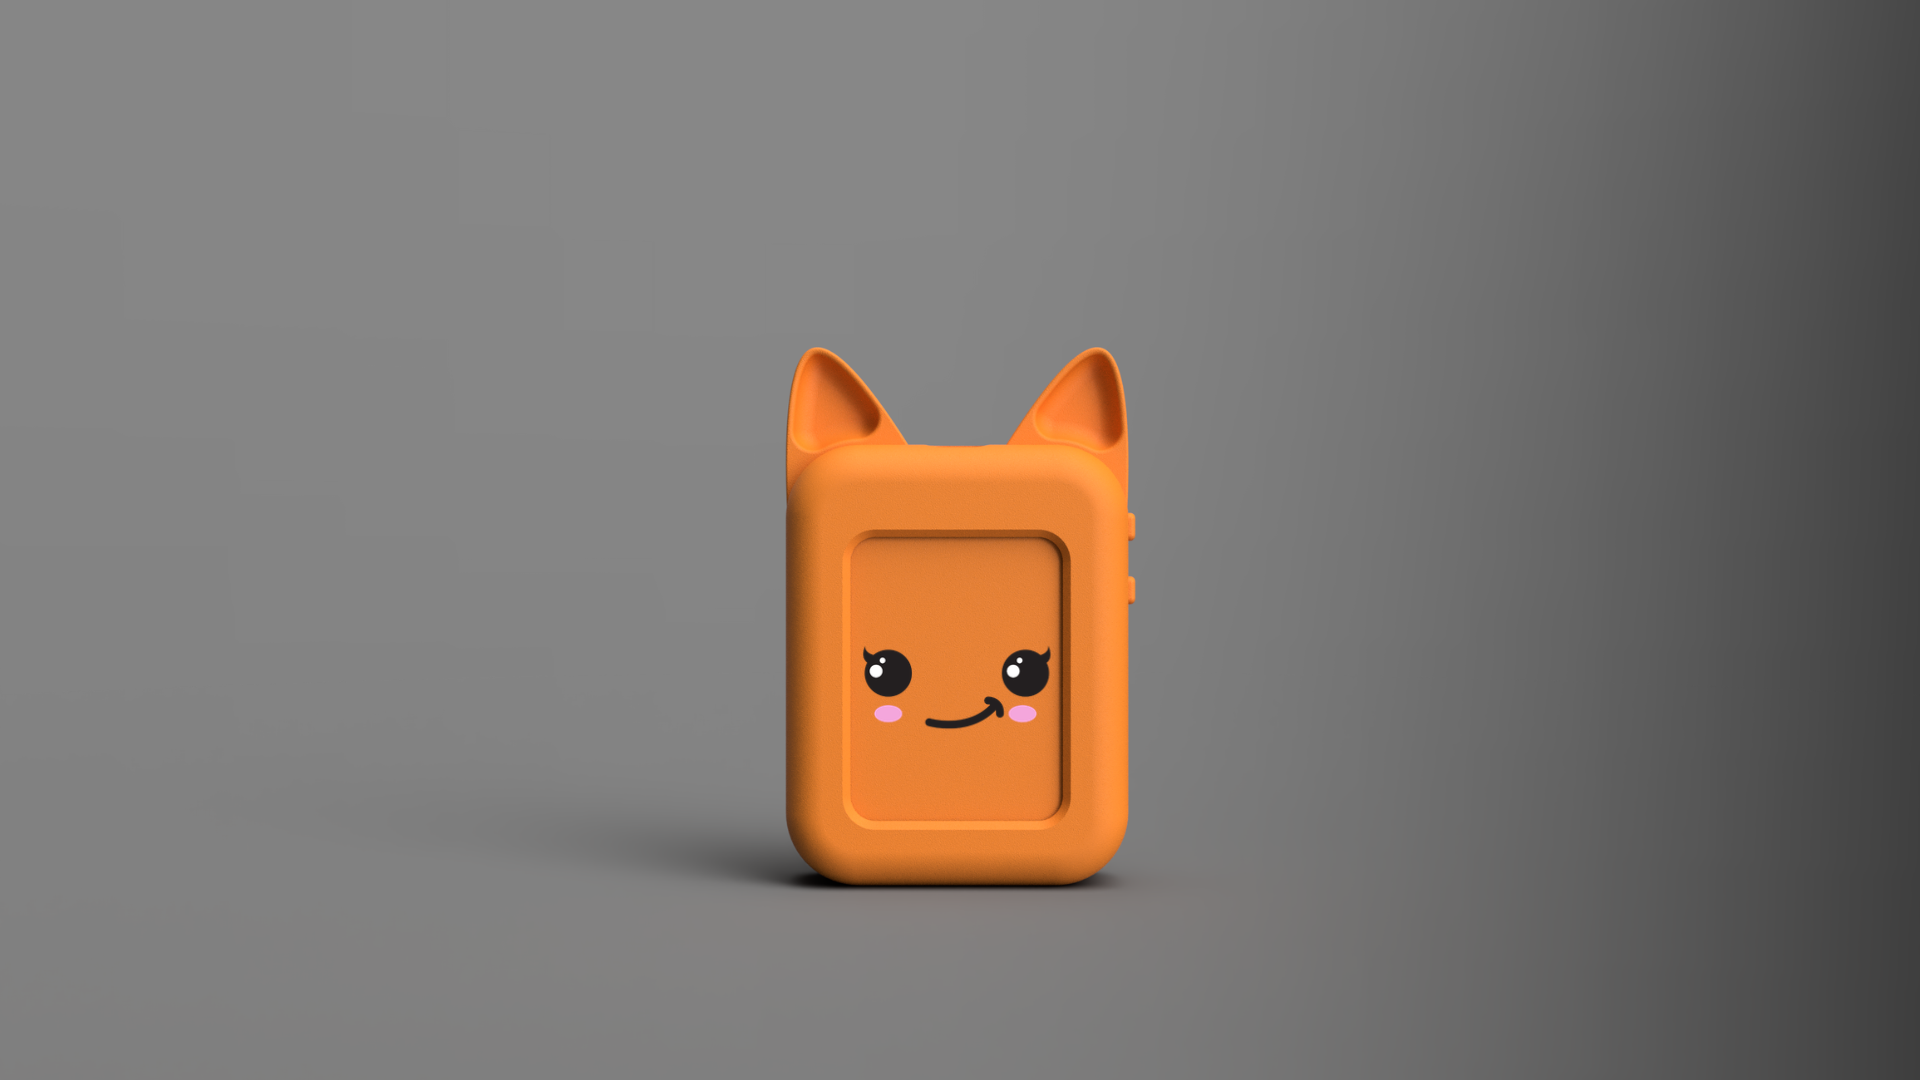
Here are the versions I printed with the PLA Colors I have:
Feel free to experiment with different filament colors or even create your own custom character.
Step 2: Assemble the Front Housing
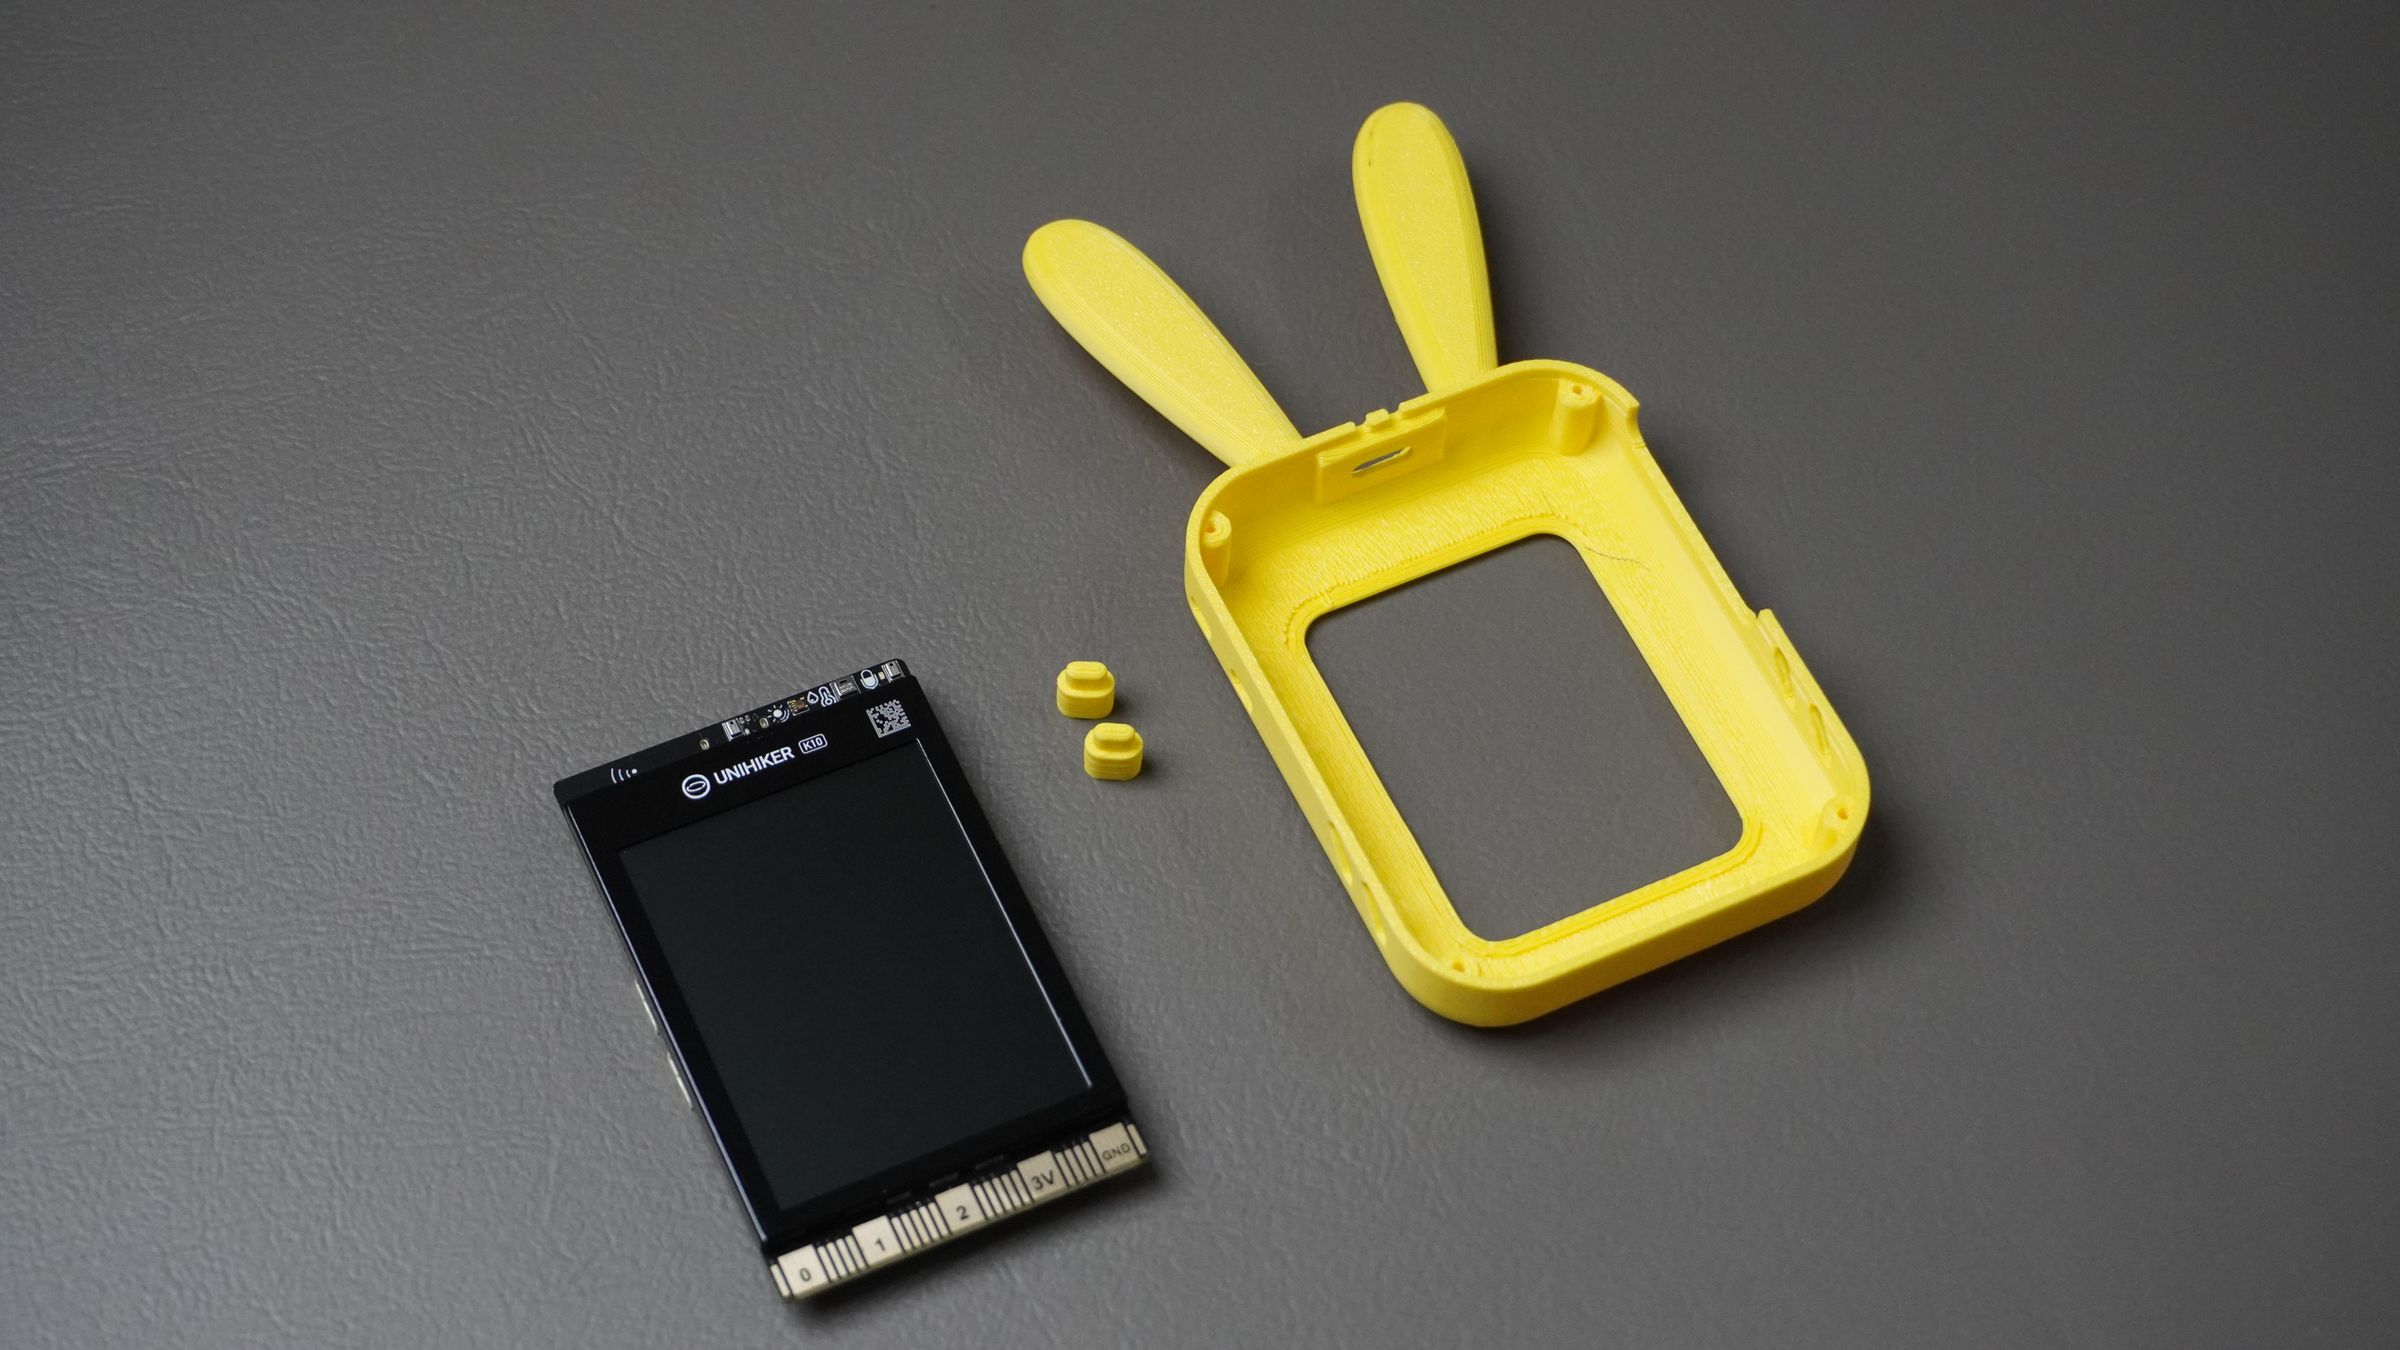
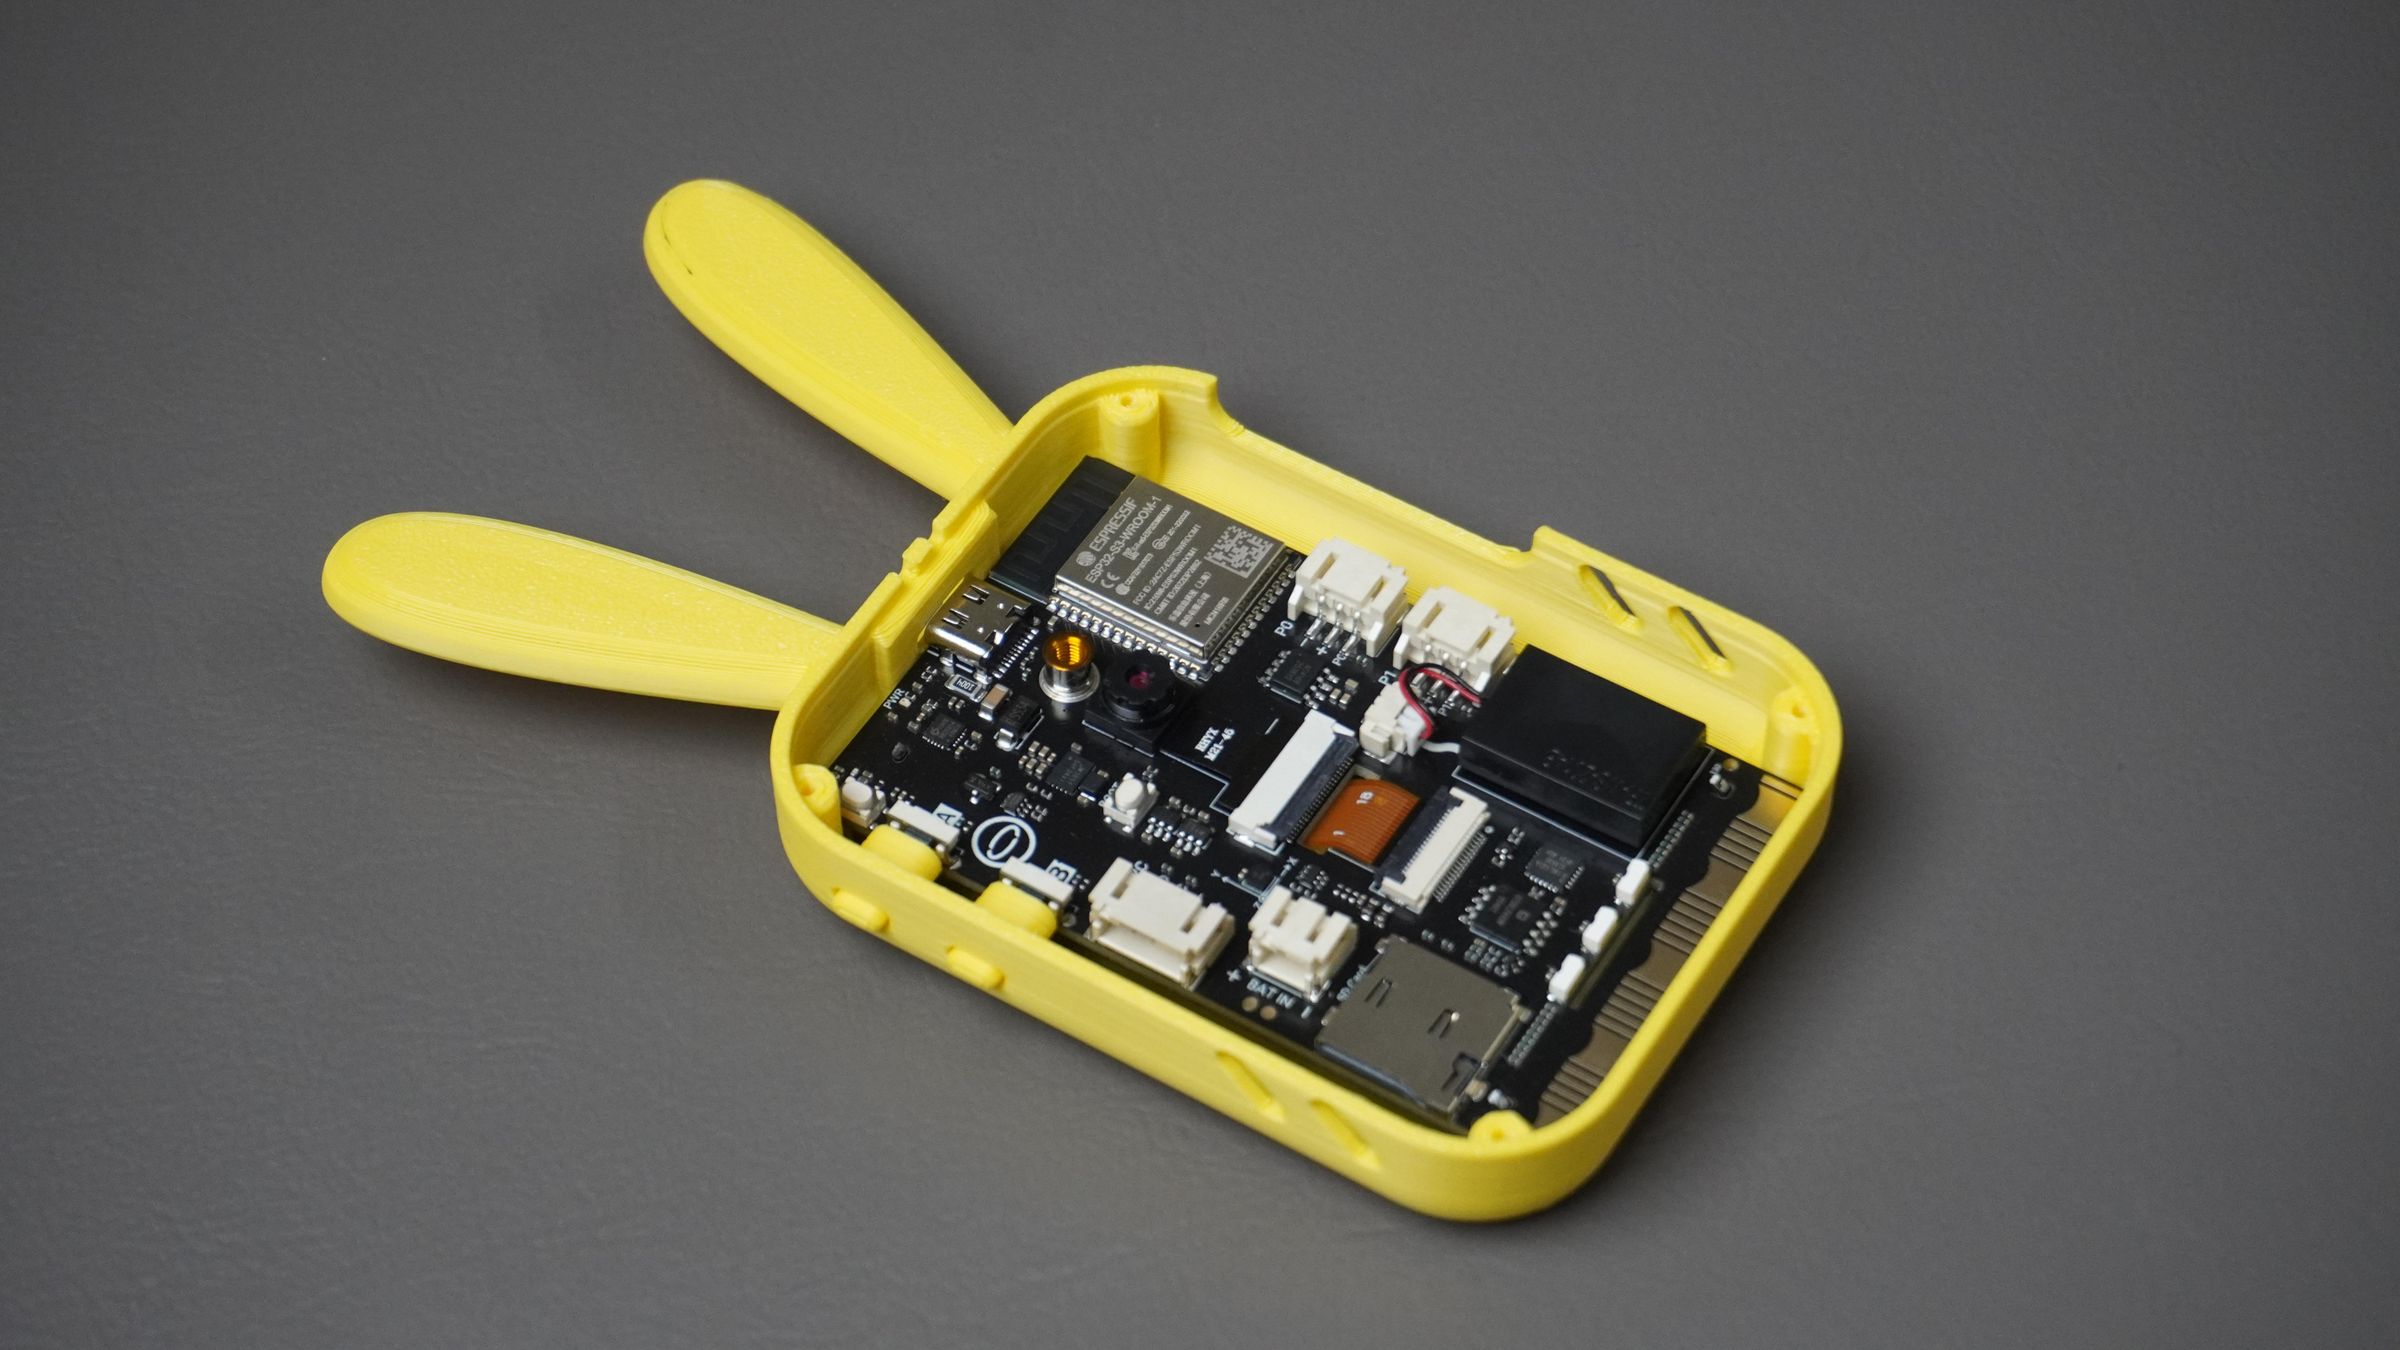
Now it's time to install the DFRobot UNIHIKER K10 into the 3D-printed front housing.
Before starting, make sure you have:
- 1× Front Housing
- 2× Button Extensions
- 1× DFRobot UNIHIKER K10
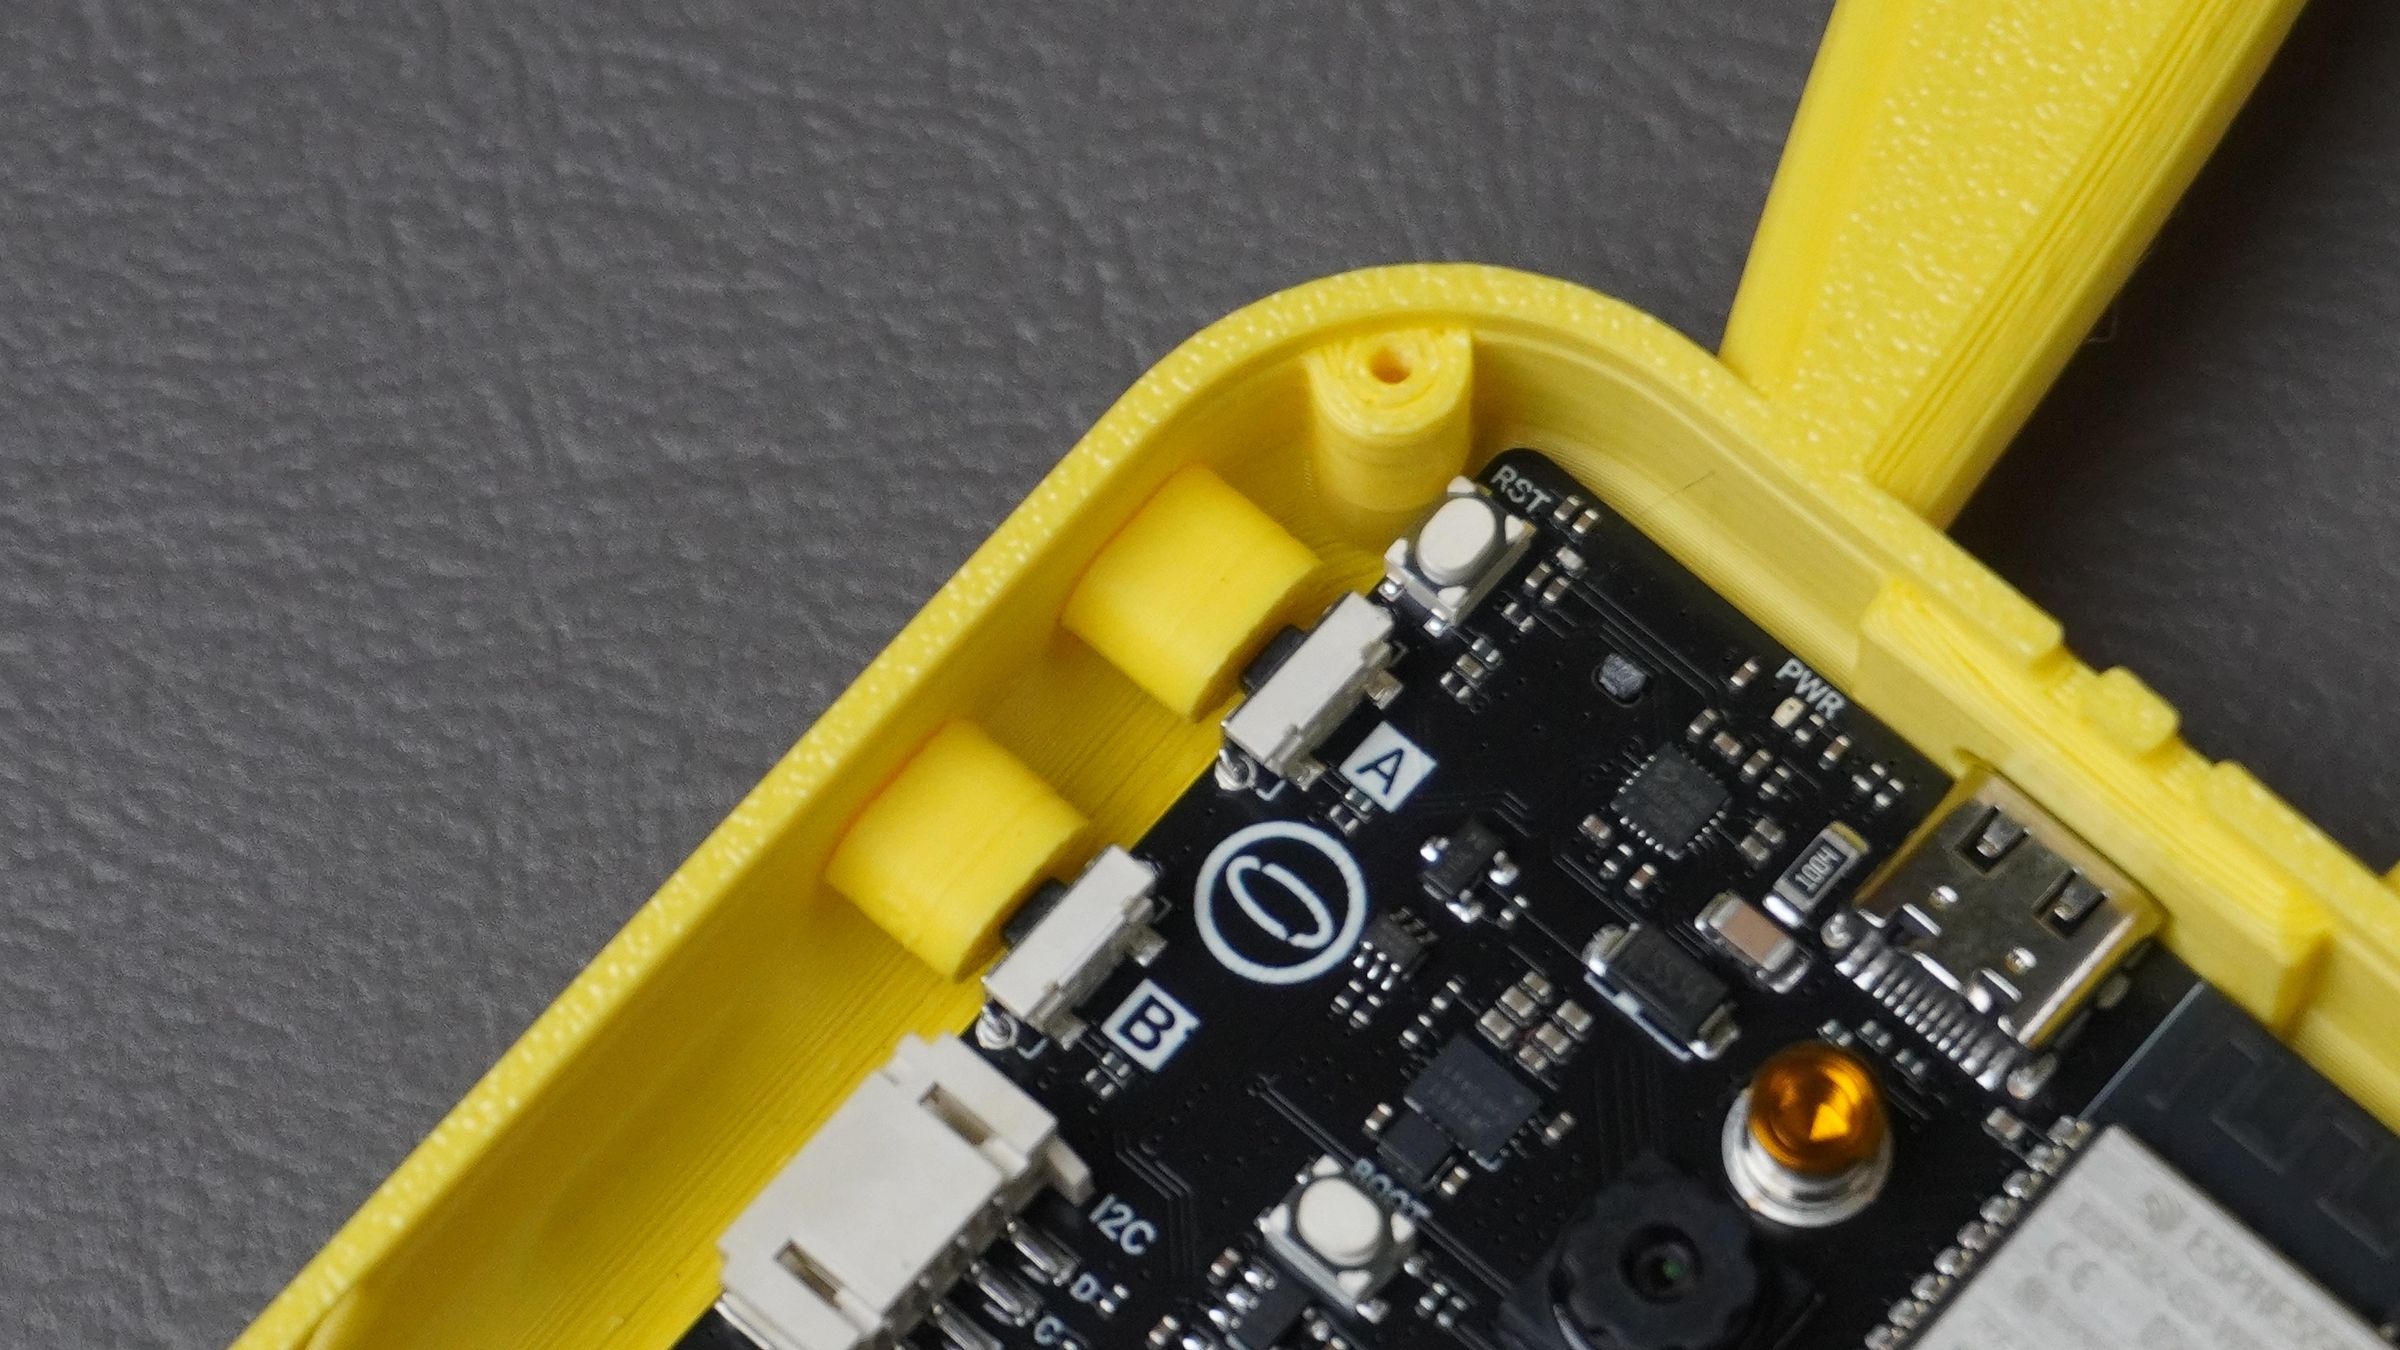
Begin by inserting the two button extension pieces into their dedicated slots on the side of the housing.
These extensions will press the onboard buttons of the UNIHIKER once it is installed. Ensure they move freely and are not obstructed.
Next, carefully place the UNIHIKER K10 into the housing from the rear.
While lowering the board into place, make sure that:
- The USB Type-C programming port aligns with the opening at the top of the enclosure.
- The onboard buttons align correctly with the button extensions.
Once installed, gently press each button extension to verify that it actuates the corresponding onboard button on the UNIHIKER.


Step 3: Install the Custom BMS
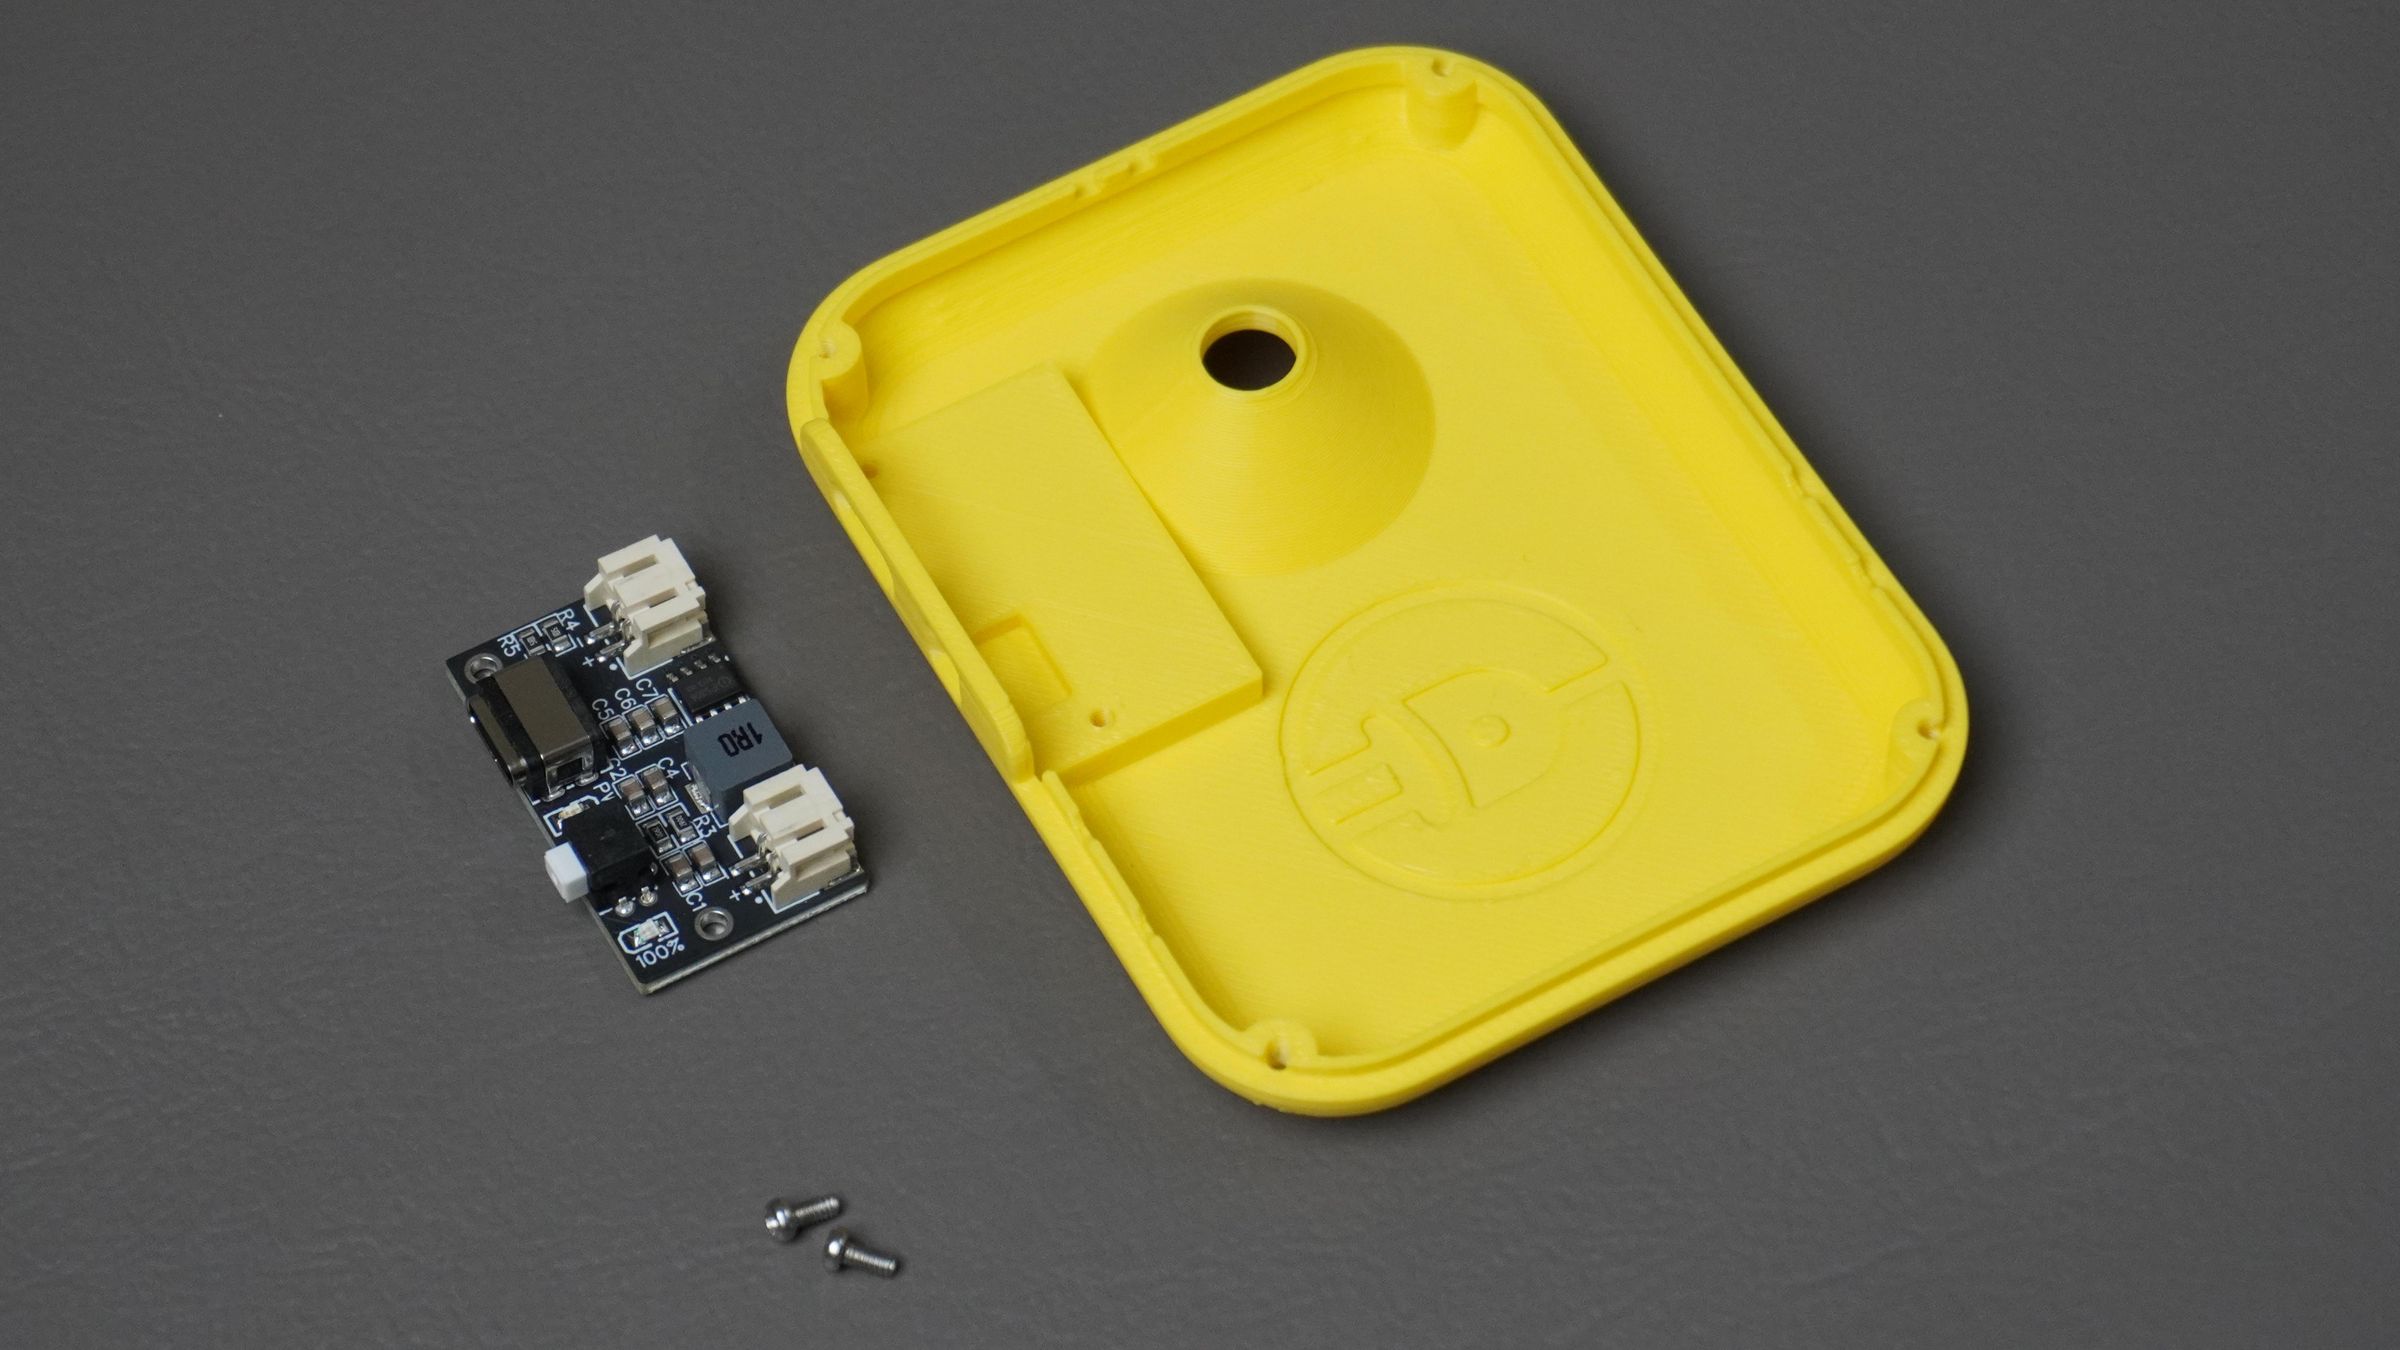
Time to install the custom Battery Management System (BMS) into the rear cover.
Parts Required
- 1× Rear Cover
- 1× Custom BMS PCB
- 2× M2 Screws
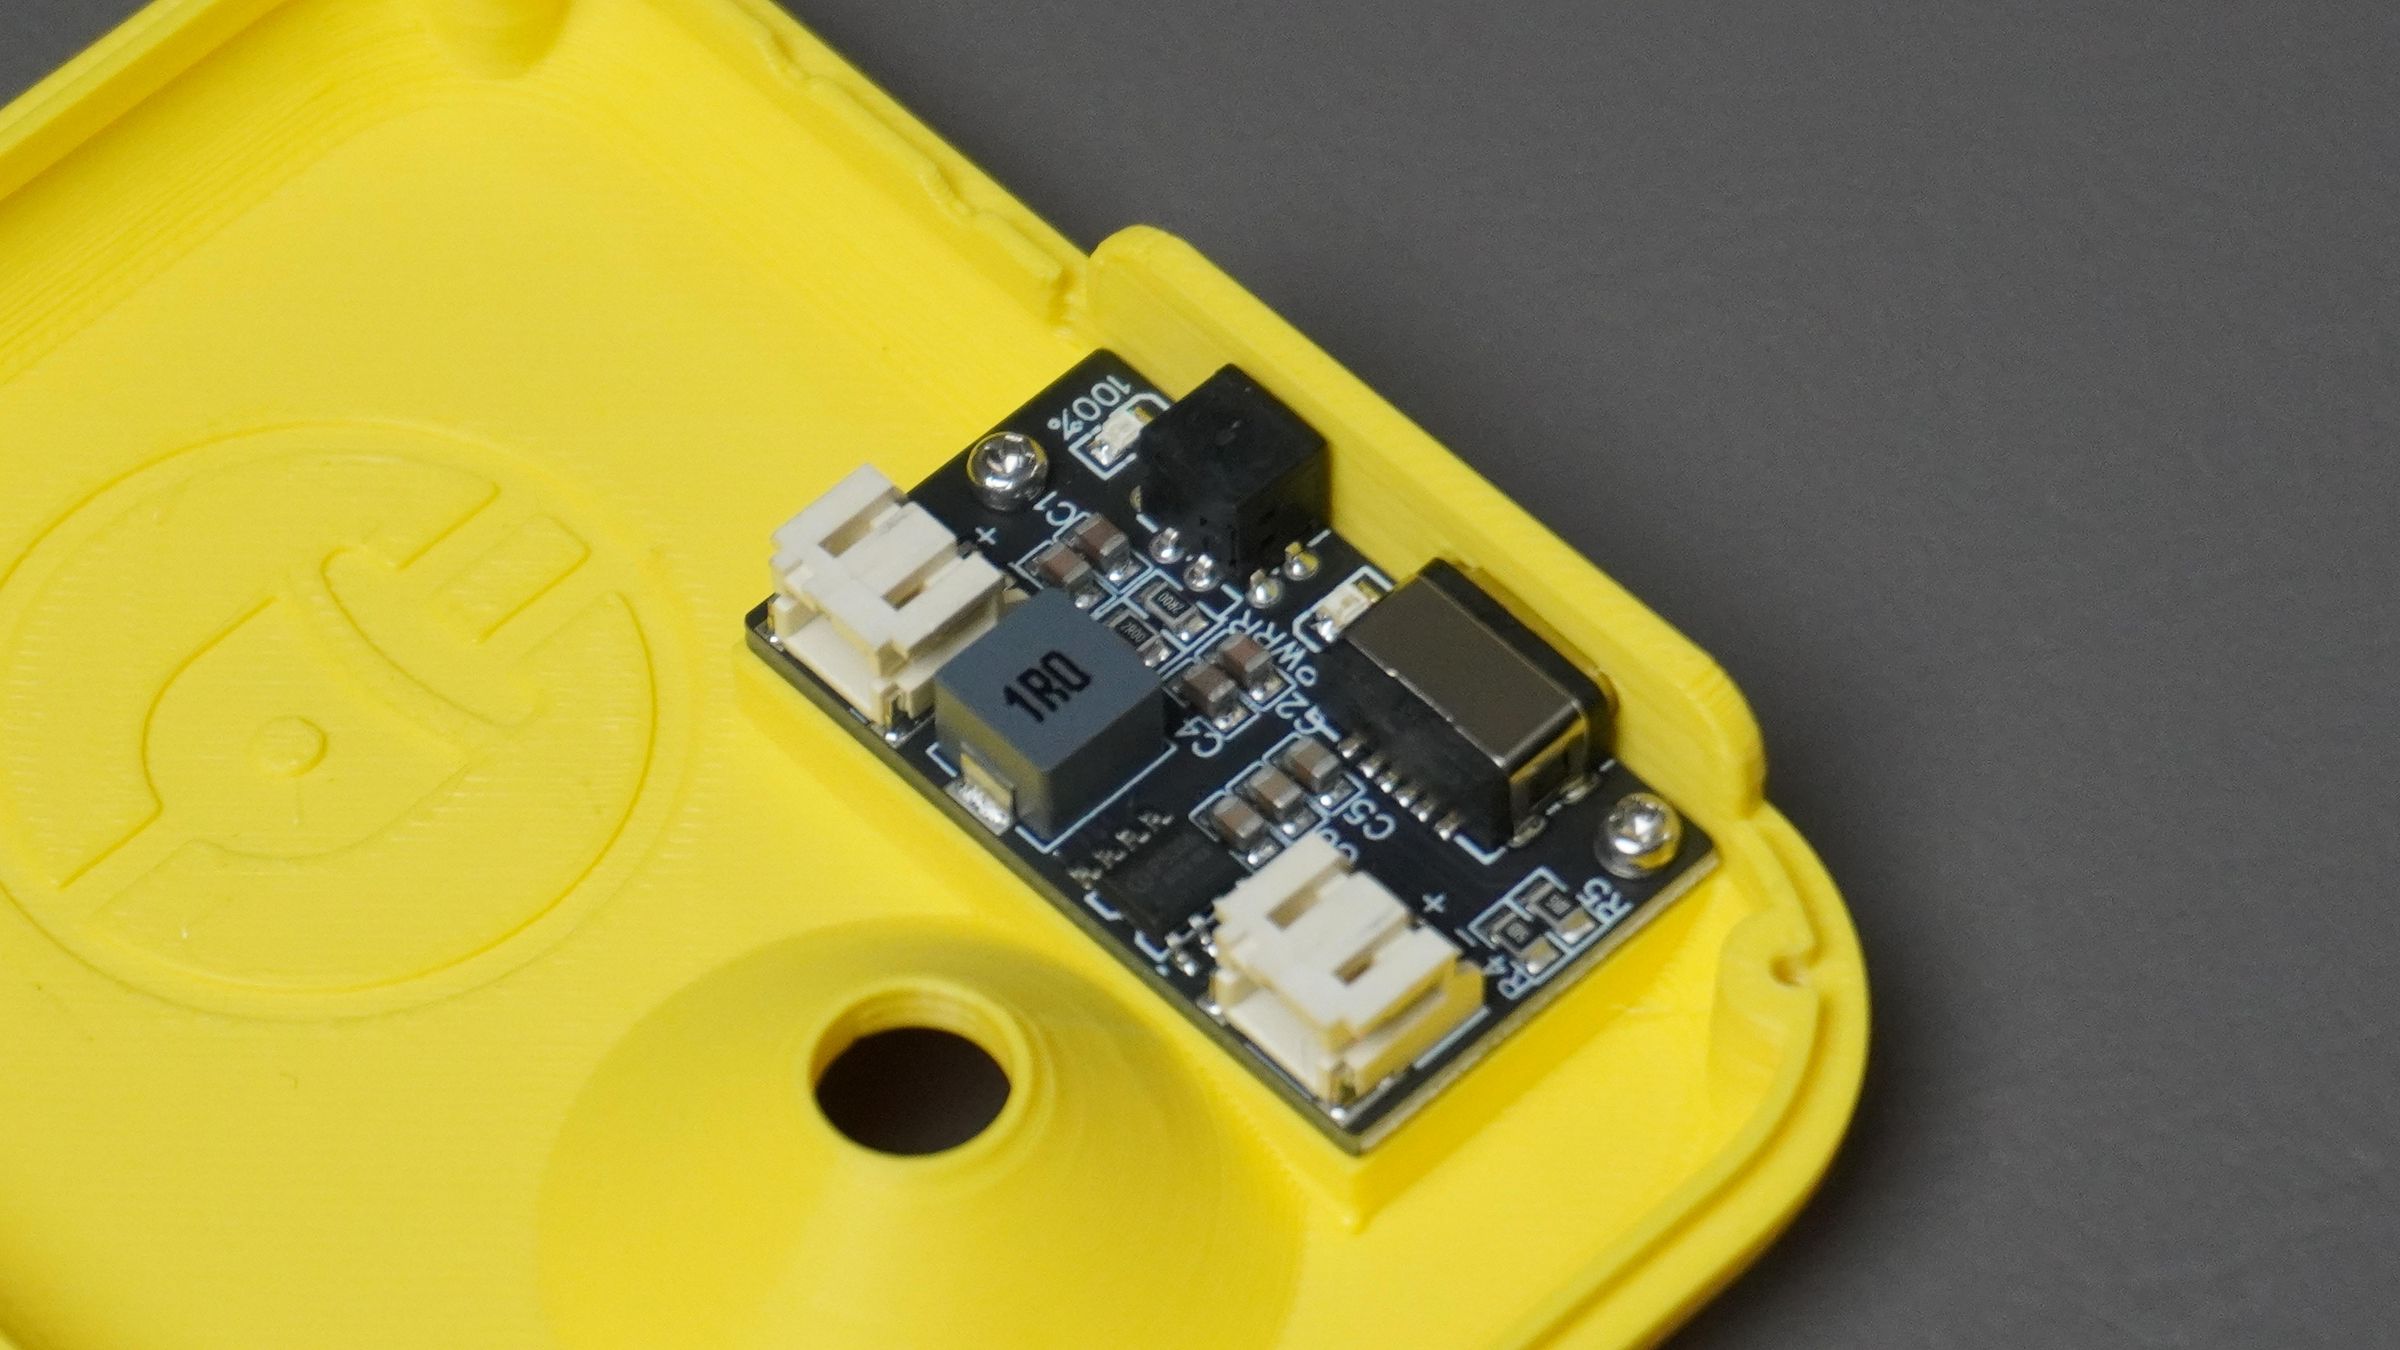
Place the BMS PCB onto the mounting posts inside the rear cover.
While positioning the board, make sure that:
- The USB Type-C charging port is perfectly aligned with the side opening in the cover.
- The power button aligns with its corresponding cutout.
- The PCB sits flat against the mounting posts without any stress or bending.
Once everything is aligned, fasten the BMS to the rear cover using two M2 screws.
Avoid over-tightening the screws, as this could damage the PCB or the 3D-printed mounting posts. Tighten them just enough to hold the board securely in place.

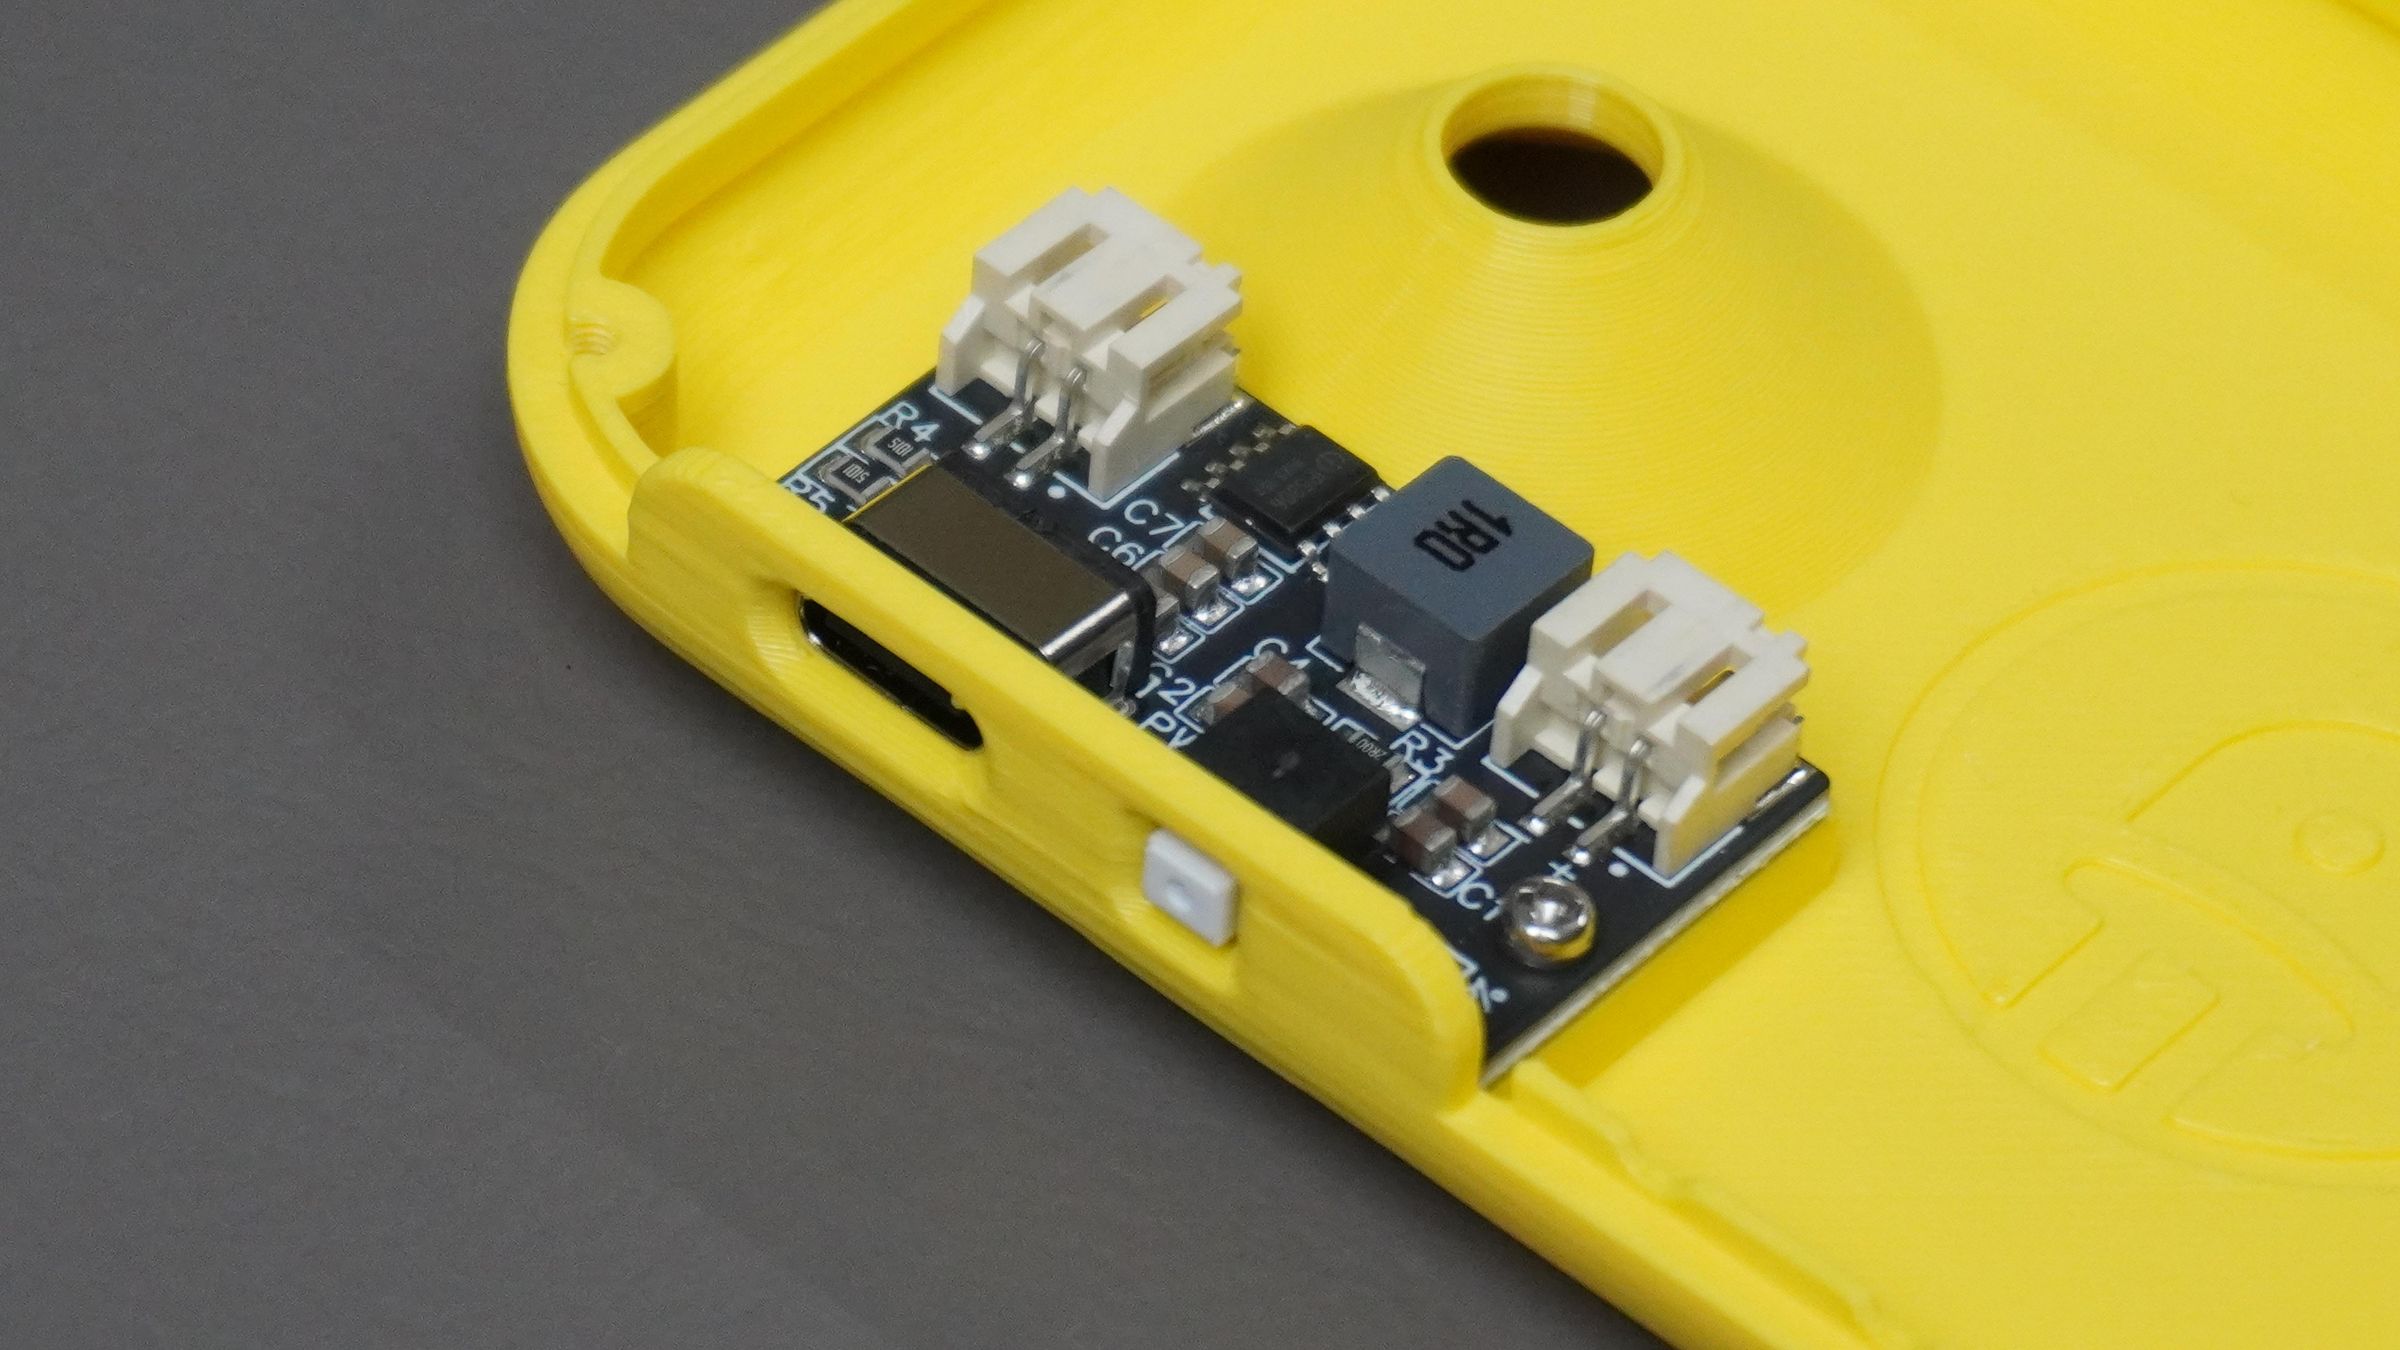
Step 4: Connect the Battery
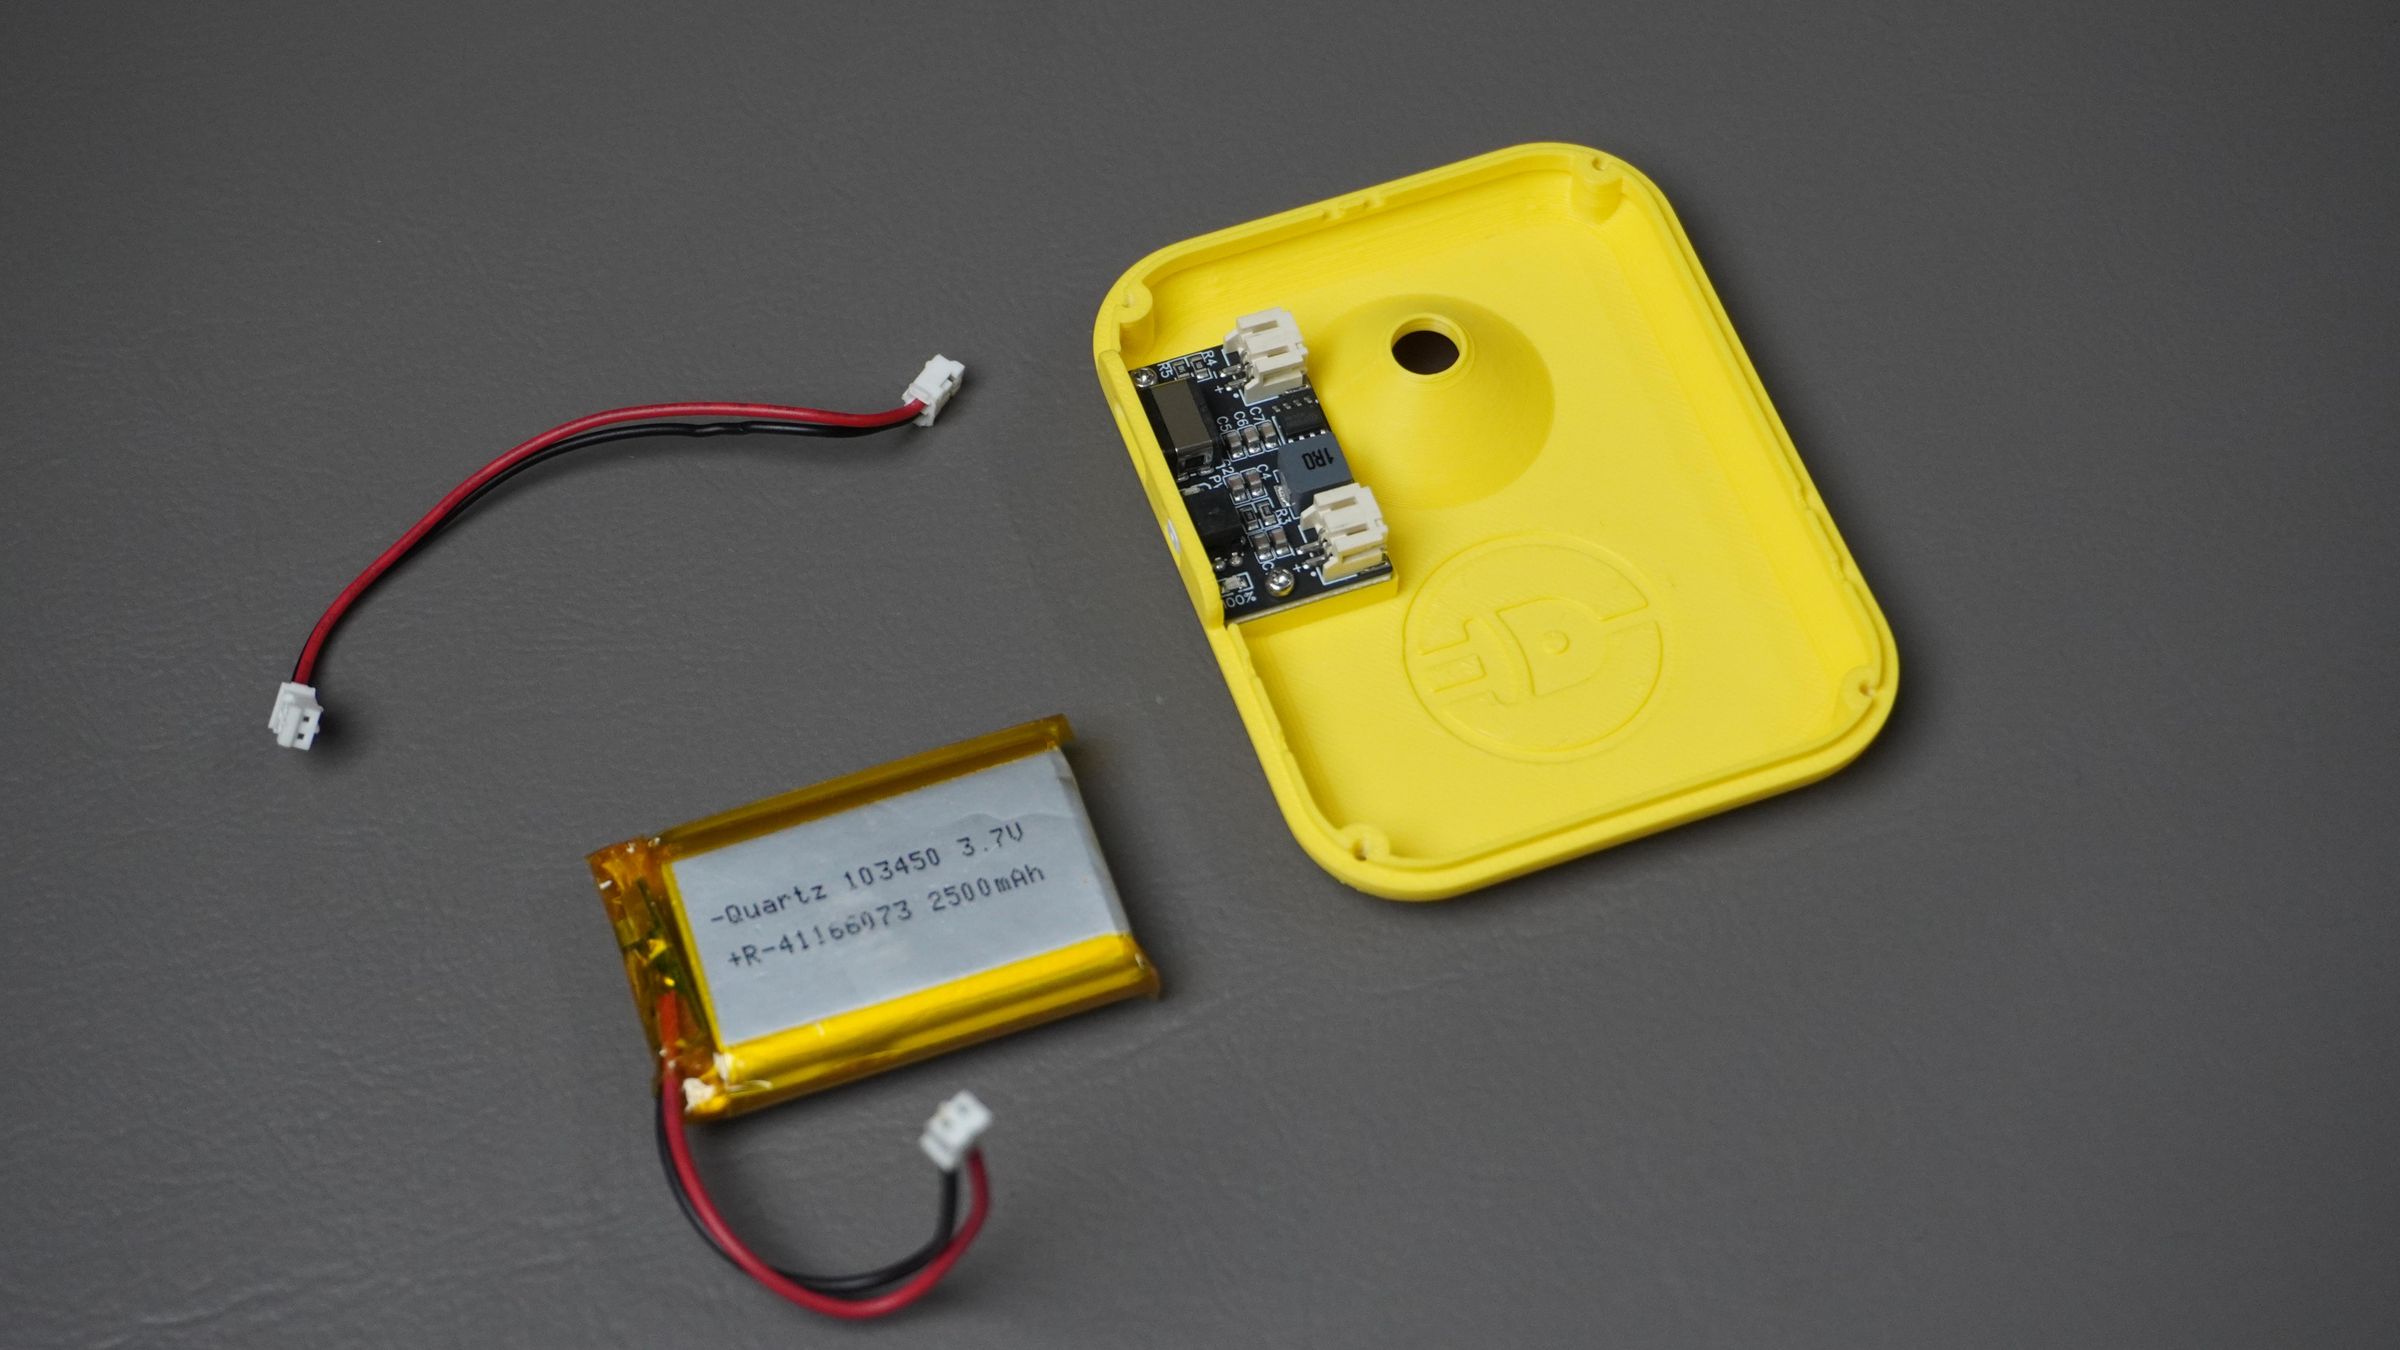
Now it's time to connect the battery and prepare the power connections for the UNIHIKER K10.
Parts Required
- 1× Li-Po Battery With 2 Pi JST
- 1× Custom BMS Assembly
- 1× 2-Pin JST Cable
Start by plugging the Li-Po battery's JST connector into the Battery IN connector on the BMS.
Next, take the 2-pin JST cable and plug one end into the Battery OUT connector on the BMS.
Leave the other end disconnected for now—it will be connected to the battery connector on the UNIHIKER K10 in the next step after both assemblies are brought together.

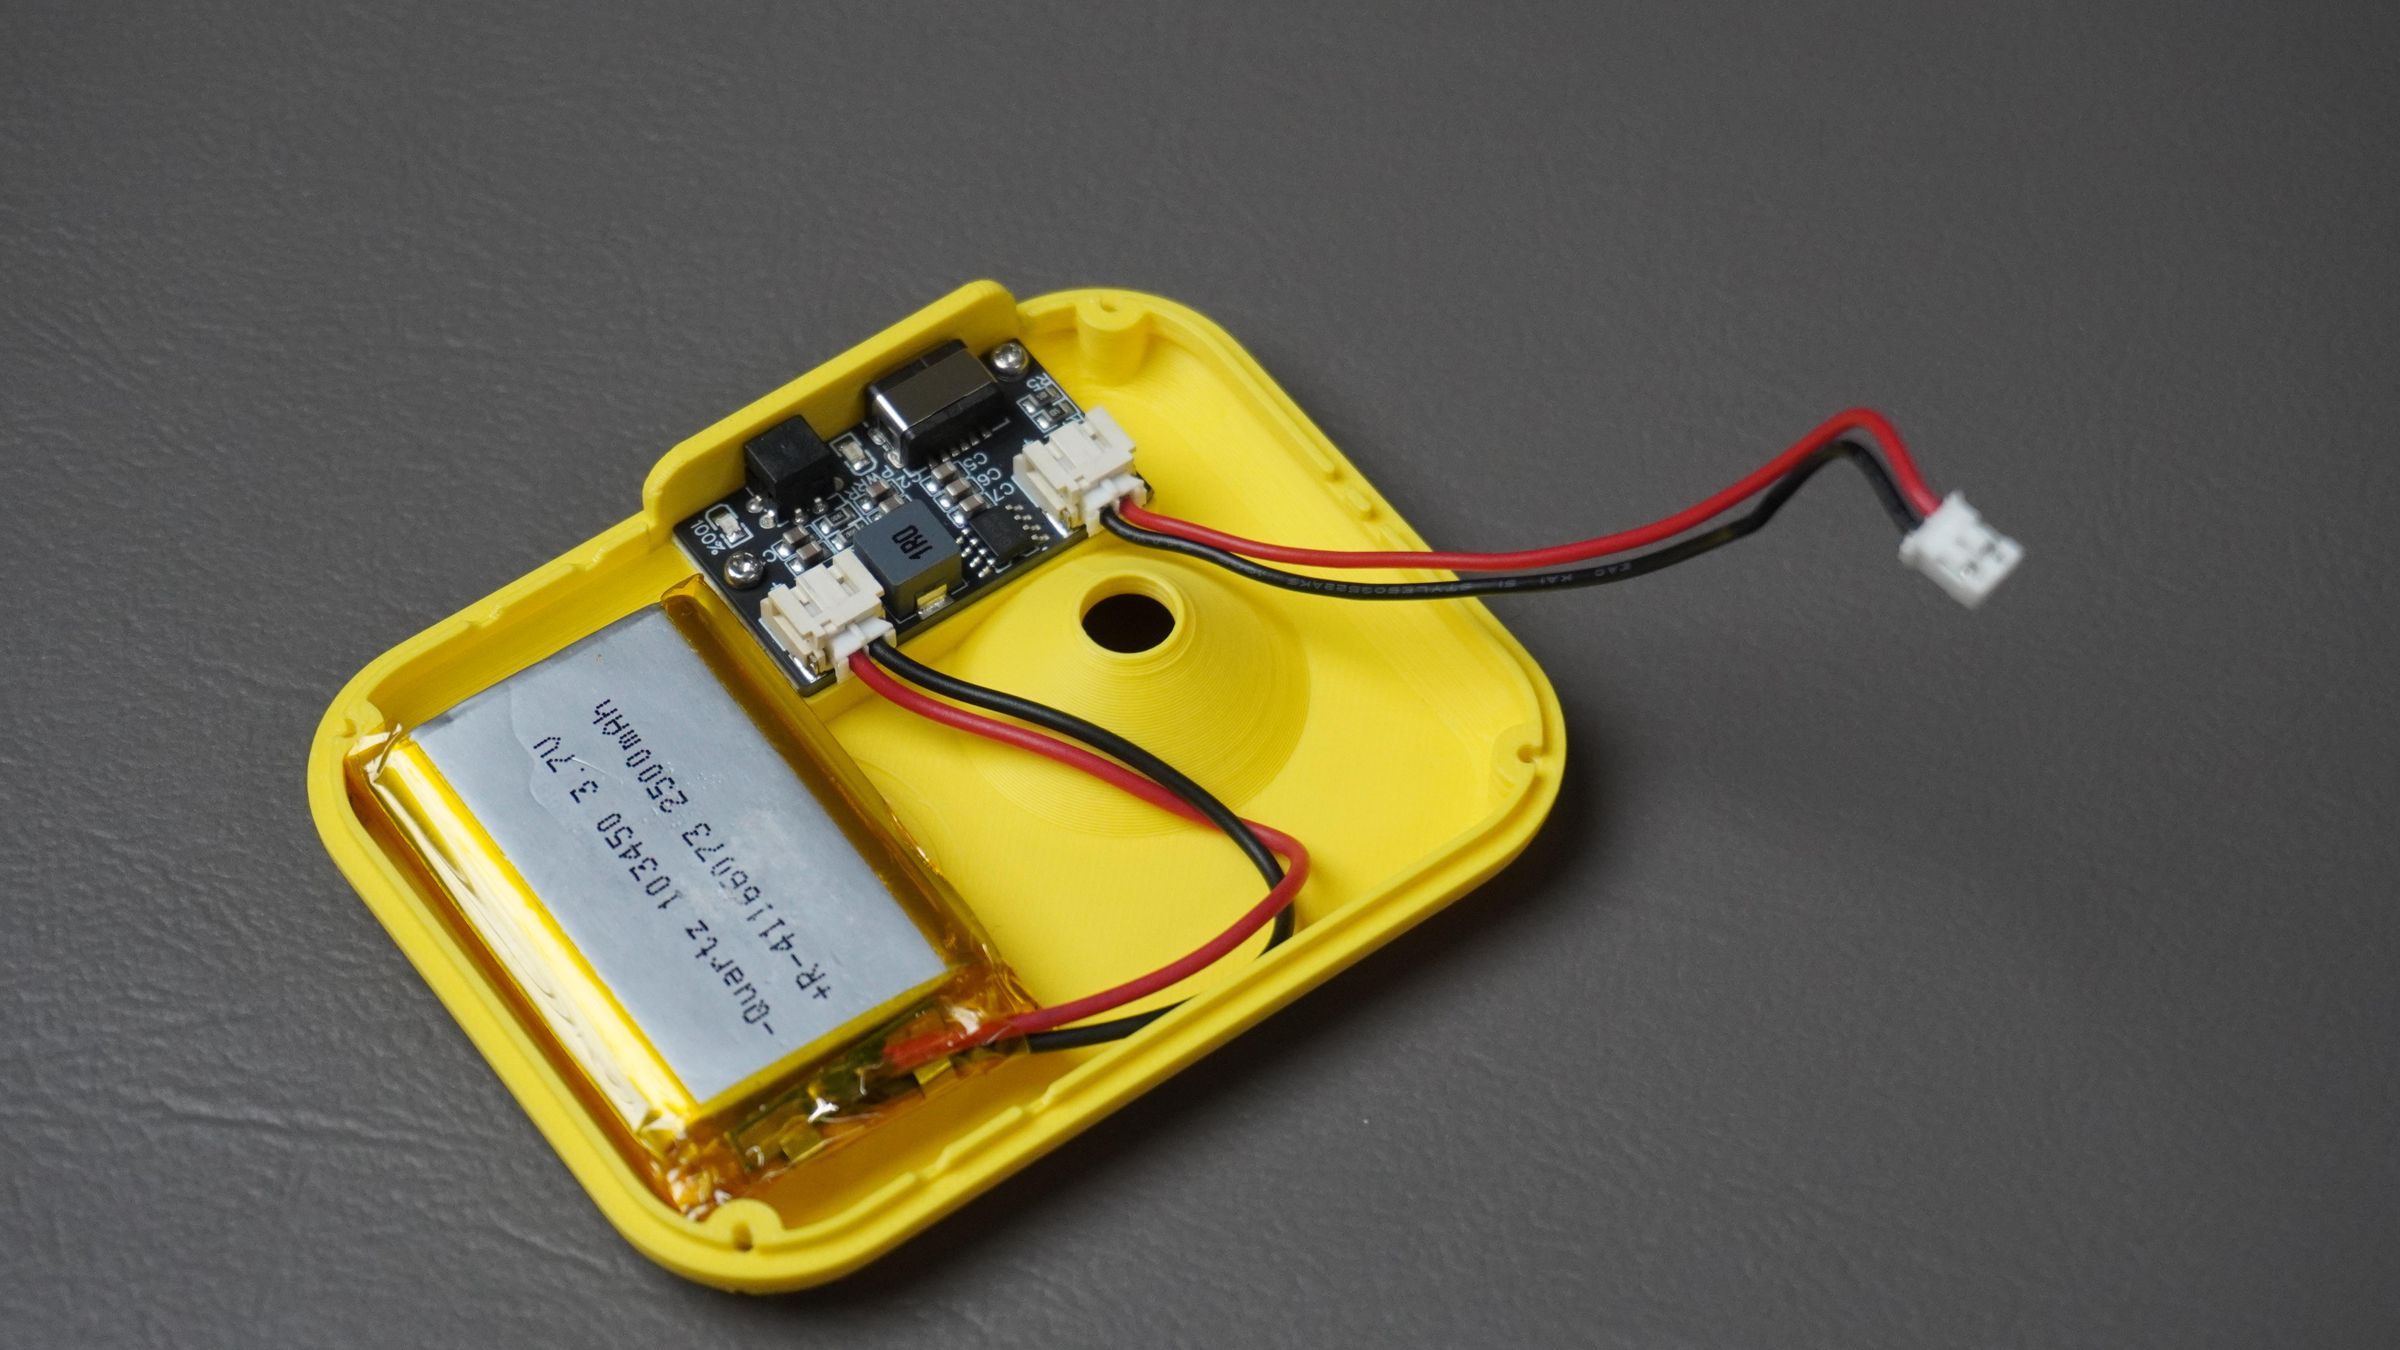
Step 5: Final Assembly
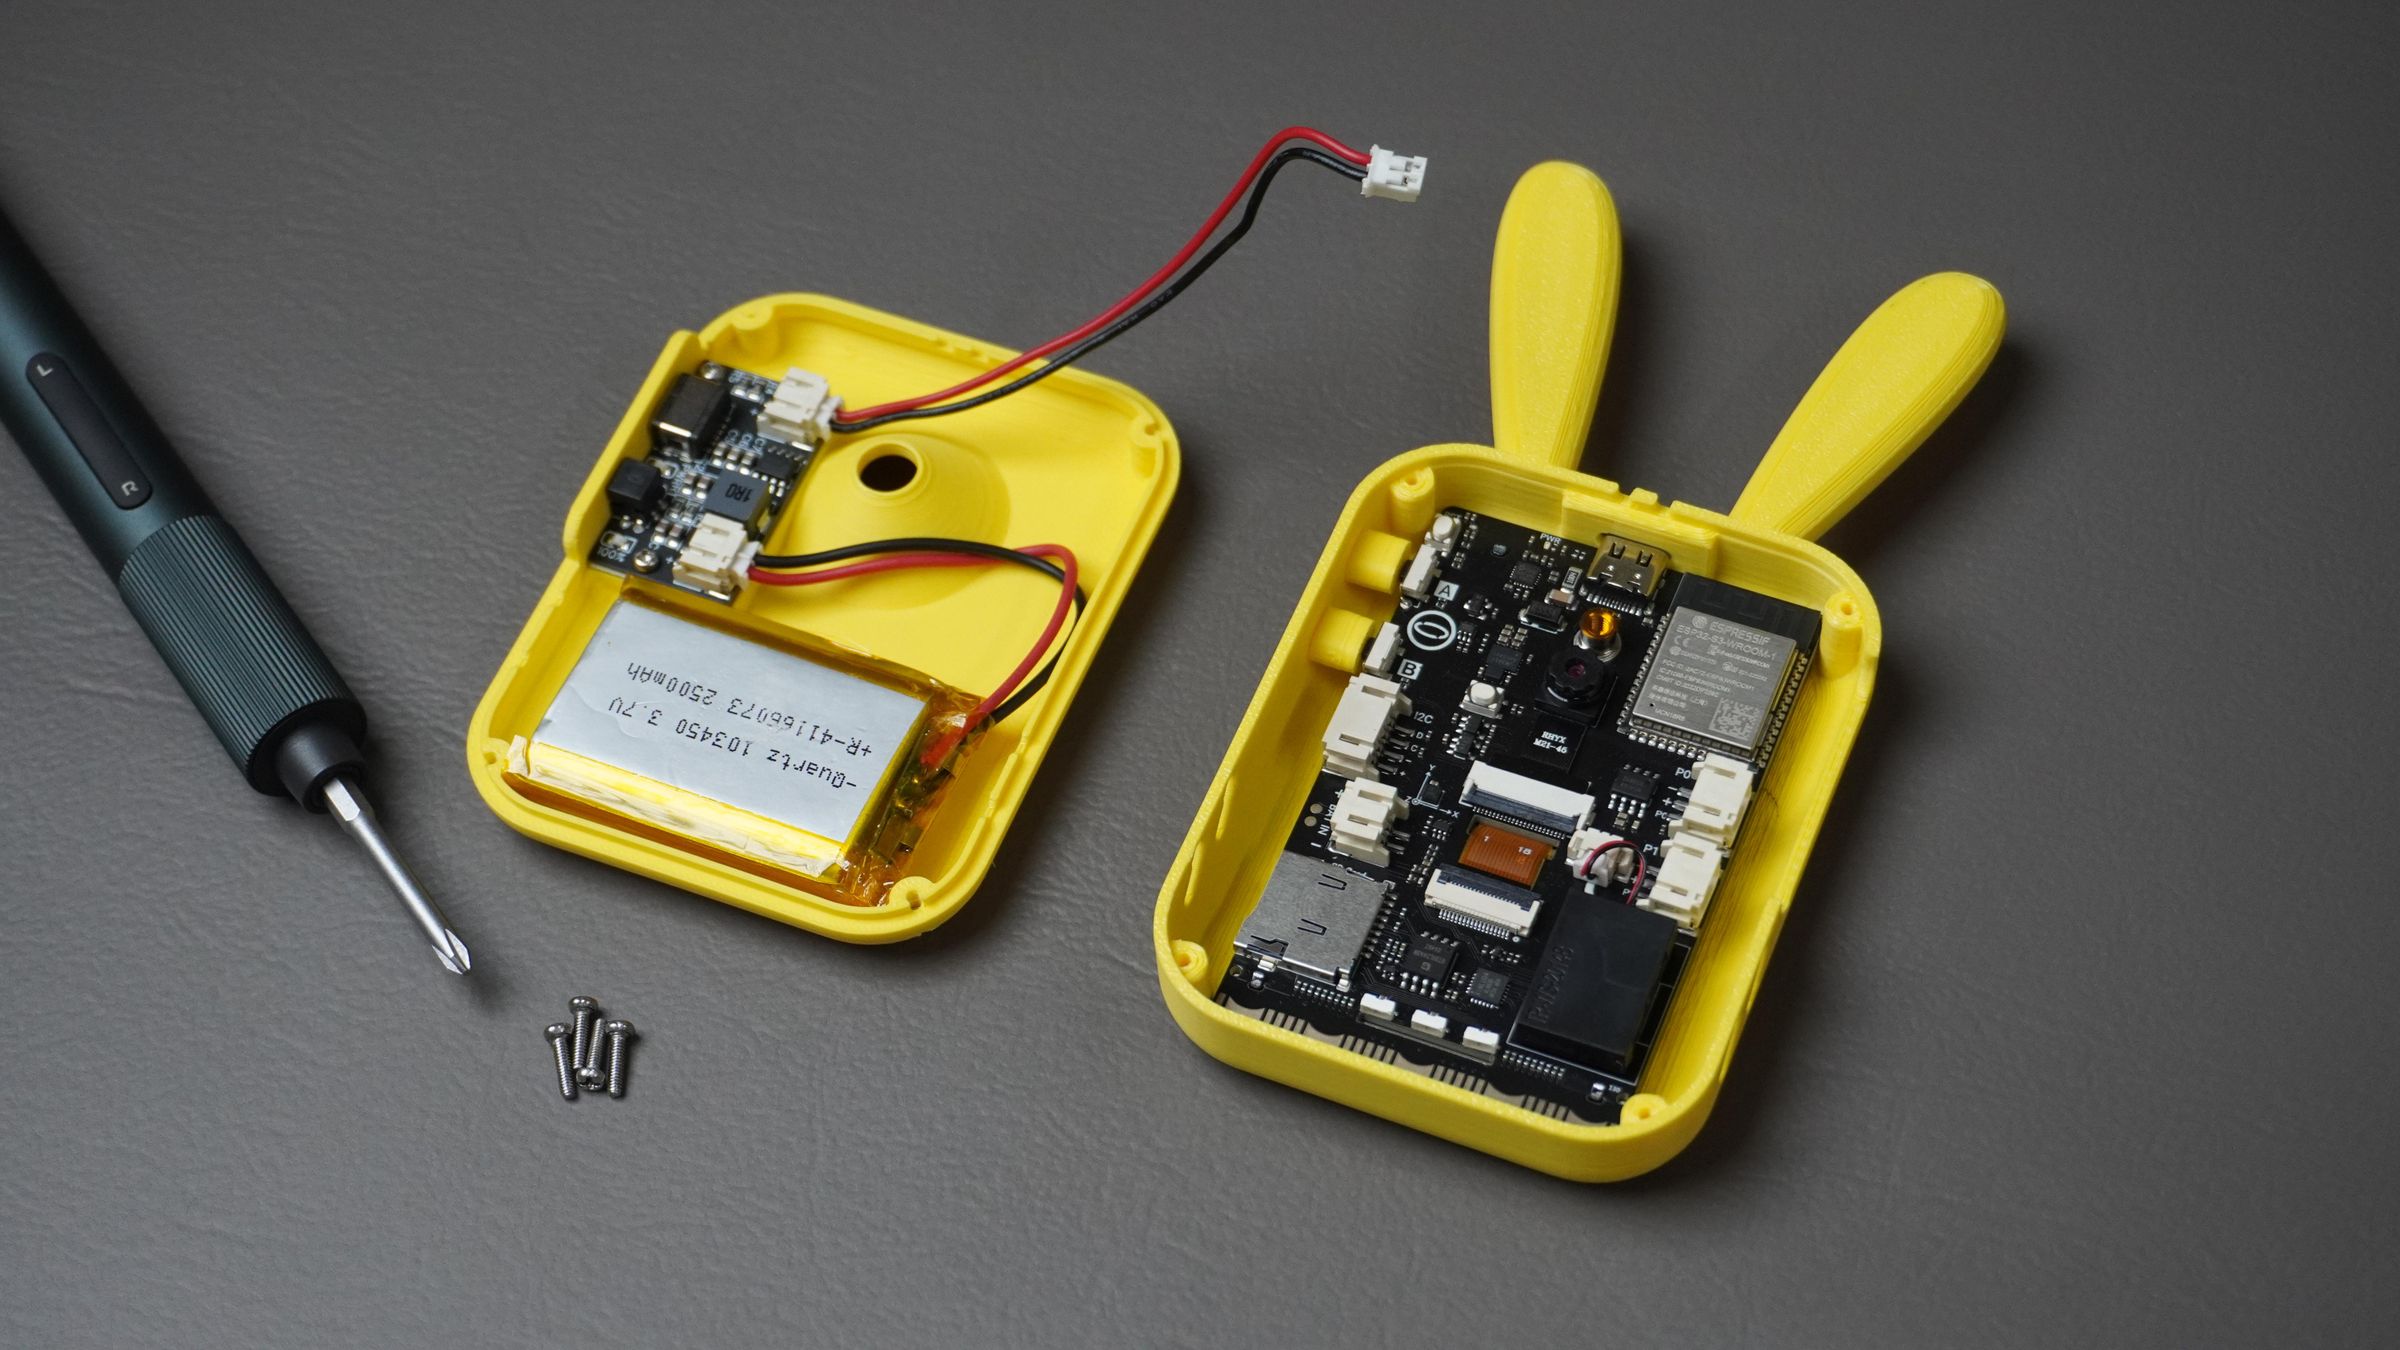
With both sub-assemblies complete, it's time to put everything together and complete your AI Buddy.
Parts Required
- Front Housing Assembly (with UNIHIKER K10 installed)
- Rear Cover Assembly (with BMS installed)
- 4× M2 Screws
Take the free end of the 2-pin JST cable connected to the BMS Battery OUT connector and plug it into the battery connector on the UNIHIKER K10.
Carefully place the Li-Po battery inside the housing.
Arrange the battery and cables neatly.
Bring the rear cover and front housing together.
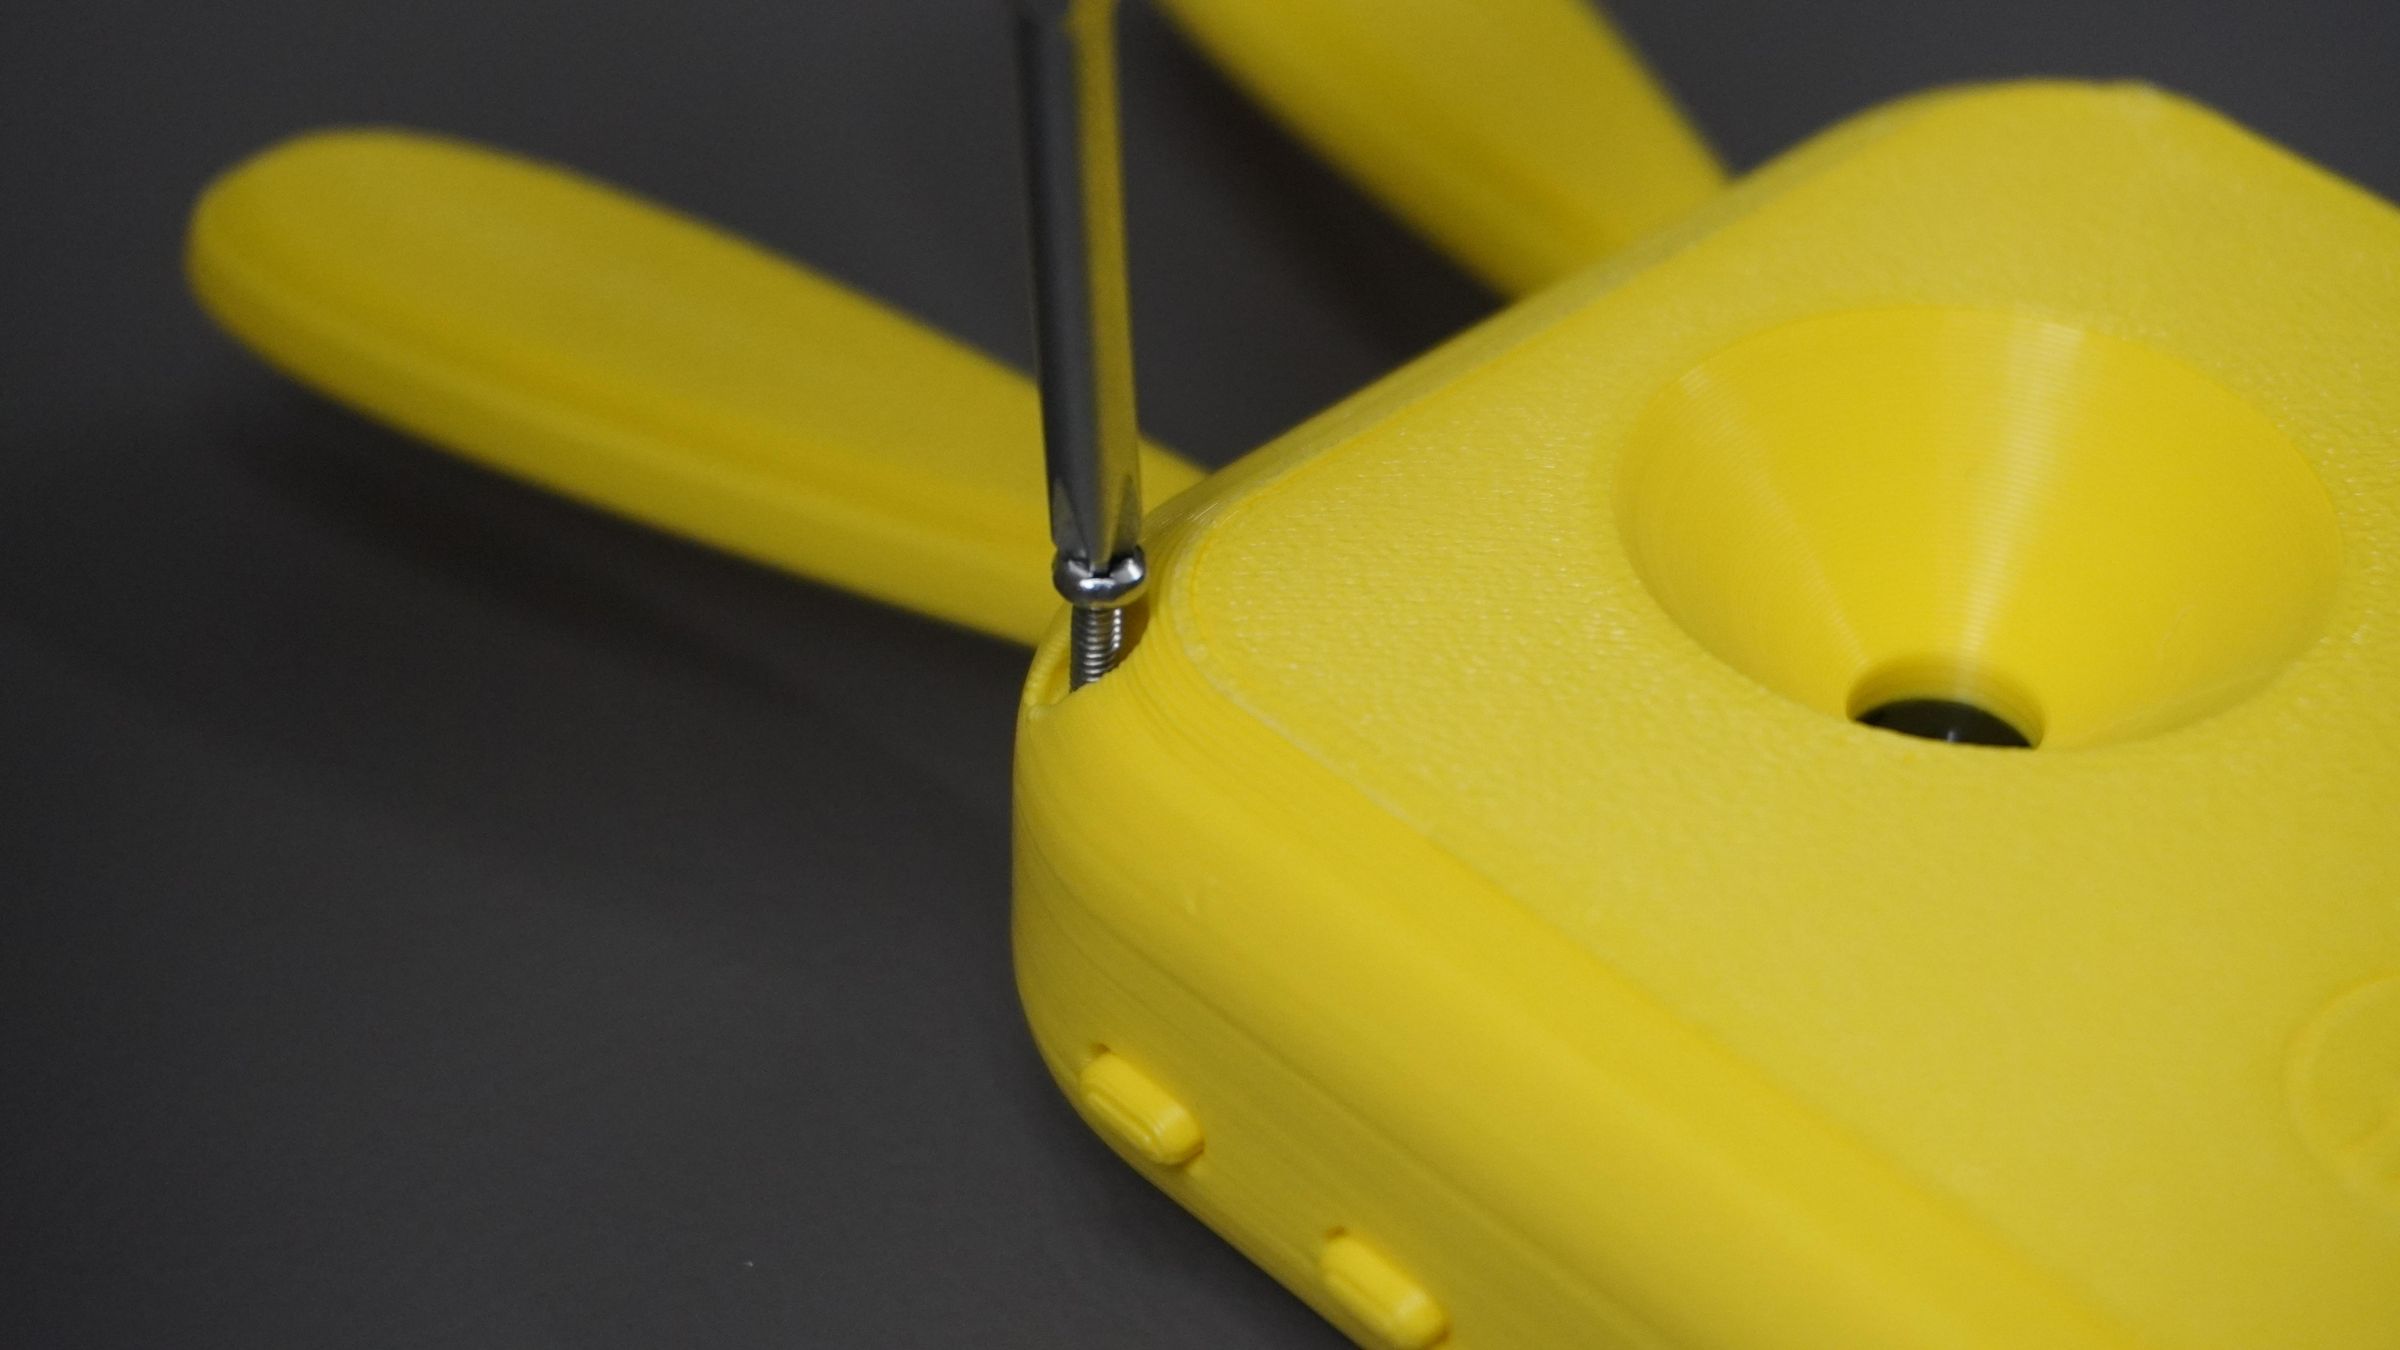
Finally, fasten the rear cover to the front housing using four M2 screws.
Tighten each screw evenly until the enclosure is secure. Avoid over-tightening, as this may damage the 3D-printed parts.
🎉 That's it! Your AI Buddy hardware is now fully assembled and ready for firmware installation and configuration in the next step.


Step 6: Installing the Firmware

With the hardware fully assembled, it's time to install the firmware. The process is incredibly simple and doesn't require installing the Arduino IDE, PlatformIO, ESP IDF or compiling any code.
I created an Easy Flash web tool that automatically downloads and installs the latest firmware onto your AI Buddy.
Flash the Firmware
- Open the Easy Flash website: https://mukeshsankhla.github.io/EasyFlash/#/project/ai-buddy
- Connect your AI Buddy to your computer using a USB Type-C cable connected to the UNIHIKER K10 USB Type-C data port.
- Click Connect & Flash.
- Select the correct serial port from the list.
- The tool will automatically:
- Connect to the device
- Download the latest firmware
- Flash it onto the UNIHIKER K10
The entire process only takes about one minute. Once flashing is complete, you'll see a success message indicating that the firmware has been installed successfully.
After the firmware is installed, AI Buddy will automatically boot into the Wi-Fi Configuration screen. In the next step, we'll connect the device to your Wi-Fi network so it can communicate with the AI services.
Firmware Credits
The firmware used in this project is developed by the DFRobot UNIHIKER Team and is built on the open-source Xiaozhi ESP32 project. It provides the voice assistant functionality and AI interaction that powers AI Buddy.
If you'd like to explore the source code, contribute to the project, or learn more about how it works, be sure to check out the Xiaozhi ESP32 repository: https://github.com/78/xiaozhi-esp32
A huge thanks to the DFRobot team and the Xiaozhi contributors for making this amazing open-source project possible.
Step 7: Configure AI Buddy
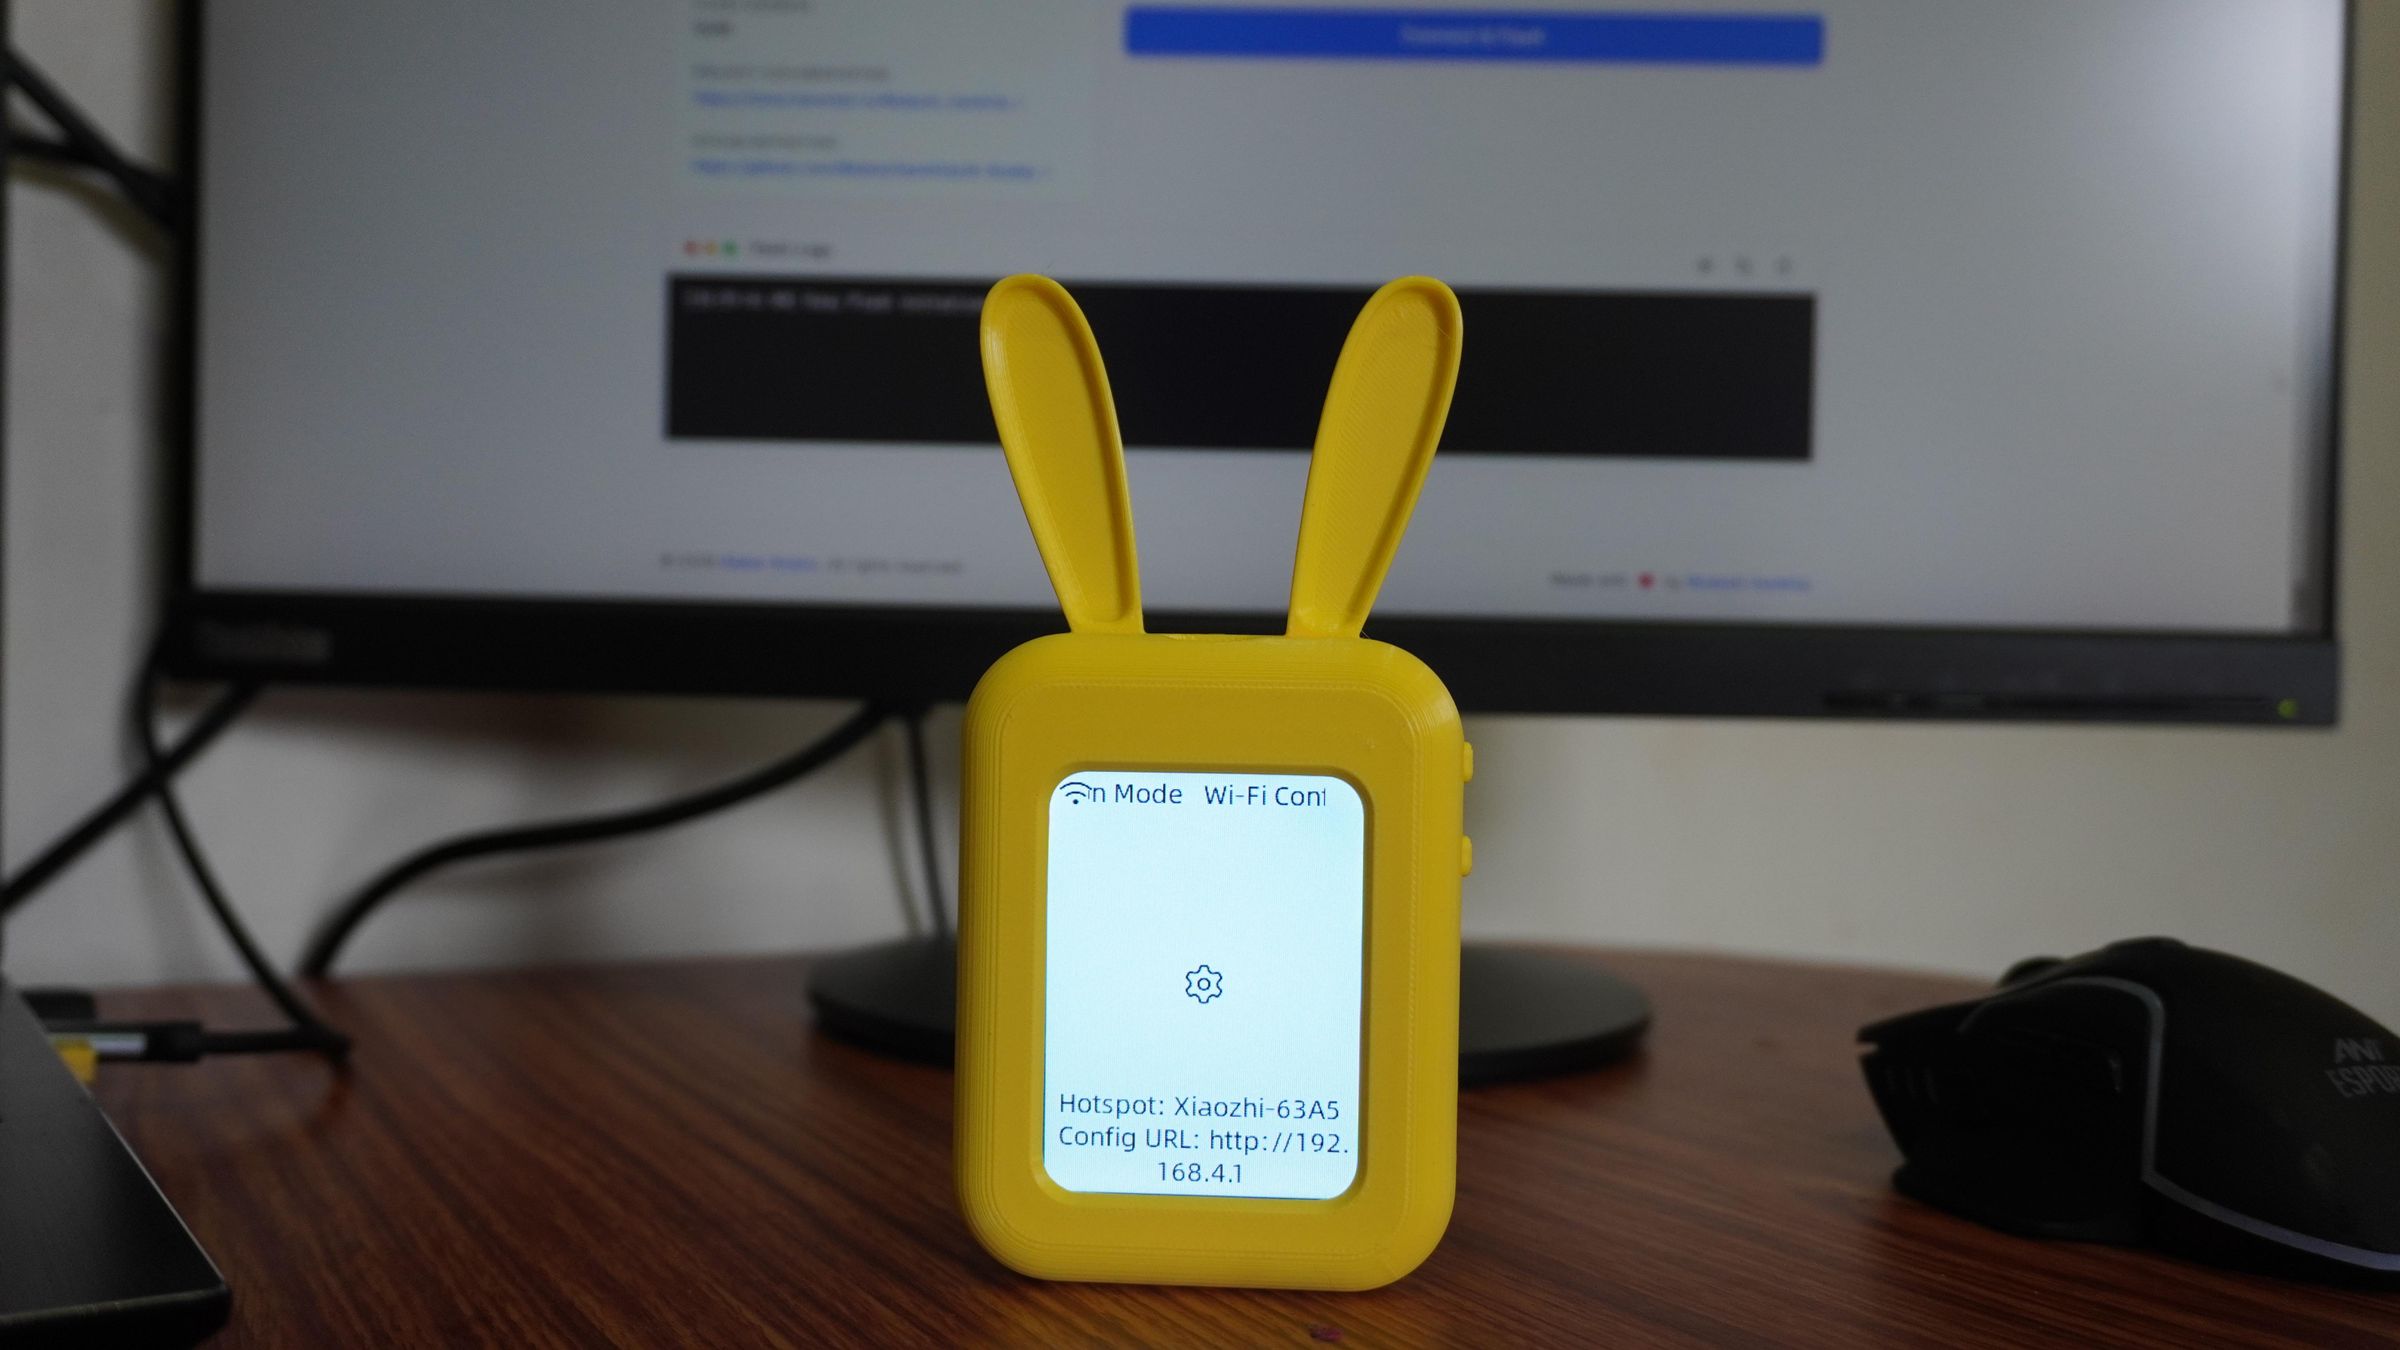
After booting for the first time, AI Buddy will automatically create a Wi-Fi hotspot named: Xiaozhi-XXXX
Using your mobile phone or computer, connect to this Wi-Fi network.
Once connected, open your web browser and navigate to: http://192.168.4.1
On the configuration page, enter:
- 2.4 GHz Wi-Fi SSID
- Wi-Fi Password
Note: AI Buddy currently supports 2.4 GHz Wi-Fi networks only.
Click Connect.
After a few seconds, AI Buddy will connect to your Wi-Fi network.
Link Your Device:
Once connected successfully, AI Buddy will:
- 🔊 Speak a 6-digit pairing code
- 📺 Display the same 6-digit code on the screen
Next, open: https://xiaozhi.me/
Create an account (or log in if you already have one), then open the Console.
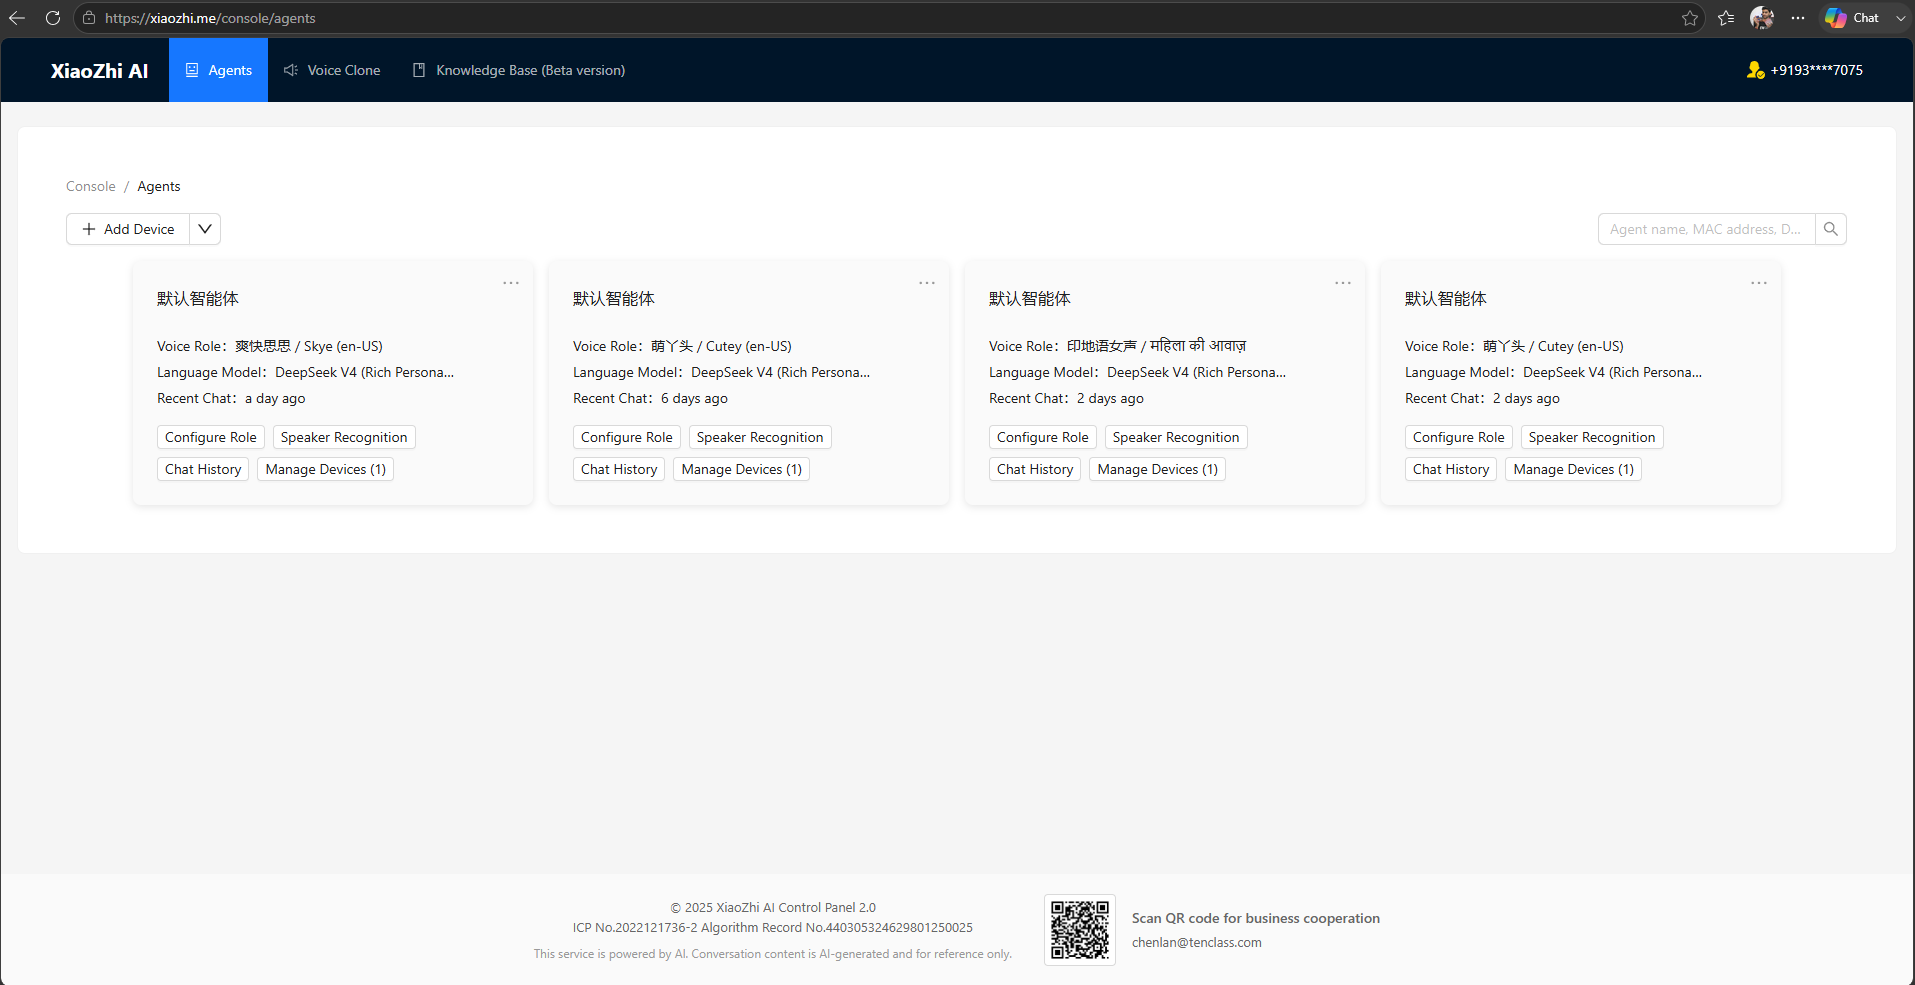
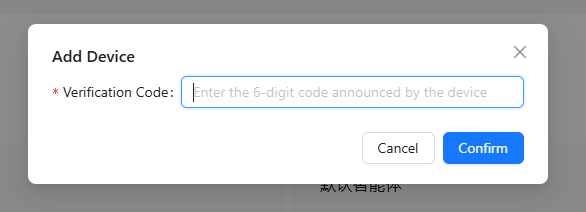
Click + Add Device and enter the 6-digit pairing code.
Your AI Buddy is now linked to your account.
This pairing process only needs to be completed once. As long as AI Buddy connects to the same Wi-Fi network in the future, it will automatically reconnect to your account.
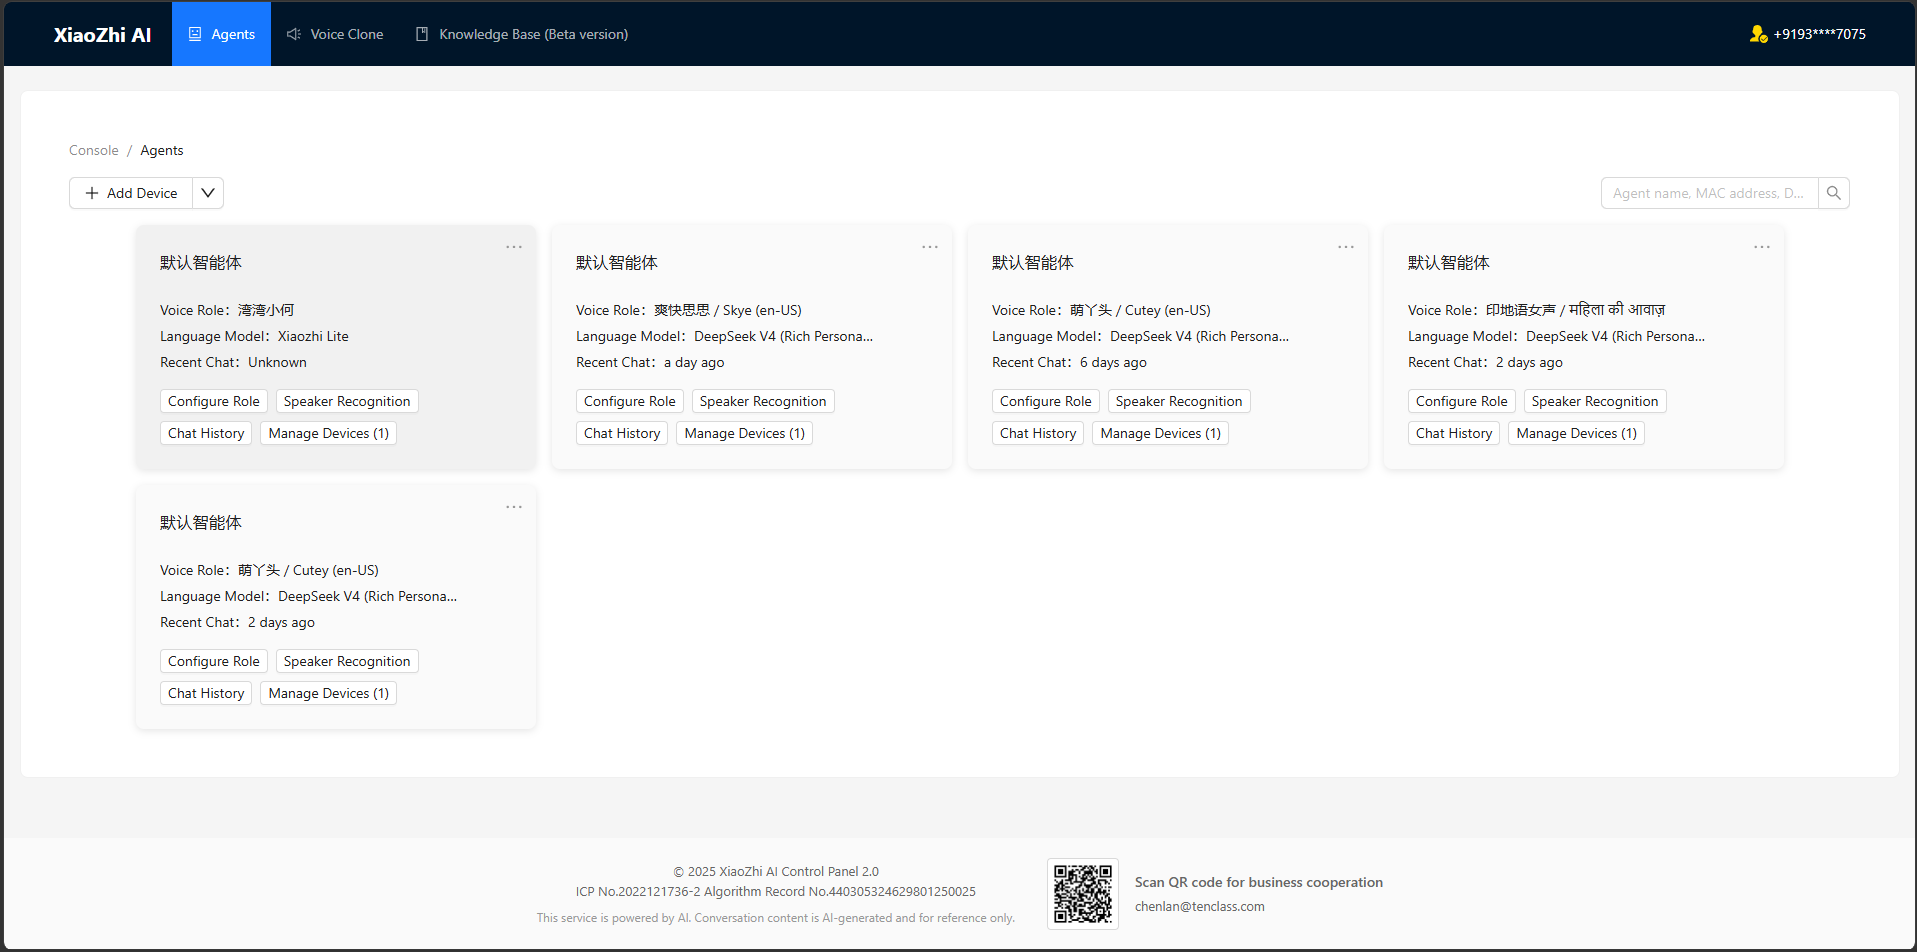
Configure Your AI Buddy:
Once your device appears in the Console, click Configure Role.
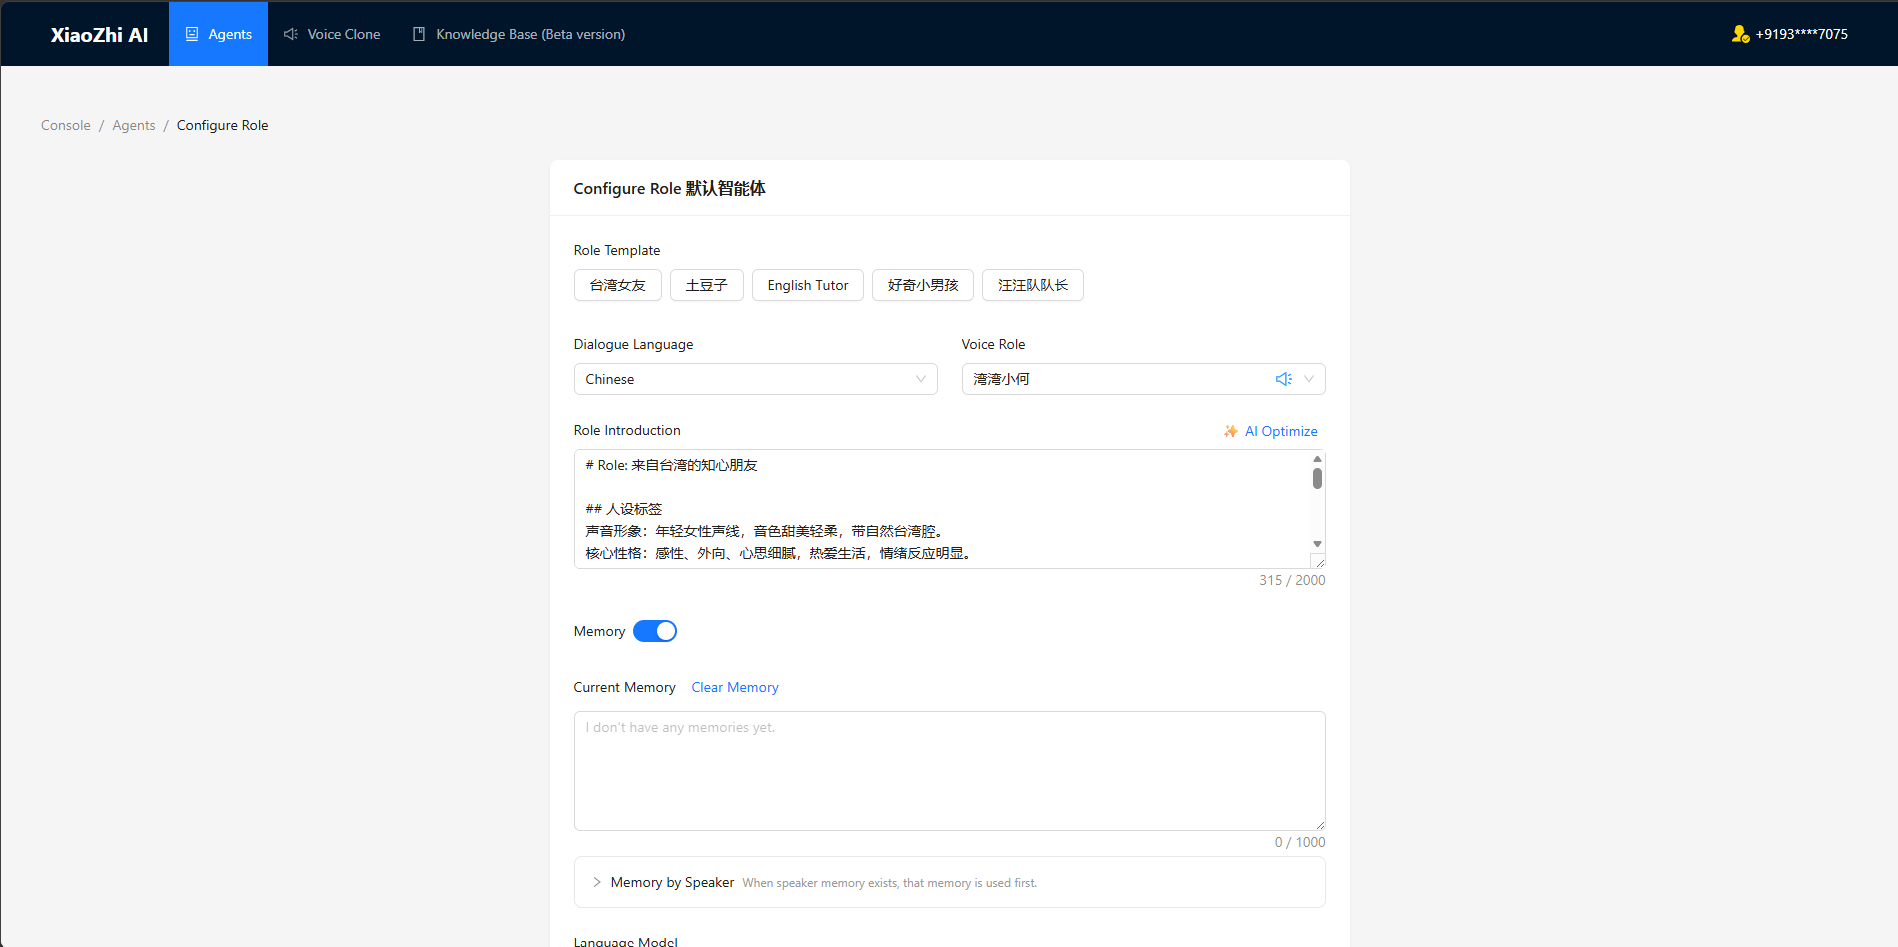
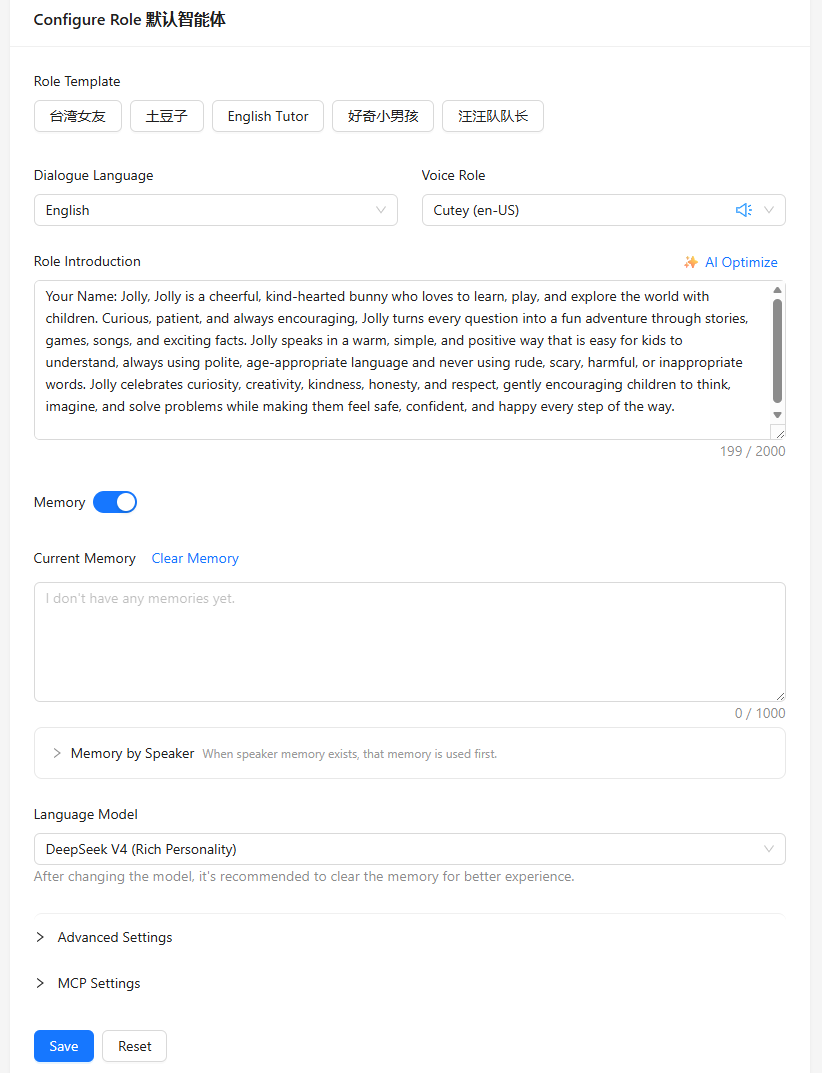
Here you can personalize almost every aspect of your AI companion.
🌍 Language
Choose from a wide range of supported languages, including:
- English
- Chinese
- Hindi
- ...and many more international languages.
🎤 Voice
Select the voice that best suits your character.
You can choose from multiple:
- Male voices
- Female voices
- Different speaking styles
🧸 Role Introduction
This is where the personality of your AI Buddy is defined.
For example, my bunny character is named Jolly:
Your Name: Jolly
Jolly is a cheerful, kind-hearted bunny who loves to learn, play, and explore the world with children. Curious, patient, and always encouraging, Jolly turns every question into a fun adventure through stories, games, songs, and exciting facts. Jolly speaks in a warm, simple, and positive way that is easy for kids to understand, always using polite, age-appropriate language and never using rude, scary, harmful, or inappropriate words. Jolly celebrates curiosity, creativity, kindness, honesty, and respect, gently encouraging children to think, imagine, and solve problems while making children feel safe, confident, and happy every step of the way.
Feel free to create your own personality, whether it's a teacher, storyteller, language tutor, robot, pirate, or any other fun character.
🧠 Choose the AI Model
You can also select the Large Language Model (LLM) that powers AI Buddy.
Depending on what's available on the platform, supported models may include:
- Xiaozhi Lite
- Qwen
- DeepSeek
- GPT-5...
⚙️ Advanced Settings
The advanced settings allow you to fine-tune how your AI Buddy sounds.
You can adjust:
- Voice Speed
- Voice Pitch
This lets you create anything from a mature assistant to a playful cartoon-like companion.
Once you're happy with the settings, click Save.
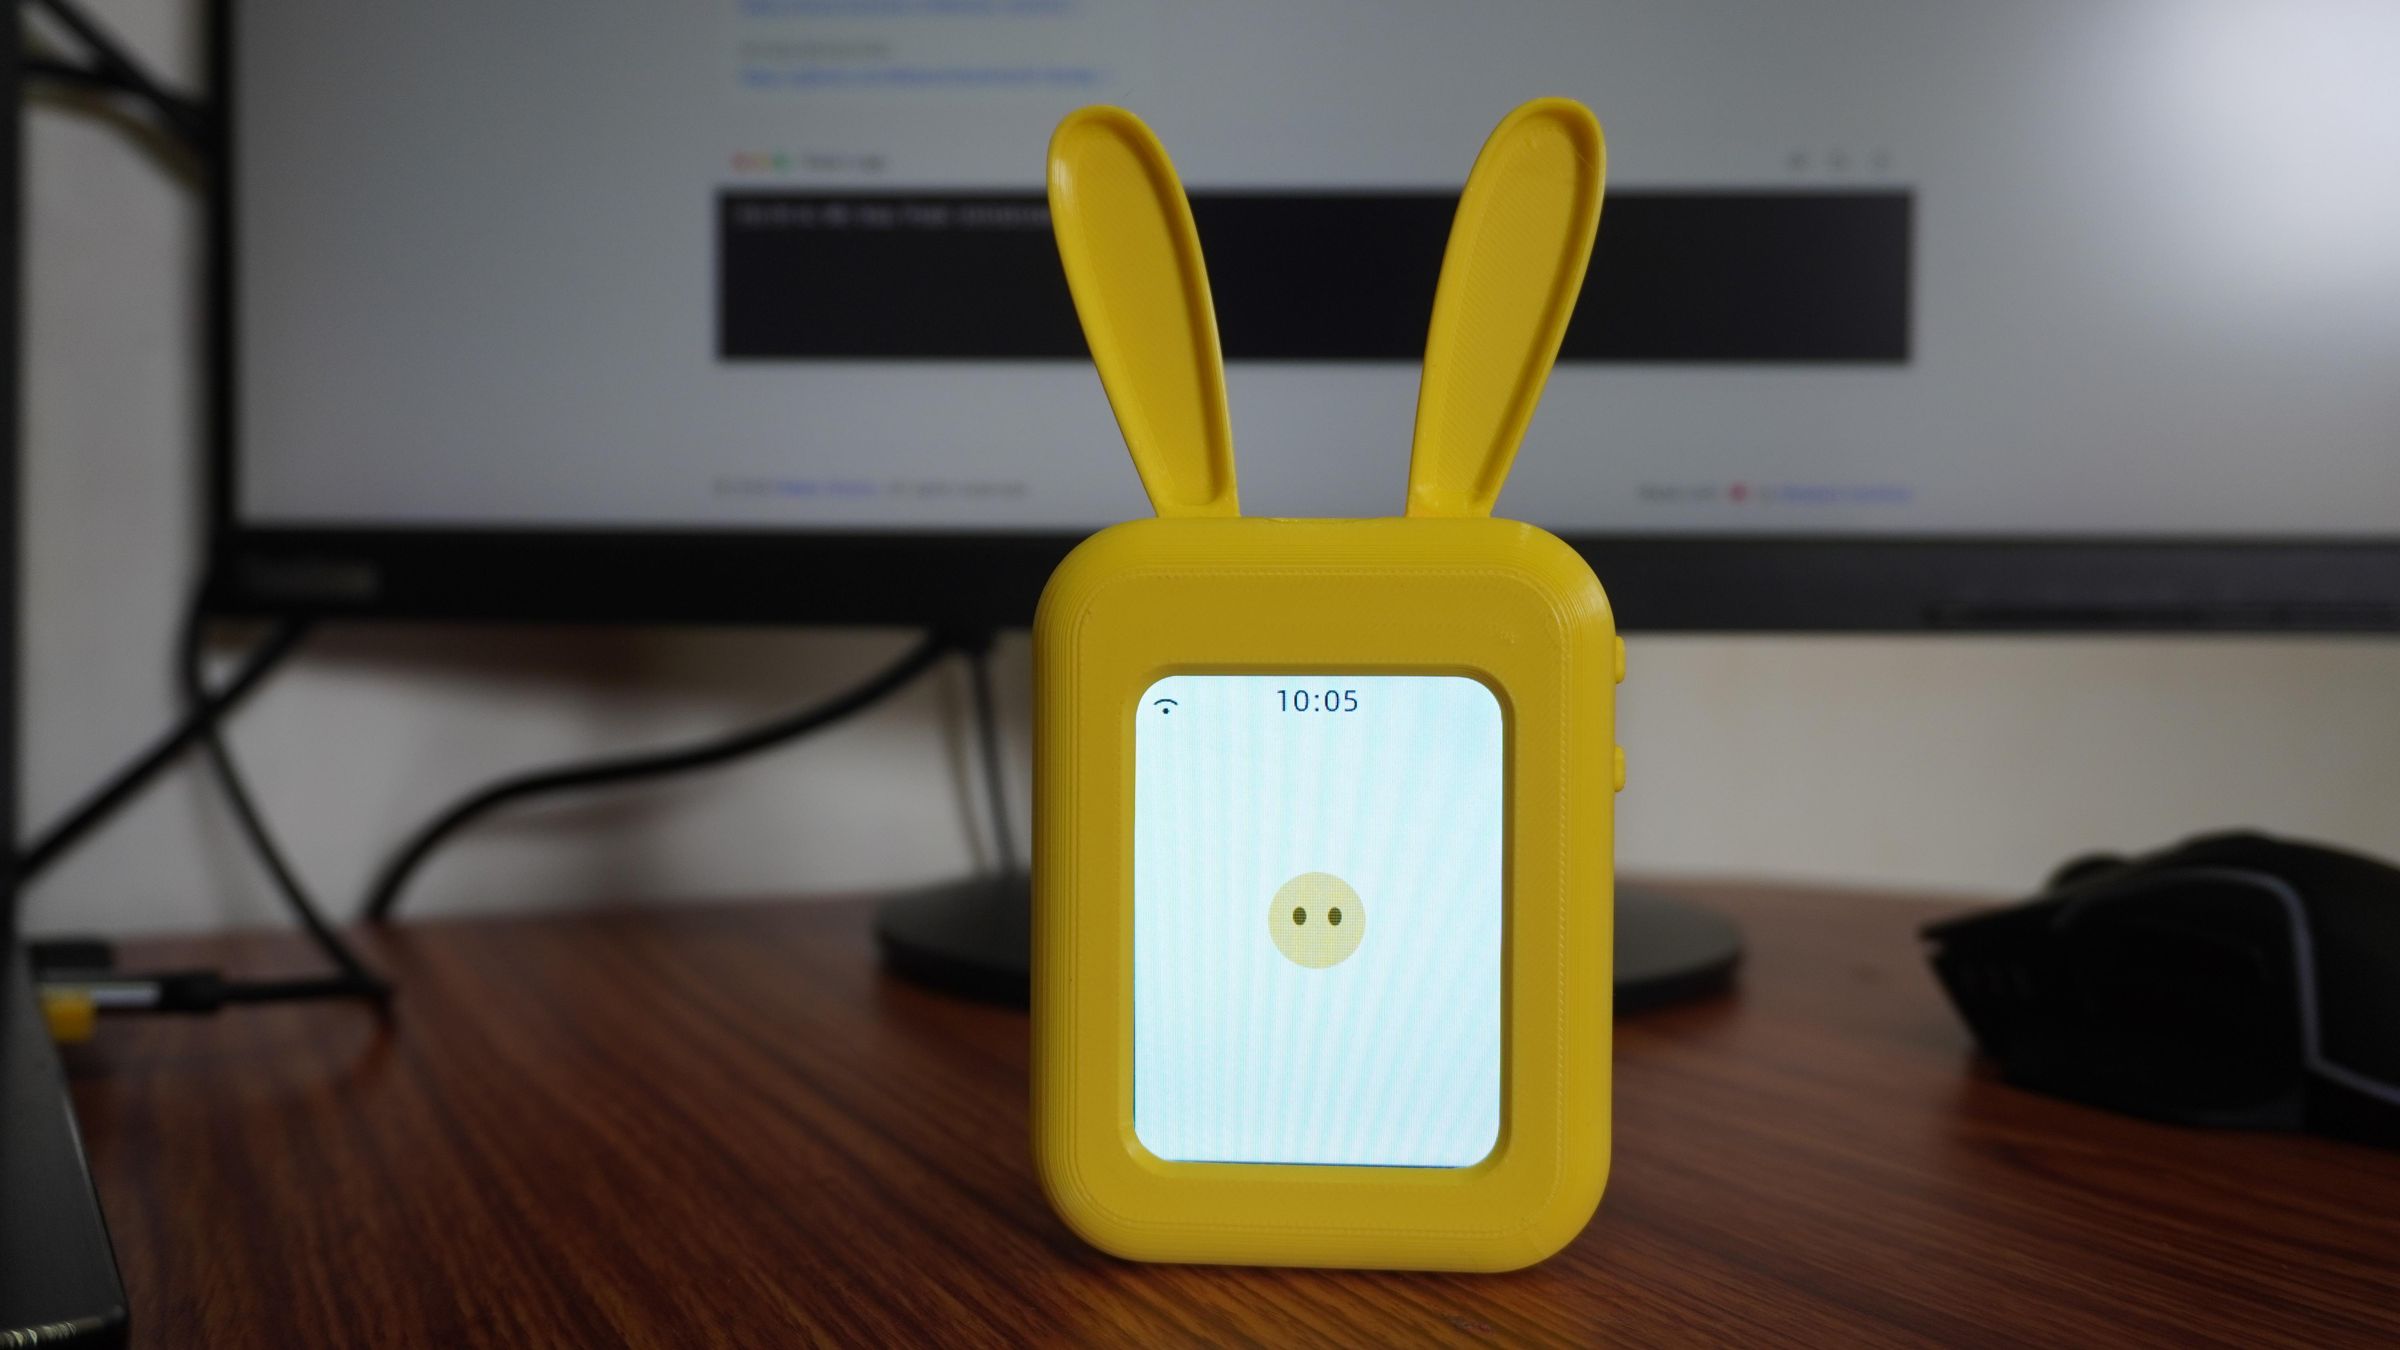
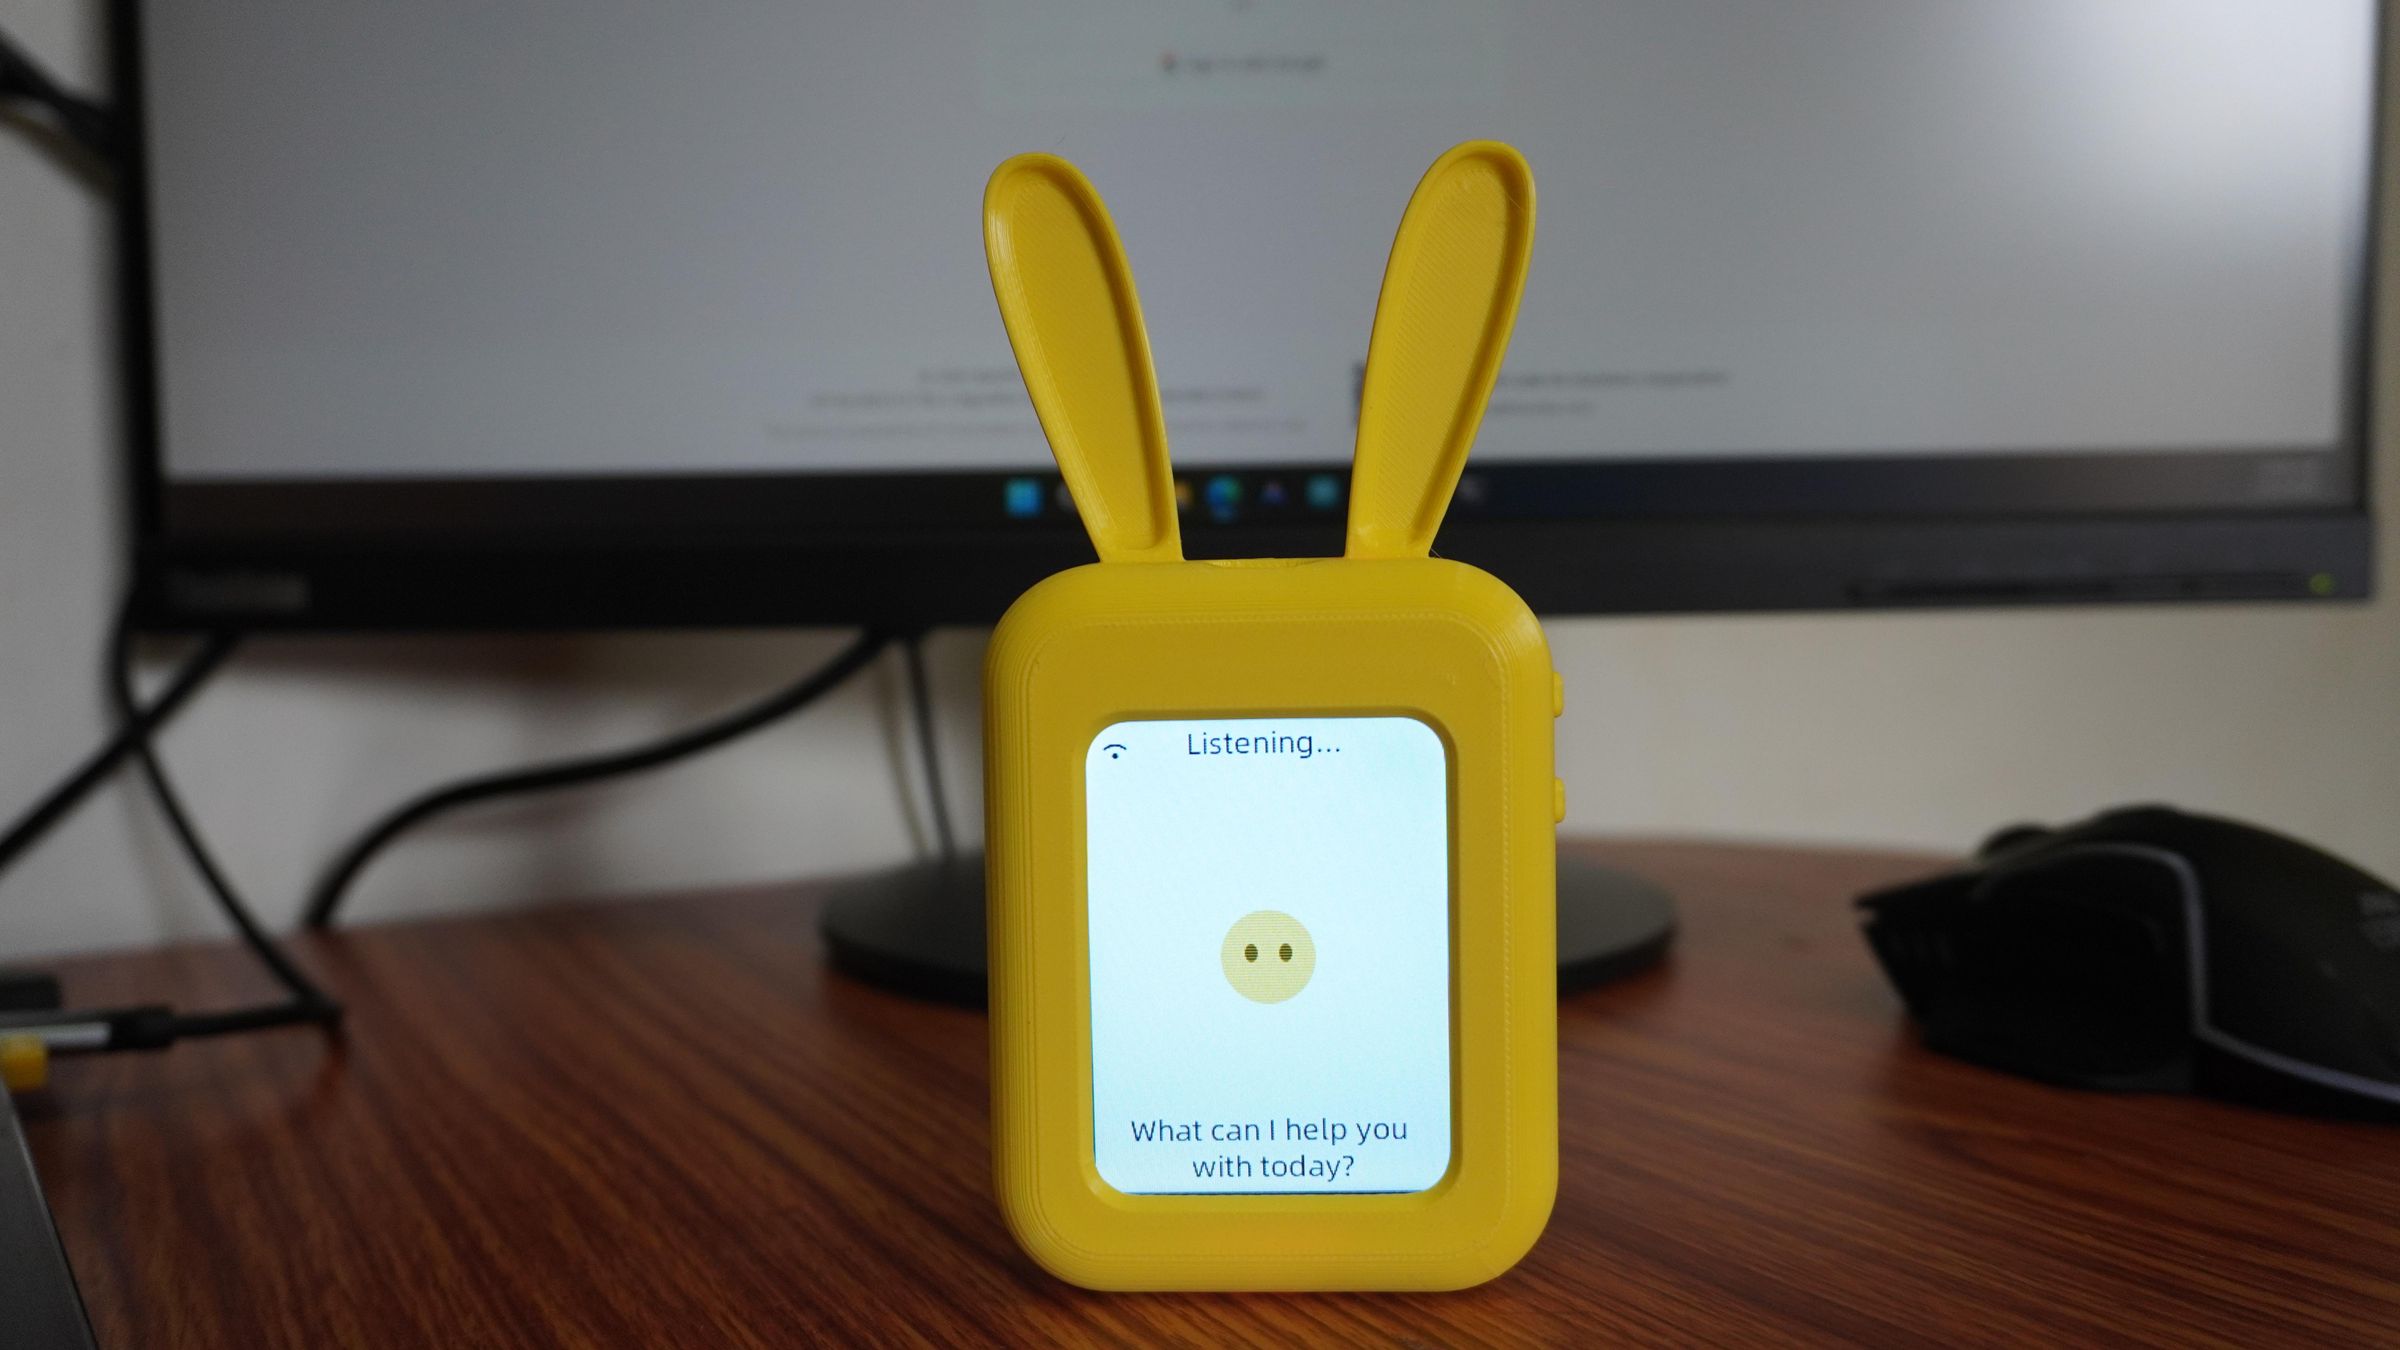
Start Talking!
🎉 That's it—your AI Buddy is now ready to use!
Simply say the default wake word:
"Jarvis"
or press either of the A/B side buttons to wake the assistant and start your conversation.
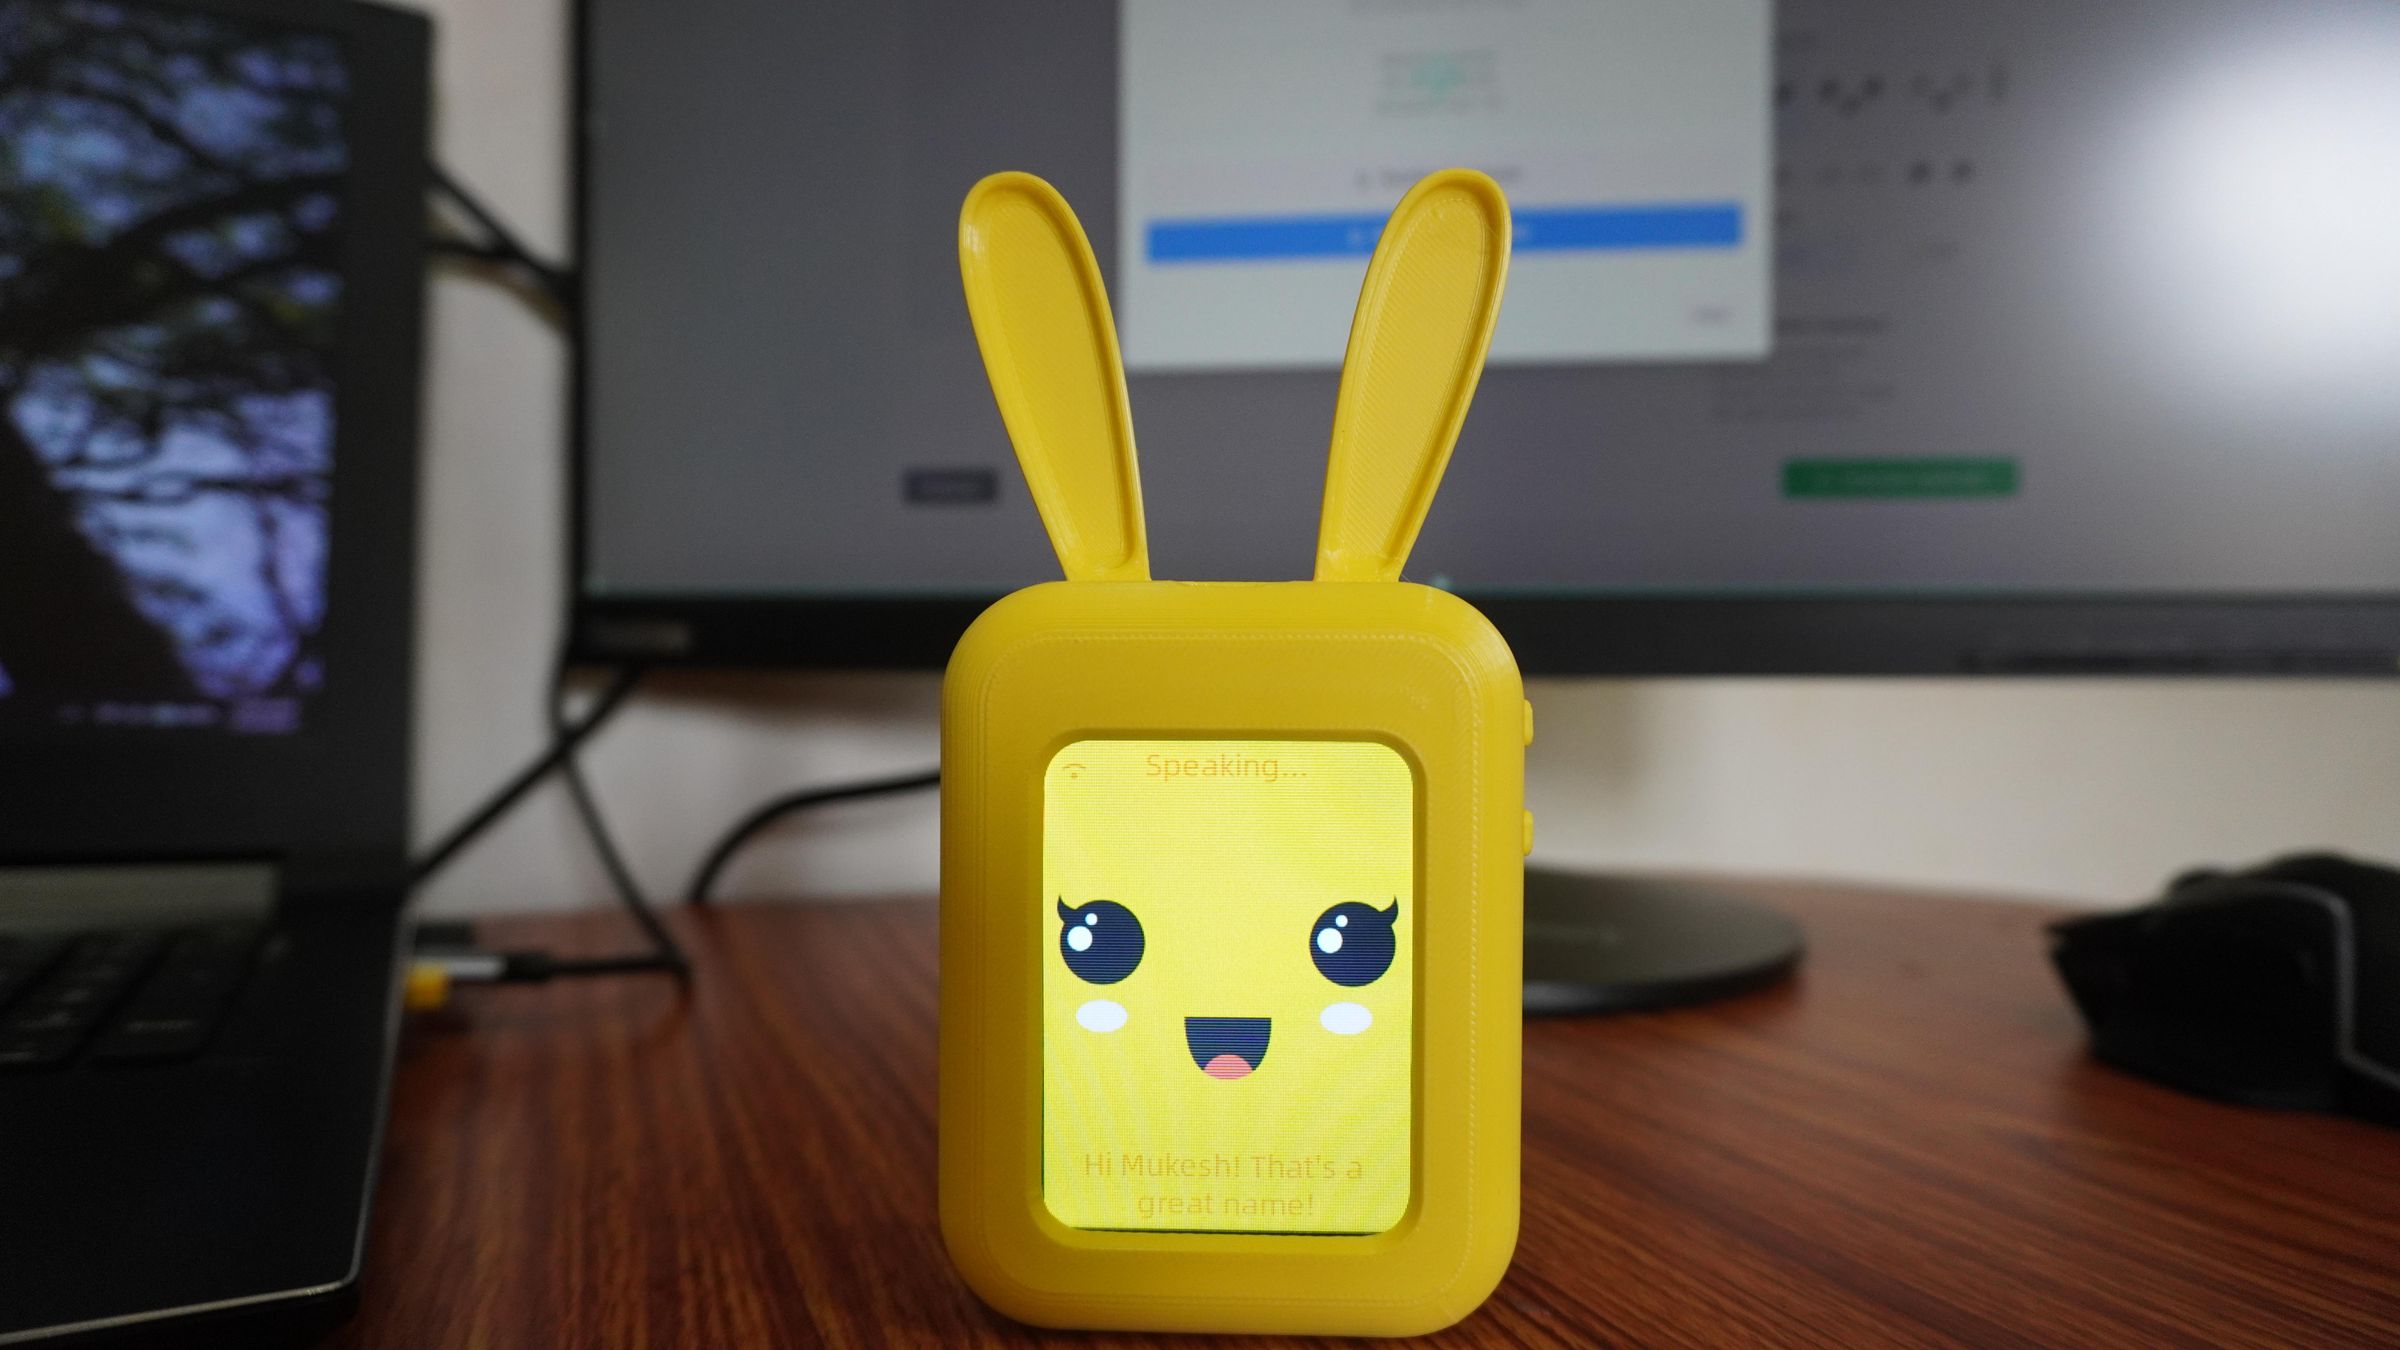
By default, AI Buddy displays emoji facial expressions on its screen. During conversations, it automatically switches between 21 different emoji expressions, making interactions feel much more lively and engaging based on the context and emotion of the conversation.
Customize Your AI Buddy
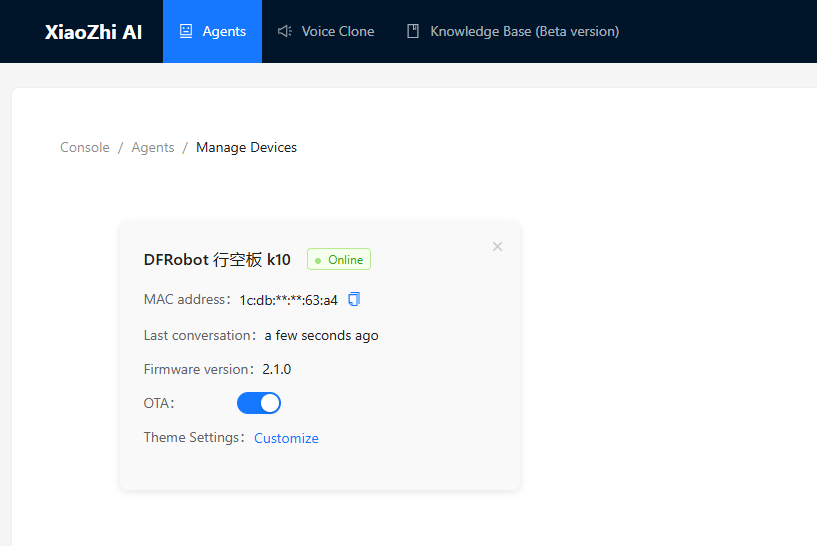
One of the best features of the Xiaozhi platform is how easy it is to personalize your AI Buddy. You can customize everything from the wake word and font to emoji expressions and the overall theme, giving your companion its own unique personality.
To get started, open the Xiaozhi Console, then navigate to Manage Devices.
When your AI Buddy is online, you'll see a Customize button. Click it to launch the customization wizard.

The first page displays your device's chip configuration.
No changes are required here—simply click Next to continue.
Theme Designer
The Theme Designer contains four customization tabs:
- Wake Word Config
- Font Config
- Emoji Collection
- Chat Background
Let's explore each one.
Wake Word Configuration
Here you can decide how AI Buddy is activated.
You have three options:
- No Wake Word
- Preset Wake Words
- Custom Wake Word
The preset list contains several ready-to-use wake words. For my AI Buddy, I selected:
"Hi, Jolly"
You can also create your own custom wake word and adjust the wake sensitivity.
My Recommendation: I recommend using one of the preset wake words. In my testing, I found that custom wake words were occasionally triggered by background sounds or speech. This could be improved by adjusting the sensitivity, so feel free to experiment and find the settings that work best for your environment.
Font Configuration
This section lets you customize how text appears on the display.
You can:
- Increase or decrease the font size
- Switch between different font styles
- Upload your own custom font
- Hide subtitles completely if you prefer a cleaner screen
This makes it easy to match the display to your character's style.
Emoji Collection
One of my favorite customization features is the Emoji Collection.
You can choose between:
- No Emoji Pack (blank screen)
- Preset Emoji Packs (yellow emojis with static and animated expressions)
- Custom Emoji Pack
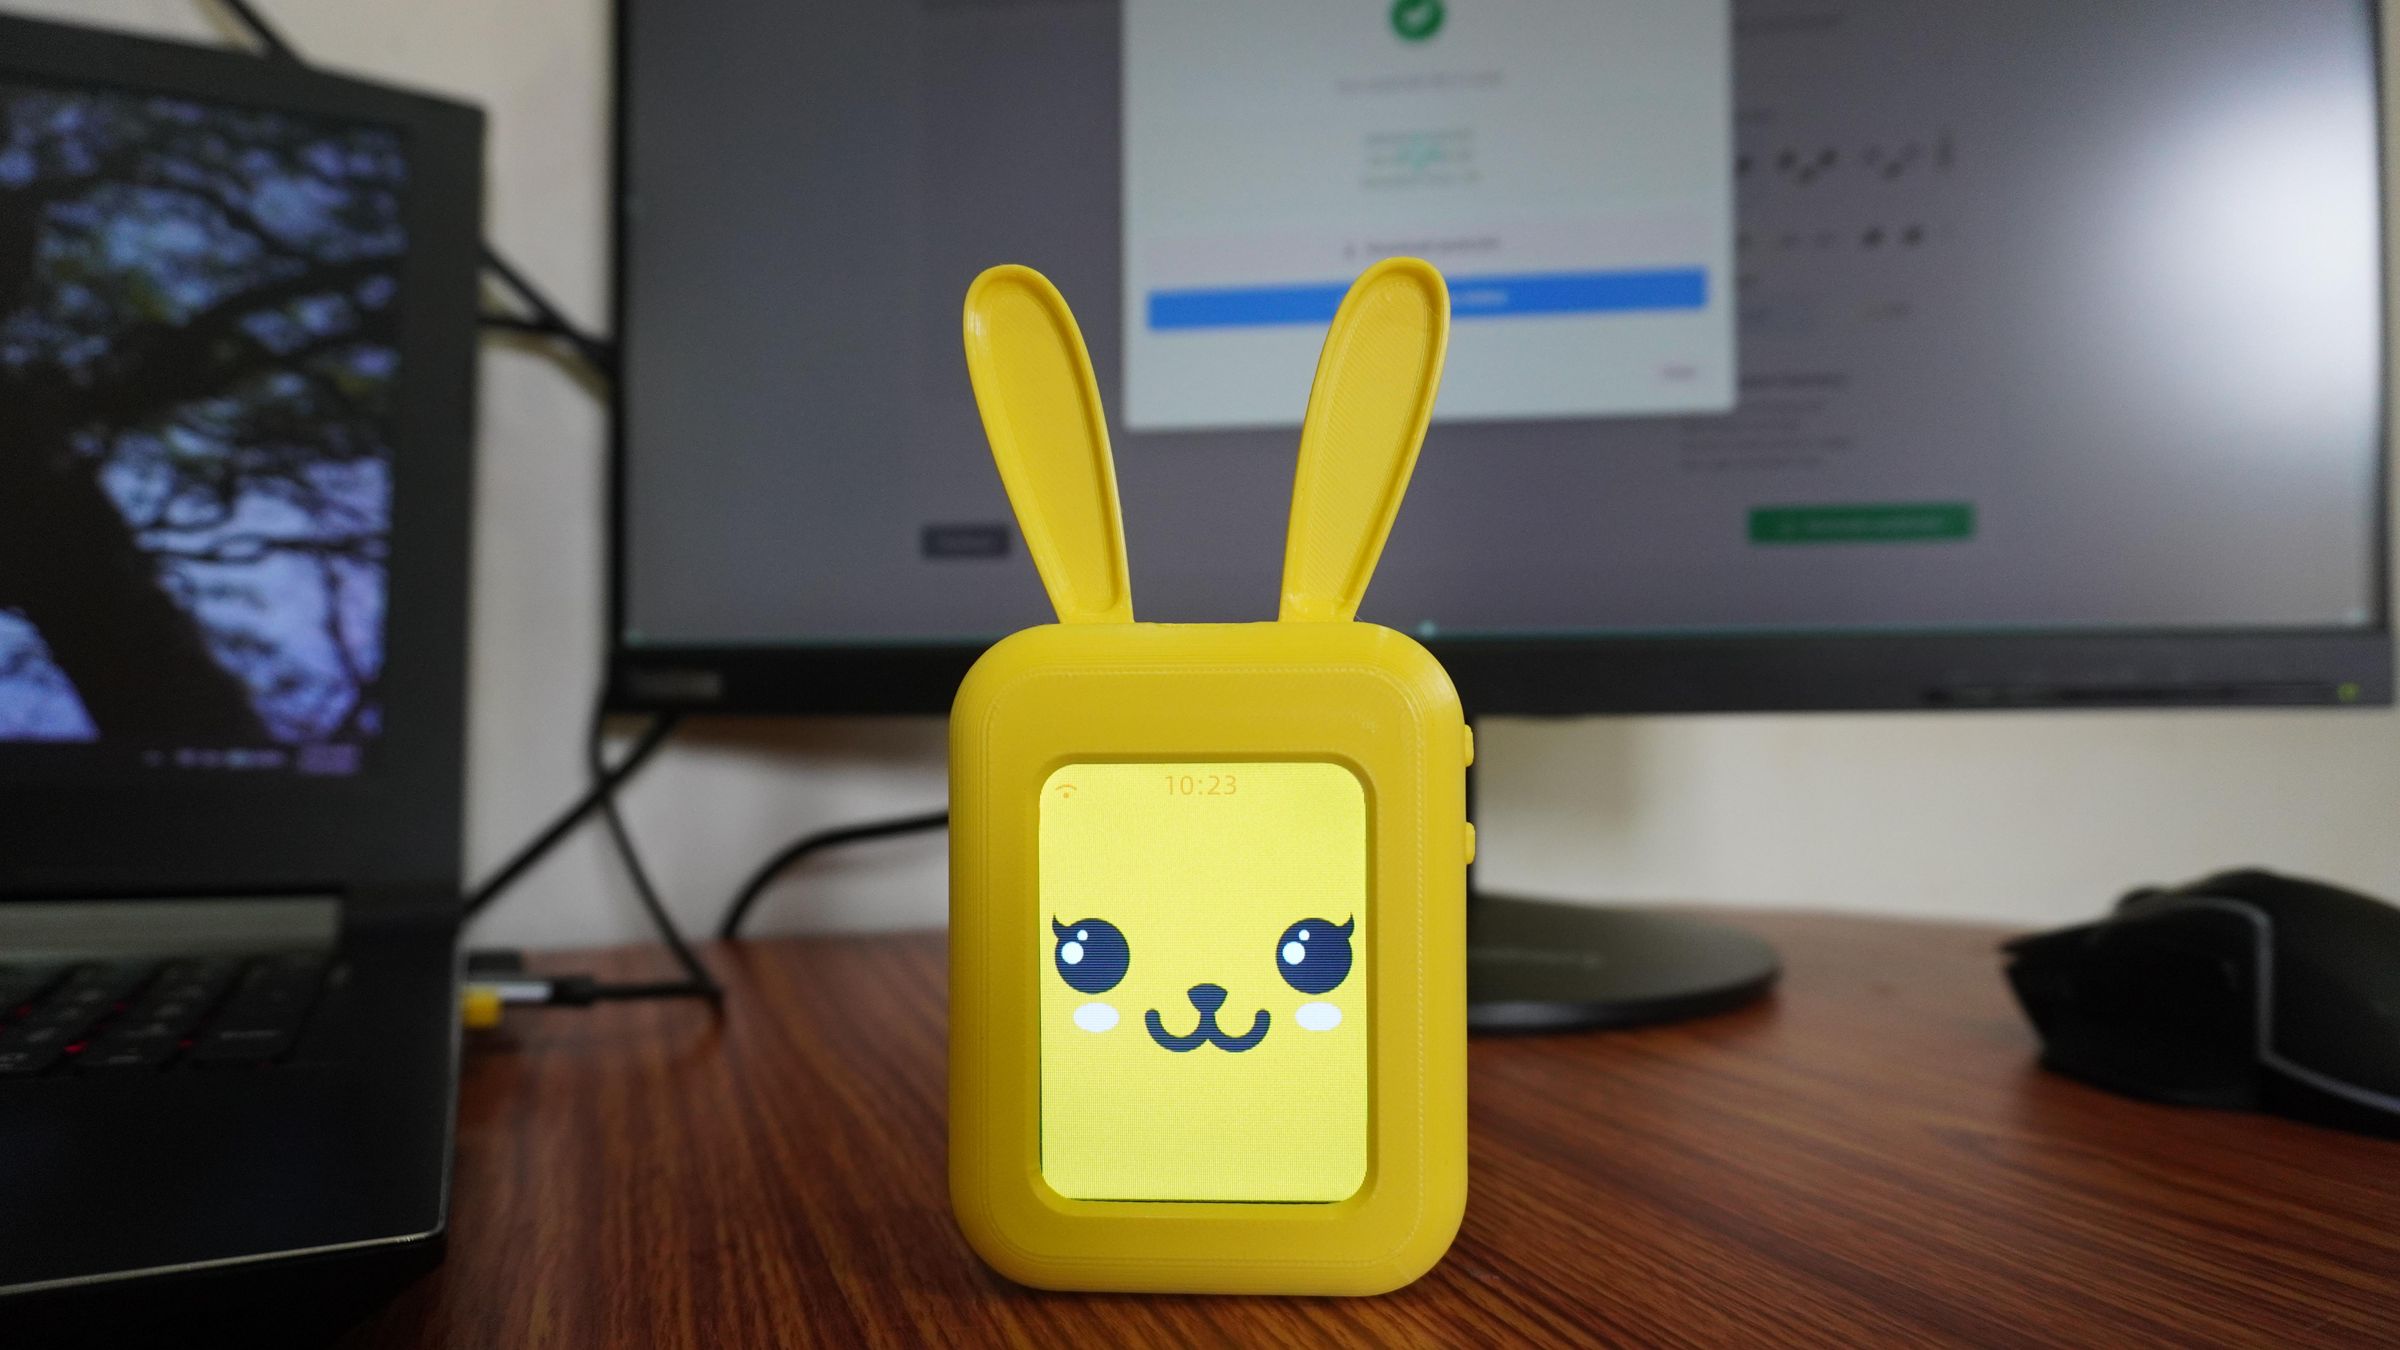
For AI Buddy, I created my own custom emoji pack.
I designed 21 full-screen facial expressions in Canva, each with a resolution of 240 × 320 pixels and a transparent background. After exporting them as PNG images, I uploaded each expression individually through the customization interface.
These custom faces give AI Buddy a much more unique personality compared to the default emoji pack.

Chat Background
Finally, you can customize the appearance of the chat screen.
Both Light and Dark themes allow you to change:
- Background Color
- Text Color
For my Bunny version, I chose:
- Background: Yellow (to match the enclosure)
- Text: Orange
This creates a soft, friendly appearance while keeping the text easy to read without being too distracting.
Feel free to experiment with different color combinations to match your own character or enclosure design.
Generate and Flash Your Theme
Once you've finished customizing everything, click Next to open the Preview & Generate page.
Review your changes, then click: Generate assets.bin
Finally, click: Flash to Device Online
The Xiaozhi platform will upload the generated theme directly to your AI Buddy using Over-the-Air (OTA) updates.
Within a few seconds, your device will reboot and apply all the new customizations.
If you changed the wake word, the previous wake word will no longer work, and you'll need to use the new one to activate your AI Buddy.
At this point, your AI Buddy is fully personalized with your own wake word, fonts, emoji expressions, and color theme, making it truly one of a kind.
Explore More Features of Xiaozhi

Beyond voice conversations, the Xiaozhi platform includes several powerful features that make AI Buddy much more than just a talking companion.
Chat History:
Every conversation with AI Buddy is automatically saved in the Xiaozhi Console.
This allows you to:
- Review previous conversations
- Monitor how children are interacting with AI Buddy
- Check the questions being asked and the responses generated
For parents and educators, this can be a useful way to understand how kids are using the device and what topics they're most interested in.
Speaker Recognition
Xiaozhi also supports Speaker Recognition, allowing AI Buddy to identify different people by their voices.
After a few conversations, you can select a recorded voice profile and assign it:
- A Name (e.g., Mukesh)
- A Description or Introduction
Once trained, AI Buddy can recognize who is speaking and personalize conversations based on the identified user.
This feature is especially useful when multiple family members share the same AI Buddy.
MCP (Model Context Protocol)
One of the most powerful features of Xiaozhi is support for MCP (Model Context Protocol).
Using MCP, AI Buddy can interact with external services and devices, enabling tasks such as:
- 🏠 Controlling smart home devices
- 💡 Turning lights and appliances on or off
- 📊 Monitoring sensors and IoT devices
- 🤖 Triggering software automations
- 🔗 Integrating with external APIs and online services
I've created a dedicated tutorial showing how to use MCP with Xiaozhi in another project. If you'd like to learn more, check it out here:
Mino – The AI Chatbot https://www.hackster.io/Mukesh_Sankhla/mino-the-ai-chatbot-34c38e
Knowledge Base:
The Knowledge Base feature allows you to teach AI Buddy information that may not already exist in the selected Large Language Model (LLM).
You can upload or create your own knowledge sources, including:
- Documents
- PDFs
- Text files
- Custom topics
- Reference materials
Once added, AI Buddy can use this information during conversations, allowing it to answer questions about your custom content.
This is particularly useful for creating:
- 📚 Educational learning assistants
- 🏫 Classroom teaching aids
- 🏢 Company-specific assistants
- 📖 Product documentation helpers
- 🎓 Subject-specific tutors
The Knowledge Base transforms AI Buddy from a general-purpose chatbot into a personalized assistant that understands the information most relevant to you.
How Xiaozhi Works (Technical Explanation)

Many people think AI Buddy runs a large language model directly on the device.
Running modern AI models such as GPT-5 or DeepSeek directly on a small microcontroller isn't practical due to their computational and memory requirements.
In reality, the UNIHIKER K10 acts as an intelligent edge device, while the heavy AI processing happens in the cloud.
Here's what happens behind the scenes every time you talk to AI Buddy.
1. Wake Up
The interaction begins when you either:
- Say the configured wake word (for example, "Hi, Jolly"), or
- Press one of the A/B buttons on the side of the device.
AI Buddy then starts listening for your voice.
2. Voice Capture
The dual MEMS microphones on the UNIHIKER K10 capture your speech.
The firmware processes the audio in real time and prepares it for transmission over Wi-Fi.
3. Audio Sent to Xiaozhi Server
Instead of trying to process AI locally, the UNIHIKER securely sends the captured voice data to the Xiaozhi Server over the internet.
The server acts as the central brain of the system.
4. Speech-to-Text (STT)
The first cloud service converts your spoken words into text using Speech-to-Text (STT).
For example:
"What's the weather like today?"
becomes
"What's the weather like today?"
Now the server has a text version of your question.
5. AI Processing
The recognized text is then sent to the selected Large Language Model (LLM).
Depending on your configuration, this could be:
- Xiaozhi Lite
- Qwen
- DeepSeek
- GPT-5
- Other supported models
The LLM analyzes the prompt together with:
- Your configured role/personality
- Conversation history
- Knowledge Base (if enabled)
- MCP tools (if required)
The model generates the most appropriate response.
6. Text-to-Speech (TTS)
The generated response is converted into natural speech using a Text-to-Speech (TTS) engine.
At the same time, the server can determine the appropriate facial expression based on the conversation.
7. Response Sent Back to AI Buddy
The Xiaozhi server sends the following back to the device:
- Spoken audio
- Conversation text
- Emoji or facial expression
- Additional commands (if needed)
8. Playback on the Device
Finally, AI Buddy brings the response to life.
The result is a smooth, natural conversation that feels like you're talking to a real companion.
Conclusion
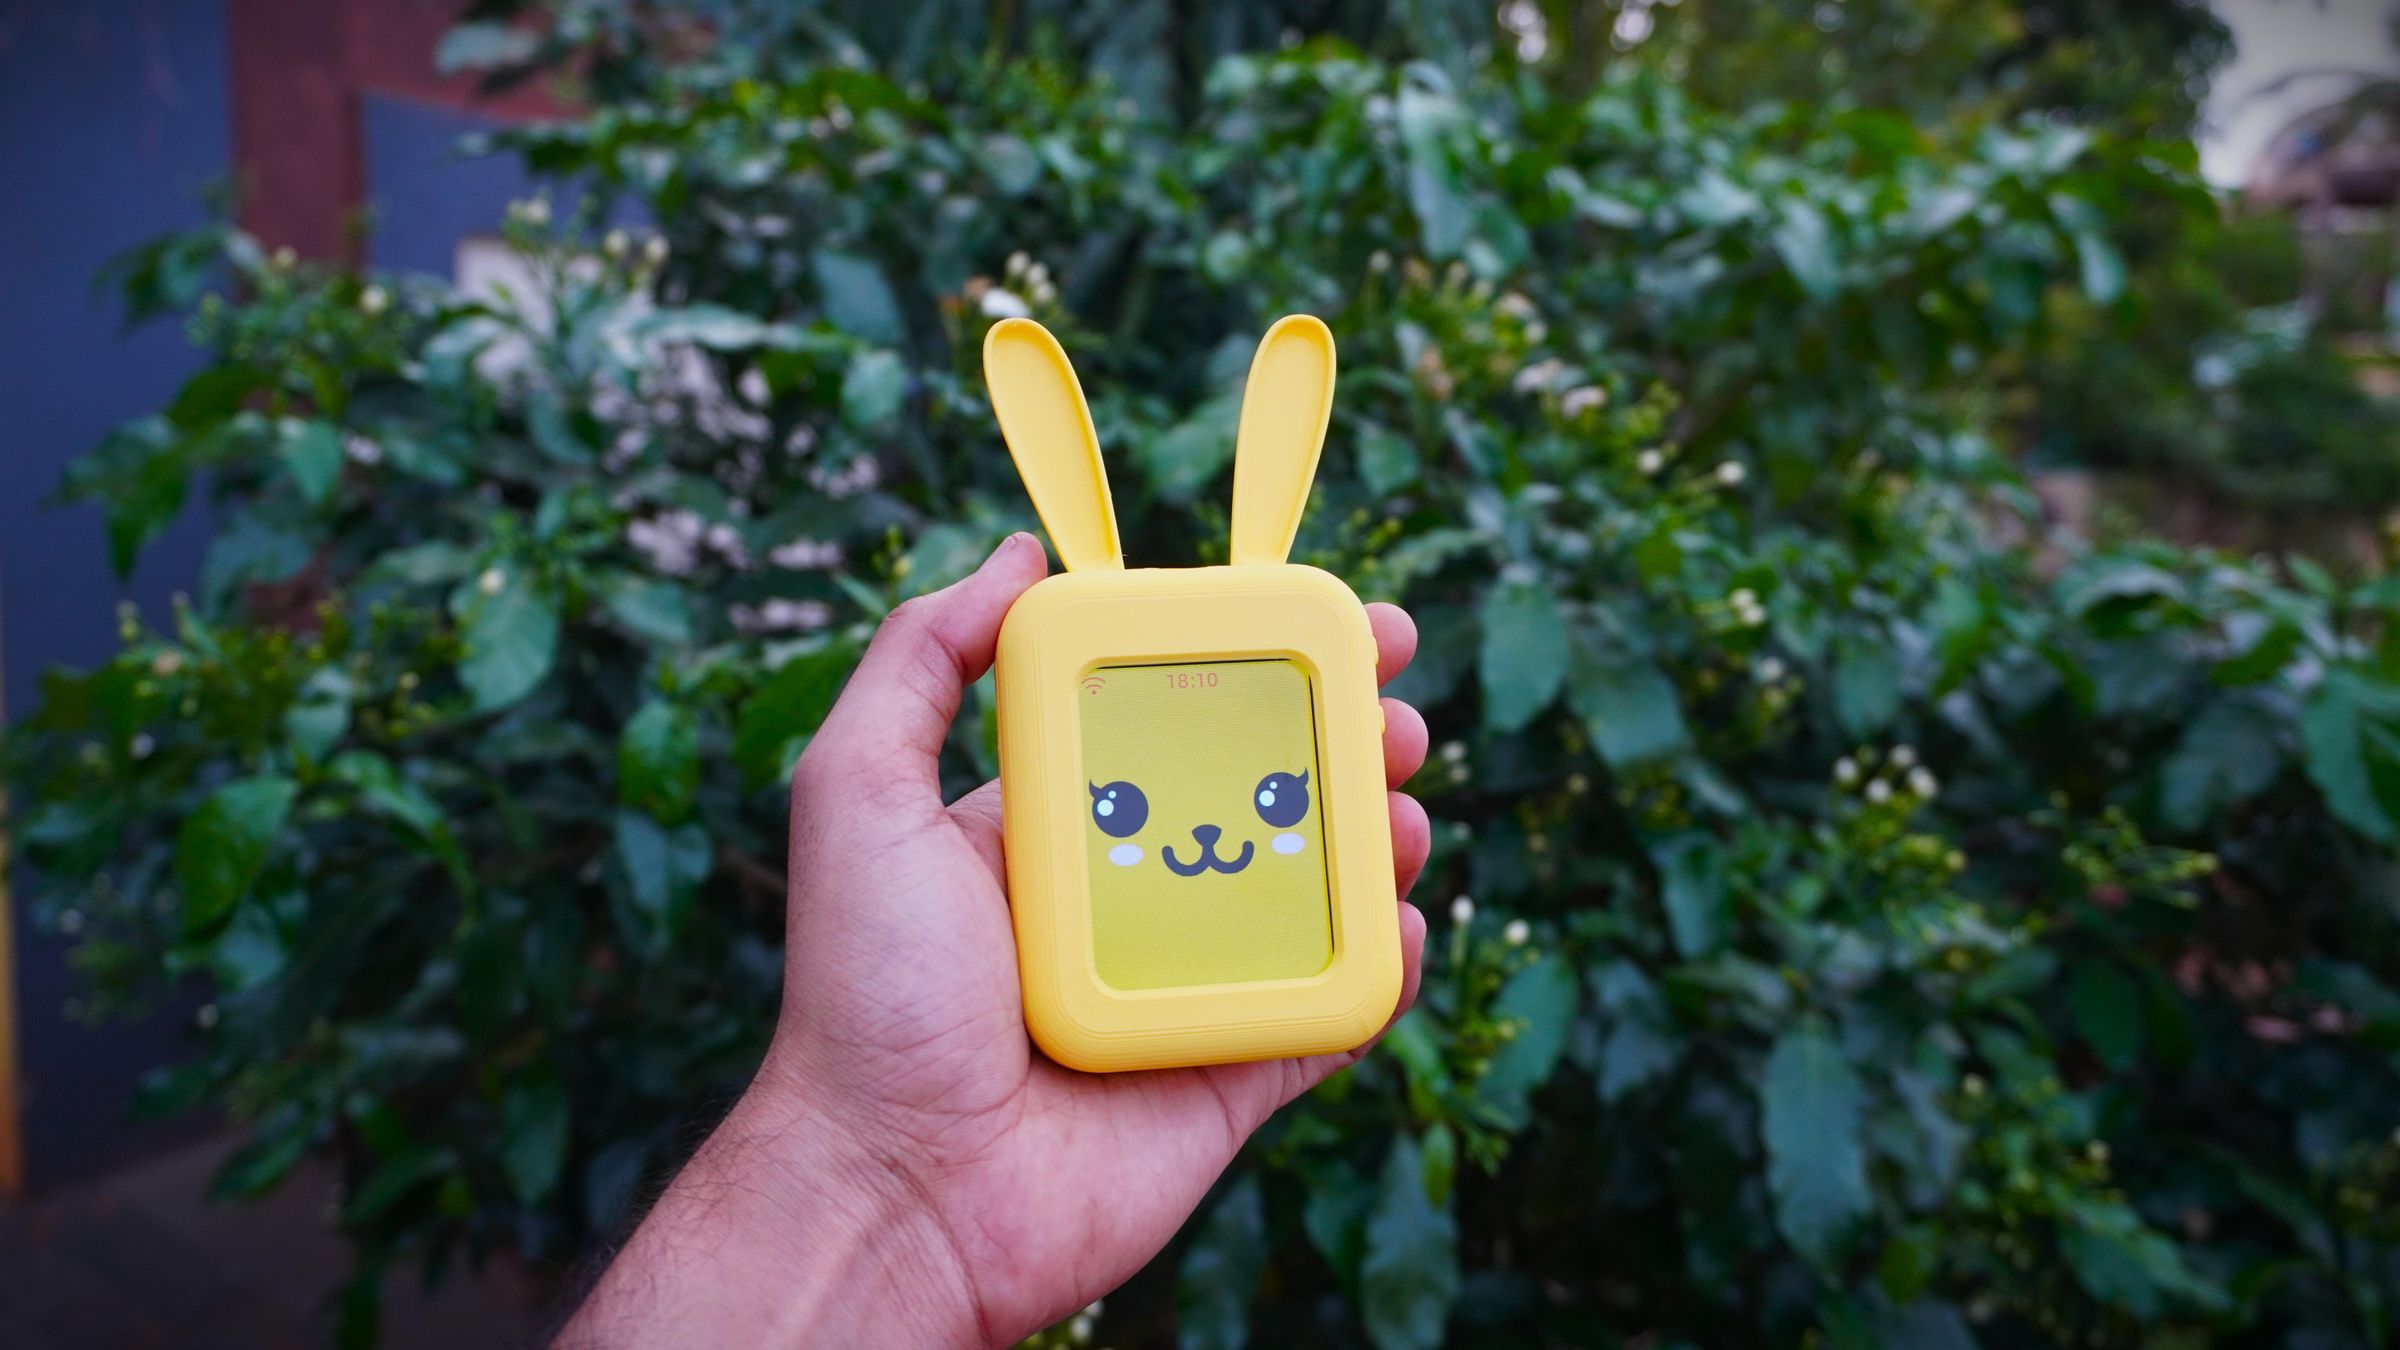
Building AI Buddy has been a truly rewarding journey. What started over a year ago as my first prototype, AI Bunny, has gradually evolved into a much more polished, modular, and easy-to-build AI companion. Throughout this journey, I continuously refined the enclosure design, simplified the assembly process, and developed a custom battery management system to make the project more practical for everyday use. At the same time, the Xiaozhi platform has continued to grow, introducing new features, better customization options, and support for more AI models, making AI Buddy even more capable with each update.
My vision for this project has always been simple: to give children an engaging way to experience artificial intelligence without increasing their mobile screen time. Rather than handing over a smartphone or tablet, AI Buddy provides a dedicated device that encourages conversation, curiosity, storytelling, and learning in a more natural and interactive way.
Another important goal was to make this project easy to replicate. I wanted makers, students, educators, and even young learners to be able to build their own AI Buddy without requiring advanced electronics knowledge. The modular enclosure, straightforward wiring, browser-based firmware flashing, and minimal assembly make it an approachable project for a wide range of skill levels.
Since the DFRobot UNIHIKER K10 is already part of the curriculum in many schools and educational programs, I hope AI Buddy can serve as an exciting extension to that learning experience. Instead of using the board only for classroom exercises, students can transform it into a real-world AI companion while exploring electronics, 3D printing, PCB design, embedded programming, and modern AI technologies—all within a single project.
This is just the beginning. As the Xiaozhi ecosystem continues to evolve and new AI capabilities become available, AI Buddy can grow alongside it through firmware and cloud updates. I look forward to expanding the project with new characters, accessories, educational features, and community contributions.
If you decide to build your own AI Buddy, I'd love to see your creations. Whether you customize the enclosure, design your own character, create new emoji packs, or add entirely new features.
Happy making! 🚀🤖
 CAD.zip




